This site is supported by our readers. We may earn a commission, at no cost to you, if you purchase through links.
Your favorite jeans just blew out at the knee, and tossing them feels like losing an old friend. Before you relegate them to the rag pile, consider this: learning how to sew a patch on jeans takes about 20 minutes and costs less than a coffee.
You don’t need a sewing machine or years of tailoring experience—just the right patch, some thread, and the willingness to give those jeans a second life. The trick lies in matching your patch fabric to your denim weight and choosing a stitch that can handle the stress of daily wear.
Whether you’re covering a small tear or reinforcing a worn-through knee, mastering this skill means you control when your jeans retire, not the other way around.
Table Of Contents
Key Takeaways
- Match your patch fabric to your denim’s weight and fiber composition—heavy denim needs heavy patches, and mismatched materials create tension points that fail under normal wear.
- Sew-on patches last 50+ washes when stitched properly, while iron-on patches typically survive only 10-20 washes unless you combine both methods for maximum durability.
- Proper prep work—washing, ironing, trimming frayed edges, and backing thin areas with fusible interfacing—determines whether your repair lasts years or peels off after a few washes.
- Reinforce high-stress corners and wear zones with bar tacks or dense zigzag stitches, then inspect your patch every 2-3 months to catch loose threads before they compromise the entire repair.
Choosing The Right Patch for Jeans
You can’t just slap any patch on your jeans and expect it to hold up. The right patch makes the difference between a repair that lasts for years and one that peels off after a few washes, so you need to match the fabric, type, and size to your specific denim.
If you prefer a no-sew approach, choosing the best fabric glue for denim can give you a strong, wash-resistant bond that rivals traditional stitching.
The right patch—matched to your denim’s fabric, weight, and wear—makes the difference between a repair that lasts years and one that fails after a few washes
Here’s what you need to keep in mind before you start stitching.
If you’re just getting started, check out this complete hand sewing guide for beginners to build your foundation.
Matching Patch Fabric and Denim Weight
Match your patch material to your denim’s weight—otherwise you’re building failure into the repair from day one. Here’s what you need to nail down:
If you’re working with embellished denim and need to remove embroidery before patching, do it carefully so you don’t weaken the fabric underneath.
- Keep patch fabric within one to two weight levels of your denim fabric to prevent bulk or sagging at the patch placement.
- Pair heavy denim (12 oz+) with equally heavy denim patches for proper weight distribution and denim balance.
- Use patches with similar fiber composition—cotton on cotton maintains consistent stretch and aging patterns through denim care.
- Test by laying the patch on your jeans; it shouldn’t stand away from the surface, which signals seam stress when worn.
Lightweight patches on heavy denim create tension points that’ll fail under normal wear and show through the repair area.
That’s why most portable machines designed for lighter work struggle with the power and needle strength needed for durable denim repairs.
Selecting Patch Type (Sew-on Vs. Iron-On)
Your fabric match sets the stage—now pick your patch type with purpose. Sew-on patches dominate in patch durability, surviving 50+ wash cycles when stitched with dense thread work. Iron-on patches offer speed but rely on adhesive types and iron settings that may fail after 10–20 washes without reinforcement.
Combine both methods—iron first, then stitch the edges—for maximum hold on your jeans.
| Feature | Sew-On Patches | Iron-On Patches |
|---|---|---|
| Durability | 50+ washes with proper stitching | 10–20 washes without reinforcement |
| Application | Requires needle, thread, sewing techniques | Needs ironing board, heat activation |
| Fabric Compatibility | Works on all denim weights | Best on cotton blends, may fail on synthetics |
| Best For | High-wear areas, frequent laundering | Quick fixes, decorative fabric patch placement |
Choosing Patch Color, Texture, and Design
Beyond attachment method, color contrast grabs focus—bright red or yellow patches pop against medium indigo denim, while neutral tones (black, gray, white) blend universally.
Texture blend matters: leather adds rugged edge but stiffens stretch fabric, while felt softens edges yet frays faster.
Design themes should reflect your personal style—bold motifs or subtle embroidery—ensuring patch proportion stays balanced against your torso height and denim panel size for cohesive fabric choices.
Sizing and Shaping The Patch
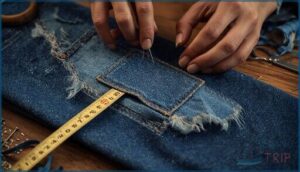
Once you’ve settled on color and texture, measure the damaged zone: your patch needs at least 2 to 3 inches of coverage for solid reinforcement.
Before you stitch, check your thread tension adjustment tips to prevent puckering or loose seams along the patch edges.
For knees or seat areas prone to friction, extend that to 4 inches square.
Trace a chalk outline slightly larger than the worn spot, then trim with a consistent 1/4-inch seam allowance to prevent edge curling during wear and washing.
Preparing Jeans for Patching
You can’t just slap a patch on dirty, wrinkled jeans and expect it to hold—proper prep work makes the difference between a repair that lasts and one that peels off after a few washes.
Taking a few minutes to get your denim ready ensures the patch sits flat, adheres properly, and looks clean from the start.
Follow these four steps to set yourself up for a solid, professional-looking repair.
Cleaning and Ironing The Denim
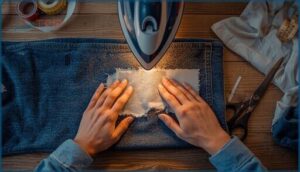
You can’t slap a patch on dirty denim and expect it to hold—textile care comes first. Pre-wash your jeans in cold water to remove sizing and prevent future shrinkage, then press them flat on an ironing board.
Here’s your denim prep checklist:
- Use cold water and a gentle cycle for color preservation
- Skip chlorine bleach to protect fabric softening and denim fabric strength
- Air-dry or tumble on low heat
- Iron at medium-high temperature for smooth results
- Test any stain removal products on hidden seams first
Trimming Frayed Edges and Fuzz Balls
Loose threads sabotage even the cleanest denim patch, so grab sharp fabric scissors and cut parallel to the jeans weave for Edge Trimming that respects the fabric’s structure.
Snip fuzz balls with precision, avoiding cuts into the denim itself—this Fuzz Removal step creates a smooth surface for hand sewing.
For stubborn fibers, mist lightly with water before trimming, then brush the edge to align threads for excellent Fabric Preparation.
Marking Patch Placement With Chalk
With tailor’s chalk in hand, you control Patch Alignment through precise Fabric Marking—trace the patch center and outline lightly, avoiding deep grooves that smudge during handling.
This Placement Guidance locks in Symmetry Checks by folding your jeans flat, confirming both sides mirror perfectly before hand sewing techniques secure your denim patch.
Chalk Selection matters: pick removable colors visible against dark denim for confident jeans repair.
Reinforcing Thin or Stretchy Areas
When worn denim starts to thin, you need Fabric Stability before sewing patches—back the area with fusible material or Interfacing Materials that add structure without bulk.
Apply a stabilizing zigzag or Stretch Stitching along edges to maintain flexibility, using Flexible Patches with compatible thread for denim maintenance.
Extend Reinforced Seams 1–2 cm beyond the weak zone through hand sewing techniques or machine fabric mending to stop new tears.
Applying and Securing The Patch
Once you’ve prepped your jeans and chosen the right patch, it’s time to lock it in place before any stitching begins. This step ensures your patch won’t shift or pucker when you sew, giving you a clean, professional finish.
You’ll use fusible interfacing for stability, pin everything down precisely, and apply heat to bond the layers together.
Using Fusible Interfacing for Stability
Before you pin your patch in place, you need to back it with strength. Fusible interfacing transforms fragile denim into a rock-solid foundation that won’t tear again. Choose medium-weight fusible material (100–120 gsm) for everyday repairs, or go heavyweight for high-stress zones like knees. For stretch denim, knit fusible interfacing preserves flex while stabilizing thin spots.
- Cut interfacing slightly larger than the damaged area using fabric scissors
- Place adhesive side against the wrong side of your jeans
- Press with a dry iron for 10–15 seconds without steam
- Use a pressing cloth to protect the denim surface from residue
- Let the fused area cool completely before handling for maximum adhesive bonding
To guarantee a long-lasting repair, consider using techniques for garment repair services.
Centering and Pinning The Patch
Measure equal distances from your jean’s side seams and hem to center the patch over the damage, allowing at least 0.6 cm overlap on all sides. Align the patch grain with your denim’s lengthwise threads to prevent twisting during wear.
Pin perpendicular to edges every 2.5 to 5 cm, working from opposite sides inward. This Pin Placement strategy locks Grain Matching and prevents Fabric Distortion, giving you control over perfect Patch Alignment.
To achieve a durable attachment, consider using proper sewing patch techniques for the best results.
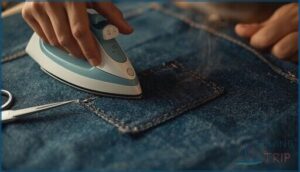
Ironing to Bond Patch and Fusible Material
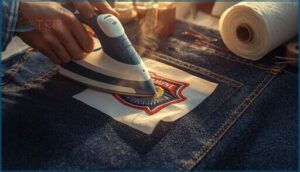
After Pin Placement locks your patch, set your iron to high heat—around 350°F for cotton denim. Cover the patch with a thin pressing cloth to shield the surface, then press firmly for 20 to 30 seconds without sliding.
This Iron Techniques approach triggers Adhesive Activation in the fusible material, creating Bond Durability. Let the area cool completely before moving your jeans so the fabric glue solidifies.
Sewing The Patch by Hand or Machine
You’ve positioned your patch and bonded it down—now it’s time to lock it in place with thread. You can choose between hand sewing for maximum control or machine stitching for speed and strength, depending on your skill level and the patch location.
The key is selecting the right needle, thread, and stitch technique to make your repair both durable and nearly invisible.
Choosing Needle, Thread, and Stitch Type
Your needle choice dictates success—match it to your denim’s weight and your intended sewing techniques. Here’s your power toolkit:
- Denim Needle Selection: Use 90/14 for standard jeans, 100/16–110/18 for heavy patches or multiple layers to prevent skipped stitches and breakage.
- Thread Thickness: Choose heavy-duty polyester thread for durability under stress and laundering.
- Stitch Length: Set machines to 3.0–4.0 mm to avoid fabric perforation.
- Fabric Tension: Maintain even pressure to prevent puckering along edges.
Hand Stitching Techniques (Whip, Blanket, Invisible)
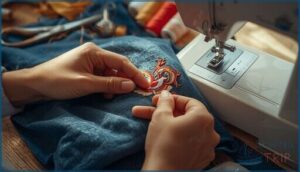
Once your needle’s threaded, it’s time to master the three hand-stitching rebels: whip stitches loop diagonally around edges for fast, secure attachment; blanket stitches form visible, evenly spaced borders that showcase your craftsmanship; invisible stitches slip between patch and denim, hiding thread entirely.
Control stitch tension to prevent puckering, adjust thread selection for durability, and maintain needle control through fabric stretch for professional hand sewing tips.
Sewing Machine Options for Patching
While hand stitching gives you control, machine sewing patches on jeans slashes repair time and delivers consistent strength. Choose a domestic machine with zigzag machine stitch types for durable patch edges, or upgrade to a heavy-duty motor that powers through denim customization without hesitation.
Look for automatic threading and adjustable presser foot options that handle thick fabric compatibility, letting you tackle jeans patch projects like a pro.
Reinforcing Corners and High-Wear Areas
Stress distribution matters most at corners, where every tug and bend threatens patch stability. You’ll want to sew patches with bar tacks or dense zigzag stitches at each corner for wear area repair and fray prevention.
Focus your corner reinforcement on knees and seat areas during denim patching—those high-friction zones demand double-stitching.
Smart jeans patch placement and hand stitching techniques keep repairs invisible yet bulletproof.
Finishing Touches and Patch Care
Once you’ve sewn your patch in place, a few final steps will make your work look sharp and last longer. You’ll need to clean up loose threads, press the denim smooth, and consider adding decorative touches if you want extra style.
Proper care after patching keeps your jeans looking good and prevents repairs from coming undone over time.
Trimming Excess Thread and Final Pressing
Once your stitching’s locked down with a solid knot, you’re not quite done—trimming excess thread and final pressing lock in patch security for the long haul.
Snip threads with fabric scissors at 1–2 mm beyond the knot to prevent snagging during wear, then press the patch area from the inside using medium heat and a pressing cloth for fabric protection.
Let your jeans cool flat to maintain seam finishing and bond strength.
Decorative Stitching for Style
Transform your patch into a statement piece with decorative topstitching. Blanket stitches form bold borders, whip stitches add subtle texture, and sashiko embroidery creates geometric patterns that turn repair into art.
Contrast thread colors against your denim for maximum impact, or match them for understated elegance.
Hand stitching for beginners starts simple: running stitches along patch edges instantly enhance fabric textures while reinforcing seams you’ll wear with pride.
Washing and Maintaining Patched Jeans
Your patched jeans deserve care that preserves patch adhesion and prevents fabric fading. Turn jeans inside out before washing, use cold water to avoid denim shrinkage, and skip the dryer to protect color preservation and adhesive bonds.
Follow these laundry tips for clothing maintenance quality:
- Wait 24 hours after patching before first wash
- Choose gentle cycles over heavy-duty settings
- Use mild detergent without bleach for fabric repair longevity
- Air dry to maintain garment mending integrity
- Store away from direct sunlight to prevent color loss
Inspecting and Reinforcing Over Time
Check your patch every two to three months for loose threads and edge lifting—early detection prevents full detachments.
Reinforce corners with bar-tack stitching if you notice wear patterns at stress points, especially on knees and seat areas.
This proactive garment repair extends patch longevity by six to twelve months, stopping fabric fatigue before it compromises edge integrity and forces you to start the sewing process over.
Frequently Asked Questions (FAQs)
Can you sew a patch on jeans?
A stitch in time saves nine, and yes, you can sew a patch on jeans using hand sewing or a sewing machine, depending on your patch materials, sewing tools, and denim repair needs.
How do you sew jeans patches on a sewing machine?
Set your sewing machine to medium speed with a 0–5 mm stitch length, use polyester thread that matches your denim fabric, and secure the patch with straight stitches around the edge.
How do I choose the right patch for my jeans?
Match your patch material to your denim’s fabric weight—canvas or heavy twill for durability, lighter options for style.
Choose colorfast, pre-washed patches to prevent dye bleeding and shrinkage during washing.
How do you make a patch on jeans?
You can make a patch on jeans by cutting fabric slightly larger than the worn area, fusing it with fabric adhesives or interfacing, then securing with denim repair stitches for durable patchwork.
How do you sew patches on jeans?
You’ll need a sewing needle, thread, and patch materials that match your denim repair goals.
Choose fabric selection and thread choices carefully, then apply your preferred sewing techniques—hand stitching or machine weaving—to secure the patch permanently.
What is the best stitch for patching jeans?
Backstitch gives you the strongest hold for high-wear spots, while blanket stitches frame decorative patches with clean edges.
Zigzag machine stitching absorbs fabric movement, and whip stitches work perfectly for smaller repairs.
How do you fix a hole in jeans with a patch?
You’ll turn the jeans inside out, cut the patch slightly larger than the hole, position it over the damaged area, then secure with pins. Sew using dense zigzag stitches around the edges for durable fabric repair.
How to sew a repair patch?
Position your denim repair patch to extend 5 to 3 cm beyond the damaged area, then secure it with 8 to 10 evenly spaced stitches along each side using thread matching your fabric.
How do I remove an old patch?
Inspect the old patch for stitching or adhesive, then carefully cut threads with a seam ripper or soften iron-on adhesive with a hairdryer, peeling gently to avoid fabric damage during patch removal.
What tools are needed for patching jeans?
You’d think patching jeans requires a whole workshop, but you really only need fabric scissors, sewing needles, denim threads, an ironing board, pins, and optionally a sewing machine or thimble for hand-sewing comfort.
Conclusion
Like a well-placed stitch holding fabric together, knowing how to sew a patch on jeans gives you control over your wardrobe’s lifespan. You’ve learned to select the right materials, prepare your denim properly, secure patches with precision, and reinforce high-stress areas for lasting wear.
Each repaired pair becomes a small rebellion against throwaway culture, proving that durability beats disposability. Your jeans don’t retire until you say so—and now you’ve got the skills to back that up.
- https://www.wikihow.com/Sew-Straight-by-Hand
- https://www.thesprucecrafts.com/sewing-machine-stitches-4023693
- https://www.sciencedirect.com/science/article/pii/S0749208123000268
- https://www.fabricsgalore.co.uk/blogs/fabric-news/how-to-select-interfacing-weights-for-sewing-projects
- https://pmc.ncbi.nlm.nih.gov/articles/PMC6290625/


