This site is supported by our readers. We may earn a commission, at no cost to you, if you purchase through links.
 Removing embroidery can be as easy as pie with the right tools and patience.
Grab a seam ripper—your trusty sidekick—and gently pull out those stitches from the back.
For tougher jobs, a specialized electric embroidery remover might do the trick; it’s like a magic wand for fabrics!
Household razors or trimmers can also help for larger patches.
Just be careful not to nick the fabric; it’s a delicate dance.
Once the stitches are gone, tidy up with a quick steam iron press.
Curious about handling different types of embroidery?
Stick around for more pro tips!
Table Of Contents
- Key Takeaways
- Can You Remove Embroidery
- Removing Embroidery Methods
- Step-by-Step Embroidery Removal
- Addressing Potential Issues
- Why Remove Embroidery
- Seam Ripper Vs. Embroidery Eraser
- Tools for Removing Embroidery
- Preventing Embroidery Mistakes
- Fixing Fabric Holes
- Tips for Successful Embroidery Removal
- Frequently Asked Questions (FAQs)
- Conclusion
Key Takeaways
- You can remove embroidery using tools like seam rippers, stitch erasers, or household razors, but exercise caution to avoid damaging the fabric.
- Choose the right removal method based on your fabric type and stitch density since delicate fabrics require gentler approaches.
- Wetting the embroidery and working from the back of the fabric makes stitch removal easier and reduces the risk of damage.
- Patience and careful handling are crucial; test on a hidden area first to ensure you won’t harm the fabric.
Can You Remove Embroidery
You can remove embroidery from most fabrics, but you’ll need to factor in things like stitch density and fabric type before starting the project.
Stitch density and fabric type are important factors to consider.
While dense embroidery on delicate fabrics can be tricky to remove, you’ll find it’s much easier to tackle larger stitches on sturdy materials like denim or canvas.
Factors Affecting Removal Ease
Before diving into embroidery removal, you’ll want to assess a few key factors that’ll make or break your success.
The type of fabric plays a huge role – sturdy materials like denim are more forgiving than delicate ones.
Stitch density matters too; those large, loose satin stitches come off like a dream, while tight, complex designs can test your patience.
Thread thickness and embroidery size round out the equation – bigger isn’t always better!
Potential for Fabric Damage
Certain fabrics just don’t play nice with embroidery removal.
You’ll want to be extra careful with delicate materials like silk, chiffon, and thin jersey shirts – they’re prone to permanent damage.
Even sturdy materials like leather and vinyl will keep those pesky needle holes as souvenirs.
Think of it like removing a tattoo – sometimes you’re left with a mark.
Your best bet? Test a small, hidden area first to see how your fabric responds.
Types of Embroidery and Removal Ease
Different embroidery types come with their own removal challenges.
You’ll find that large satin stitch letters on sturdy fabrics are easiest to tackle, while dense stitching on delicate materials can be tricky.
Think of it like untangling yarn – the thicker the thread and stronger the fabric, the easier it’s to work with.
For best results, assess your fabric’s thickness and stitch density before deciding whether to attempt removal.
Removing Embroidery Methods
You’ll find that removing embroidery isn’t as tricky as it seems once you’ve got the right tools and method for your specific project.
Whether you’re working with a stitch eraser, seam ripper, or household razor, each approach has its sweet spot for tackling different types of embroidery work.
Method 1 – Stitch Eraser or Stitch Ripper
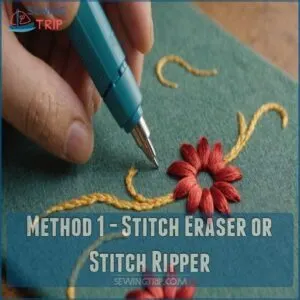
A stitch eraser or stitch ripper is your secret weapon for tackling machine embroidery like a pro.
These electric tools shave through stitches from the back, making removal a breeze compared to manual methods.
Here’s why embroiderers love these tools:
- They cut through fill-stitch designs effortlessly
- You’ll feel like a surgeon with precise control
- Your fabric stays safer than with manual methods
- You’ll save hours of frustrating picking and pulling
Start by gently shaving the bobbin stitches, then pull remaining threads from the front.
Method 2 – Seam Ripper
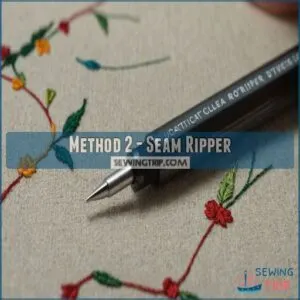
While stitch erasers are great for machine embroidery, seam rippers are excellent for removing running stitches.
They’re your go-to for delicate fabrics like terry towels, where precision is key, and knowing how to remove stitches without a seam ripper can be handy in a pinch.
Sure, tackling large fill-stitch designs with a seam ripper can be as slow as watching paint dry, but it’s all about the right tool for the job.
When using a seam ripper to remove embroidery, it’s essential to utilize the pointed tip to lift and pick loose threads, as discussed in the art of unpicking techniques. Here’s a pro tip: place the seam ripper perpendicular to the bobbin stitches on the back, then remove every 3-4 stitches along the design.
Method 3 – Household Razors or Trimmers
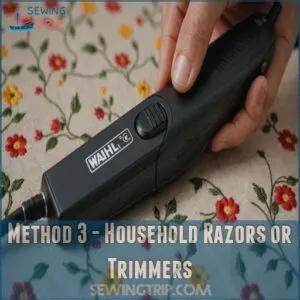
If you’re on a budget or in a pinch, household razors or trimmers can be your embroidery removal sidekicks.
Electric hair clippers and women’s razors offer a wallet-friendly alternative to specialized tools.
Just remember, they’re not as precise, so tread carefully to avoid fabric damage.
The Wahl Peanut trimmer is a fan favorite for its effectiveness.
While these methods mightn’t be as slick as dedicated tools, they’ll get the job done in a pinch.
Step-by-Step Embroidery Removal
You’re about to become an embroidery removal pro with our easy-to-follow steps.
Get ready to transform your garment as we walk you through the process, from wetting the stitches to cleaning up those pesky thread remnants.
Wetting The Embroidery
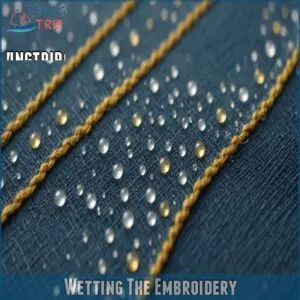
Now that you’ve got your tools ready, let’s kick off the embroidery removal process with a little water magic.
Wetting the embroidery is like giving those stubborn stitches a spa day – it softens them up and makes your job a whole lot easier.
Here’s how to do it:
- Fill a spray bottle with lukewarm water
- Lightly mist the embroidered area
- Let it sit for 5-10 minutes
This simple step can make a world of difference in your embroidery removal journey.
Turning The Garment Inside Out
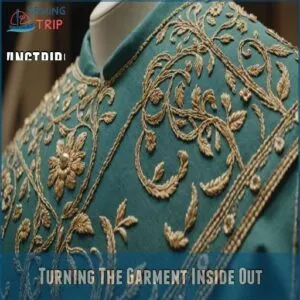
Diving into the embroidery removal process, let’s flip that garment inside out!
This important step gives you VIP access to the back of your stitches, making removal a breeze.
Here’s a handy guide to help you navigate this step like a pro:
| Action | Benefit | Pro Tip |
|---|---|---|
| Flip garment | Exposes back stitches | Be gentle with delicate fabrics |
| Locate design | Easier targeting | Use good lighting |
| Smooth fabric | Prevents new wrinkles | Iron if needed |
| Secure edges | Keeps work area tidy | Use clips or pins |
Pulling Stitches Off From The Front
After you’ve tackled the back, it’s time to face the front.
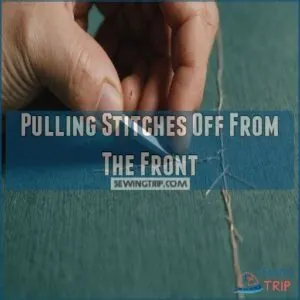
Grab your tweezers or suture removers and gently pull those stubborn stitches away from the fabric.
Remember, patience is key to avoiding fabric damage.
Here’s why this step matters:
- It reveals hidden imperfections
- It tests your determination
- It brings you closer to your goal
- It’s oddly satisfying, like peeling off a face mask
Keep an eye on the stitch direction as you work, and soon you’ll be thread-free and fabulous!
Cleaning Up The Embroidered Area
You’ve done the heavy lifting, now it’s time for the finishing touches.
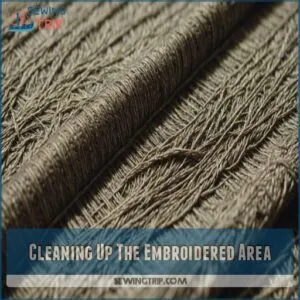
Grab a lint roller and sweep away those pesky thread fragments.
This isn’t just about tidying up; it’s your chance to assess your handiwork.
Run your fingers over the fabric, feeling for any stubborn stitches you might’ve missed.
Remember, patience is key here – a thorough clean-up can make or break your embroidery removal project.
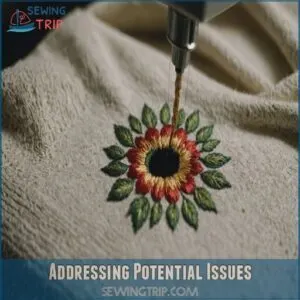
Addressing Potential Issues
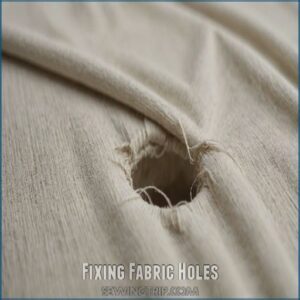
You’ve removed the embroidery, but now you’re facing some pesky holes in your fabric.
Don’t worry, we’ve got some clever tricks up our sleeve to fix those holes and make your garment look as good as new.
Holes in The Fabric
When you remove embroidery, you might encounter a pesky problem: holes in your fabric.
Don’t panic, these little nuisances are common, especially with delicate materials.
To fix small holes, you can try no-sew methods for pinholes, which often come with metal hardware like belt buckles.
Small holes often disappear after washing or ironing.
Larger holes may require more creative solutions.
The fabric type impacts how easily holes can be fixed.
Remember, prevention is key.
Using the right embroidery removal techniques, including gentle unstitching methods, can minimize fabric damage.
With a bit of patience and know-how, you’ll be a pro at handling these holey situations!
Disguising Holes With Embroidery or Appliqué
Got holes in your fabric after removing embroidery? Don’t sweat it! You’ve got some nifty tricks up your sleeve.
Think of those holes as a blank canvas for your creativity. Why not cover them with a new embroidery design? It’s like giving your fabric a makeover.
Or, if you’re feeling fancy, try appliqué. It’s like slapping on a fabric patch, but way cooler. These techniques help hide the flaws and add a personal touch to your piece.
Pressing With a Steam Iron
Pressing with a steam iron can be your secret weapon for tackling those pesky fabric holes left after embroidery removal.
Set your iron to the appropriate heat for your fabric type, and let the steam work its magic.
Gently massage the area with the iron, coaxing those fibers back into place.
It’s like giving your fabric a spa day!
Remember, this trick works best on forgiving materials, so test a small area first to avoid any unwanted surprises.
Why Remove Embroidery
You’d be surprised how often you might want to remove embroidery – from repurposing old clothes to fixing a botched design.
Whether you’re giving new life to a thrift store find or saying goodbye to that embarrassing logo, embroidery removal can transform your wardrobe without breaking the bank.
Repurposing Old Clothing Items
Breathing new life into old clothes through embroidery removal opens up endless creative possibilities.
Whether you’re diving into sustainable fashion or just love giving cherished pieces a fresh start, removing embroidery can transform your wardrobe.
- Turn that old work uniform into a trendy statement piece
- Transform branded sportswear into clean, versatile basics
- Convert outdated logo tees into blank canvases for your own designs
Removing Unsightly Embroidery
Sometimes you’ll spot embroidery that just doesn’t look right – maybe it’s crooked, poorly designed, or simply not your style.
You’re not stuck with it forever!
Whether it’s a thrift store find with an outdated logo or a gift with wonky stitching, removing unwanted embroidery can transform your garment.
Just take it slow and use the right tools to avoid damaging your fabric.
Creating a Neat Seam Line
You’ll often need to remove embroidery when creating clean, professional seam lines in your sewing projects.
Getting rid of old stitches lets you join fabrics smoothly without bulk or bumps that could make your seams look amateur.
A seam ripper works perfectly here – just take your time working through each stitch. Your patience will pay off with crisp, flat seams that look store-bought.
Enhancing Aesthetic Appeal
The quest for perfect style often means saying goodbye to dated embroidery designs.
When your embroidered piece doesn’t match your vision anymore, removing it can transform your garment into something fresh and modern.
Here are three ways removal enhances appeal:
- Creates a clean canvas for new design ideas
- Removes outdated patterns that clash with current trends
- Allows for personalization that better reflects your style
Removing Unwanted Branding or Logos
Brand-free clothing opens up new possibilities for your wardrobe.
When you’ve got a perfectly good piece with unwanted logos, removing them can save you money and give you more styling options.
Here’s a quick comparison of your logo removal options:
| Method | Cost | Time | Skill Level | Success Rate |
|---|---|---|---|---|
| DIY Tools | $10-30 | 1-2 hours | Moderate | 75-85% |
| Pro Service | $15-40 | 24-48 hrs | Expert | 90-95% |
| Home Trimmer | $20-25 | 30-60 min | Beginner | 60-70% |
| Seam Ripper | $5-10 | 2-3 hours | High | 80-90% |
| Stitch Eraser | $30-50 | 30-45 min | Low | 85-95% |
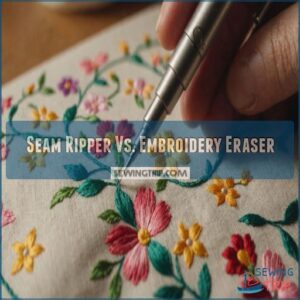
Seam Ripper Vs. Embroidery Eraser
You’ll want to choose between two popular tools for your embroidery removal project: the trusty seam ripper for precise, stitch-by-stitch work, and the efficient embroidery eraser that makes quick work of machine stitching.
While a seam ripper’s perfect for both hand and machine embroidery, you’ll find an embroidery eraser is your best friend when tackling larger machine-made designs that need a speedy cleanup.
Suitable for Hand-Stitched and Machine-Stitched Embroidery
Sometimes removing embroidery feels like solving a puzzle – that’s where a seam ripper shines.
This versatile tool helps tackle both hand-stitched and machine-made designs with precision.
Here’s what a seam ripper can handle:
- Delicate cross-stitch patterns on cotton
- Chain stitch monograms on denim
- Satin stitch logos on polo shirts
- Running stitch designs on quilts
Just slide the pointed tip under each stitch, and you’re in control.
Specifically Designed for Machine-Stitched Embroidery
Specialized embroidery erasers revolutionize the way you tackle machine-stitched designs, offering precision that basic seam rippers can’t match.
These tools are engineered specifically for power and control when removing machine embroidery, often being used for tasks like removing unwanted logos.
These purpose-built tools shave through dense stitches effortlessly, making quick work of even the most intricate machine-made patterns.
| Feature | Embroidery Eraser | Seam Ripper |
|---|---|---|
| Speed | Ultra-fast | Slow |
| Precision | High | Moderate |
| Design Focus | Machine stitches | All stitches |
| Power Source | Electric | Manual |
Patience and Careful Handling Required
While embroidery erasers handle machine stitches like a pro, using a seam ripper demands a steady hand and zen-like patience.
You’ll need to work stitch by stitch, keeping your movements controlled and deliberate.
But if you’re unsure which tool is best for you, check out embroidery eraser reviews.
Think of it like defusing a tiny fabric bomb – one wrong move and you could snag or tear the material.
Take your time, and remember that rushing usually leads to mistakes.
Faster and Cleaner Removal Process
An embroidery eraser makes quick work of those stubborn stitches.
Unlike the methodical pace of a seam ripper, this power tool zips through machine embroidery in a fraction of the time.
You’ll love how it shaves off bobbin threads cleanly, letting you pull the top threads away like butter.
Plus, there’s less risk of fabric damage since you’re not poking and prodding with a pointed tool.
Tools for Removing Embroidery
You’ll need the right tools to make your embroidery removal project a breeze, and we’ve everything you need, from electric stitch erasers to precision scissors.
Whether you’re a DIY enthusiast or just looking to remove that outdated logo from your favorite jacket, these essential tools will help you get the job done without damaging your fabric.
1. Cordless Stitch Eraser for Embroidery
The cordless stitch eraser is your secret weapon for tackling dense machine embroidery.
Here’s what makes it shine:
- Works both corded and cordless – perfect for those tricky spots
- Weighs just 8.4 ounces, making it easy to maneuver
- Side-to-side motion cuts through stitches like butter
- Runs for ages between charges
Just remember – it might be noisy and takes practice to master, but it’s worth every penny for serious embroidery removal.
2. Havel Snip A Stitch Scissors
Havel’s Snip A Stitch Scissors are your go-to tool for precision embroidery removal.
These 4.5-inch stainless steel scissors boast a notched blade for clean cuts and easy squeeze action.
But like any tool, they’ve their quirks.
Let’s break down the pros and cons:
| Feature | Pro | Con |
|---|---|---|
| Sharpness | Stays sharp longer | Potential snagging |
| Comfort | Easy to use | Tail ends may rub |
| Durability | Don’t pop apart | Some sticking issues |
Despite minor drawbacks, these scissors are a solid choice for your embroidery toolkit.
3. Precision Hobby Knife Set 16 Piece
Sharp and precise, the MULWARK 16-piece hobby knife set is your secret weapon for embroidery removal.
You’ll love its versatility, tackling everything from delicate fabrics to tougher materials.
The ergonomic handle fits comfortably in your hand, giving you ultimate control.
While it might take some practice, you’ll soon be slicing through stitches like a pro.
Just remember, these blades mean business – they’re not for the faint of heart!
4. Philips Norelco Multigroom Trimmer Series 3000
Moving from precision knives, let’s talk about an unexpected ally in embroidery removal: the Philips Norelco Multigroom Trimmer Series 3000.
This versatile tool isn’t just for grooming – it’s a secret weapon for tackling stubborn stitches.
With its self-sharpening blades and long battery life, you’ll breeze through embroidery removal tasks.
Here’s why you’ll love this trimmer for embroidery removal:
- It’s like having a tiny, handheld barber for your fabric
- No more hand cramps from hours of seam ripping
- Feels oddly satisfying, like mowing a lawn of thread
- Your old embroidered shirts are trembling in fear
- You’ll feel like a fabric surgeon, precisely removing stitches
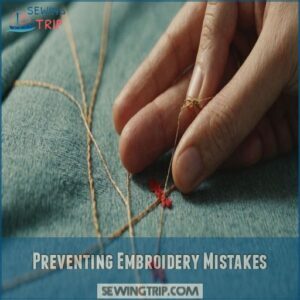
Preventing Embroidery Mistakes
You’ve mastered removing embroidery, but wouldn’t it be great to avoid those mishaps in the first place?
Let’s explore some savvy tricks to keep your embroidery flawless from the get-go, saving you time and frustration down the road.
Monitoring The Machine
Now that you’ve got your tools ready, let’s talk about keeping an eagle eye on your embroidery machine.
It’s like babysitting a mischievous toddler – you can’t take your eyes off it!
Watch for any hiccups in thread tension by ensuring you’re using the correct stitch selector dial for your fabric type or fabric feeding.
A sudden change in the machine’s hum? That’s your cue to investigate.
Keep your needle sharp and your bobbin full.
By staying vigilant, you’ll catch those pesky mistakes before they become full-blown embroidery disasters.
Creating a Test Stitch-Out
Imagine this: you’re about to embroider a masterpiece, but why risk it? Creating a test stitch-out is your secret weapon against embroidery mishaps.
Here’s why it’s a game-changer: You can even practice different embroidery stitches for monogramming clothes on your scrap fabric to make sure you’re happy with the results. Catch design flaws before they ruin your project, test different thread colors to nail the perfect palette and experiment with stabilizers to achieve pro-level results.
By using scrap fabric that matches your final piece, you’ll get a sneak peek of the finished product. It’s like a dress rehearsal for your embroidery – saving you time, thread, and headaches!
Double-Checking Machine Settings
After your test stitch-out, don’t forget to double-check your machine settings.
It’s like giving your car a once-over before a road trip.
Here’s a quick checklist to keep your embroidery on point:
| Setting | What to Check |
|---|---|
| Needle | Sharp and correct size |
| Hoop | Proper size and tension |
| Thread | Quality and color match |
| Tension | Balanced for fabric type |
Remember, a stitch in time saves nine.
Taking a moment to verify these settings can save you from embroidery headaches down the road.
Fixing Fabric Holes
You’ve removed the embroidery, but now you’re facing fabric holes – don’t worry, we’ve a solution for you.
With a few clever tricks up your sleeve, you’ll learn how to make those pesky holes disappear faster than a magician’s rabbit.
Embroidering Over Holes
When you’ve got a pesky hole from removing embroidery, don’t fret.
Embroidering over holes is like giving your fabric a second chance.
Choosing the right needle for your repair job is crucial, and as explained in sewing machine needle guide, selecting the right needle size and type can make all the difference in the outcome. The size of the hole and fabric play a big role in your repair technique.
For small holes, you can often camouflage them with a new design using a sturdy embroidery hoop frame, like those found at embroidery hoop frames.
Choose embroidery thread colors that complement or contrast with your fabric, depending on the look you’re after.
Got a larger hole?
No worries!
Create a design that covers the entire area, effectively "patching" it with stitches.
Remember, this isn’t just a fix—it’s an opportunity to add some flair.
Who knows?
Your repair might end up being the coolest part of your piece!
Appliquéing or Ironing on a Patch
Got a hole in your fabric after removing embroidery? No worries! Appliquéing or ironing on a patch is your secret weapon.
Choose a patch that complements your garment’s style and color. For the best results, pick a patch slightly larger than the hole.
If you’re handy with a needle, sew the patch on for a durable fix. Not into sewing? No problem! Iron-on patches are your best friend. Just position the patch over the hole, set your iron to the right temperature, and press firmly. Voilà! Your fabric’s good as new.
Remember, this trick isn’t just for covering holes – it’s a great way to breathe new life into old clothes or add a personal touch to plain items.
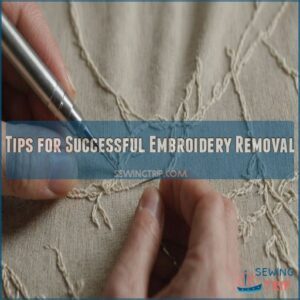
Tips for Successful Embroidery Removal
You’re about to become an embroidery removal pro, armed with expert tips to tackle even the trickiest stitches.
Whether you’re using a stitch eraser or your trusty seam ripper, we’ll show you how to choose the right method and handle your fabric with care, ensuring your embroidery vanishes without a trace.
Careful Handling and Attention to Detail
Take your time and be as gentle as a feather when removing embroidery.
The fabric type and stitch density matter a lot, and using the right amount of pressure with your removal tools can make a world of difference.
Always pay attention to stitch direction to avoid accidental snags.
Remember, patience and control are your best friends and can help prevent embroidery mistakes and ease embroidery repair or restoration.
Choosing The Right Removal Method
Ready to tackle embroidery mistakes?
Picking the right removal method feels like choosing the perfect tool for a delicate operation.
Factor in fabric type and stitch density, and consider utilizing a seam ripper technique.
Larger stitches might cooperate with a simple seam ripper, but intricate designs call for specialized embroidery removal tools.
Gauge your budget constraints and tool availability.
Remember, removing embroidery from fabric can be finicky, so arm yourself with the best embroidery removal methods for standout results.
Considering The Type of Embroidery
Before you dive headfirst into removing embroidery, stop and scrutinize the type you’re dealing with.
Stitch density and thread thickness can make or break your removal plan.
Think of dense designs like knots in your shoelaces; they’re stubborn and tricky.
Lighter stitches are your friends here.
To make the process smoother, using the right tools, such as those found in an embroidery thread remover, can be a great help.
Fabrics have their quirks too—linen’s forgiving, but silk’s delicate.
The right strategy makes embroidery thread removal as smooth as butter.
Frequently Asked Questions (FAQs)
Can embroidery be removed?
Don’t worry, it’s not always a lost cause.
You can remove embroidery, but it depends on the fabric and stitches.
Some methods are easier than others, so let’s explore your options.
How do you remove embroidery from a sewing machine?
To remove embroidery from a sewing machine, especially those with automatic needle threaders like the Singer SE300 Legacy, flip the fabric inside out.
Use a stitch eraser or trimmer to gently cut backside threads.
Then pull front threads with tweezers.
Clean stray threads with a lint roller.
How do you remove embroidery from a garment?
Start by dampening the embroidery and turning the garment inside out.
Use a stitch eraser or seam ripper to gently cut the stitches from the back, then pull the front stitches.
Clean up with tweezers and a lint roller.
How to remove embroidery stitches without damaging fabric?
You’re more likely to see pigs fly than remove embroidery without risking fabric damage.
But, with a stitch eraser or seam ripper, and lots of patience and care, you can gently free those threads.
How do you remove embroidery from a jacket?
Flip the jacket inside out.
Gently loosen the stitches with a seam ripper or electric stitch eraser.
Avoid tugging too hard to prevent damage.
Once loose, pull stitches away with tweezers, then clean the area.
What is the fastest way to remove embroidery?
To quickly remove embroidery, grab a stitch eraser, ideal for machine embroidery.
It’s like mowing a tiny thread lawn.
If you don’t have one, a seam ripper with steady hands will do the trick.
What is the easiest way to remove embroidery?
Use an embroidery eraser for machine-stitched designs; it’s quick and efficient.
If that’s not available, a seam ripper combined with tweezers and patience works well for hand-stitched embroidery.
Just handle each method carefully to avoid fabric damage.
Can embroidery be removed without damage?
Removing embroidery’s tricky; it’s possible, but damage is a real risk, especially on delicate fabrics. Careful work with the right tools is key. Don’t expect miracles!
Will removing embroidery leave holes?
You might notice small holes after removing embroidery, especially with delicate fabrics.
It’s like a tiny surprise party you didn’t plan for.
Sometimes washing or ironing can ease them out, or a patch could help disguise them.
How to remove logo from clothing?
Removing a logo involves using a stitch eraser or seam ripper on the inside of your clothing to carefully cut and pull threads.
Tackle it gently to avoid fabric damage.
Then clean up any remaining threads.
Is removing embroidery safe for all fabrics?
Not all fabrics embrace embroidery removal.
Delicate materials like silk or chiffon mightn’t survive unscathed, while robust ones like denim handle it better.
Always test on a hidden spot to avoid unexpected fabric tantrums.
Can embroidery removal be done on leather?
Taking embroidery off leather poses challenges since needle holes often become permanent.
Patience and precision are essential to avoid damage.
Deciding if removal is worth the risk can save your leather piece from lasting scars.
How long does embroidery removal take?
On average, embroidery removal takes about 30 to 60 minutes for small sections.
It’s like peeling a potato—quick if you’re skilled, but time-consuming when it’s detailed or on delicate fabric.
Patience and precision are key.
Will removing embroidery damage waterproof fabrics?
Removing embroidery from waterproof fabrics is tricky. It’s likely to leave holes, since those materials don’t stretch. Consider if it’s worth the risk; sometimes, replacing the item’s easier.
Are there any professional embroidery removal services?
They say a stitch in time saves nine, but regarding embroidery removal, professionals are rare.
Many embroiderers don’t offer this due to damage risks, but some charge if they expect good results.
Conclusion
With this guide, "how to remove embroidery" becomes as easy as falling off a log.
By understanding the different methods and tools, from seam rippers to trimmers, you can tackle any embroidery removal job with ease and confidence.
Keep an eye on potential snags and holes, and remember, patience is your best friend.
Whether you’re tidying up old clothes, like carefully pressing silk fabric with a pressing cloth to avoid shine and scorch marks like this when working with delicate materials, or repurposing fabric, approach each project with care, and you’ll get perfect results every time.

