This site is supported by our readers. We may earn a commission, at no cost to you, if you purchase through links.
 Ready to conquer the dreaded buttonhole? You’re in for a treat!
To sew a perfect buttonhole, start with the right tools: a buttonhole foot, sharp scissors, and stabilizer.
Mark your fabric precisely, then set up your machine with the correct tension and stitch settings.
Take a deep breath—you’ve got this! Sew slowly, keeping the fabric taut. Don’t rush; even seasoned pros take their time here.
Once you’re done, carefully cut the center and reinforce the edges. Voila! You’ve just leveled up your sewing game.
But wait, there’s more to learn about buttonhole wizardry, including some nifty tricks for tricky fabrics that’ll make you feel like a sewing superhero.
Table Of Contents
- Key Takeaways
- Essential Tools for Sewing Perfect Buttonholes
- Choosing The Right Buttonhole Style
- Preparing Your Fabric for Buttonholes
- Setting Up Your Sewing Machine
- Step-by-Step Guide to Sewing Automatic Buttonholes
- Mastering Manual Buttonhole Techniques
- Cutting and Finishing Your Buttonholes
- Troubleshooting Common Buttonhole Problems
- Advanced Buttonhole Techniques for Various Fabrics
- Perfecting Your Buttonhole Skills
- Frequently Asked Questions (FAQs)
- Conclusion
Key Takeaways
- You’ll need the right tools: a buttonhole foot, sharp scissors, and stabilizer to set yourself up for success.
- Prepare your fabric by marking accurately, applying interfacing, and using stabilizers to prevent puckering and ensure clean results.
- Master your machine settings by adjusting tension, selecting the appropriate stitch, and practicing on scrap fabric before tackling your project.
- Don’t be afraid to experiment with different techniques for various fabrics, from denim to silk, and explore decorative options to make your buttonholes stand out.
Essential Tools for Sewing Perfect Buttonholes
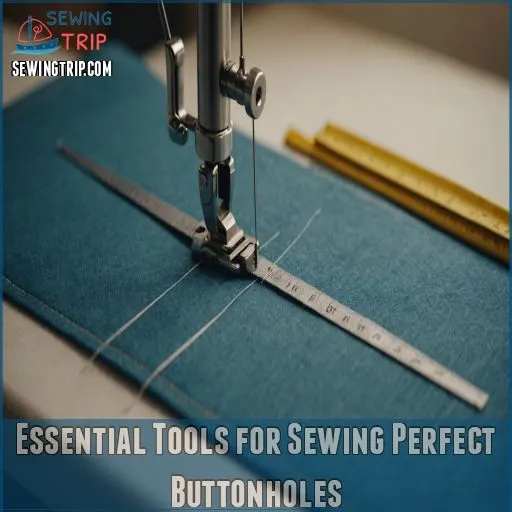
You’ll need the right gear to tackle buttonholes like a pro.
From a trusty buttonhole foot to a sharp cutter, these tools will transform your sewing from "Oh no!" to "Oh wow!" in no time.
Buttonhole Foot and Its Types
Your trusty buttonhole foot is like a loyal sidekick in the sewing world.
You’ll find two main types: the one-step wonder and the four-step adventurer .
The one-step foot creates buttonholes in a single swoop, perfect for those who want to zip through projects.
For more control, the four-step foot lets you take it slow and steady.
Choose based on your machine and fabric type for buttonhole bliss!
Buttonhole Cutter and Seam Ripper
Now that you’ve got your buttonhole foot sorted, let’s talk about opening those babies up!
A good buttonhole cutter is like a surgeon’s scalpel for your fabric.
It’ll slice through those stitches cleaner than a hot knife through butter.
No more accidentally snipping threads with scissors – you’ll feel like a pro in no time!
Just remember, safety first: always use the chisel away from your fingers.
Fabric Markers and Measuring Tools
Three essential tools will transform your buttonhole game: fabric markers, measuring tools, and the trusty button foot. Let’s explore precise marking and measuring!
- Water-soluble markers for crisp, temporary lines
- Sewing gauge for consistent buttonhole spacing
- Expanding sewing gauge for larger projects
- Fabric-specific markers (e.g., Frixion for printed fabrics)
- Fine Line Pen for light-colored fabrics
Remember, test your markers first – you don’t want permanent marks crashing your buttonhole party!
Interfacing and Stabilizers
Precision meets strength with interfacing and stabilizers.
These unsung heroes give your buttonholes superpowers, preventing fraying and keeping things neat.
Choose tear-away for wovens or wash-away for knits.
It’s like giving your fabric a secret shield!
Apply interfacing to the wrong side before marking, and don’t skimp on stabilizer – it’s your buttonhole’s best friend.
Remember, a well-supported buttonhole is a happy buttonhole!
Fray Check and Thread Options
Ever wondered why some buttonholes look like they’ve been through a paper shredder?
Enter fray check, your new best friend.
Dab this liquid magic on your stitches to keep them from unraveling faster than your patience.
For thread, go for a heavyweight champ like buttonhole twist or silk – they’re the Rocky Balboa of buttonhole threads, tough and ready to go the distance.
Choosing The Right Buttonhole Style
You’ve mastered the tools, now let’s tackle the fun part: picking your buttonhole style.
Whether you’re going for classic rectangular or fancy keyhole, your choice can make or break your project, so let’s get it right!
Buttonhole Size Matters
Buttonhole size is key! You’ll want to match your buttonhole size to your button and fabric weight.
The rule of thumb? Make your buttonhole 1/8" larger than your button.
This will help:
- Your buttons won’t pop out like excited jack-in-the-boxes
- You won’t struggle to fasten your garment like it’s a wrestling match
- Your project will look as polished as a showroom mannequin
Thread Choice Impacts Appearance
Your buttonhole’s thread choice can make or break its appearance. It’s like choosing the perfect accessory for your outfit! Let’s explore the thread weight, color, and texture that’ll make your buttonholes pop.
| Thread Factor | Impact on Buttonhole |
|---|---|
| Weight | Affects visibility |
| Color | Blends or contrasts |
| Texture | Adds character |
| Sheen | Influences formality |
| Durability | Ensures longevity |
Remember, thicker threads camouflage raw edges better.
For a subtle look, match your thread color to your fabric.
Feeling bold? Try a contrasting hue for a fun twist!
Historical Accuracy Considerations
Time-traveling through buttonhole styles can be a real hoot.
To nail historical accuracy, you’ll need to become a buttonhole detective, much like the Inuits, who were masters of caribou sinew sewing.
Let’s unbutton the past:
- Pre-1670: Loop fasteners were all the rage
- 1670-1755: Buttonholes got fancy, with contrasting colors and extra length
- 1800s: Hand-sewn buttonholes reigned supreme, each stitch a tiny time capsule
Remember, matching era-specific tools and stitching techniques is key. It’s like solving a fashion puzzle – frustrating but oh-so-satisfying!
Preparing Your Fabric for Buttonholes
You’re about to turn your fabric into buttonhole paradise, but first, let’s get it prepped and ready for action.
With the right marking, interfacing, and stabilizing techniques, you’ll set the stage for buttonholes that’ll make even the pickiest seamstress swoon.
Marking Buttonhole Placement Accurately
Buttonhole-placement precision can make or break your sewing project.
Grab your trusty marking tools and let’s nail this!
Start by trying on your garment and pinning where a button hits your bust’s fullest point.
From there, use a button hole gauge for perfect spacing.
Don’t forget to mark for horizontal or vertical buttonholes .
Pro tip: tailor’s tacks are your secret weapon for accuracy.
Interfacing Application Techniques
Nobody said applying interfacing was easy, but with these tips, you’ll be a pro in no time.
Choose the right type for your fabric – fusible for most projects, sew-in for delicates.
Cut interfacing slightly smaller than your fabric piece, leaving the seam allowance free.
Here’s a quick guide to nailing it:
- Iron your fabric first to remove wrinkles
- Place interfacing adhesive-side down on wrong side of fabric
- Use a press cloth to protect your iron
- Apply firm pressure and hold for 10-15 seconds
- Let it cool before handling to make sure a strong bond forms
Stabilizing Different Fabric Types
Taming unruly fabrics for buttonholes is like wrangling a herd of cats – tricky but doable.
For lightweight fabrics, use tear-away stabilizer to prevent puckering, ensuring you choose the right weight based on design intricacy and stitch count learn more about how to use tear away stabilizer.
Heavy fabrics need sturdy interfacing, while stretchy knits benefit from fusible interfacing.
Match your stabilizer to your fabric’s weight and stretch.
Pro tip: For delicate fabrics, try tissue paper under your buttonhole foot. It’ll slide like butter and tear away easily.
Setting Up Your Sewing Machine
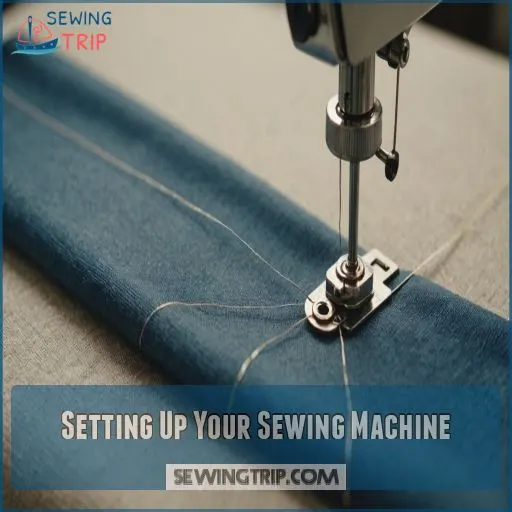
You’re on the home stretch now, so let’s get your sewing machine ready for buttonhole magic.
With a few tweaks to tension, the right foot, and some stitch wizardry, you’ll be churning out pro-level buttonholes faster than you can say "where’s my seam ripper?
Adjusting Tension for Buttonholes
Before you get started, remember that tension is the secret sauce for perfect buttonholes.
You’ll want to adjust it like a pro, whether you’re working with woven or knit fabrics.
Here’s your quick-fire guide:
- Check your manual for machine-specific settings
- Aim for invisible bobbin thread on the top side
- Test on scrap fabric matching your project’s thickness
- Fine-tune based on thread type and buttonhole size
Don’t sweat it if you’re not nailing it right away – even seasoned sewers play tension tango sometimes!
Installing and Calibrating Buttonhole Foot
How do you tame the buttonhole beast?
Start by installing your buttonhole foot.
Snap it on, making sure it’s compatible with your machine.
Now, let’s calibrate!
Pull down the buttonhole lever until it touches the foot’s back tab.
Here’s a quick guide to buttonhole foot emotions:
| Foot Type | Your Reaction |
|---|---|
| Automatic | Excited |
| Sliding | Curious |
| 4-step | Determined |
| Sensor | Impressed |
| Snap-on | Intrigued |
Don’t fret if yours looks different – there’s a foot for every sewist!
Selecting Appropriate Stitch Settings
Now that your buttonhole foot’s ready, let’s dial in those stitch settings.
You’re the conductor, and your machine’s the orchestra – time to make some beautiful music!
For most buttonholes, set your stitch length to about 0.5 and your zig-zag width to 4 or 5.
Adjust the upper tension to around 3 or 4 for a neater result.
Remember, different fabrics might need a bit of tweaking – it’s like finding the perfect recipe for your grandma’s cookies!
Threading Machine for Buttonhole Sewing
Threading your machine for buttonhole sewing can feel like threading a needle in a haystack, but it’s a cinch with the right approach.
Use a strong polyester thread for durability.
Don’t skimp on needle quality – a fresh, sharp needle can make or break your buttonhole game.
Keep your bobbin tension in check to avoid those pesky thread nests under your fabric.
Remember, a well-threaded machine is your ticket to buttonhole bliss!
Step-by-Step Guide to Sewing Automatic Buttonholes
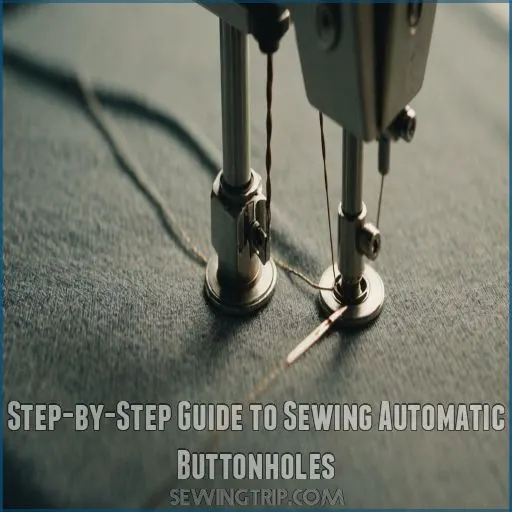
Ready to conquer automatic buttonholes? You’ll be stitching like a pro in no time as we walk you through the process, from positioning your fabric to troubleshooting pesky machine hiccups.
Positioning Fabric Under Presser Foot
Let’s tame that fabric-positioning beast!
Slide your marked fabric under the presser foot, aligning the buttonhole’s start point with the needle.
Adjust foot pressure for even tension – you want it snug, not strangled.
Double-check your fabric alignment; a crooked buttonhole is like a bad haircut, it’ll bug you forever.
Keep the stitch direction consistent, and you’ll be stitching like a pro in no time!
Operating Buttonhole Lever
With your fabric in place, it’s time to tackle the buttonhole lever.
This nifty gadget is your secret weapon for perfect buttonholes.
Locate the lever on your machine – it’s usually near the presser foot.
Pull it down gently until you feel a click.
This sets the buttonhole length and tells your machine, "Hey, let’s make some magic!"
Different machines have various lever types, so consult your manual for specific settings and troubleshooting tips.
Monitoring Stitch Formation
Now that you’ve set the buttonhole lever, it’s time to keep a hawk’s eye on your stitch formation. You’re the captain of this sewing ship, so stay alert! Watch how your fabric moves and listen to your machine’s rhythm. It’s like conducting a tiny orchestra of thread and fabric.
- Monitor stitch tension for even, balanced stitches
- Check needle position to make sure it’s centered
- Observe fabric feed for smooth, consistent movement
- Pay attention to stitch length for uniform coverage
Remember, you’re not just sewing; you’re crafting a mini masterpiece! Keep your eyes peeled and your hands steady. If something looks off, don’t panic – you’ve got this under control. Trust your instincts and let your inner sewing guru shine.
Troubleshooting Common Machine Issues
You’ve been watching those stitches like a hawk, but suddenly your machine’s throwing a tantrum. Don’t panic! Here’s a quick troubleshooting guide to get you back on track:
| Issue | Possible Cause | Solution |
|---|---|---|
| Foot not moving | Fabric touching toe | Make sure the project’s behind the foot |
| Uneven stitches | Low foot pressure | Increase pressure setting |
| Stuck mid-stitch | Buttonhole lever issue | Pull lever all the way down |
| Size problems | Clamp not engaged | Use fabric clamp for stability |
| Puckering | Incorrect stabilizer | Apply suitable interfacing |
Remember, even pros hit snags. Just breathe, adjust, and you’ll be back to buttonhole bliss in no time!
Mastering Manual Buttonhole Techniques
You’ve mastered automatic buttonholes, but now it’s time to tackle the manual method.
With a steady hand and a few pro tricks up your sleeve,
you’ll be creating custom buttonholes that’ll make even your sewing machine jealous.
Creating Precise Rectangular Buttonholes
Ready to tackle rectangular buttonholes? Let’s get started!
First, choose a fabric that complements your project.
Mark your buttonhole length precisely – it’s the key to success.
Adjust your machine’s stitch density and tension for a crisp finish (Source).
Take it slow, folks – sewing speed matters here.
Remember, practice makes perfect, so don’t fret if your first attempt looks like a wonky rectangle.
You’ve got this!
Sewing Keyhole Buttonholes for Coats
Let’s kick things up a notch with keyhole buttonholes for coats.
These beauties are the secret weapon of tailors everywhere.
To make sure a refined, artisanal appearance, use a high-quality thread that matches the fabric’s weight and type Selecting the right thread.
Choose a thick wool fabric and mark your keyhole placement carefully – it’s like finding the sweet spot on a baseball bat.
Reinforce the area with gimp thread for extra oomph.
Remember, practice makes perfect, so don’t be afraid to buttonhole-bomb some scrap fabric first!
Executing Corded Buttonholes for Strength
For a bulletproof buttonhole that can withstand the test of time, corded buttonholes are your secret weapon.
Think of them as the superhero version of regular buttonholes – they’re stronger, more durable, and ready to take on any fashion challenge you throw at them.
Here’s why corded buttonholes are a game-changer:
- They prevent fraying in delicate or loosely woven fabrics
- They add strength and definition to heavy-duty garments
- They create a polished, professional look that’ll make your sewing buddies green with envy
To execute this technique like a pro, choose a cord that’s just right for your fabric weight.
Remember, it’s all about balance – you don’t want your buttonhole to look like it’s been hitting the gym too hard!
Adapting Techniques for Stretch Fabrics
While stretch fabrics can be tricky, you’ll be a buttonhole boss in no time.
Start by interfacing the area to tame that stretch.
Choose a knit-friendly buttonhole setting on your machine or adjust for deeper bites and less dense stitches.
Corded buttonholes are your secret weapon for extra stability.
Don’t forget to test on scraps first – you’ll thank yourself later when your stretchy creation stays buttoned up!
Cutting and Finishing Your Buttonholes
You’ve stitched your buttonholes, but the job’s not done yet! Now it’s time to cut them open and add those finishing touches that’ll make your buttonholes look pro-level sharp.
Using Buttonhole Cutter Safely
Now that you’ve mastered manual buttonholes, it’s time to open them up safely.
A buttonhole cutter is your new best friend – it’s like a magic wand for neat openings!
Here’s how to use it like a pro:
- Place a wooden block underneath for protection
- Line up the cutter with your buttonhole’s center
- Press down firmly, rocking slightly if needed
- Keep fingers clear of the blade – no DIY manicures here!
- Clean the cutter after use to maintain sharpness
Applying Fray Check to Edges
You’ve cut your buttonhole, but don’t call it a day just yet!
Fray Check is your secret weapon against fraying edges.
Think of it as hair gel for your fabric – it keeps everything in place.
Apply a tiny drop along the cut edges, front and back.
Got butterfingers? Use a toothpick for precision.
Let it dry completely before you start button-popping!
Adding Reinforcement Stitches
Ready to take your buttonholes from flimsy to fabulous? Let’s beef up those edges with some reinforcement stitches!
Choose a sturdy thread and adjust your machine settings for a tight bar tack.
Place these little powerhouses at each end of your buttonhole for maximum strength.
Your buttons will thank you, and you’ll feel like a sewing superhero when you’re done!
- No more droopy cardigans ruining your day
- Say goodbye to the dreaded button pop-off in public
- Strut your stuff with confidence, knowing your buttons are going nowhere
Pressing for Professional Results
With your buttonholes reinforced, let’s put the finishing touch on your handiwork.
Properly pressing your fabric is key, as it anchors seams and shapes darts, unlike ironing, which only smooths fabric learn how to press sewn fabric.
Grab your iron and press those babies like they owe you money!
Steam works wonders for most fabrics, but go easy on delicates.
Press from the wrong side first, then flip and give the right side a gentle once-over.
Remember, a well-pressed buttonhole is the cherry on top of your sewing sundae!
Troubleshooting Common Buttonhole Problems
Even seasoned sewers can hit a snag with buttonholes, but don’t worry – you’re not alone!
Let’s tackle those pesky problems head-on, from wonky stitches to puckered fabric,
so you can create buttonholes that’ll make your grandma proud.
Fixing Uneven Stitches
After cutting your buttonhole, uneven stitches can make you feel like you’ve hit a snag.
Don’t throw in the towel just yet!
Check your tension settings and needle condition first.
If you’re still seeing wonky stitches, try flipping the buttonhole dial back to Step 1 and stitch over those uneven spots.
It’s like giving your buttonhole a second chance at perfection!
Addressing Puckering Issues
If your buttonholes are puckering like a fish’s lips, don’t panic!
Adjust your tension to smooth things out.
For slippery fabrics, try a tear-away stabilizer – it’s like giving your fabric a backbone.
Lengthen your stitch if you’re still seeing waves.
Thick fabrics? Grade your seams to reduce bulk.
Remember, practice makes perfect, so don’t be afraid to experiment on scraps. You’ll be a buttonhole boss in no time!
Resolving Size Discrepancies
Those pesky buttonholes giving you a size headache? Don’t sweat it! You’ve got this. Remember, the perfect buttonhole is just a few tweaks away.
Let’s tackle those size discrepancies head-on:
- Measure your button and add 1/8" for wiggle room
- Mark the new length with chalk or a pin
- Adjust your machine’s settings for the right width
- Practice on scrap fabric before committing to your garment
With these tricks up your sleeve, you’ll be a buttonhole boss in no time!
Repairing Damaged Buttonholes
Buttonhole tears can be a real pain, but don’t throw in the towel just yet! You’ve got options to breathe new life into those frayed edges. Let’s tackle common issues head-on:
| Problem | Solution | Pro Tip |
|---|---|---|
| Unraveling | Re-stitch with linen thread | Use buttonhole stitch |
| Gaps | Reinforce with interfacing | Fuse on both sides |
| Severe damage | Replace fabric panel | Consider professional help |
With these tricks up your sleeve, you’ll be fixing buttonholes like a pro in no time!
Advanced Buttonhole Techniques for Various Fabrics
You’ve mastered the basics, now it’s time to level up your buttonhole game.
From tackling tough denim to finessing silk, we’ll show you how to adapt your techniques for any fabric that comes your way.
Sewing Buttonholes on Denim
Ready to tackle those tough-as-nails denim buttonholes? You’ve got this!
Start by marking your denim buttonhole placement carefully.
For extra durability, reinforce the area with interfacing.
Use a topstitching needle and heavy thread in the top, but regular thread in the bobbin.
Increase your stitch length to prevent jamming.
For a pro finish, skip the automatic function and sew manually.
Remember, practice makes perfect – you’ll be a denim dynamo in no time!
Handling Delicate Fabrics Like Silk
Moving from rugged denim to delicate silk is like switching from a sturdy jeep to a sleek sports car.
You’ll need a lighter touch!
Start by applying a fusible interfacing to stabilize the fabric.
Use a fine needle and lower your machine’s tension to prevent puckering.
A silk buttonhole foot can be your secret weapon for smooth stitching.
Remember, silk’s slippery nature means you’ll need extra patience – but the luxurious results are worth it!
Adapting Methods for Knit Fabrics
Knits throw a curveball in the buttonhole game, but don’t sweat it!
You’ll need to stabilize these stretchy fabrics to keep your buttonholes from going rogue.
Try using interfacing or tear-away stabilizer on both sides.
For extra oomph, make corded buttonholes – they’re like a gym for your stitches, keeping them tight and toned even after lots of use.
Remember, with knits, it’s all about finding that sweet spot between flexibility and structure.
Creating Decorative Buttonholes
Let’s jazz up those buttonholes.
Decorative stitches can turn a functional element into a showstopper, and mastering the basics is essential – for instance, marking buttonhole length with a fabric marker or chalk can make all the difference.
You’ll be the talk of the sewing circle with these eye-catching techniques:
- Try buttonhole embroidery for a vintage flair
- Experiment with color variations to make your buttons pop
- Use unique buttonholes like the tailor’s stitch for added texture
Remember, practice makes perfect.
Soon you’ll be whipping up buttonholes that are both functional and fabulous!
Perfecting Your Buttonhole Skills
You’ve got the basics down.
Buttonhole game.
With practice and a keen eye for detail, you’ll soon be churning out flawless buttonholes that’ll make your sewing projects shine.
Practice Exercises for Improvement
Practice makes perfect for buttonholes.
Start by creating a "buttonhole sampler" using different fabric types and buttonhole sizes.
Experiment with stitch tension and machine settings to find your sweet spot.
Gradually increase your sewing speed as you gain confidence.
Try blindfolded practice to hone your muscle memory.
Remember, even seasoned pros sometimes end up with wonky buttonholes – it’s all part of the learning curve!
Analyzing and Learning From Mistakes
You’ve put in the practice, but now it’s time to play detective with your buttonholes.
Grab a magnifying glass and examine your work closely.
Spot uneven stitches? Maybe your tension needs tweaking.
Puckered fabric? You might need to adjust your stabilizer.
By identifying these little hiccups, you’ll level up your buttonhole game faster than you can say "button up!"
Remember, even pros make mistakes – it’s how we learn and grow.
Maintaining Consistency Across Projects
Your buttonhole’s consistency is the key to a polished, professional look across all your projects.
To achieve this, create a buttonhole template that’ll be your secret weapon.
Here’s how to keep your buttonholes looking sharp:
- Use tear-away stabilizer for tricky fabrics
- Mark your buttonholes precisely with pins or fabric markers
- Maintain the same stitch length and tension settings for each project
Remember, practice makes perfect. Soon, you’ll be churning out buttonholes like a pro, no matter the fabric type!
Exploring Creative Buttonhole Designs
Let’s jazz up those buttonholes! Think of them as tiny canvases for your creativity.
Mix it up with vintage-inspired designs or eye-catching contrast stitching.
Here’s a table of fun ideas to get your creative juices flowing:
| Technique | Description |
|---|---|
| Embellished Edge | Add beads or embroidery |
| Reverse Chain | Create a vine-like effect |
| Bullion Wheel | Make a flower-shaped buttonhole |
| Silk Twist | Use decorative thread for flair |
| Buttonhole Edge | Double-sided fancy stitching |
Don’t be afraid to experiment – your buttonholes might just become the star of the show!
Frequently Asked Questions (FAQs)
How to make perfect button holes?
Threading the needle of perfection, sew buttonholes like a pro.
Stabilize your fabric with tear-away backing.
Mark precisely, practice on scraps, and use the right stitch settings.
Don’t fear buttonholes—embrace them!
With patience, you’ll master this button-up art.
What tension do you need to sew a buttonhole?
Achieving the perfect buttonhole tension is like walking a tightrope.
Aim for a balanced setting where the bobbin thread isn’t visible on top.
Start with a tension of 3-4, then adjust as needed for your fabric.
Test on scraps first!
How to stabilize a buttonhole?
Chaos breeds perfection for buttonholes.
Tear-away stabilizer is your secret weapon for crisp results.
Apply it to the wrong side, stitch confidently, and watch your buttonholes transform from wobbly to wow-worthy.
What is the stitch length for a buttonhole?
You’ll want to set your stitch length to about 5 for a buttonhole.
This short length creates tight, durable stitches.
For wider bartacks, bump it up to 4, and for narrower ones, dial it down to
How do I sew buttonholes without a buttonhole foot?
Who said you need fancy gadgets to master the art of buttonholes?
Fear not!
Mark your fabric, set your machine to zigzag, and sew a tight rectangle.
Adjust stitch width for sides and ends.
Cut carefully, and voilà – buttonhole perfection!
Can I make buttonholes on thick fabrics like leather?
Making buttonholes on thick fabrics like leather can be tricky, but it’s doable.
You’ll need a heavy-duty machine and specialized techniques.
Try the two-piece piped method for best results (Source).
Don’t forget to practice on scraps first!
Whats the best thread for sewing buttonholes?
Prepare for buttonhole bliss! Your secret weapon is buttonhole thread, a smooth operator that spreads beautifully for excellent coverage (Source).
Can’t find it? No sweat! Good-quality 100% cotton thread in a matching color works wonders too. Just wax it for extra strength.
How to fix a buttonhole thats too small?
Don’t fret over a snug buttonhole!
You’ve got options.
Extend it by carefully unpicking one end, then restitch to your desired length.
For a quick fix, gently stretch the hole or consider swapping to a smaller button.
Are there alternatives to traditional buttonholes?
You’ve got options beyond traditional buttonholes!
Try button loops for delicate fabrics, or go for snaps and decorative buttons for a pro look.
Feeling fancy? Jazz up your garment with frogs or clasps for a unique twist.
Conclusion
You’re now armed to the teeth with the know-how to sew a perfect buttonhole.
Remember, practice makes perfect, so don’t be discouraged if your first attempts aren’t flawless.
Keep at it, and soon you’ll be churning out buttonholes like a pro.
Whether you’re tackling delicate silks or sturdy denim, these tips will help you nail it every time.
So go ahead, give it a shot – you might just surprise yourself with how easily you can master this essential sewing skill.

