This site is supported by our readers. We may earn a commission, at no cost to you, if you purchase through links.
 Practice makes perfect, especially when mastering the art of hand-sewn buttonholes.
You’re about to learn a timeless tailoring skill that offers control and a touch of elegance to your garments.
This guide will walk you through selecting materials, marking and cutting your fabric, and sewing with precision.
Whether you’re adding a bespoke flourish to a suit or ensuring your fabric’s thickness is handled with care, mastering how to make a buttonhole by hand will elevate your sewing projects to the next level.
Table Of Contents
Key Takeaways
- Hand-sewn buttonholes are known for their durability and elegance, offering a sophisticated touch to garments and outperforming machine-sewn buttonholes in terms of strength and protection against fraying.
- The process of creating hand-sewn buttonholes involves careful preparation, including the use of matching thread, a sharp needle, beeswax for thread strengthening, and precise marking tools.
- Hand-sewn buttonholes provide a refined, artisanal appearance that machine-sewn buttonholes lack, enhancing the overall aesthetic of the garment.
- To achieve the best results, it is important to select the right thread tension and needle size based on the fabric’s weight and type, and to practice the technique on a mock-up before sewing on the actual garment.
How to Make a Buttonhole by Hand
Yes, you can make a buttonhole by hand. To do so, start by marking the buttonhole size, cutting the slit, and then carefully stitching around the edges.
What is a Hand-worked Buttonhole?
A hand-worked buttonhole is created by sewing over the raw edge of the opening, wrapping the fabric to prevent fraying, and finishing along the opening.
Hand-sewn buttonholes offer durability and elegance compared to machine-sewn buttonholes. They require practice but result in smooth, well-supported edges, making them a valuable skill for adding a touch of sophistication to garments.
Machine-sewn Vs. Hand-worked Comparison
When comparing machine-sewn and hand-worked buttonholes, you’re looking at two distinct approaches to a common sewing task. Machine-sewn buttonholes are quick and uniform, but they can fray easily and lack the personal touch.
On the other hand, hand-worked buttonholes are a testament to the art of tailoring, offering durability and a polished look that machine stitching can’t quite match.
- Durability comparison: Hand-sewn buttonholes wrap the fabric’s raw edges, protecting against fraying and wear over time.
- Strength testing: A hand-worked buttonhole, reinforced with a gimp or cord, can withstand more stress than its machine-sewn counterpart.
- Aesthetic differences: The hand-sewn method provides a refined, artisanal appearance that elevates the garment.
- Historical relevance: Hand-sewn buttonholes hark back to a time when meticulous craftsmanship was the norm in tailoring.
- Cost effectiveness: While machine-sewn buttonholes save time, hand-sewn ones save on future repairs due to their superior strength.
Benefits of Hand-Sewn Buttonholes
After mastering the art of machine-sewn buttonholes, you’re ready to dive into the world of hand-tailored buttonholes. These little beauties pack a punch in durability and strength, ensuring your garment not only looks sharp but lasts longer.
They’re a nod to historical accuracy, elevating the value of your piece. From the precise layout and basting to the careful overcasting and cutting open, every step adds a layer of sophistication.
It’s like giving your fabric a VIP treatment, making each buttonhole a testament to your craftsmanship.
Materials and Preparation
When preparing to sew a buttonhole by hand, selecting the right materials and marking the buttonhole accurately are crucial steps. You’ll need thread that matches your fabric color, a needle, beeswax for strengthening the thread, sharp scissors, and optionally, chalk or a pencil for marking.
Start by marking the position and length of your buttonhole on the fabric, ensuring it’s sized appropriately for your button, including its thickness. This preparation sets the foundation for a strong, durable hand-sewn buttonhole that adds a touch of elegance to your garment.
Choosing the Right Thread and Needle
Choosing the right thread and needle for your hand-sewn buttonholes is like picking the perfect duo for a dance performance. You want them to work in harmony, creating a beautiful result without stepping on each other’s toes.
For thread tension that’s just right, go for a high-quality thread that matches your fabric’s weight and type. Think of thread quality as the lead dancer, setting the pace for the performance.
Now, let’s talk needle sharpness and size. You wouldn’t bring a butter knife to a sword fight, right? So, grab a needle that’s sharp enough to glide through your fabric without a hitch. The needle size should be the perfect partner to your thread weight, not too bulky or too flimsy, just like a dance partner who complements your moves.
If you’re working with delicate fabrics, consider using embroidery floss or a fray check to prevent those pesky frays from crashing the party. And for a seamless blend, pick a blending thread that’ll make your buttonhole look like it was born there.
Marking and Cutting the Buttonhole
When it comes to crafting the perfect hand-sewn buttonhole, the devil is in the details. First off, let’s talk material selection. You’ll want to choose a thread that not only matches your fabric in color but also in weight.
This ensures your stitches blend seamlessly into the fabric, creating a polished look. Now, onto the nitty-gritty of buttonhole marking. Grab your trusty scissors, because precision is key. Whether you’re aiming for a vertical buttonhole to add a touch of elegance to a blouse or a horizontal buttonhole for a sturdy coat closure, marking accurately is your first step towards success.
In the end, whether you’re crafting a vertical buttonhole that stands tall and proud or a horizontal one that lays flat and discreet, these steps will guide you towards buttonhole bliss.
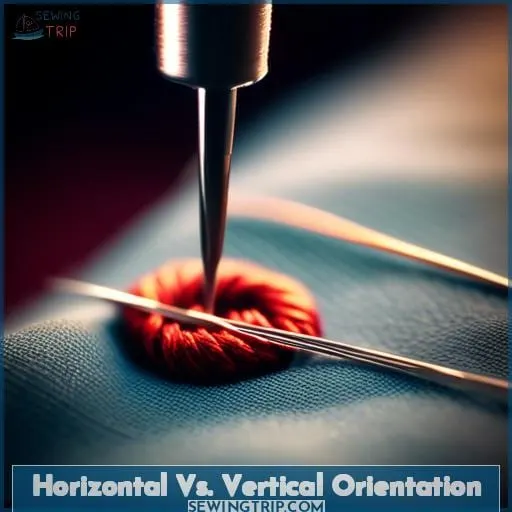
Horizontal Vs. Vertical Orientation
When deciding between horizontal and vertical buttonholes for your hand-sewn projects, consider the garment type and the specific needs it presents.
Horizontal buttonholes are generally more secure and handle stress well, making them suitable for closely fitted dresses.
Vertical buttonholes are ideal when space is limited, such as on shirt plackets.
Pros and Cons
Continuing from the previous discussion on materials and preparation, let’s dive into the pros and cons of buttonhole orientation. Whether you’re a seasoned stitcher or a budding tailor, understanding the orientation of buttonholes is crucial for both the functionality and the aesthetics of your garment.
-
Horizontal Buttonholes:
- Offer more room for the button to slide, reducing stress and potential distortion.
- Require precise placement to align with buttons, challenging your attention to detail.
- Not suitable for narrow plackets but provide a secure hold, keeping the button in place.
-
Vertical Buttonholes:
- Easier to align in a column, giving you a bit more leeway during sewing.
- May not hold the button as securely, leading to potential slippage.
- Common in mass-produced clothing due to ease of sewing multiple buttonholes in succession.
Choosing Based on Garment Type
When choosing buttonhole placement for your garment, consider the type of fabric, garment thickness, button size, and your style preferences.
| Horizontal Buttonholes | Vertical Buttonholes |
|---|---|
| Ideal for shirts, blouses, dresses | Common in men’s-style shirts with tab fronts |
| Button slides towards center, stays secure | Allows button play, good for narrow plackets |
| May not fit on shirt placket bands | Easier to sew in manufacturing |
General Sewing Tips
Achieving the perfect hand-sewn buttonhole requires attention to stitch depth and tension.
It’s crucial to practice on scrap fabric to ensure consistency and avoid the pitfalls of uneven stitching.
Stitch Depth and Tension
Just like choosing whether to go horizontal or vertical, mastering stitch depth and tension is crucial for that top-notch finish on your hand-sewn buttonholes. Think of it as the secret sauce that elevates your sewing game from just okay to wow, you made that?! It’s all about finding that sweet spot where your stitches are snug enough to hold everything together without being so tight they warp the fabric or so loose they look sloppy.
Imagine your thread as a tightrope walker. Too much tension, and it’ll snap under the pressure. Too little, and it won’t support the weight of the performance. Your goal? To keep that tightrope taut but flexible, allowing your stitches to form a secure yet elegant line across the fabric.
This is where muscle memory kicks in, guiding your hand to apply just the right amount of tension, stitch after stitch.
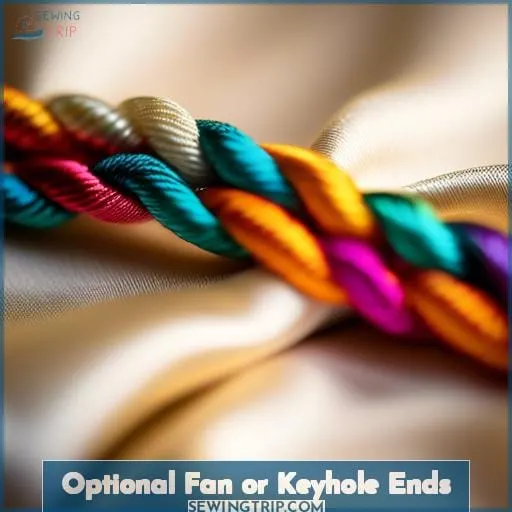
And let’s not forget about those wibbly bits at the ends – the optional fan or keyhole ends. They’re like the cherry on top of your sewing sundae, adding that extra flair. But they also require a delicate balance of tension and stitch spacing to look just right.
If you’re using a four cord or gimp for added durability and a raised appearance, remember that it’s not just about threading it through; it’s about managing it with each stitch, ensuring it lies flat and contributes to the buttonhole’s overall strength and beauty.
So, as you practice on that printed ground or scrap fabric, remember: each stitch is a step towards perfection. It might take time, but with each buttonhole, you’re not just sewing – you’re weaving strength, precision, and a bit of your own flair into your garment.
Practice Techniques
To master the art of hand-sewn buttonholes, you’ll want to cozy up with your practice fabric and get stitching.
Think of each practice hole as a stepping stone to buttonhole brilliance. Your practice stitches should dance along the fabric’s edge, each one a little better than the last.
As you practice placement, imagine your needle is a tiny artist, painting a masterpiece on the canvas of your practice garment.
So, grab that scrap, and let’s turn those practice holes into gateways of garment glory as you learn how to make a buttonhole by hand.
Step-by-Step Guide
Creating a hand-sewn buttonhole is a skill that elevates your sewing projects, offering both functionality and a touch of elegance.
Here’s a concise guide to help you master this technique.
First, you’ll mark and cut the buttonhole, ensuring precision from the start.
Then, you’ll sew the first side with careful stitches, followed by the second side, ensuring both sides are symmetrical and secure.
Finally, finishing touches will ensure your buttonhole is both durable and aesthetically pleasing.
With practice, these steps will become second nature, enhancing your sewing projects with beautifully crafted buttonholes.
Mark and Cut the Buttonhole
To master the art of hand-sewn buttonholes, start with precise buttonhole placement. Measure carefully, considering button size and fabric thickness. Mark the length and position with chalk or a fabric pen, ensuring the buttonhole slightly exceeds the button’s size for easy closure.
Prevent fraying by outlining the marked area with a running stitch, which is crucial for fabric stabilization. This step defines the buttonhole’s edges and keeps the fabric intact during the cutting process.
Next, cut the buttonhole along the marked line, taking care not to snip the running stitches or the working thread. Use sharp embroidery scissors for a clean cut, which is essential for a polished look.
Sew the First Side
Now, let’s dive into sewing the first side of your buttonhole. Start at the top corner, where you’ll anchor your thread with a small knot. Imagine you’re a surgeon, stitching up with precision—no room for a slip-up here! With your needle in hand, dive in from the top corner and emerge on the underside, like a dolphin dipping in and out of the water.
Next, it’s time to create the purl stitch, the star of the show. Loop the thread under the needle’s point, and as you pull through, you’ll see the purl stitch hugging the edge of the cut. It’s like a line of tiny soldiers standing to attention, guarding the raw edge from fraying’s cruel clutches.
Keep repeating this stitch down the first side. Think of it as laying bricks, each one needs to be in its rightful place for a sturdy wall—or in this case, a sturdy buttonhole. When you reach the end, it’s time for a bar tack, like planting a flag at the summit of a mountain.
This little reinforcement is your victory lap before you march down the second side.
Sew the Second Side
After you’ve nailed the first side with a neat row of purl stitches, it’s time to tackle the second side of your buttonhole.
- Start with a sturdy bar tack at the end to anchor your work.
- Keep your purl stitches snug and even as you round the corner.
- Maintain consistent stitch depth and thread tension to avoid a wonky look.
- Remember, practice makes perfect—don’t skimp on it!
Getting the hang of hand-sewn buttonholes is like riding a bike—wobbly at first, but once you’ve got it, you’ll be cruising through your sewing projects with style.
Finishing Touches
To wrap up your hand-sewn buttonhole with finesse, it’s crucial to nail the finishing touches. This stage is where your craftsmanship shines, turning a functional feature into a piece of art. Let’s dive into a quick table that outlines common pitfalls and how to sidestep them, ensuring your buttonhole not only looks professional but also stands the test of time.
| Common Mistakes | How to Avoid Them |
|---|---|
| Inconsistent stitch depth | Practice maintaining uniform distance |
| Uneven thread tension | Pull each stitch with consistent force |
| Fraying fabric | Use fray check on fabric edges |
| Misjudged buttonhole size | Always measure twice, cut once |
Optional Fan or Keyhole Ends
When adding optional fan or keyhole ends to your hand-sewn buttonholes, you’re stepping up the detail for both aesthetics and function.
You’ll draw or baste an additional line as a guide, then stitch in a curve at the ends instead of forming a bar tack, continuing your stitching as usual.
Creating a Fan End
Creating a fan end on your buttonhole isn’t just about adding a functional element; it’s about infusing your garment with a dash of tailored sophistication.
Picture this: you’re crafting a masterpiece, and the final touch is a beautifully curved fan end, a testament to your sewing prowess. To achieve this, first, envision the fan end length as your canvas, where precision meets creativity.
Begin by drawing or basting a line to guide your stitches, transforming the mundane into the extraordinary.
As you stitch, let the thread dance in a curved fan end shape, reinforcing the fabric’s edge with each loop. This isn’t just sewing; it’s sculpting a reinforced fan end that stands as a bulwark against fraying, ensuring your creation not only looks impeccable but lasts.
Creating a Keyhole End
Creating a keyhole end for your hand-sewn buttonhole not only adds a touch of class but also ensures your buttonhole can handle the stress of a shank button.
- Mark and Cut: First, mark the length and shape of your buttonhole on the fabric, including the keyhole shape at one end. Carefully cut along your markings.
- Stitch Spacing: Keep your stitches evenly spaced. This ensures a neat appearance and uniform strength throughout the buttonhole.
- Thread Tension: Maintain consistent thread tension as you sew. This prevents puckering and ensures the fabric lays flat.
- End Orientation: Pay special attention to the orientation of the keyhole end; it should face towards the edge of the garment for ease of buttoning.
- Decorative Options: Feel free to get creative with the keyhole end. A little flair here can turn a functional feature into a decorative highlight.
Four Cord or Gimp
To enhance the durability and appearance of your hand-sewn buttonholes, consider incorporating a four-cord or gimp.
This technique involves using a specially made or homemade stiff cord placed beneath your stitches, providing structure and preventing the buttonhole from stretching out of shape.
Making Your Own Gimp
Making your own gimp for buttonholes is like being a magician with thread—transforming simple strands into a sturdy, elegant finish.
Picture this: you’re the tailor in your own epic saga, and the gimp is your secret weapon.
Start by twisting your chosen gimp thread into a tight, resilient cord. The gimp material should be strong, so it can stand up to the task without flinching.
Weave your gimp design with confidence, knowing it’s the backbone of your buttonhole’s structure. It’s not just about making it work; it’s about crafting a tiny monument to your sewing prowess.
So, wield that needle like a master and make every stitch count!
Using Gimp in Buttonholes
After mastering the art of making your own gimp, it’s time to weave this magic into your buttonholes. Think of gimp as the secret backbone that gives your buttonholes a stand-out structure and resilience.
Whether you’re opting for gimp in vibrant hues or sticking to classic tones, the choice of gimp colors can subtly complement or boldly contrast your fabric, adding a layer of sophistication.
The thickness of your gimp plays a pivotal role too; it’s like choosing the right foundation for a building. It needs to be just right—not too bulky to overwhelm the fabric, nor too slender to lose its purpose.
When threading your needle, consider the dance between thread contrast and fabric texture.
And let’s not forget about stitch density. It’s the rhythm to your melody, ensuring your buttonhole isn’t just functional but also a testament to your craftsmanship.
So, grab your needle and thread, and let’s bring those buttonholes to life with a touch of gimp finesse!
Frequently Asked Questions (FAQs)
Can I resize a finished buttonhole?
Resizing a finished buttonhole isn’t straightforward. It’s like trying to alter a tattoo. You can’t easily make it smaller, but you might extend it a smidge if you’re careful.
How do I fix a frayed buttonhole?
To fix a frayed buttonhole, first, cut away any loose threads with a razor blade or sharp knife.
Then, using a needle and thread, stitch around the buttonhole’s edge, creating knots to secure the fabric.
This reinforces the buttonhole and prevents further fraying.
What’s the best fabric for buttonholes?
The best fabric for buttonholes is a medium-weight, woven fabric, as it provides a classic look and ensures durability.
For lightweight fabrics, narrow buttonholes are ideal, while keyhole buttonholes suit heavyweight materials like those used in coats.
Can buttonholes be decorative only?
Yes, buttonholes can be purely decorative, adding a touch of flair without any functional purpose.
They’re like the cherry on top—unnecessary but oh-so delightful!
How do I align multiple buttonholes evenly?
Just like a chef uses a ruler to ensure every slice is uniform, aligning buttonholes evenly is all about precision.
Imagine your garment as a canvas, where each buttonhole is a stroke of paint. To achieve this masterpiece, use a sewing gauge or a clear ruler to mark the placement of each buttonhole accurately. This tool is your secret ingredient, ensuring every buttonhole is spaced perfectly, creating a harmonious balance across your garment.
Conclusion
Embarking on the journey of mastering how to make a buttonhole by hand is like painting a masterpiece with thread and needle.
You’ve armed yourself with the knowledge of selecting materials, understanding orientations, and applying precise sewing techniques.
As you continue to refine your craft, each buttonhole you create won’t only secure a garment but also stitch your legacy into the fabric of time.

