This site is supported by our readers. We may earn a commission, at no cost to you, if you purchase through links.
Measure and cut two equal pieces, leaving a 1/2-inch seam allowance. Iron out any wrinkles, then pin the right sides together and stitch around the edges – but leave a gap to turn it right-side out.
Stuff that baby with fluffy filling, then hand-stitch the opening closed for a professional look.
Add a few decorative touches like buttons or tassels to make it your own. With a little practice, you’ll be sewing pillows like a pro in no time! Can’t wait to see what you create.
Table Of Contents
- Key Takeaways
- Choosing the Right Fabric
- Measuring and Cutting Fabric
- Preparing Fabric for Sewing
- Pinning and Sewing the Pillow
- Turning and Stuffing the Pillow
- Finishing the Pillow
- Pillow Sewing Techniques
- Pillow Sewing Tips and Tricks
- Creating a Professional-Looking Pillow
- Frequently Asked Questions (FAQs)
- Conclusion
Key Takeaways
- Don’t let the idea of sewing intimidate you! Start by picking a fabric that suits your style and comfort—it’s like dressing your pillow in its Sunday best. Measure carefully, add a bit of seam allowance, and soon you’ll be cutting fabric like a pro chef slicing veggies.
- When stitching your fabric, remember that patience is your new best friend. Pin everything together, like assembling a puzzle, ensuring the right sides face each other. Don’t forget to leave an opening for turning your masterpiece right-side out—it’s the door to pillow-ville!
- Filling your pillow is where the fun begins. Choose your stuffing wisely; whether it’s as fluffy as a cloud or firm as an office chair, it’s all about what feels right for you. Hand-stitch the opening closed with care, and your pillow will look store-bought.
- Add a dash of personality with buttons or tassels, like decorating a cake. Remember, your pillow is a canvas for creativity, so don’t hold back. Each piece you make is a testament to your newfound sewing skills—and who knows, it might even rival those high-end boutique designs!
Choosing the Right Fabric
Choosing the right fabric for your pillow is like picking the perfect outfit; it should look good and feel right.
Opt for high-quality cotton for its comfort and versatility.
Or let your style guide you to something bold and unique.
Fabric Properties and Style Compatibility
Choosing the right fabric for your pillow cover is like picking the perfect outfit.
Consider these three key factors:
- Fabric weight and texture: Opt for something durable yet cozy.
- Pattern and color palette: Match your throw pillows to your room’s vibe.
- Durability: Make sure you get long-lasting beauty and functionality.
With these tips, you’ll create a fabulous finished look!
Researching Fabric Suitability for the Pillow’s Environment
You’ve picked a style, now let’s chat about fabric suitability.
Think about the environment in which your pillow will be used, such as outdoor use, and also consider indoor allergies, as well as how often you plan to wash it.
Stain resistance and durability are key—no one wants a pillow falling apart! Check the sewing pattern and fabric’s seam allowance.
Consider sturdy options like cotton batting or polyester fiberfill for filling.
Ready to transform your pillow form? Let’s begin!
Benefits of High-Quality Cotton
High-quality cotton is a dream material for your pillow project. Its natural breathability and hypoallergenic properties make it a cozy, healthy choice.
Plus, cotton is:
- Durable and long-lasting
- Soft and comfortable
- Easy to clean and maintain
- Eco-friendly and sustainable
Embrace the benefits of cotton and craft a pillow that will lull you into blissful sleep.
Adding Stitching Details for a Unique Design
Spruce up your pillows with a splash of creativity by adding decorative stitches, embroidery, or applique details.
A zigzag stitch, for instance, can add texture and dimension to your fabric, making it perfect for securing stretch fabrics.
Whether you prefer a bold zigzag or a subtle slip stitch for contrast, these stitching patterns can elevate your craft to a whole new level.
Think of it as your pillow’s little black dress — classic with a unique twist!
Ready, set, sew!
Selecting a Fabric That Speaks to Your Personal Style
Let’s pick a fabric that truly reflects your style! After mastering those stitching details, it’s time to let your personality shine through. Your pillow should be a mini-masterpiece that tells your story.
- Bold prints for a statement piece
- Soft neutrals for a calming vibe
- Textured fabrics for added interest
- Sustainable options for eco-conscious decor
Remember, there’s no right or wrong choice – it’s all about what makes you smile!
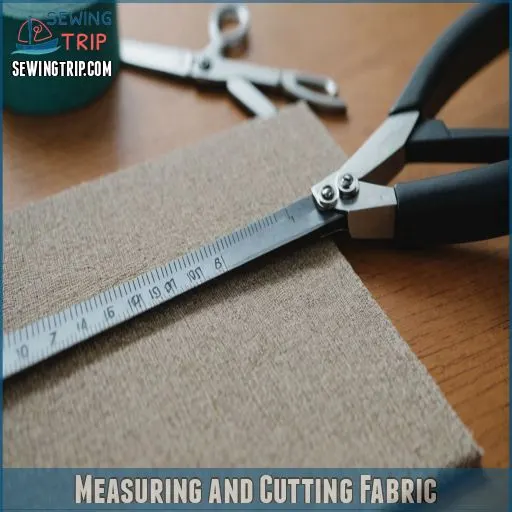
Measuring and Cutting Fabric
You’re about to start the exciting journey of creating your very own pillow.
Let’s start by measuring and cutting your fabric, which is the important first step that’ll set you up for sewing success.
Measuring Two Equal-Sized Fabric Pieces
Now that you’ve picked your perfect fabric, it’s time to roll up your sleeves and get measuring! Grab your trusty measuring tape and let’s size up those fabric pieces. Remember, precision is key here – we’re aiming for two identical squares that’ll make your pillow look sharp.
| Pillow Size | Fabric Size | Seam Allowance |
|---|---|---|
| 16" x 16" | 17" x 17" | 1/2 inch |
| 18" x 18" | 19" x 19" | 1/2 inch |
| 20" x 20" | 21" x 21" | 1/2 inch |
Measure from seam to seam for the most accurate sizing . Don’t forget to add an extra inch for that all-important seam allowance!
Cutting Fabric to the Measured Dimensions
With your fabric laid out flat, it’s time to make the cut! Grab your favorite fabric cutting tools and get ready to transform that beautiful material into your future pillow.
- Sharp fabric scissors or a rotary cutter
- A self-healing cutting mat
- A clear ruler or measuring tape
- Fabric weights or pins
Carefully cut along your measured lines, ensuring you stay straight and true. Remember, precision now means a polished pillow later!
Allowing for Seam Allowance
Once you’ve cut your fabric, it’s time to factor in seam allowance. This extra bit of fabric makes sure your pillow doesn’t end up too small.
For most pillows, a 1 cm (3/8") seam allowance works well .
Remember, different fabric types may require adjustments. If you’re using a thicker material or planning decorative stitching, you might want to increase your allowance. Don’t worry if it seems tricky – you’ll get the hang of it!
Cutting Corners for a Fringe Pillow
After allowing for seam allowance, it’s time to give your fringe pillow some flair!
Cutting corners isn’t just an idiom here – it’s a pro move. To achieve those chic Turkish corners, mark 1/2 inch inward from each corner on your fabric squares.
Then, grab your scissors and confidently trim those little wedges. This simple trick will transform your pillow from flat to fab, giving it that coveted boxy shape you’ve been dreaming of.
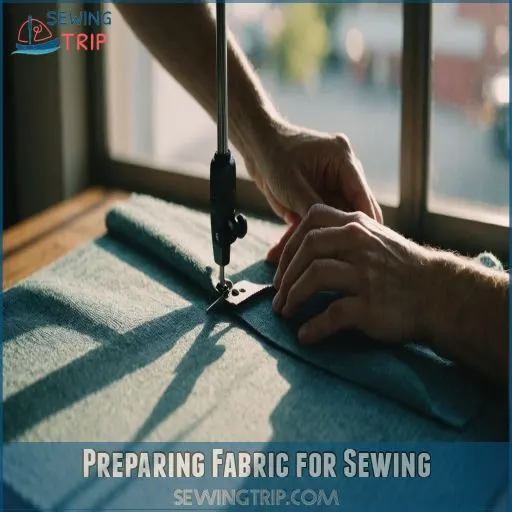
Preparing Fabric for Sewing
Before you start stitching your pillow, it’s really important to prep your fabric for the best results.
You’ll want to iron out any wrinkles, trim those pesky frayed edges, and give your fabric a good wash to prevent any surprises after sewing.
Ironing Fabric Pieces for a Smooth Finish
Before you get started sewing, let’s tackle those pesky wrinkles!
Ironing your fabric pieces is like giving them a spa day – they’ll thank you with a smooth, professional finish.
Set your iron to the right temperature for your fabric type .
For linen-cotton blends, a medium heat with steam works wonders.
Remember, a well-pressed fabric is the secret ingredient to a pillow that’ll make your couch jealous with a and **.
Trimming Fabric to Prevent Fraying
Trimming fabric to prevent fraying is a breeze with these simple tricks.
First, grab some pinking shears for a jagged edge that keeps fraying at bay.
Second, try a zigzag stitch on your sewing machine to hold those edges tight.
Prewashing Fabric for Shrinkage and Pre-Treatment
Getting ready to sew pillows? Consider prewashing your fabric to prevent shrinkage surprises and soften the fibers. It’s like giving your fabric a spa day—removing unwanted color bleeding and lurking stains.
If you’re unsure about prewashing, consider your fabric type; natural fibers like cotton often benefit most.
Here’s a handy table:
| Benefit | Fabric Type | Consideration |
|---|---|---|
| Prevents shrinkage | Cotton, linen | Consistent size |
| Stain removal | Most fabrics | Nice clean start |
| Color bleeding | Bright colors | Avoid color mishaps |
Washing first, you’ll face sewing confidently with the fabric right-side out!
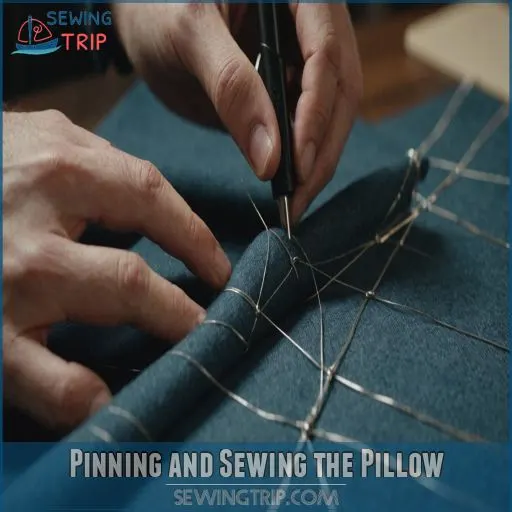
Pinning and Sewing the Pillow
Now that you’ve got your fabric squares ready, it’s time to bring them together with some trusty safety pins.
Think of it as assembling a sandwich—only instead of lettuce and cheese, you’re layering fabric—so pin those pieces together snugly, but leave a little opening for turning your pillow the right way later!
Laying Fabric Pieces Face Up and Face Down
Lay your fabric pieces on the table, one right side up, the other wrong side out.
Think of it as a dance, where opposites attract!
This alignment sets the stage for a pillow that’s both cozy and stylish.
Remember, aligning fabrics correctly makes for smooth seams and a delightful finish, making your pillow a masterpiece in the making.
Pinning the Fabric Pieces Together With Safety Pins
Now that you’ve got your fabric pieces ready, it’s time to pin them together for sewing.
Grab your safety pins and start securing the edges, keeping the right sides facing each other. Consider your fabric’s thickness—use larger pins if needed.
Remember, placing pins perpendicular to the seam allows easy removal while sewing.
Your pillow’s taking shape already!
Leaving a Few Inches Open for Turning the Pillow
Once you’ve pinned the fabric pieces together, be sure to leave a few inches open along one edge. This opening will allow you to turn the pillow right-side out after sewing. The size of the opening should be about 3-4 inches wide, which provides ample access for stuffing the pillow.
After turning, simply hand-stitch this final seam closed for a professional finish.
- Choose a location for the opening that’s easy to access
- Leave enough space to comfortably insert the pillow filling
- Make sure the opening is large enough to turn the fabric right-side out
- Neatly fold the raw edges inward before hand-stitching the seam
- Take your time with this final step for a clean, polished look
Turning and Stuffing the Pillow
Turning your pillow right-side out is like revealing a hidden masterpiece—suddenly, all your hard work comes to life.
Now, it’s time to give your pillow character by stuffing it with just the right filling; think of it as giving your creation a cozy hug.
Carefully Turning the Pillow Right-Side Out
Here’s the moment you’ve been waiting for: flipping the pillow!
With careful pillow turning techniques, reach inside the opening and gently work the fabric through, avoiding any fabric tears.
A seam allowance tip: trim corners slightly for neatness.
Use a turning tool to finish inside corners, ensuring they pop out crisply. It’s like magic—watch your creation come alive!
.
Stuffing the Pillow With Desired Filling Material
As you stuff your pillow, visualize filling it like a taco: snug and cozy.
Channel your inner artisan and use sustainable filling like cotton or even upcycled scraps.
Engage with tools like a chopstick for those stubborn corners.
Different stuffing techniques will determine pillow firmness, so play around until your creation feels like the perfect, cloud-like companion, and it is made with a material such as cotton.
Choosing the Right Pillow Filling for Your Needs
Stuffing’s the soul of your pillow project. Choose fillers that suit your needs.
- Hypoallergenic Options: Polyester fiberfill keeps sneezes away while being soft and bouncy .
- Firmness Preferences: Buckwheat hulls offer solid support for firmer pillows (Source).
- DIY Stuffing: Repurpose old t-shirts or dryer lint for eco-friendly innovation.
Thoughtful choices make a pillow speak volumes!
Fluffing and Shaping the Pillow
Fluffing your pillow is like coaxing a cloud back to life. Begin by kneading and hand-fluffing to redistribute the stuffing evenly.
Don’t be shy—really work it!
For firmness, try adding more filling. Use shaping techniques like karate-chopping the top to form a crease.
Experiment with stuffing alternatives if you need different pillow density . Enjoy your masterpiece!
Finishing the Pillow
Now that your pillow is stuffed and ready to go, it’s time to put the finishing touches on your creation.
Sew up the open edge to enclose the filling, then give your pillow a quick press with an iron to make it look polished.
Feel free to add a few decorative elements like buttons or tassels for a unique, personalized touch.
Sewing Up the Open Edge After Stuffing
Now that you’ve stuffed your pillow, it’s time to close the gap with finesse.
Opt for a ladder stitch for an invisible finish that’s practically magic.
Thread your needle, make small, neat stitches, and voilà—a seamless look! It’s like your pillow has a hidden zipper or a slip stitch—proof that even a decorative closure can be invisible.
Pressing the Finished Pillow With an Iron
After sewing the open edge, grab your iron—it’s your trusty ally against pesky wrinkles.
Set it to the appropriate ironing temperature for your fabric type, and add a bit of steam for good measure.
Gently press the pillow, smoothing out any stubborn creases. It’s like giving your creation a spa day, ensuring it looks crisp and professional.
Adding Decorative Elements, Such as Buttons or Tassels
When adding decorative elements, explore button placement and tassel types that complement the pillow’s fabric texture and color coordination.
Think of buttons as the cherry on top, offering charm and practicality.
Tassels can be the playful fringe that dances along the edges.
Decorative stitching ties everything together, transforming your pillow into a masterpiece worthy of designer shelves.
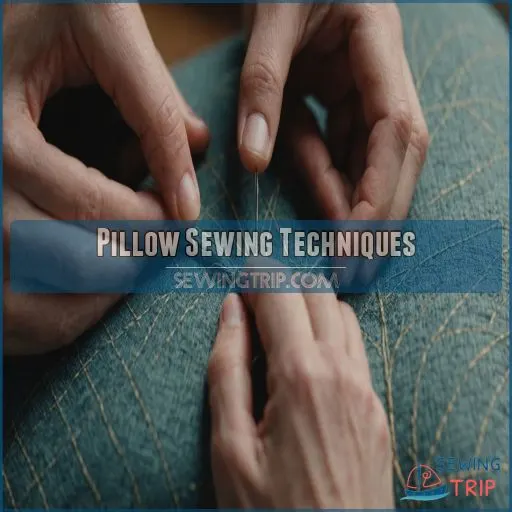
Pillow Sewing Techniques
Sewing a pillow can be as easy as pie or a chance to get fancy with zippers and buttons.
Let your creativity shine as you stitch a simple straight line or add unique designs.
Just like decorating a cake without frosting mishaps, this is a chance to get fancy.
Using a Straight Stitch for a Simple Pillow
Creating a simple pillow with a straight stitch is like building the foundation of a sewing skyscraper. You’ll need your fabric pieces ready, measured precisely, and cut to perfection–you’ve got this!
Lay them with the right sides facing each other and pin them together. Remember to leave a little gap for stuffing—a rookie mistake is sewing it entirely closed!
Fire up your sewing machine, or grab your hand stitching kit, and sew those edges. It’s a breeze, and you’ll soon be fluffing it up with your chosen pillow filling . Happy sewing!
Using Zippers, Buttons, or Appliques for a Unique Design
Ready to jazz up your pillow game? Let’s add some flair! Try using zippers, buttons, or appliques for a unique touch.
- Zipper Placement: Add a quirky zip to the back or edge.
- Button Styles: Mix and match vintage or wooden buttons for charm.
- Applique Ideas: Use bold shapes like stars or hearts.
- DIY Embellishments: Tassels or pom-poms for extra pizzazz.
- Unique Pillow Shapes: Experiment with odd sizes or forms for novelty.
Remember, personal touches make your creations truly one-of-a-kind!
Pillow Sewing Tips and Tricks
Sewing pillows can be a breeze with the right tips and tricks.
Use a ruler or measuring tape to make sure you have precise measurements.
Don’t forget to press those seams flat for a professional finish – your pillows will look like they came straight from a home decor magazine.
Using a Ruler or Measuring Tape for Accurate Measurements
Always use measuring tools like a ruler or measuring tape to get those precise cuts in your fabric.
Accurate sizing with a dash of seam allowance is important for a pillow that fits just right.
Don’t let fabric shrinkage pull the wool over your eyes—prewash fabrics! Precise measurements guarantee your pillow is a masterpiece, not a pillow fight! .
Pressing Seams Flat for a Professional Finish
Imagine this: You’re ironing your pillow seams, trying to tame them like a lion tamer at the circus.
Here’s how:
- Press with a Clapper: It’s like magic! The wood sets seams flat (Source).
- Use Starch Wisely: Apply just on the seam, not the whole fabric.
- Iron Wool Mat Advantage: Makes sure crisp seams.
- Avoid Pressing Mistakes: Patience beats scorch marks every time.
Troubleshooting Common Sewing Issues
Frustration can loom like a storm cloud when sewing, but troubleshooting’s got your back.
For fabric fraying, use pinking shears. Uneven stitching can often be resolved by checking tension and matching thread weights.
Sewing machine jams are often caused by dust bunnies, so cleaning them out is a simple solution. Thread tangles can usually be fixed by rethreading with the presser foot up.
Broken needles could be the result of the wrong fabric choice or using the wrong needle type.
| Issue | Quick Fix | Extra Tip |
|---|---|---|
| Fabric Fraying | Use pinking shears | Try fray-checking products |
| Uneven Stitching | Adjust tension and thread | Use quality thread |
| Sewing Machine Jams | Clean and oil regularly | Refer to manual for guidance |
| Thread Tangles | Rethread the machine | Make sure the presser foot is raised |
| Broken Needles | Switch needle type | Check fabric compatibility |
Creating a Professional-Looking Pillow
You’ve sewn a pillow, but how do you give it that polished, professional look?
By adding a topstitch or using a blind hem, you can transform your simple craft into a masterpiece that even your fanciest friends will envy.
It’s so good, they’ll think you bought it!
Adding a Professional Finishing Touch With Topstitching
You’ve stitched your pillow, now let’s jazz it up with topstitching! It’s the cherry on top of a sewing sundae.
Follow these steps:
- Choose Your Thread: Pick a contrasting color for flair or matching for subtlety. Make sure it’s strong enough to hold.
- Select Your Tools: Use a walking foot for even stitching and a guide for straighter lines.
- Plan Your Placement: Topstitch around edges or create patterns for eye-catching design.
- Master the Technique: Practice straight lines and consistent spacing – it’s all about precision!
Go ahead, show your pillow who’s boss!
Using a Blind Hem Stitch for a Invisible Hem
After mastering the art of stitching, why not try adding a blind stitch? It’s like magic — your stitches practically vanish, giving your pillow a sleek, professional look.
Just fold your fabric like you’re auditioning for a fabric folding championship and let your sewing machine foot do the work .
This technique will make your pillows look like they strolled out of a designer showroom.
Remember: practice makes perfect, and soon, you’ll be stitching invisible hems with the grace of a seasoned sewing guru!
Frequently Asked Questions (FAQs)
How do you make a pillow step by step?
In the blink of an eye, you can whip up a pillow by sewing fabric with a 1/2 inch seam, leaving a gap.
Turn it right-side-out, stuff it, and stitch the gap closed.
What stitch to use for making pillows?
For pillows, use a ladder stitch to close openings seamlessly. It’s hand-sewn magic, making the stitches invisible and tidy. With practice, you’ll master this simple technique, elevating your pillow-making game! .
How much fabric do you need to sew a pillow?
To sew two 18×18 inch pillows, you’ll need about 2 yards of fabric if it’s 45 inches wide.
or 2 yards for 58-inch wide fabric.
Remember, fabric can shrink, so buy a bit extra.
How much seam allowance for a pillow?
Sewing sumptuous pillows? Stick with a standard half-inch seam allowance.
This sensible size helps create sturdy seams and sleek edges, keeping those pesky pillow "dog ears" at bay.
This arrangement also invites comfort to your cozy corner .
How to match thread color with fabric?
When matching thread to fabric, try going a shade darker for seamless seamless blending.
Compare a single thread strand on the fabric rather than the spool.
And remember, nobody’s judging your thread hue except maybe your Great Aunt Mabel!
What are alternative pillow closure methods?
Ditch the zipper and try envelope closures, button closures, or the clever "stitch and flip triangle" technique – they’re just as effective and add a unique touch to your pillows.
How to prevent pillow seams from unraveling?
Prevent pillow seams from unraveling by using a zigzag stitch or French seams for a clean finish.
Pinking shears are great for preventing fraying on tightly woven fabrics.
Most importantly, take the time to finish edges! .
What is the best type of pillow insert?
Calling all pillow enthusiasts—think polyfill inserts for softness and adaptability, or down inserts for luxury.
Yet, the real star? Your sewing skills, turning any fabric into a masterpiece, perfect for those whimsical or custom forms (Source).
How to ensure pillow corners are sharp?
To get sharp pillow corners, trim excess fabric from the corners before turning them right side out.
Use a tool like a capped pen to push out the corners gently for a crisp finish.
Conclusion
Imagine sewing pillows back in the Stone Age—thank goodness you’ve got modern tools!
Now that you’ve learned how to sew a pillow, you’re ready to create cozy décor for any room.
Just remember, practice makes perfect. From choosing the right fabric to adding personal touches like buttons or tassels, every stitch gets you closer to perfecting the craft.
So grab your needle and thread, and let your creativity make its mark on your comfy new pillows!


