This site is supported by our readers. We may earn a commission, at no cost to you, if you purchase through links.
 To sew a pillow cover without a zipper, start by cutting a single piece of fabric or three separate pieces if you prefer an envelope-style closure. For the one-piece method, fold the fabric so the edges overlap in the back, creating a pocket for the pillow.
Hem the edges to prevent fraying, then pin and sew the side seams with the fabric inside out.
For the three-piece method, overlap the smaller back panels over the larger front piece, pin everything in place, and stitch the edges. Flip it right side out, give it a quick press, and voilà—you’re done with a simple method that is actually quite easy and quick to complete.
Table Of Contents
- Key Takeaways
- Sewing a Pillow Cover Without Zippers
- How to Sew a Pillow Cover Without a Zipper
- Calculating Fabric Measurements for Pillow Covers
- Cutting and Preparing The Fabric for Sewing
- Hemming The Fabric Edges for a Professional Finish
- Layering and Pinning The Fabric for Sewing
- Sewing The Pillowcase Seams Without a Zipper
- Turning The Pillowcase Right Side Out and Finishing
- Styling and Enjoying Your New Zipperless Pillow Cover
- Time and Cost Efficiency of Zipperless Pillow Covers
- Frequently Asked Questions (FAQs)
- Conclusion
Key Takeaways
- Use either the one-piece or three-piece method to sew a zipperless pillow cover; both are simple and beginner-friendly.
- Hem the edges to prevent fraying, align the fabric carefully, and sew with a straight stitch for a polished finish.
- Create an envelope-style closure with overlapping fabric layers instead of a zipper for easy pillow insertion and removal.
- Pre-wash your fabric to prevent shrinkage, and use sharp tools like scissors or a rotary cutter for clean, precise cuts.
Sewing a Pillow Cover Without Zippers
You’ll save time and money by making pillow covers without those fussy zippers that always get stuck anyway.
With just some fabric, thread, and basic sewing skills, you can create custom covers that slip on and off as easily as your favorite t-shirt, which will also allow you to make basic sewing projects with ease.
Creating custom covers is simple and fun—just fabric, thread, and a little sewing can transform your space with ease!
Benefits of Zipperless Pillow Covers
Zipperless pillow covers offer a treasure trove of benefits that make sewing projects easier and more enjoyable.
Zipperless pillow covers transform sewing into a breeze, blending simplicity, cost savings, and style for effortless, custom home decor.
When you choose the envelope-style closure instead of fiddly zippers, you’ll discover these advantages:
- Beginner friendly design requires minimal sewing skills, perfect for your first project
- Cost savings by eliminating zipper purchases and specialized tools
- Quick project completion—most covers take just 30 minutes from start to finish
- Easy customization with your choice of fabrics and patterns
- Hypoallergenic option when using quality cotton materials
The no-zipper pillow approach creates an envelope pillowcase that’s simple to remove and wash.
Plus, the forgiving design means small imperfections won’t ruin your project.
It’s like having a secret shortcut to professional-looking home decor!
Choosing The Right Fabric and Materials
Three key factors make or break your zipperless pillow cover project: fabric weight, print direction, and thread matching.
Choose mid-weight cotton fabric for durability and easy sewing. If you’re sensitive to allergens, hypoallergenic options like organic cotton work wonderfully.
You can find the right pillow based on weight for your project. Always pre-wash your fabric to test shrink resistance—nothing’s worse than a cover that no longer fits after washing!
Consider how prints will appear when sewn together, especially directional patterns. Match your thread to your fabric for invisible seams, or go bold with contrasting colors for a fun design element.
Essential Sewing Tools and Equipment
Before diving into your zipperless pillow project, gathering the right tools will make sewing a breeze – like having training wheels while learning to ride a bike!
You’ll need these simple essentials:
- Sewing machine: A basic beginner model works perfectly – nothing fancy required! Even a secondhand machine can tackle pillow covers with ease.
- Fabric cutting tools: Sharp fabric scissors are a must, while a rotary cutter with mat offers clean, straight edges for professional results.
- Thread material: Choose thread that matches your fabric color and weight – cotton thread works great for most pillow projects.
- Measuring tools: A tape measure for fabric dimensions and a sturdy ruler for seam allowances guarantee your cover fits just right.
Don’t forget pins to hold everything in place – they’re like little helping hands when you can’t grow extra fingers!
Many beginners find it useful to start with a simple sewing machine.
How to Sew a Pillow Cover Without a Zipper
You’ll save time and money when you make pillow covers without those pesky zippers that always seem to break at the worst moment.
With just fabric, thread, and basic sewing skills, you can create custom covers that slip on and off your pillows as easily as your favorite t-shirt, which is a great way to make custom covers.
One-Piece Method Overview
With a single piece of fabric, you’ll discover the easiest way to create a pillow cover without any pesky zippers. The one-piece method is perfect for beginners looking for a quick sewing project.
This technique uses fabric doubling with a generous overlap allowance, creating a pocket that holds your pillow snugly. You’ll need just one seam allowance calculation, making pattern alignment a breeze. The best part? You can finish a zipperless pillow cover in under 15 minutes!
| Step | What You’ll Do | Time | Difficulty |
|---|---|---|---|
| 1 | Measure & Cut Fabric | 5 min | Easy |
| 2 | Fold & Create Overlap | 2 min | Super Easy |
| 3 | Pin Sides & Bottom | 3 min | Easy |
| 4 | Sew, Trim & Turn | 5 min | Medium |
Three-Piece Method Overview
The three-piece method transforms ordinary fabric into a professional pillow cover using just a front panel and two overlapping back panels.
Unlike more complicated techniques, this approach requires simple fabric calculation for your pillow’s dimensions.
- Feel the satisfaction of creating something beautiful with your own hands
- Experience the joy of mastering a practical skill that saves money
- Enjoy the pride of showing off your handmade home decor
- Relish the comfort of resting on pillows that perfectly match your style
This beginner project is perfect for your first sewing adventure. Just measure your pillow, cut your panels with proper seam allowance, and follow the easy pillow cover tutorial steps. No zipper, no problem!
Comparing Methods for Beginners
Looking at both methods for your zipperless pillow cover? Let me break it down for you!
- One-piece ease: Perfect for beginners – fewer seams mean fewer chances to mess up. It’s the "training wheels" of pillow projects!
- Three-piece precision: Better for fabric savings and creates a more customized envelope closure pillow.
- Time investment: The one-piece method takes about 15 minutes, while three-piece might need 30.
For your first easy pillow cover sewing project, I’d recommend the one-piece method. You’ll build confidence before tackling the slightly trickier three-piece design.
Calculating Fabric Measurements for Pillow Covers
You’ll never ruin another DIY pillow project once you know the right way to measure your fabric.
Getting your measurements spot-on is like having the secret recipe to grandma’s cookies – it makes all the difference between a saggy cover that slides off and one that hugs your pillow just right.
Formula for One-Piece Method
Now that you know what method you’ll use, let’s nail down the math for the one-piece approach.
The formula is super simple: take your pillow’s width (let’s call it "W") and use this equation:
Fabric Length = (2 × W) + 6 inches + seam allowance.
For example, a 20" square pillow needs:
(2 × 20) + 6 + 1 = 47 inches of fabric.
This gives you enough for a nice overlap in the back without any zipper hassle.
Don’t forget to keep in mind pattern alignment if you’re using fancy prints.
| Pillow Size | Fabric Cut |
|---|---|
| W × H | (2W + 6) × (H + 1) |
Formula for Three-Piece Method
While measuring for a one-piece method is handy, the three-piece method has its own simple formula for your pillow cover sewing project.
For the front panel dimensions, add 1 inch to your pillow’s measurements. For back panels, take your front panel length (which matches your pillow width plus 1 inch) and divide the width by 2, then add 5 inches for overlap security.
This gives you two identical back pieces that create that perfect envelope closure. Your allowance calculations guarantee a snug fit without bunching.
Think of it like making a sandwich – one whole piece on top, two overlapping pieces on bottom. No zipper needed!
Accounting for Fabric Shrinkage and One-Way Prints
Now that you’ve mastered the three-piece formula, let’s tackle a common headache – fabric that shrinks like your favorite sweater in hot water!
Pre-washing your fabric isn’t just good advice; it’s your shield against shrinkage surprises.
When calculating your measurements, remember these fabric fundamentals:
- Pre-wash your fabric before cutting – trust me, better to shrink now than later!
- Check your fabric grain – it’s like the foundation of a house, keep it straight!
- Mind your print direction – nothing screams "homemade" like upside-down flowers
- Add extra inches for one-way prints – you’ll thank yourself during pattern matching
- Consider the fabric’s shrinkage rate – cotton can shrink up to 5%, so plan accordingly
Knowing what fabrics shrink can save you from unexpected size changes.
Your pillow cover should look store-bought, not like it survived a washing machine tornado!
Cutting and Preparing The Fabric for Sewing
Cutting your fabric the right way sets the stage for a neat, polished pillow cover.
Grab some sharp scissors or a rotary cutter, and let’s make those edges clean and straight—your future self will thank you!
Using Rotary Cutters or Scissors for Precise Cuts
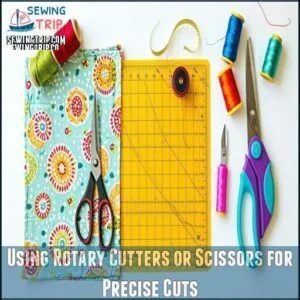
Precise cuts are the backbone of any great sewing project. Whether you’re team rotary cutters or a fan of sharp fabric scissors, it’s all about control, safety, and getting those edges just right.
Rotary cutters are perfect for speed and smooth lines, but don’t forget Rotary Cutter Safety—always use a fabric cutting mat to protect your table (and fingers). Scissors, on the other hand, are classics for a reason. Keep them sharp, and they’ll glide through fabric like butter.
Here’s how to up your fabric cutting game:
- Keep blades sharp: Dull tools lead to jagged edges.
- Use a cutting mat: It saves your surfaces and helps guide straight lines.
- Practice cutting curves: Slow and steady wins here.
- Oil scissors regularly: A little maintenance goes a long way.
- Snip corners carefully: Precision matters for a clean finish.
Happy crafting!
Cutting Fabric to Desired Width and Length
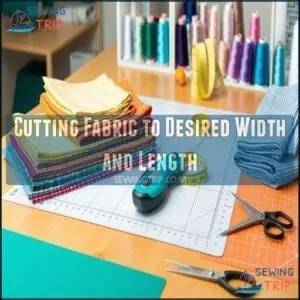
Getting your fabric measurements right is like finding the perfect recipe—everything clicks when the numbers add up.
Start by measuring your pillow form and adding extra for seam allowance and overlap. Use cutting tools like scissors or a rotary cutter for clean, straight edges. Pay attention to the fabric grain for a polished look, and pre-wash to avoid post-wash surprises.
| Step | What to Do | Why It Matters |
|---|---|---|
| Measure pillow form | Add seam allowance | Guarantees accurate measurement |
| Align fabric grain | Follow fabric’s natural lines | Prevents twisting |
| Mark dimensions | Use ruler or tape measure | Keeps cuts precise |
| Cut fabric | Use sharp cutting tools | Clean edges for neat sewing |
A little planning makes fabric cutting feel like a breeze!
Tips for Working With Different Fabric Types
Choosing the right fabric makes all the difference.
Lightweight fabrics, like cotton, are easy to sew and forgiving.
Stretchy fabric types need a gentle touch—don’t tug! Watch for bold prints or tricky weave density; matching patterns takes patience.
Always pre-wash to handle shrinkage rates. Your fabric choice sets the tone, so pick something sturdy yet stylish for a smooth sewing experience.
Hemming The Fabric Edges for a Professional Finish
Hemming the edges might sound fancy, but it’s really just about keeping things neat and fray-free.
With a few folds, some pressing, and a steady stitch, you’ll give your pillow cover a clean, polished look that lasts.
Creating Seams and Finishing Edges
Your fabric’s cut and ready—now it’s time to make those edges look sharp.
Start by folding a 1/2-inch seam allowance along each edge, then fold it again. This double fold works like magic, hiding raw edges and preventing fraying. Press the hems with an iron for a crisp, clean look.
- Seam Allowances: Keep folds even for seam accuracy.
- Hem Pressing: Iron twice for a polished finish.
- Straight Stitching: Secure folds with a neat, hidden seam.
Don’t forget to trim corners diagonally for easier turning. Your pillow cover’s edges will look professional and stay durable!
Using a Serger for Faster Edge Finishing
A serger is the superhero of edge finishing in any sewing project. It trims, sews, and finishes all at once, making your pillow cover tutorial a breeze. With its speed and precision, even beginners can feel like pros.
Here’s how to make the most of it:
- Check Serger Thread Tension: Test on scrap fabric to avoid puckering.
- Use Differential Feed Settings: Adjust for smooth or stretchy fabrics.
- Try a Rolled Hem Technique: Perfect for lightweight edges.
Many sewers find that the best models available offer enhanced features. Don’t forget regular serger maintenance tips like cleaning lint and oiling parts. A serger saves time, adds a polished touch, and makes sewing pillowcases fun and frustration-free.
Zig-Zagging or Serging Edges for a Clean Finish
A neat finish can make your pillow cover look like it came straight from a boutique.
For seam finishing, you’ve got two solid options: use a zig-zag stitch on your sewing machine or grab a serger for a polished edge.
Zig-zagging works well for most fabrics—just adjust the stitch width and thread tension to avoid puckering.
Sergers, on the other hand, trim and wrap edges in one go, perfect for a clean, professional touch.
Whether you’re after durability or decorative edge finishes, both methods guarantee your seam allowance stays tidy and fray-free.
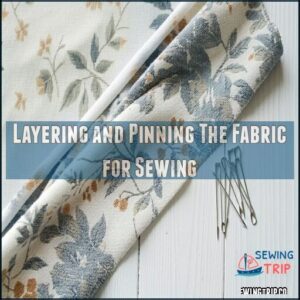
Layering and Pinning The Fabric for Sewing
Layering and pinning your fabric is like setting the stage for a smooth sewing experience.
Take your time to align the edges perfectly and pin them securely, so nothing shifts while you work, which is crucial for a smooth sewing experience.
One-Piece Method Layering
You’ve hemmed like a champ—now let’s get that fabric set up for the one-piece method.
Lay it flat with the right side facing up. Fold both short edges toward the center to create an envelope-style overlap. Keep the overlap placement even for a snug fit.
- Fabric Orientation: Verify the right side faces inward when folded.
- Edge Alignment: Line up edges for smooth seams.
- Corner Securing: Pin corners tightly to hold everything in place.
This pinning strategy keeps your DIY pillow cover looking sharp!
Three-Piece Method Layering
Start by placing the front panel face-up on your table. Then, take the two hemmed back pieces and lay them on top, right sides facing down. Line up the raw edges with the front panel, overlapping the hemmed edges in the middle by 3-4 inches to form the envelope closure. Think of it like layering a sandwich—everything needs to stay in place.
Use pins or clips to lock the layers together. For slippery fabrics, it’s especially important to use horizontal pinning techniques to prevent distortion. Pay attention to Fabric Orientation and keep your Pinning Sequence tidy for smooth stitching later.
Double-check Seam Alignment and confirm Corner Precision for a polished look. This setup guarantees Flap Security, giving your zipperless pillow cover a snug, professional fit that’s ready to sew.
Tips for Accurate Pinning and Alignment
Getting your pinning right is like setting the stage for a perfect show—everything flows smoothly when done well.
Accurate pinning techniques make fabric alignment and seam matching a breeze.
Here’s how to ace it:
- Align edges carefully, treating fabric like puzzle pieces that need to fit.
- Pin perpendicular to edges so your machine can glide without hiccups.
- Start at the center, then pin outward for balanced tension.
- Tame tricky corners by adding extra pins to keep them in check.
Smooth wrinkles as you go, like ironing without the heat.
These steps guarantee corner precision and a flawless fit every time!
Sewing The Pillowcase Seams Without a Zipper
Sewing pillowcase seams without a zipper is easier than you think and just as sturdy.
With a few straight stitches and a clever overlap, you’ll have a snug cover that’s both practical and stylish.
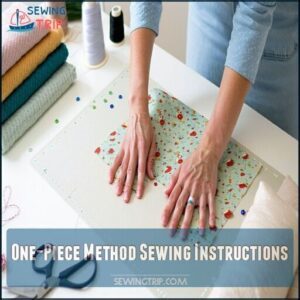
One-Piece Method Sewing Instructions
The one-piece method for a zipperless pillow cover is like wrapping a gift—simple and satisfying.
Once your fabric is cut and ready, follow these steps:
| Step | Action | Quick Tip |
|---|---|---|
| 1 | Pin edges together | Use plenty of pins to keep the fabric overlap steady. |
| 2 | Sew ½-inch seams | Adjust tension for smooth, even stitches. |
| 3 | Trim corners | Snip diagonally to avoid bulky edges. |
After sewing, turn the fabric right side out.
A pencil works great for pushing out corners—just don’t poke too hard!
Iron the seams flat to give your DIY pillow cover a polished look.
This one-piece method is beginner-friendly, quick, and stress-free.
With no zipper to fuss over, you’ll have a stylish, no zipper pillow in no time!
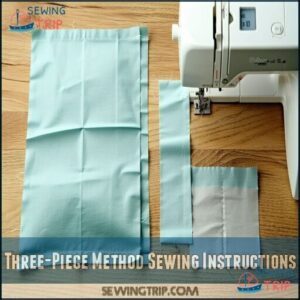
Three-Piece Method Sewing Instructions
To sew a pillowcase using the three-piece method, lay the main panel right side up.
Place the smaller panels face down, guaranteeing proper fabric alignment and overlap security. Pin around the edges and sew with a 1/2-inch seam allowance.
Trim corners neatly for easy turning. This no zipper pillow technique guarantees a polished finish and sturdy seam finishing!
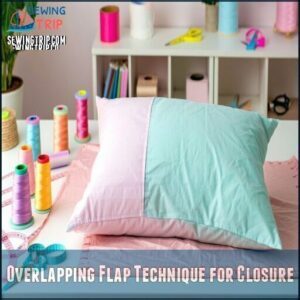
Overlapping Flap Technique for Closure
The overlapping flap technique makes creating a zipperless pillow cover a breeze.
This envelope closure keeps your pillow insert snug and secure while looking stylish.
Here’s how to nail it:
- Cut fabric with a 4-6 inch flap overlap for security.
- Adjust flap depth for larger pillows.
- Iron seams flat for clean, crisp edges.
Choose flap fabric styles that complement your décor.
Add hidden closure options like snaps or Velcro for extra grip.
This method is simple, forgiving, and perfect for beginners!
Turning The Pillowcase Right Side Out and Finishing
Now comes the fun part—turning your pillowcase right side out.
Be gentle with the corners, and don’t be afraid to use a pencil or your fingers to get them nice and sharp.
Trimming Excess Fabric and Turning Right Side Out
Once your seams are stitched, grab sharp scissors for clipping corners. Snip diagonally about 1/4 inch from the seam allowance to reduce bulk—this trick makes flipping easier.
Now, gently turn the pillow cover right side out, like pulling a rabbit from a hat. Use your fingers or a pencil as a turning tool to shape smooth corners.
It’s oddly satisfying, and you’re one step closer to completing this fun sewing tutorial!
Pressing The Pillowcase for a Crisp Finish
Now that your pillow cover is flipped, it’s time to bring it to life with a smooth, polished look.
Grab your iron and let’s talk ironing techniques to level up your seams.
Pressing fabric isn’t just about looks—it makes seams lay flat and guarantees a professional finish. Adjust the heat for your fabric type, then tackle those creases like a champion.
Here’s a quick checklist for wrinkle prevention:
- Press seam allowances open before flipping.
- Test gentle heat on delicate materials.
- Use steam to relax stubborn wrinkles.
- Iron outward from the center for a neat finish.
Your cover’s nearly pro-level ready!
Tucking Flap Technique for a Secure Closure
Once pressed, fold the overlapping flap inward for a neat, secure envelope closure.
Adjust the overlap depth based on your fabric choice—thin fabrics may need a deeper fold, while sturdier ones hold well with less.
Reinforce corners for added flap security.
This no-zipper pillowcase method keeps everything snug and polished.
For extra flair, consider closure alternatives like buttons or snaps for your zipperless pillow cover!
Styling and Enjoying Your New Zipperless Pillow Cover
You’ve stitched up your pillow cover, so now it’s time to show it off! Play around with patterns, textures, or even seasonal themes to make your space pop.
Tips for Adding Decorative Touches
Adding decorative touches to your pillow cover is like icing on a cake—it’s where the fun begins!
Try these ideas:
- Tassel Corners: Sew tassels onto each corner for a playful vibe.
- Fabric Appliqués: Cut shapes from patterned fabric and stitch them on for unique designs.
- Button Accents: Add buttons for charm and extra flair.
Mix embroidery designs or piping details to highlight seams.
Consider using the blanket stitch for a classic edge finish.
Sewing for pillow covers becomes an art, not just a task!
Seasonal Décor Ideas With Zipperless Pillow Covers
Transform your space with seasonal decor by swapping out zipperless pillow covers—it’s like dressing your home for the holidays!
Try Holiday Themes with snowflakes for winter or Floral Patterns to welcome spring.
Bright, breezy Fabric Choices scream summer, while warm Color Palettes and plaid add autumn coziness.
Add Embellishment Ideas like fabric paint or stencils for extra flair.
These DIY Quick Changes are budget-friendly, and since there’s no zipper, swapping covers is a breeze.
Fresh vibes, no storage headaches!
Creating a Custom Look With Different Fabrics
Let your creativity shine with bold fabric combinations and playful patterns.
A custom look starts with thoughtful fabric selection.
Try these ideas:
- Pattern Matching: Pair florals with stripes or polka dots for visual interest.
- Texture Contrast: Mix soft velvet with crisp linen—it’s like pairing comfy with classy.
- Color Palettes: Go for vibrant combos like mustard yellow and navy blue.
Experiment with embellishment options like tassels or fabric paint for extra flair!
Time and Cost Efficiency of Zipperless Pillow Covers
Making zipperless pillow covers is a quick, affordable way to refresh your space without breaking the bank.
You’ll save time, skip the cost of zippers, and even repurpose old fabric for a project that’s both budget-friendly and satisfying.
Estimated Time and Materials Cost
Making a zipperless pillow cover is an affordable method that’s easy on your wallet and time.
Fabric costs around $3–$5 per cover, with thread costing about $1. Most sewing supplies, like a sewing machine, are likely already in your stash.
With just 30 minutes of project time, it’s perfect for any skill level. Material expenses are a key factor.
Who knew fabric yardage could stretch this far, making it a great way to save money and still achieve a professional-looking zipperless pillow cover with minimal sewing supplies?
Benefits of Repurposing Old Pillows and Fabric
Don’t toss those old pillows or fabric scraps just yet—they’re goldmines for budget-friendly and sustainable decor.
By repurposing what you already have, you’ll cut down on fabric waste and save serious cash. That thrift store curtain? It could be your next chic pillow cover.
Plus, creative reuse lets you flex your imagination while giving your space a fresh, personal touch.
The best part? Upcycling old fabrics isn’t just eco-friendly—it’s fun! You’ll turn “trash” into treasures while helping the planet.
It’s a win-win. So, grab those forgotten materials, and start crafting something unique. Your wallet (and Mother Earth) will thank you for embracing the upcycling benefits!
Comparison to Purchasing New Pillows or Covers
Buying new pillows can lighten your wallet, but sewing zipperless covers at home is a more budget-friendly, cost-effective option.
You’ll save $20-$40 per cover while enjoying fabric savings and the joy of personalization. Plus, upcycling old fabrics or thrift store finds is great for long-term savings and the environment.
Customization options guarantee your pillows match perfectly, and you’ll feel good about the ethical considerations of reducing waste. Your sewing skills will shine without sacrificing style or your budget.
- Pro Tip: Turn leftover fabric into unique, eye-catching designs!
Frequently Asked Questions (FAQs)
How to make a pillow cover without a zipper?
Who needs zippers anyway?
Fold fabric like wrapping a gift, sew the edges, and leave an overlap for inserting the pillow.
It’s simple, beginner-friendly, and done in under 30 minutes.
Easy-peasy!
Can you make a cushion cover without a zipper?
Skip the zipper drama by trying an envelope-style cushion cover.
It’s simple, beginner-friendly, and fast.
Just overlap fabric at the back, sew the edges, and you’re done.
No zippers, no stress!
Do pillow covers have zippers?
Funny enough, not all pillow covers have zippers—some skip them entirely.
Zipperless covers, like envelope-style ones, use overlapping fabric for closures.
They’re simple, comfy, and easy to remove, making them perfect for quick swaps or washes.
Can you make a pillow cover with an envelope closure?
You can totally make a pillow cover with an envelope closure!
It’s simple, beginner-friendly, and doesn’t need a zipper.
Just overlap fabric pieces in the back, sew the edges, and you’re done.
How do you sew a pillow cover?
Cut your fabric, fold and press hems, and pin pieces together with right sides facing.
Sew edges with a ½" seam, leaving an opening.
Trim corners, turn it right-side-out, insert pillow, and enjoy your new creation with a nicely finished product.
How do you keep a pillow cover from fading?
Keep a pillow cover from fading by washing it inside out with cold water, using a mild detergent.
Skip the dryer when you can and hang it in the shade.
Sunlight’s a color killer!
How do you sew a pillowcase?
To sew a pillowcase, measure your pillow.
Cut fabric pieces with seam allowances, and pin them right sides together.
Sew around the edges, leave one side open, turn it inside out, and press.
How do you insert a pillow form?
Slide the pillow form through the back opening gently, like you’re stuffing a fluffy taco.
Wiggle it into the corners, then smooth out any lumps.
Adjust the overlap for a tidy, snug fit. Voilà!
How to make pillows without a zipper?
Imagine transforming your space effortlessly—grab fabric, measure your pillow, and hem edges neatly.
Overlap two back panels, sew around the edges, flip it right-side out, and voilà!
No zippers, zero stress, total style.
How to sew a pillowcase by hand step by step?
Grab your fabric, fold one edge twice, and stitch the hem.
Layer pieces together, pin them, and sew the edges.
Flip it inside out, smooth the corners, insert the pillow, and admire your handiwork!
Conclusion
Creating a pillow cover without a zipper is simpler than threading a needle.
You’ve got two great options: the one-piece fold or the three-piece envelope. Both are quick, beginner-friendly, and save you the headache of messing with zippers.
Just measure your fabric, hem the edges, sew the seams, and flip it right side out. It’s a fun way to spruce up your space.
So grab your fabric and get sewing—your couch will thank you!

