This site is supported by our readers. We may earn a commission, at no cost to you, if you purchase through links.
A table runner can transform your dining space from ordinary to magazine-worthy in minutes—and sewing your own means you get exactly the color, pattern, and length you need without settling for store-bought options that never quite fit right.
Whether you’re working with leftover fabric from another project or starting fresh with something seasonal, creating a custom table runner is one of those satisfying weekend projects that looks far more impressive than the effort required.
You’ll need basic straight stitching skills, about a yard of fabric, and an hour or two. The beauty of learning how to sew a table runner is that once you master the technique, you can whip up different versions for holidays, dinner parties, or just because your table deserves a refresh.
Table Of Contents
- Key Takeaways
- What is a Table Runner?
- Choosing The Best Fabric for Table Runners
- Determining Table Runner Size and Dimensions
- How Much Fabric Do You Need?
- Essential Supplies and Tools for Sewing
- Preparing and Cutting Your Fabric
- Step-by-Step: Sewing a Table Runner
- Adding Borders and Decorative Elements
- Customizing Your Table Runner Design
- Top 9 Must-Have Sewing Supplies for Table Runners
- 1. Cotton Fabric Quilting Squares Bundle
- 2. Medium Weight Iron On Interfacing
- 3. Turquoise Polyester Sewing Thread Cones
- 4. Stainless Steel Multipurpose Scissors Set
- 5. Fiskars Rotary Cutter Sewing Set
- 6. Pearl Head Straight Sewing Pins
- 7. Clover Sewing Wonder Clips Set
- 8. Sewing Craft Multifunctional Tool Set
- 9. Brother XM2701 Sewing Machine Versatile Lightweight
- Frequently Asked Questions (FAQs)
- Conclusion
Key Takeaways
- Sewing your own table runner takes just an hour or two with basic straight stitching skills and about a yard of fabric, letting you create custom colors, patterns, and exact lengths that fit your table perfectly instead of settling for generic store options.
- The key to professional-looking results lies in proper preparation—prewash your fabric to prevent up to 10% shrinkage, calculate the right dimensions (typically 12-18 inches wide with 6-12 inch overhangs), and trim corners diagonally before turning to achieve crisp, sharp edges.
- Cotton fabric works best for beginners at $8-10 per runner because it’s machine washable and easy to handle, while a rotary cutter paired with a self-healing mat cuts your fabric prep time in half compared to scissors and delivers straighter, more accurate edges.
- You can transform a basic runner into something magazine-worthy by adding simple decorative elements like contrasting borders, tassels, or making it reversible with two coordinating fabrics—giving you multiple looks from one project without advanced sewing skills.
What is a Table Runner?
A table runner is a long strip of fabric that runs down the center of your table to add color, texture, and personality to your space. You can use it on its own for a minimalist look or layer it over a tablecloth for extra visual interest.
Let’s look at how table runners work in your home, the different styles you can create, and where to place them for the best effect.
Table Runner Purpose and Uses
Think of a table runner as your table’s best friend—it protects while it prettifies. Beyond looking gorgeous, here’s what these fabric strips can do for you:
- Shield surfaces from scratches, heat marks, and those dreaded wine spills that happen at every dinner party
- Draw the eye to your centerpiece, whether it’s fresh flowers or flickering candles
- Define your buffet layout, keeping serving dishes organized and accessible
- Transform any surface—dining tables, coffee tables, even console tables get the decorative treatment
Table runners offer numerous benefits, including enhanced aesthetic benefits that can enhance the overall look of a room.
Table Runner Styles and Occasions
Your table runner style sets the mood for every occasion. Minimalist neutrals keep your everyday table classy, while linen runners (up 153% in summer 2025) bring breezy elegance to casual gatherings.
Planning a formal event? Reach for velvet or embroidered silk with gold accents.
For holiday decor, swap in festive prints—think Halloween witchy vibes or Christmas ornamental motifs that reflect current seasonal trends.
To create a refined and elegant atmosphere, consider exploring contemporary designs for your table setting.
Table Runner Placement Tips
Once you’ve chosen your runner style, placement makes all the difference. Centered placement down the middle creates table symmetry and visual balance—aim for 6 to 12 inches of runner overhang on each end.
This decorative alignment anchors your centerpiece and guides your table setting ideas.
For creative flair, try diagonal placement on square tables or position table runners widthwise across the table to define individual guest spaces.
Choosing The Best Fabric for Table Runners
The fabric you choose sets the tone for your entire table runner project. Different materials bring their own strengths to the table, from durability to drape to how they handle washing.
Let’s walk through your best options so you can pick the perfect fabric for your needs.
Cotton Vs. Linen Vs. Decor Weight
You’ll find three main fabric types to choose from, each with its own personality. Cotton fabric weighs around 120-180 gsm, making it beginner-friendly and machine washable—perfect for everyday use. Linen brings natural elegance but needs more TLC with ironing. Home decor weight fabric (270+ gsm) offers excellent fabric durability and structure, though it requires stronger needles and creates sewing challenges for newcomers.
- Cotton: Affordable material costs ($8-10 per runner), easy fabric selection, adaptable texture analysis
- Linen: Premium weight comparison, refined weaving, higher maintenance
- Decorweight: Outstanding longevity, professional appearance, expert sewing requirements
Backing Fabric Options
Your backing fabric selection transforms your runner from flimsy to functional. Broadcloth and quilting cotton work beautifully as table runner linings for heavier decorative backings, while polyester resists wrinkles and stains for everyday durability.
Cotton backing offers breathability, and linen adds elegant texture.
For reversible designs, coordinate your backing materials with your top fabric—you’re basically getting two runners in one with smart fabric choices.
Seasonal and Holiday Fabric Ideas
Seasonal colors and holiday prints let you refresh your dining room with every celebration. Spring calls for soft pastels and florals, while autumn themes shine with burnt orange and rustic plaid.
Your winter table runner works wonders in velvet or metallic fabrics—think rich textures paired with festive reds and greens.
For Halloween, grab those quirky pumpkin prints and dark purple cottons that scream spooky chic.
Prewashing Fabrics and Why It Matters
Prewashing fabric might feel like an extra step, but it’s your secret weapon for impeccable results. This simple fabric preparation prevents three common headaches:
- Fabric shrinkage up to 10% after your first wash
- Color bleeding from vibrant reds, blues, and purples
- Chemical removal that softens stiff fibers
Texture adjustment through prewash makes sewing for beginners infinitely easier while ensuring your fabric crafts maintain their shape beautifully.
Determining Table Runner Size and Dimensions
Getting the size right makes all the difference between a table runner that looks intentional and one that just seems off. The good news is that you don’t need to guess or eyeball it—there are some straightforward guidelines that work for most tables.
Let’s walk through how to figure out the perfect dimensions for your project.
Standard Width and Length Guidelines
Most table runner dimensions follow a simple rule: your width should land between 12 and 18 inches—usually about one-third of your table width.
For table length, aim for runners that measure roughly two-thirds of your table’s surface. A 6-foot table, for instance, pairs beautifully with a 48-inch runner, while longer 7 or 8-foot tables need 56 to 64 inches for proper table proportions.
Calculating Overhang for Different Tables
Your overhang determines how far your runner drapes beyond each table edge. For casual settings, aim for a 6-inch drop on each end; formal occasions call for 10 to 12 inches.
Simply add twice your desired overhang to your table length—a 60-inch table with 8-inch drops needs a 76-inch runner.
Round tables work similarly, though you’ll subtract 12 to 24 inches from the diameter instead.
Measuring Your Table Correctly
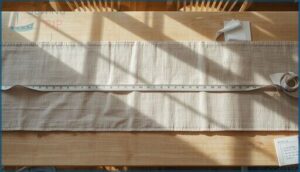
Before you start cutting fabric, grab a retractable tape measure—it won’t stretch like cloth measuring tapes do. Measure your table length from edge to edge, then record the width at its widest point. Double-checking these measurements cuts errors by up to 80%.
Note your table shape too, since rectangular, round, and square tables each need different overhang calculations for proper table runner dimensions.
How Much Fabric Do You Need?
One of the biggest questions beginners ask is how much fabric to buy for their table runner project. The answer depends on your table size, whether you’re prewashing your fabric, and how much extra you need for seams.
Let’s break down the yardage you’ll need so you can shop with confidence and avoid running short mid-project.
Yardage Estimates for Different Sizes
Most table runners need between 2/3 and 1.5 yards, depending on table runner dimensions and finished width. A standard 14 x 72-inch runner requires about 2/3 yard of 45-inch fabric width, while longer runners for 8-foot tables need closer to 1 yard.
Choosing fabric for table runner projects wisely means considering table length, overhang amount, and runner style—plus waste reduction when cutting multiple pieces from wider bolts.
Accounting for Seam Allowances
Once you’ve calculated yardage, don’t forget seam allowances—they directly impact your finished dimensions.
Here’s what you need to know:
- Add 1 to 1.5 inches total to both length and width for typical ½-inch seam allowances on all sides
- Mark measurements accurately using a fabric pencil or washable pen before cutting fabric
- Adjust for fabric type—heavyweight materials need wider allowances than lightweight cotton
- Maintain consistency throughout sewing to prevent dimension errors and misaligned edges
Fabric Shrinkage Considerations
Beyond seam allowances, fabric shrinkage can sabotage your runner’s final size if you skip prewashing. Cotton generally shrinks 5–10% after its first wash, while linen and rayon can lose similar amounts.
That’s why fabric preparation matters—always prewash fabric before cutting to prevent post-construction surprises. Add 7–10% extra yardage when calculating fabric amounts, especially for natural fibers, ensuring your finished runner maintains the dimensions you planned.
Essential Supplies and Tools for Sewing
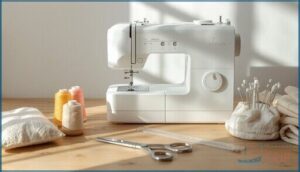
You don’t need a fancy sewing studio to make a beautiful table runner. A basic sewing machine and a few essential tools will get the job done.
Let’s look at what you’ll actually use to bring your project together.
Sewing Machine Recommendations
You don’t need an expensive machine for this beginner sewing project. Here’s what to think about:
- Entry-level models like the Janome 219-S ($170) or Brother CS7000X ($200–$250) give beginners enough stitches and features for sewing techniques that produce polished table runners.
- Market leaders Brother and Singer dominate North America with reliable, well-reviewed machines.
- Sophisticated features like automatic needle threaders and built-in LED lighting simplify sewing tutorials.
- Reliability stats show top brands experience under 4% warranty claims, ensuring your beginner sewing adventures stay frustration-free.
Thread, Needles, and Cutting Tools
Quality materials make sewing easier and deliver better results. All-purpose polyester thread works for most cotton and linen runners, with tensile strengths suited to medium-weight fabrics. Universal needles (size 80/12 or 90/14) handle typical table runner materials without breaking.
For fabric cutting, rotary cutters offer sharper accuracy and cleaner edges than scissors—reducing cutting time by up to 50% while minimizing fabric distortion across multiple layers.
Pins, Clips, and Turning Tools
You’ll rely on three helpers to hold fabric layers together and achieve crisp corners. Sewing pins—glass head or quilting varieties—secure lightweight to thick materials without melting under heat.
Sewing clips offer advantages for bulkier projects, gripping firmly without puncturing delicate surfaces.
When you turn the runner right side out, a turning tool or chopstick lets you gently push out corners you’ve trimmed, creating sharp, professional edges.
Optional Embellishment Supplies
Embellishments let you infuse personality into every runner you create. Sequins and beads add shimmer—popular in over a third of decorative runners sold today.
Embroidery details, ribbon, and lace bring texture, while tassels, pom poms, and fringe define edges with playful movement.
Appliqué motifs and piping offer bold visual interest, transforming simple fabric into statement pieces for any occasion.
Preparing and Cutting Your Fabric
Before you start sewing, you need to get your fabric ready and cut to the right size. This step makes the difference between a runner that looks handmade in the best way versus one that looks, well, a little wonky.
Let’s walk through the key techniques that’ll set you up for success.
Marking and Measuring Techniques
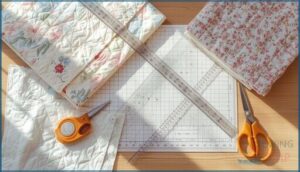
Accurate marking starts with fabric preparation—press out wrinkles and align the grainline on your cutting mat. Use a measuring tape and fabric pencil to mark seam allowance lines, ensuring seam consistency throughout.
For bias cuts, a clear ruler helps maintain accuracy. Mark hem lines before pressing for crisper folds.
Tool calibration matters: double-check your measurements to avoid costly mistakes.
Using Rotary Cutters Vs. Scissors
When you’re ready to cut fabric for your table runner, choosing between rotary cutters and scissors affects your entire sewing experience. Here’s what you need to know:
- Cutting speed: Rotary cutters slice through long edges faster than scissors, especially on a cutting mat.
- Edge precision: Rotary cutters keep fabric flat, producing straighter lines with less distortion.
- Safety concerns: Rotary cutters require careful handling; scissors are generally safer for beginners.
- Cost analysis: Scissors have lower upfront costs than rotary cutters plus mats.
- User comfort: Rotary cutters reduce hand fatigue during extended cutting sessions.
Cutting Backing and Batting (if Used)
Think of backing and batting as your table runner’s foundation—cutting them right matters. Cut both layers 3–4 inches larger than your runner top on all sides to prevent shifting during sewing. This backing overage accounts for squaring fabric and trimming after stitching. Use sharp cutting tools to minimize fabric waste.
Low-loft cotton batting works best for beginners, keeping your runner flat and professional-looking without bulk.
Step-by-Step: Sewing a Table Runner
Now that your fabric is cut and ready, it’s time to bring your table runner to life. This is where you’ll see all that prep work pay off as you stitch, trim, and press your way to a finished piece.
We’ll walk through each step so you can create a table runner that looks polished and professional.
Pinning and Stitching The Layers
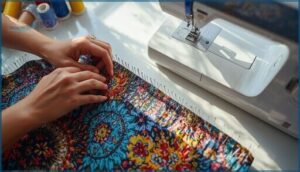
With your fabric layers stacked right sides together, place sewing pins perpendicular to the edge every 3 inches—this pinning frequency prevents fabric shifting as you work.
Set your sewing machine to a straight stitch with a ½-inch seam allowance, then stitch around the perimeter steadily. These sewing techniques create clean stitching, though you’ll leave a gap for turning.
Thread selection matters, so match your fabric weight.
Seam Allowances and Corner Trimming
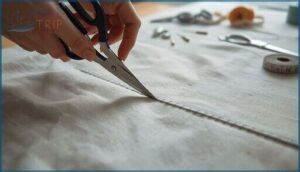
After stitching around the perimeter, your seam allowance size—that ½-inch margin—needs protecting during corner trimming. Trim diagonally across each corner, stopping about ⅛ inch from your stitching line for bulk reduction.
This diagonal trimming prevents bunching when you turn the runner right side out. Don’t skip this step; those sharp, professional corners you’re after depend on removing that excess fabric now.
Turning and Pressing The Runner
Now comes post-stitching turning. Reach through that opening you left and pull the runner right side out. Use your turning tool—a chopstick works perfectly—to coax those trimmed corners into crisp points without forcing. Corner bulk reduction pays off here.
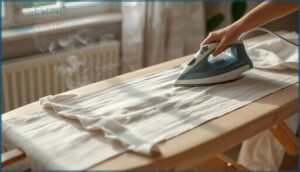
Next, place your runner on the ironing board with a pressing cloth. Set your pressing temperature for cotton, then iron methodically from center outward for edge ripple elimination. Fold your seam allowance inward at the opening before this final press.
- You’re seeing your fabric transform from inside-out chaos into something polished
- Those corners you worried about? They’re suddenly sharp and professional
- The heat from your iron makes everything settle into place beautifully
- Your careful trimming work reveals itself in clean, flat edges
- This is where your table runner stops looking homemade and starts looking handcrafted
Topstitching for a Professional Finish
Your runner’s pressed and ready—now add that polished topstitch. Thread selection matters here: grab 50 wt cotton for invisibility and strength. Keep your straight stitch length at 2.5 mm, then guide fabric under an edge-finishing foot positioned 1/8 inch from the border.
This sewing technique locks layers together while preventing future fraying. Lock stitches at each end for fabric stability that lasts through countless dinner parties.
Adding Borders and Decorative Elements
Once your basic table runner is sewn and turned right side out, you can take it from simple to stunning with a few personal touches.
Decorative elements like borders, tassels, and piping give your runner a custom look that matches your style and skill level.
Here’s how to add those finishing details that make your project truly yours.
Attaching Borders or Contrasting Edges
Borders transform a plain table runner into a standout piece that catches every eye. Here’s how to attach them with confidence:
- Cut 2.5-inch-wide border strips and pin them at the center and ends before stitching—this keeps everything aligned.
- Sew with a standard quarter-inch seam allowance to minimize bulk.
- Press seams toward the border for durability.
- Consider contrasting fabrics or piping for visual pop.
Adding Tassels, Pom Poms, or Fringe
Tassels, pom poms, and fringe textures turn a basic runner into something guests will remember. Pin store-bought tassels inside the binding before topstitching—they’ll stay secure even after washing. Pom pom colors work best spaced 1.5 inches apart along edges. Fringe adds tactile appeal, perfect for weddings or formal dinners.
| Embellishment Tips | Best Attachment Method |
|---|---|
| Tassel Styles | Secure in binding with ¾” seam |
| Pom Pom Colors | Running stitch, knot ends |
| Fringe Textures | Pin then topstitch edges |
| Decorative Edges | Space trim evenly |
| Weaving Them | Test placement first |
Trim corners before adding decorative elements to prevent bulk buildup.
Incorporating Piping or Cording
A crisp folded edge defines your runner’s personality, and piping techniques make that edge unforgettable. You’ll sandwich fabric-covered cording between layers, then stitch close with a zipper foot. Cording materials like cotton cord (around 4-5 mm) add dimension without overwhelming your design.
- Cut bias strips double your cord width plus seam allowances
- Clip corners carefully without cutting stitches
- Position piping with raw edges aligned before stitching
- Choose contrast colors for dramatic edge finishing
Decorative trims enhance homemade table runners to heirloom quality.
Using Batting for Structure
Think of batting as your runner’s backbone—it transforms limp fabric into something with real presence. Cotton batting offers breathability and frequent washability, while polyester resists shrinkage better. For table runner construction, stick with low-loft options that won’t bulk up your edges when sewing a table runner.
| Batting Types | Best Loft Options | Key Durability Benefits |
|---|---|---|
| Quilting cotton | Ultra-thin/low | Withstands frequent washing |
| Polyester | Lightweight | Minimal shrinkage, easy care |
| Fusible fleece | Low to medium | Bonds layers, adds stability |
Cut your batting to match fabric dimensions, pin all layers together, then trim corners carefully to avoid bulk. Fusible options simplify the process—just iron to secure before stitching.
Customizing Your Table Runner Design
Once you’ve mastered the basics, it’s time to make your table runner truly your own. The beauty of sewing your own runner is that you’re not stuck with whatever’s on the store shelf.
Here are three simple ways to add your personal stamp and create something that perfectly fits your style.
Patchwork and Quilted Styles
You can turn your table runner into quilted art with modern patchwork techniques that blend vintage revival charm with contemporary flair.
Making a patchwork runner lets you piece together quilting cotton in cultural patterns that tell your story. This sustainable fabrics approach transforms scraps into a quilt-inspired centerpiece, weaving tradition with innovation—and it’s easier than you’d think!
Creating Reversible Table Runners
A reversible table runner tutorial opens the door to design versatility like nothing else—flip it over, and you’ve got a whole new look! You’ll sew two coordinating fabrics with interfacing options sandwiched between, finish the edges with topstitching, and boom—instant seasonal themes at your fingertips.
- Switch between bold patterns and subtle tones for any occasion
- Layer backing fabric that complements your everyday or holiday décor
- Explore fabric combinations that make reversible sewing projects twice as exciting
Using Fabric Prints for Personalization
Your fabric selection for table runners tells a personal story—think maximalist patterns like bold florals paired with coordinating fabrics, or eco-friendly prints that reflect 2025’s botanical trends.
AI-driven designs now let you customize prints beyond solid fabrics, perfect for commercial customization or home use.
With proper care, print longevity keeps these unique runners vibrant through countless dinner parties and holiday gatherings.
Top 9 Must-Have Sewing Supplies for Table Runners
You don’t need to spend a fortune to create beautiful table runners. A few key supplies will make the process faster, easier, and more enjoyable.
Here are nine specific items that’ll set you up for success from start to finish.
1. Cotton Fabric Quilting Squares Bundle
You’ll love working with a cotton fabric quilting squares bundle for your table runner project. These precut bundles generally include 42 to 50 coordinating pieces, each measuring around 5″ x 5″ or larger, perfect for patchwork designs.
The fabric quality matters—look for 100% quilting cotton that’s durable and easy to handle on your sewing machine. Bundles range from $5 to $40 depending on size and brand, with the market growing thanks to the handmade home décor trend.
They’re incredibly adaptable for table runners, pillows, and other creative sewing projects.
2. Medium Weight Iron On Interfacing
Once you’ve chosen your fabrics, medium weight iron-on interfacing becomes your secret weapon for giving your table runner body and stability. This fusible interfacing uses heat-activated adhesive that bonds directly to fabric—just press with your iron and you’re done.
At around 102 GSM, it’s perfect for table runners because it adds structure without making things stiff. Available in black or white to match your fabric choices, it eliminates pinning hassles while preventing stretching.
When you compare interfacing weights, medium strikes the ideal balance for most home sewing projects.
3. Turquoise Polyester Sewing Thread Cones
After you’ve prepped your fabric and interfacing, you’ll need reliable thread to bring everything together. Turquoise polyester thread cones pack 6,000 yards each—enough for multiple sewing projects without constant rewinding.
The 40-weight strikes that sweet spot for sewing techniques across different fabrics, offering excellent thread strength and material durability while minimizing lint buildup. These cones work with most home sewing machines, including sergers, making machine compatibility a breeze.
Plus, when color matching matters for your design, having this much yardage on hand means consistent results throughout your table runner.
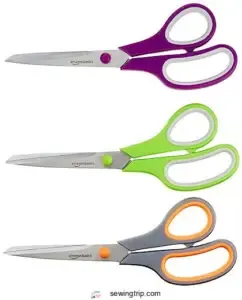
4. Stainless Steel Multipurpose Scissors Set
Quality scissors can make or break your sewing project, and stainless steel multipurpose scissors deliver the cutting performance you need. Their blade durability stands up to fabric, thread, and even cardboard without dulling quickly, while the ergonomic design reduces hand fatigue during extended cutting sessions.
The material quality—stainless steel—resists rust and stains, keeping your tools sharp longer. Market trends show consumers favor these all-purpose options for their reliability.
When you’re working with your sewing machine and fabrics, having sharp, comfortable scissors makes every step easier.
5. Fiskars Rotary Cutter Sewing Set
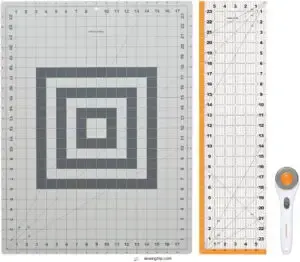
The Fiskars Rotary Cutter Sewing Set transforms fabric cutting from a chore into a breeze. Its 45mm blade performance slices through eight layers of cotton smoothly, while the 18″x24″ self-healing mat and 6″x24″ ruler guarantee precision every time.
Safety features like the squeeze trigger and dual-action lock protect beginner sewers from accidents. User feedback consistently praises its ergonomics—you’ll notice less hand fatigue during long cutting sessions.
Market trends show Fiskars dominates for good reason: it’s reliable, sharp, and built to last through countless sewing techniques.
6. Pearl Head Straight Sewing Pins
You’ll breeze through pinning fabric layers with Singer’s 120-count pearl head pins—they’re a beginner sewer’s secret weapon. Their 1½-inch length and visible pearl heads prevent you from losing pins in fabric, boosting pin visibility while you work. Though some users note mixed feedback on pin sharpness, most find them sharp enough to minimize fabric damage.
The nickel-plated steel ensures rust resistance, protecting your fabric from stains during any sewing project. Head security keeps them intact during sewing techniques, and at under $10 for bulk quantities, they’re perfect for your table runner sewing guide.
7. Clover Sewing Wonder Clips Set
When thick layers of fabric or bulky materials threaten to slow you down, Clover Wonder Clips step in where pins can’t. These sturdy clips open 12mm wide, gripping multiple fabric layers without causing fabric damage—perfect for binding your table runner or handling vinyl and leather in DIY projects.
Their flat bottom design glides smoothly under your machine’s presser foot, making complex sewing techniques feel simple.
Available in various clip sizes (including Mini Wonder Clips for precision work), they justify their cost through clip durability and alternative uses across quilting, bag construction, and countless sewing tips.
8. Sewing Craft Multifunctional Tool Set
Think of a multifunctional tool set as your sewing Swiss Army knife—one compact kit covers measuring, turning corners, pressing seams, and feeding fabric under your presser foot. These ergonomic tool designs have evolved with DIY crafting trends, now including digital sewing tools for precision work on sustainable sewing projects.
You’ll find curved ends perfect for easing table runner corners and flat edges ideal for crisp seams. At around $10–$50, they simplify sewing techniques across home decor DIY projects while supporting your creative vision.
9. Brother XM2701 Sewing Machine Versatile Lightweight
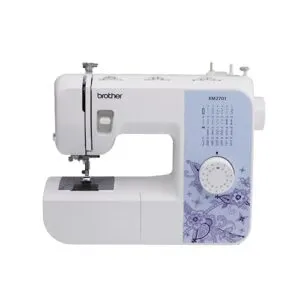
Your home sewing setup needs a reliable foundation, and the Brother XM2701 delivers 27 built-in stitches at an accessible price point—perfect beginner suitability for table runner projects.
Weighing just 12.6 pounds, this machine’s portability makes repositioning fabric during your easy sewing project simple.
The included feet (buttonhole, zipper, and blind stitch) expand your sewing techniques beyond basic seams. Stitch selection happens through a straightforward dial, while the automatic needle threader saves time when switching thread colors.
At around $70–$130, it’s an investment that grows with your skills.
Frequently Asked Questions (FAQs)
What type of thread should I use for sewing a table runner?
For sewing table runners, polyester thread stands out for durability and low shrinkage. Unlike pure cotton alternatives, it won’t snap under tension.
Choose a mid-weight thread—like Coats Dual Duty XP—for balanced strength and smooth sewing techniques.
How do I secure the thread ends when hemming the table runner?
Like tying a shoelace that won’t come undone, securing thread ends requires simple knotting techniques or machine backstitching.
Try adhesive options like Fray Check for extra thread durability, ensuring your hemming tape and sewing projects last beautifully.
How do I attach a binding to the edges of the table runner?
Binding adds a polished edge finish. Fold your binding strip lengthwise, align it with raw edges using a 1/4 inch seam allowance, then secure with a straight stitch.
Miter corners by folding at 45-degree angles for clean transitions.
What are some simple table runner patterns suitable for beginners?
Try patchwork designs using precut fabric squares or simple quilted runners with straight-line stitching.
Woven strips offer striking visual impact, while minimalist styles and holiday themes let you practice basic sewing techniques confidently.
How do you wash a finished table runner?
Caring for your fabric creation doesn’t have to feel like walking on eggshells. Machine-washable table runners thrive on cold water and gentle cycles, while delicate fabrics need hand washing.
Air dry flat, then press with medium heat for crisp, wrinkle-free results.
Can you make a table runner without sewing?
Yes, you can create a no-sew DIY table runner using fabric adhesives like iron-on tape or fabric glue.
These nosew methods make table decor accessible for beginners without machines, completing fabric crafts in under 20 minutes.
What mistakes should beginners avoid when sewing?
A crooked seam is like a crack in a foundation—it shows. Beginners often stumble with fabric selection, measuring errors, and thread tension.
Master seam allowance, prewash materials, and align grain lines before cutting to avoid common sewing mistakes.
How do you store table runners between uses?
Store table runners flat or rolled in breathable cotton bags, away from light and moisture.
Ideal conditions include climate control around 65–70°F and 50% humidity, with rotation frequency every few months to maintain freshness.
Can you use quilting techniques on table runners?
Think table runners are too simple for quilting? Think again.
Quilted designs bring warmth and texture through patchwork, batting, and precise seam allowances—transforming basic fabric into stunning, layered pieces using traditional quilting cotton and construction techniques.
Conclusion
Now you’ve got the table turner—literally—to refresh your dining space whenever the mood strikes. Learning how to sew a table runner means you’ll never settle for ill-fitting store options again.
You’ve mastered the measurements, conquered those corners, and discovered how simple fabric and straight stitching create something truly custom.
So grab that fabric you’ve been hoarding, fire up your machine, and give your table the handmade treatment it deserves. Your next dinner party just got considerably more stylish.
- https://www.artfulhomemaking.com/how-to-make-a-table-runner/
- https://www.tablecoversnow.com/guides/best-top-quality-table-runners-reviews
- https://happiestcamper.com/how-to-make-a-reversible-table-runner-for-beginners/
- https://sewcanshe.com/50-free-table-runner-patterns-for-any-season/
- https://www.supermomnocape.com/october-fnsi-results-two-table-runners/

