This site is supported by our readers. We may earn a commission, at no cost to you, if you purchase through links.
 Learning how to sew a vest starts with choosing medium-weight fabric like wool or cotton twill. You’ll need a pattern, fabric scissors, pins, and a sewing machine.
Take chest, waist, and length measurements for proper fit. Cut front and back pieces, then sew side seams and shoulder seams together.
Add interfacing to button areas for structure. Attach lining by sewing it to the shell, leaving one shoulder open for turning.
Insert closures like buttons or zippers last. The trick lies in pressing seams flat and trimming excess fabric at curves.
Once you master these fundamentals, advanced techniques like welt pockets and decorative topstitching will transform your basic vest into something truly special.
Table Of Contents
Key Takeaways
- Choose medium-weight fabrics like cotton twill or wool for structure, and take accurate chest, waist, and length measurements before cutting to ensure a proper fit
- Master the construction sequence by sewing darts first, then shoulder seams, followed by side seams, and always press seams flat after each step for professional results
- Add interfacing to buttonhole areas for stability and use the bagging method when attaching lining to create clean, finished edges without visible raw seams
- Focus on precision techniques like proper grain line placement, consistent seam allowances, and careful topstitching to transform a basic vest into a polished, professional-looking garment
Sewing Vest Basics
Before you start cutting fabric, you’ll need to master three key areas that determine your vest’s success.
Getting your fabric choice, tools, and measurements right from the start will save you time and frustration later.
Choosing Fabric
Fabric selection sets the foundation for your vest pattern success. Your fabric weight affects drape and flow, while fiber content determines care requirements. Choose wisely to make your sewing project shine.
Your fabric choice is your vest’s destiny – pick wisely for sewing success.
- Medium-weight fabrics (6-8 oz/sq yd) provide the best structure for most vest patterns
- Cotton blends offer easy care and comfort for casual fabric vest projects
- Solid colors coordinate easily with existing wardrobe pieces
- Pre-wash fabrics to prevent shrinkage after construction
- Consider drape – structured fabrics like canvas hold shape better than flowing materials
These vests often utilize versatile fabric options.
Essential Sewing Tools
You’ll need the right tools to tackle your sewing project. Start with sharp fabric scissors and seam rippers for clean cuts and easy corrections.
Marking tools like chalk help transfer your vest pattern accurately. Your sewing machine should handle medium-weight fabrics well.
Stock up on thread variety in matching colors and choose appropriate needle types for your fabric. Don’t forget pressing tools – they’re your best friend for professional results on any beginner sewing adventure.
For accurate measurements, consider using a flexible measuring tape.
Measuring and Fitting
Taking accurate body measurements sets the foundation for a perfect fit in your vest tutorial. Start with your chest, waist, and back width measurements using a flexible tape measure.
Perfect measurements are your blueprint for a vest that fits like it was made just for you.
- Create muslin mockups before cutting your final fabric to test the fit
- Adjust patterns at common alteration points like shoulder width and armhole depth
- Address fitting challenges early by pinning and marking problem areas during fitting
This approach prevents common alterations later and guarantees your garment construction meets your body’s unique proportions perfectly.
How to Sew a Vest

Creating your own vest opens up endless possibilities for Vest Customization and personal expression. Start with proper Fabric Selection – cotton works great for beginners, while wool adds structure and linen brings casual vibes.
Your vest tutorial journey begins with understanding basic construction principles that apply across all Style Variations. When you sew vest projects, focus on these core elements:
- Foundation first – Master basic construction before attempting Pattern Hacking techniques
- Fit matters most – Plan for Fit Alterations during your initial fitting sessions
- Practice precision – Clean seams and accurate measurements make professional results
This diy vest approach lets you control every detail. Whether you’re making a formal waistcoat or casual layering piece, the fundamentals remain consistent. Remember, vest making builds on basic sewing skills you already have.
For a quicker project, you could explore no sew techniques. These sewing tips will guide you through each step, ensuring your handmade piece fits perfectly and reflects your unique style preferences.
Cutting Vest Pieces
Once you’ve drafted your pattern, you’ll cut your fabric pieces with precision to guarantee a professional fit.
This step requires careful attention to grain lines and pattern placement to create clean, matching edges that’ll sew together beautifully, ensuring a clean finish.
Drafting a Pattern
Pattern drafting starts with your bodice sloper as the foundation.
Mark bust points, then calculate front width using half bust circumference plus ease.
Adjust shoulder slopes by 1-1.5cm for natural lines.
Set neckline depth at neck width plus 0.5cm.
Position waist darts 2-3cm from center front for proper shaping.
A key step involves determining the scye width to guarantee proper armhole construction.
| Measurement | Calculation | Purpose |
|---|---|---|
| Back Width | Bust ÷ 2 + ease | Main body block |
| Neckline Depth | Neck width + 0.5cm | V-neck placement |
| Dart Placement | 1/10 bust + 1cm | Front alignment |
Cutting Fabric Pieces
Once you’ve drafted your pattern, you’ll cut fabric pieces with precision.
Place your pattern pieces on fabric grain for stability. Mark each piece clearly to avoid confusion during construction.
- Follow fabric grain lines for proper drape and fit
- Use sharp cutting tools for clean edges
- Add seam allowances consistently around all pieces
- Mark notches and dots for accurate piece matching
This fabric cutting stage sets the foundation for professional vest construction through careful pattern layout and proper cutting techniques.
Interfacing and Stabilizers
Choose fusible interfacing for buttonhole areas to prevent stretching and tearing.
Apply it to your vest’s button band before cutting buttonholes.
Lightweight sew-in interfacing works well for delicate fabrics that can’t handle heat.
Match interfacing weight to your fabric—heavy canvas needs sturdy stabilizer types, while silk needs featherweight support for proper buttonhole stability.
Interfacing is essential for garment construction support to ensure proper buttonhole stability.
Sewing Vest Shells
You’ll now assemble your vest pieces into a complete shell before adding the lining.
Start by sewing the darts on both front and back pieces, then press them open to reduce bulk.
Constructing The Vest
With your fabric pieces ready, you’ll start assembling your custom vest by tackling dart manipulation and preparing seams. Begin with the front and back pieces, focusing on proper interfacing placement and layer alignment.
These sewing techniques form the foundation of professional vest construction and guarantee your vest design meets bespoke standards.
- Sew darts on front and back pieces, pressing them open for bulk reduction
- Apply interfacing to strategic areas like buttonhole zones for stability
- Join shoulder seams with precise stitching, maintaining proper seam alignment
- Press all seams open using appropriate heat settings for your fabric type
- Check fit and adjust seam finishes before proceeding to side seam construction
Sewing Side Seams
Start by aligning the side seams carefully. Match seams at the shoulder points and pin along the entire length.
Use standard seam allowances for clean invisible seams. Sew from armhole to hem in one continuous line.
Press seams open immediately after stitching to create flat, professional results. This sewing technique guarantees your vest design maintains proper shape and fit throughout construction, ensuring a professional finish.
Attaching Front to Back
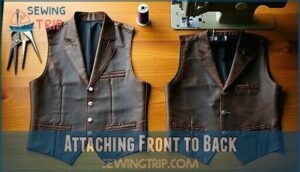
With your side seams complete, you’re ready to join the front and back pieces at the shoulder seams.
This step creates the vest’s basic shell structure.
Here’s your shoulder seam roadmap:
- Pin shoulder seams with right sides together, matching notches and armhole shaping points
- Stitch shoulder seams using a straight stitch, maintaining consistent seam allowances
- Press seams open to reduce bulk and create clean seam finishes
- Check armhole shaping confirms smooth curves without puckering at matching points
- Trim excess fabric at back neckline intersections for professional results
Adding Lining and Finishes
Adding the lining transforms your vest from a simple shell into a polished, professional garment.
You’ll attach the lining to create clean edges, add closures like buttons or zippers, and finish with topstitching for a crisp appearance.
Inserting Lining
After completing your vest shell, attach the lining using the bagging method for clean finishes.
Place lining and shell with right sides together, then stitch around neckline and armholes. Use understitching along curved seams to prevent rolling.
This facing application technique creates professional results.
| Lining Fabrics | Best Use |
|---|---|
| Polyester | Durable, easy care |
| Acetate | Smooth drape |
| Cotton batiste | Breathable comfort |
| Silk | Luxury finish |
Adding Closure and Hems
With the lining inserted, you’ll focus on closure types and hemming techniques to complete your vest.
Mark buttonhole placement carefully on the right front, then reinforce with interfacing before cutting. For hems, use a double fold method with edge finishing to prevent fraying.
A vital step involves strategic stitching techniques to guarantee proper alignment and a clean finish.
- The satisfaction of perfectly aligned buttonholes that snap together like puzzle pieces
- Crisp, professional hems that make your handmade vest rival store-bought quality
- Secure closures that’ll withstand countless wears without pulling or gapping
Topstitching and Embellishments
Perfect topstitching creates professional-looking results.
Apply decorative stitching along all vest edges using your machine’s edge foot. Try button variations like covered or contrast styles for personality.
Add beading details or piping accents before final assembly. For achieving the best results, consider using a specialized presser foot.
These embellishments transform basic vest instructions into stunning garments that showcase your advanced sewing skills.
Frequently Asked Questions (FAQs)
How do you sew a vest?
Draft your pattern using a bodice sloper with darts.
Cut main and lining pieces – two fronts, one back each.
Sew darts, then shoulder seams.
Attach lining to main fabric around edges, leaving side seam open.
Turn right-side out through opening.
Is a vest easy to sew?
Yes, vests are beginner-friendly projects.
You’ll work with simple shapes and straight seams.
The techniques aren’t complicated – basic darts, shoulder seams, and edge finishing.
Adding lining requires extra steps but creates professional results.
How to sew a vest with lining?
Measure twice, cut once—drafting a lined vest requires precision from the start.
You’ll create two layers using your bodice sloper, then sew them together at armholes and edges.
Turn through side seams for professional results.
What’s the hardest thing to sew?
Custom blazers with precise curves, bound buttonholes, and perfectly matched patterns challenge even experienced sewers.
Welt pockets, set-in sleeves, and invisible zippers also demand serious skill.
You’ll wrestle with these beasts until everything clicks together.
How to make a vest out of fabric?
Creating fabric vests isn’t rocket science—it’s about precision and patience.
Draft your pattern using measurements, cut main and lining pieces, sew darts first, then shoulders.
Pin layers together at edges, stitch carefully, turn right-side out, and finish with topstitching and buttonholes.
How do you add pockets to a vest?
Add pockets during the drafting stage by drawing rectangles where you want them.
Cut pocket pieces from your main fabric, then sew them to the vest fronts before assembling the layers together.
Can you make sleeveless vests with stretch fabrics?
You’ll find stretch fabrics work beautifully for sleeveless vests, though they require gentle handling.
Use a ballpoint needle and stretch stitches.
The fabric’s forgiving nature means less precise fitting needed, making construction surprisingly straightforward for beginners.
Whats the difference between mens and womens vest patterns?
Men’s vest patterns typically feature straighter lines, broader shoulders, and longer torsos.
Women’s patterns include bust darts, waist shaping, and curves that follow feminine silhouettes.
You’ll find men’s vests are boxy while women’s are fitted.
How do you resize a vest pattern?
Surprisingly, pattern grading mirrors the same techniques used for any garment.
You’ll measure the difference between sizes, then add or subtract that amount evenly across the pattern pieces.
Grade outward from key points like bust, waist, and shoulders to maintain the vest’s proportional fit.
Conclusion
Like building blocks stacking perfectly, mastering how to sew a vest requires patience and precision with each step.
You’ve learned the fundamentals from selecting fabric to adding professional finishes.
Practice makes perfect with this versatile garment. Start with simple cotton fabrics before advancing to wool or textured materials.
Remember that proper pressing and careful seam construction separate amateur work from professional results. Your first vest won’t be perfect, but each one you make will improve your skills and confidence.
- https://www.muellerundsohn.com/en/allgemein/pattern-construction-for-vest/
- https://gwenstellamade.com/tutorials/how-to-sew-lined-vest-draft-your-own-pattern
- https://madamsew.com/blogs/sewing-blog/hook-and-eye-closures-tutorial
- https://www.youtube.com/watch?v=YwdbXImvmXo
- https://www.blog.wawak.com/post/6-types-of-hems-and-when-to-use-them


