This site is supported by our readers. We may earn a commission, at no cost to you, if you purchase through links.
Secure the ends with a zigzag stitch.
Craft a casing by folding over the fabric, leaving enough space for the elastic to slide in.
Once the elastic’s in, stitch the casing closed while ensuring it doesn’t roll.
Pro tip: mark the elastic in quarters and pin it to the side seams for even distribution.
It’s much like hugging your waist in all the right places.
Next up, explore ways to prevent your elastic from twisting!
Table Of Contents
Key Takeaways
- Cut the elastic slightly shorter than the waist measurement to ensure a snug fit and prevent the waistband from being too loose.
- Use a zigzag stitch to secure the elastic for flexibility and strength, which allows the fabric to stretch without breaking the thread.
- When creating a casing, fold the fabric over and stitch it down, making sure the elastic can slide freely but not twist within the casing.
- Consider the type of elastic—braided, knitted, or woven—depending on your fabric and project needs to achieve the best outcome and comfort.
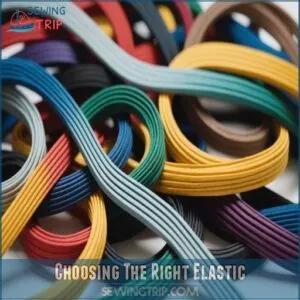
Choosing The Right Elastic
Choosing the right elastic is essential for ensuring your project’s success and comfort.
Whether you need elasticity for lightweight blouses or sturdy jeans, there’s a perfect type waiting for you!
Types of Elastic
Choosing the right elastic isn’t rocket science, but knowing types is handy.
For sewing elastic, consider:
- Braided Elastic: Shrinks with stretch.
- Knitted Elastic: Soft and sewable.
- Woven Elastic: Stiffer, yet strong.
- Elastic Thread: Perfect for shirring.
- Fold-Over Elastic: Great for finishing.
Each type has unique properties, so pair them with the right project!
Braided Elastic Uses
Thinking about elastic types, braided elastic is a top pick for projects like headbands or swimsuits.
It’s perfect for casings since it contracts when stretched.
This makes it ideal for sleeve hems or waistbands where comfort and durability count.
Remember, braided elastic shouldn’t touch your skin directly, as it can be a bit scratchy.
Perfect for sewing techniques needing stretch fabrics!
Knit Elastic Advantages
While braided elastic suits many uses, knit elastic steps in with its own perks.
Knit elastic maintains its width, making it perfect for stretchy waists without losing shape.
You can find a variety of soft elastic waistbands online for your projects, such as those found on soft elastic waistband products.
It’s soft, provides comfort, and won’t
Woven Elastic Applications
Woven elastic can be a game changer if you’re tackling heavy fabrics like those used in home decor or furniture coverings.
Its durability makes it perfect for sewing elastic waistbands in projects needing extra strength.
Using a zigzag stitch on your sewing machine helps stretch fabrics stay stretchy, giving your creations a long-lasting, professional finish, especially when working with fabrics with 2-way or 4-way stretch. Using a zigzag stitch on your sewing machine helps stretch fabrics stay stretchy, giving your creations a long-lasting, professional finish.
Specialty Elastics
Ever wondered which specialty elastic suits your project? Explore these options! From elastic thread for shirring and texture to fold-over elastic for tidy finishes, specialty elastic brands offer solutions for every need. Consider lingerie elastic, perfect for a soft touch in underwear. When it comes to sewing stretchy fabrics, understanding the different types, such as choosing between elastane, nylon, or spandex fabric properties, is crucial for creating the perfect elastic waistband. Each type brings unique benefits to sewing stretchy fabrics, adding flair and function to your elastic waistband endeavors.
- Elastic thread applications
- Fold-over elastic uses
- Lingerie elastic types
Measuring and Cutting Elastic
Now that you’ve chosen your elastic, it’s time to measure and cut! Accurately measuring your waist or garment guarantees a perfect fit, so let’s get started.
Calculating Waistband Elastic
Selecting elastic can be like picking the right pair of shoes—it’s gotta fit just right!
To calculate waistband elastic, measure your waist snugly.
Subtract a couple of inches for a comfy elastic stretch.
Here’s a handy table to guide you:
| Waist Measurement | Elastic Length | Garment Type |
|---|---|---|
| 30 inches | 28 inches | Casual Pants |
| 36 inches | 34 inches | Skirts |
| 42 inches | 40 inches | Athletic Wear |
Cutting Elastic to Size
To cut elastic to size, first measure your waist accurately, keeping fabric stretch in mind.
Since elastic shrinkage is common, cut slightly shorter than your waist measurement.
Use a sharp cutting tool for precision.
Remember, a smooth cut will help the elastic sit comfortably in the waistband, making your sewing project a breeze.
Allowing for Seam Allowances
After cutting elastic to size, remember seam allowance basics.
It’s not a guessing game—measure accurately to avoid a waistband that’s too tight or loose.
Calculate allowance based on fabric type and your sewing machine’s quirks.
Avoiding bulkiness is key, so trim excess to keep the seam sleek.
This will result in a smooth sewing project experience.
Preparing Fabric for Elastic
Before you start sewing elastic, make sure your fabric is ready by folding and pressing it neatly.
By creating a clean casing and using interfacing, you stabilize the fabric, preventing pesky twists and wrinkles.
Folding and Pressing Fabric
Consider your fabric’s grainline—it’s the backbone of a smooth finish.
Grab those pressing tools and set the iron temperature just right.
Using a pressing cloth alternative like an old white cotton bed sheet can be very helpful.
Here’s how to ace it:
- Align fabric with grain.
- Use a pressing cloth for delicate textures.
- Set iron to correct heat for fabric type.
- Press
Creating a Casing for Elastic
Creating a casing for elastic might just be easier than finding a missing sock.
Start by deciding your casing width, considering the fabric type for flexibility.
Fold the fabric’s top, then stitch it down using your trusty sewing machine.
This step guarantees casing stability and keeps your sewing tools happy.
Remember, plenty of casing options exist, so go wild!
Interfacing and Stabilizing Fabric
You’ll want a stable waistband, right?
Interfacing adds that extra oomph!
Choosing the right interfacing weight depends on your fabric.
Lighter fabrics need lighter interfacing; heavier fabrics need heavier support.
For a more professional look, consider purchasing Elastic Waistband Interfacing specifically designed for this task.
Iron the interfacing
Sewing Elastic to Fabric
Attaching elastic to fabric might sound tricky, but it’s a breeze once you get the hang of it.
You’ll explore different methods, like exposed, encased, and tunnel, each offering a unique touch to your sewing project.
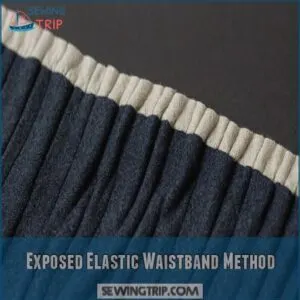
Exposed Elastic Waistband Method
Let’s shift to the exposed elastic waistband method for a tidy finish.
Here’s a quick rundown:
- Align: Match the elastic and fabric edges.
- Stretch & Sew: Use a zigzag stitch and pull tight.
- Fold Over: Bring the elastic to the wrong side and stitch.
- Secure: Use a stretch stitch for durability.
Encased Elastic Waistband Method
Switching gears from exposed to encased elastic, you’ll craft a polished waistband.
Pin and sew elastic on the wrong fabric side with a 3/8” seam allowance.
Stretch evenly as you sew, fold it twice, and secure stitches to prevent elastic distortion.
Your fabric weight influences results, so choose wisely between options for pants and skirts.
| Step | Action | Outcome |
|---|---|---|
| Pinning | Align fabric edges | Secure placement |
| Sewing | Use zigzag stitch | Stretch retention |
| Folding | Double fold fabric | Encased finish |
| Stitching | Secure ends | No twisting elastic |
| Fabric | Select weight | Best comfort |
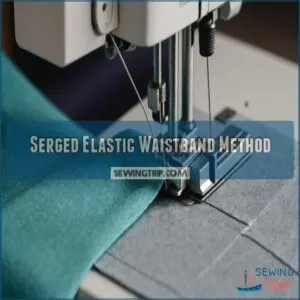
Serged Elastic Waistband Method
Start with the serged elastic waistband method by aligning the fabric and elastic on the wrong side.
Use serging techniques to secure the elastic, evenly stretching as you go.
Fold the elastic once, then stitch with precision.
With a focus on stitching tension and seam allowance, this method suits heavier fabrics.
Perfect for creating sturdy, neat waistbands with minimal fuss.
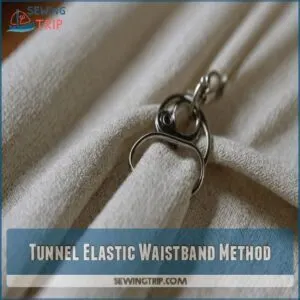
Tunnel Elastic Waistband Method
Finished with the serged method? Try the tunnel elastic waistband method!
Begin by serging the fabric’s top edge.
Create a fabric casing slightly longer than the elastic width and leave an opening for elastic insertion.
Here’s how:
- Press fabric edges for clean lines.
- Insert elastic with safety pins.
- Overlap and sew ends.
- Close the casing with a zigzag stitch.
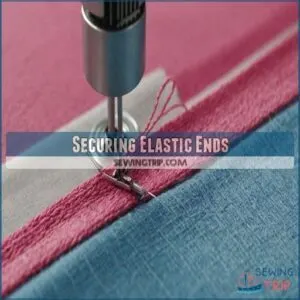
Securing Elastic Ends
Securing the ends of your elastic is essential to avoid any wardrobe mishaps, like an unexpected wardrobe malfunction.
You’ll want to make sure those ends are stitched together firmly, but don’t worry, it’s a simple step that even your grandma could handle while baking cookies!
Overlapping and Sewing Ends
Having carefully measured your elastic, neatly overlap the ends by about half an inch.
Secure these overlapping edges with a few stitches using your sewing machine.
A zigzag stitch works best for stretchy materials like elastic.
This creates a strong, secure elastic end finish, preventing unraveling.
Now you’ve mastered securing elastic ends!
This simple sewing elastic together technique is key for any sewing elastic waistband method.
You’re well on your way to a perfectly finished waistband.
Using Safety Pins for Elastic
Using safety pins for elastic is as easy as pie.
Here’s how you do it:
- Choose the right safety pin size to match your elastic.
- Securely pin one end of your elastic with the pin.
- Thread the elastic through the waistband casing.
- Remove the safety pin once you’re done, keeping everything snug.
It’s as simple as that!
Securing Elastic With Bodkins
After threading elastic with a safety pin, here’s a nifty tool: the bodkin.
Bodkin types range from flexible to rigid, perfect for different needs.
When attaching elastic directly, use a zigzag stitch to sew the elastic in place, allowing the stitch width to stretch over the elastic, as shown in sewing tutorials.
Slip it through the casing—it grips elastic better than a cat hugs sunlight.
Bodkin vs
Common Waistband Methods
When you’re ready to tackle waistband projects, it’s important to know the common methods, like finding the best approach for your needs.
From letting the elastic roam free inside its tunnel to folding fabric for a sleek finish, there’s a method to suit your style and skill level.
Free-Floating Elastic Waistband
Secured elastic ends effortlessly, now let’s tackle the free-floating elastic waistband.
Keep that elastic free in the fabric tunnel for maximum comfort.
Carefully sew close to the elastic’s edge without catching it, preventing annoying twists.
Use a zigzag stitch or stretch stitch for stability.
Adjust sewing machine tension for a clean finish, achieving waistband stability with ease.
Folded Fabric Waistband Method
Just as free-floating waistbands offer a breeze of flexibility, the folded fabric waistband method blends style and function seamlessly.
Here’s a quick guide:
- Fabric Folding: Provides structure and style.
- Waistband Stitching: A reliable sewing technique.
- Seam Allowance: Gives room for adjustments.
- Pressing Techniques: Creates a crisp finish.
Master these, and your waistbands will sing!
Shirring and Gathering Fabric
Ready to try something new? Shirring and gathering create a lovely, stretchy waistband. Let’s explore these techniques!
| Method | Description | Tools Needed | Result |
|---|---|---|---|
| Shirring | Even, delicate gathers using elastic thread. | Sewing machine, elastic thread | Smooth, even gathers |
| Gathering | Larger gathers using regular thread. | Sewing machine, gathering stitch | More dramatic, fuller gathers |
| Combination | Blend shirring and gathering for unique effects. | Sewing machine, elastic thread, regular thread | Custom look |
| No-Sew Gathering | Use fabric manipulation techniques. | Pins, needle, thread | Quick and simple gathers |
Troubleshooting and Tips
When sewing an elastic waistband, issues like distortion and uneven tension can sneak up on you, making the process tricky.
Using the right needle and thread, along with a few handy adjustments, can save the day and your project.
Preventing Elastic Distortion
Before elastic distortion ruins your handiwork, remember to keep it snug but not over-stretched.
Measuring waistband elastic correctly, such as by subtracting 2 inches from the waist measurement to determine the desired length, is key to a comfortable fit learn how to measure elastic for waistband. Elastic waistband techniques can keep your project fit perfectly.
Using the right supplies like non-twist elastic waistbands can also prevent distortion.
A little humor helps—don’t pull your hair, just pull your fabric!
- Avoid cutting elastic too short; allow proper seam allowance.
- Secure ends properly;
Adjusting Tension for Elastic
Elastic distortion sorted? Let’s tackle tension next.
Adjusting the sewing machine tension is key for flawless elastic waistbands. To prevent issues with sewing elastic, it’s essential to understand why won’t your sewing machine sew elastic common reasons for elastic sewing struggles. Adjusting the sewing machine tension is key for flawless elastic waistbands.
Set it too tight, and your fabric gets squeezed; too loose, and the stitches sag.
Experiment on a fabric scrap, tweaking settings until it flows nicely.
Remember, stitch length and fabric type play a part in mastering elastic waistband techniques.
Using The Right Needle and Thread
When diving into sewing elastic with precision, it’s important to pick the right needle and thread.
Opt for a ballpoint needle to glide smoothly through fabric and elastic, preventing snags.
You can find the perfect ballpoint needles online at ballpoint needle suppliers.
Choose stretch thread to accommodate elasticity without breaks.
Keep an eye on sewing machine tension — adjusting it can save your
Frequently Asked Questions (FAQs)
How to sew a waistband without a casing?
You can sew elastic directly onto the waistband. Use a zigzag stitch for stretch. Make sure the tension is even; otherwise, it’ll twist! Practice on scraps first. You’ve got this!
How to sew an elastic waistband?
Crafting a snug waistband is like weaving magic.
Attach elastic to fabric’s wrong side, stretching evenly.
Secure with zigzag stitches for flexibility.
Fold fabric over ends, stitch closed, and presto!
A comfy waistband fit for any adventure.
How do you make a waistband?
Start by cutting the fabric appropriately, ensuring it matches your measurements.
Pin, fold, and sew it into a loop.
Insert the elastic, secure its ends, and then sew the fabric by overlapping for a clean finish.
Should you thread elastic through a separate waistband?
Threading elastic through a separate waistband is often the way to go, especially for easy adjustments.
This method keeps things versatile and flexible, letting you tweak the fit without too much fuss or bother.
What is an elastic waistband?
An elastic waistband is a stretchable band used in clothing to provide a snug yet comfortable fit.
It’s perfect for pants, skirts, and sportswear, offering flexibility and ease, letting you move freely without buttons or zippers.
How do you calculate elastic for a waistband?
Picture your garment hugging just right; you’ll calculate elastic by measuring your waist, then subtracting 2-3 inches.
This allows stretch for comfort and a snug fit.
Always test it on fabric before sewing to make sure it’s right.
What is the best stitch for elastic waistband?
For sewing an elastic waistband, use a zigzag stitch.
It provides flexibility and strength, letting the fabric stretch without snapping threads.
Practice on scrap fabric first to adjust tension and stitch length for the perfect finish.
Do you stretch the elastic when sewing a waistband?
Sewing elastic waistbands is easier than you think!
Yes, you absolutely should stretch the elastic as you sew; it’s the secret to a perfect fit.
Don’t worry, it’s not rocket science!
How to sew elastic directly to fabric?
Start by pinning the elastic to the fabric’s wrong side.
Sew using a zigzag stitch, gently stretching the elastic as you go.
Keep the edges aligned for even distribution.
Overlap and secure ends, ensuring a snug fit.
How to insert elastic into a waistband?
Inserting elastic into a waistband feels like threading a tiny, escape artist through a maze!
Sew a fabric tunnel.
Attach elastic with safety pins, and ease it through.
Overlap, sew ends, and close the gap.
Voilà!
How to prevent elastic from twisting inside waistband?
Prevent elastic from twisting by sewing it in place with several vertical stitches evenly spaced around the waistband.
You could also use a wider casing, ensuring the elastic sits snugly but not too tightly.
What needle type is best for sewing elastic?
Sewing pros use a ballpoint or stretch needle for elastic, as it reduces skipped stitches.
A ballpoint needle gently slips between fabric threads, like trying to squeeze through subway doors without spilling your coffee.
Keeps things smooth!
How do you replace a worn-out elastic waistband?
Snip open the casing and pull out the old elastic.
Cut a new piece slightly shorter than the waistband’s length.
Thread it through with a safety pin, stitch the ends together, and close the opening.
Voilà!
Can elastic be dyed to match fabric color?
Sure, why not add another challenge to your sewing project?
You can dye some elastic with fabric dye, but check the elastic’s material first.
Natural fibers like cotton take dye best, while synthetics might resist.
What is the best stitch length for elastic?
A short, zigzag stitch works wonders. But, test it on scrap fabric first. You’ll find the perfect length for your elastic and fabric combo. It’s all about that happy medium!
Conclusion
Mastering how to sew an elastic waistband can feel like discovering the secret to a perfectly laid back fit.
You’ve learned the ropes—from picking the right elastic to ensuring it doesn’t twist or distort.
Whether you’re crafting casual joggers or a chic skirt, these steps make the process a breeze.
Just remember to measure twice and stitch once.
With practice, you’ll have waistbands that hug just right, leaving everyone wondering if you’ve got a magic tape measure.

