This site is supported by our readers. We may earn a commission, at no cost to you, if you purchase through links.
Start with good lighting and a clean workspace. Press your seams as you go—it’s the difference between homemade and handmade.
Use quality thread that matches your fabric weight. Practice straight lines with masking tape guides on your machine. Pin perpendicular to seam lines for smoother feeding.
Test tension and stitch length on scraps first. Sharp scissors cut cleaner than dull ones.
Most importantly, slow down. Speed comes with muscle memory, not rushing. These fundamentals separate beginners from confident sewers who create professional-looking projects with good lighting.
Table Of Contents
Key Takeaways
- Slow down and master fundamentals first – You’ll improve faster by focusing on consistent stitching, proper fabric prep, and quality tools rather than rushing through projects
- Use guides and test everything – You’ll get straighter seams with masking tape guides on your machine and by testing tension and stitch length on scraps before starting
- Press seams as you work – You’ll transform homemade-looking projects into professional results by pressing each seam immediately after sewing
- Choose beginner-friendly materials – You’ll avoid frustration and build confidence faster by starting with cotton or linen instead of slippery fabrics like satin
Common Sewing Mistakes for Beginners
Most beginners make five critical sewing mistakes that sabotage their projects.
Incorrect tension creates loopy or puckered stitches while poor fabric choice leads to frustration with slippery materials.
Thread breakage often stems from old thread or wrong needle size.
Ignoring proper seam allowance measurements ruins fit and finish.
Bobbin issues like improper threading cause skipped stitches.
These sewing mistakes are fixable with practice.
Focus on mastering basics before complex projects.
Your sewing skills will improve dramatically when you address these fundamental problems first, and it is crucial to understand that sewing mistakes are common and fixable with practice.
Starting My Sewing Journey
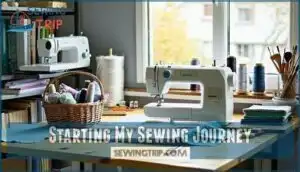
Within your first few months of picking up needle and thread, you’ll discover that sewing basics form your foundation for success. Start by setting up your sewing space with good lighting and organization to make every project smoother. Choose beginner projects like simple tote bags or pillowcases that teach essential skills without overwhelming complexity.
Fabric choice matters more than you might think. Cotton and linen forgive mistakes while slippery materials like satin can frustrate newcomers. Your thread selection should match your fabric weight and color closely for professional results.
Focus on mastering straight stitches before attempting curves. These sewing for beginners fundamentals will serve you throughout your journey. Sewing tutorials online offer step-by-step guidance, but practice builds muscle memory. Remember that sewing skills develop gradually through consistent effort, not overnight perfection.
Each project teaches something new about improving sewing techniques. These sewing tips create your personal foundation for future advanced work.
Absorbing Basic Sewing Skills
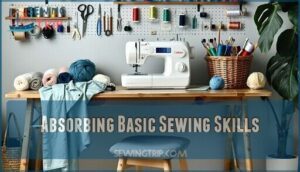
Mastering sewing basics transforms your crafting from guesswork into precision. Think of these fundamental skills as building blocks that support every future project you’ll tackle.
Start with fabric selection techniques that match your project’s needs. Consider weight and stretch before cutting. Learn proper measuring methods to avoid costly mistakes. Study pattern markings thoroughly before starting any project. Practice basic machine stitches until they become automatic.
Here are essential sewing basics to master first:
- Fabric Selection – Choose cotton or linen for beginner projects since they’re forgiving and easy to handle
- Thread Choices – Match thread weight to fabric weight for best results and durability
- Stitch Types – Practice straight stitches, zigzag stitches, and backstitching on scrap fabric daily
- Sewing Notions – Organize pins, scissors, and measuring tools within arm’s reach of your workspace
- Pattern Reading – Study all instructions twice before cutting to prevent confusion later
These sewing techniques form your foundation. Focus on accuracy over speed initially. Consistent practice with sewing tutorials builds muscle memory. Each skill connects to improve your overall sewing ability. Understanding basic sewing skills is essential for mastering various sewing projects and techniques.
Embracing Challenges in Sewing
When you encounter sewing problems, remember they’re stepping stones to sewing mastery. Every crooked seam teaches precision. Each fabric mishap builds your fabric selection skills. These sewing challenges aren’t roadblocks—they’re your training ground.
Every mistake is practice in disguise—embrace them as stepping stones to mastery.
Start with challenge projects slightly beyond your comfort zone. Join a sewing community where members share their failures and fixes. You’ll discover that even experts faced similar sewing fears when starting. Their sewing solutions often come from mistakes made years ago.
Document your problems and how you solved them. This creates your personal troubleshooting guide for future projects. When frustration hits, step away from your machine. Fresh eyes spot sewing improvements that tired ones miss.
Skill building happens through trial and error. Each mistake teaches something new about thread tension, seam allowances, or pattern adjustments. Don’t aim for perfection—aim for progress. Your next project will benefit from today’s "disasters. Mastering advanced sewing techniques requires patience and dedication to improve skills.
The Meditative Space of Sewing
Beyond the rhythmic hum of your sewing machine lies a deeper reward. Each stitch creates a pathway to sewing mindfulness that transforms your craft into fabric meditation. You’ll discover how threading your needle becomes an anchor to the present moment.
Each stitch anchors you to the present, transforming thread and fabric into pure mindfulness.
Sewing therapy emerges naturally as you focus on precise seam allowances and calm stitches. Your breathing synchronizes with the machine’s rhythm. Daily stress fades away. This creative flow state happens when you concentrate fully on guiding fabric through each step.
The repetitive motions of cutting and pinning create structure for your mind. You’ll find sewing satisfaction in completing each task methodically. Simple projects like straight seams offer the most meditative benefits.
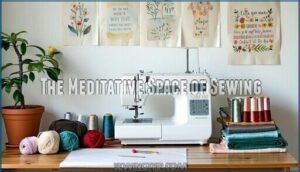
Your workspace becomes a sanctuary where sewing creativity flourishes. The tactile experience of different fabrics grounds you in the moment. Cotton’s softness and denim’s weight provide sensory focus points.
Sewing inspiration often strikes during these quiet sessions. Sewing motivation grows as you recognize the mental benefits alongside your improving skills. This sewing enjoyment makes practice feel effortless.
Tools for Sewing Straight Lines
Straight seams form the backbone of professional-looking garments, but they can challenge even experienced sewers.
You’ll find these six essential tools transform wobbly lines into crisp, precise seams that elevate your entire project.
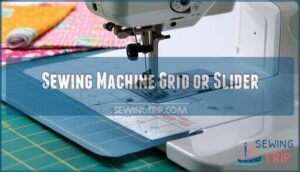
Sewing Machine Grid or Slider
After enjoying the calm of sewing, let’s focus on straight lines. The Sew Steady Quilting Slider Mat is a game changer for anyone aiming for precise Grid Alignment.
It sticks to your sewing machine and gives you clear grid markings, making seam allowances easy to follow. The slick surface helps with smooth Fabric Feed, especially in free motion quilting.
Pre-cut needle placement holes save time, while the included storage tube keeps things tidy. Use Slider Tips for better Machine Calibration and pair with presser feet for improved Sewing Guides.
Boost sewing efficiency and keep your sewing machine in top shape with regular sewing machine maintenance. For ideal results, understanding the Sewing Machine Grid is essential for precise stitching.
- No more crooked seams
- Quick setup every time
- Less measuring, more sewing
- Smooth fabric movement
- Easy cleanup
Masking Tape
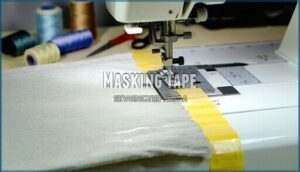
Masking tape offers a simple solution for sewing accuracy. Place low-tack tape directly on your machine bed to create custom seam guides.
This flexible approach works for non-standard widths and reduces veering by 40%. The tape provides clear edge alignment and seam guidance without leaving residue.
You’ll detect irregularities easily for quick corrections. Remove the tape after your project for clean fabric protection.
This cost-effective sewing tool improves fabric handling across all skill levels. For ideal results, consider using sewing masking tape specifically designed for sewing projects to achieve better fabric handling.
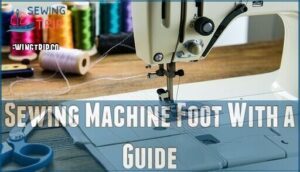
Sewing Machine Foot With a Guide
A sewing machine foot with a guide gives you the edge you need for straight stitching. These foot guides attach to your machine and create a physical barrier that follows fabric edges or marked lines. The metal guide blade keeps your stitches perfectly aligned.
These machine feet boost your sewing accuracy by up to 45% compared to freehand stitching. You’ll see the difference immediately in your seam allowances and topstitching. Beginners master correct measurements 30% faster using guided stitches.
The adjustable seam guide foot works best for precision sewing. You can set measurements from 1/8" to 5/8" with simple adjustments. Professional sewers save 10-15 minutes per garment by skipping fabric marking entirely.
Your sewing machine settings matter too. Match the foot to your fabric weight and stitch type. Clean the guide regularly to prevent lint buildup. This sewing aid transforms wobbly lines into professional results with these sewing machine tips for sewing faster. For peak performance, choosing the right sewing machine foot for your specific needs is vital to achieve.
Zipper Foot
Narrow-profile zipper feet excel at creating precise straight seams near edges and bulky areas.
Their design allows close stitching while maintaining visibility and control.
Research shows zipper feet enhance seam accuracy near raised surfaces by reducing deviation.
Here are five key zipper foot techniques:
- Zipper Installation – Position foot to stitch close to zipper teeth for professional results
- Foot Adjustment – Move foot left or right for ideal needle positioning
- Sewing Zippers – Use narrow profile to navigate tight spaces around zipper tape
- Zipper Types – Adapt technique for invisible coil or metal zippers
- Foot Techniques – Leverage narrow design for topstitching and edge seaming
This sewing tool transforms challenging seams into manageable tasks through improved precision.
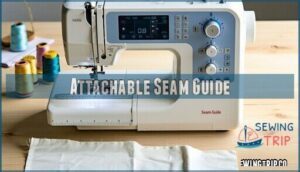
Attachable Seam Guide
Magnetic and screw-on seam guides attach to your machine bed creating a physical barrier for consistent fabric alignment.
These adjustable tools position anywhere along your seam allowance helping maintain straight stitch accuracy.
The guide acts as a fence keeping fabric edges aligned during sewing which improves seam pressing and edge finishing results.
- Seam Allowance Control: Guide positions adjust for any width delivering precise stitch control for professional top stitching and fabric guides consistency.
Changing Needle Position
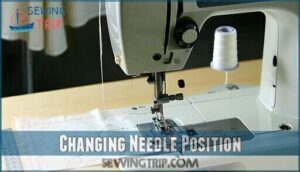
The needle position setting gives you control over where your thread pierces the fabric. You can adjust it left or right to create perfect seam allowances and achieve sewing precision that transforms amateur work into professional results.
The following table outlines the best uses for different needle positions:
| Needle Position | Best Use | Seam Allowance |
|---|---|---|
| Left | Wide seams | 5/8" standard |
| Center | General sewing | 1/2" versatile |
| Right | Narrow hems | 1/4" precise |
| Far Left | Topstitching | 3/4" decorative |
| Far Right | Edge finishing | 1/8" clean |
Combined with proper thread tension and stitch length adjustments, needle alignment becomes your secret weapon. This technique works especially well on fabric stretch materials where sewing angles matter most. Master needle threading basics first, then experiment with different sewing needles for various thread selection needs.
Tips for Faster and Better Sewing
While mastering sewing techniques takes practice, implementing smart strategies can dramatically boost your sewing productivity and precision. Professional sewists know that sewing efficiency starts with proper workspace organization and strategic planning.
Sewing Efficiency: Keep tools within arm’s reach and batch similar tasks together. This approach reduces setup time by 25% and maintains steady workflow.
Fabric Selection: Choose beginner-friendly materials like cotton or linen. These fabrics cooperate better during stitching and improve sewing outcomes.
Time Management: Plan projects in advance and prepare multiple bobbins. Wind several bobbins with required thread colors to avoid interruptions.
Sewing Precision: Use marking tools and check measurements frequently. Press seams as you go for professional results.
Thread Control: Maintain proper machine tension and change needles every 8 hours. Fresh needles prevent skipped stitches and fabric damage.
These sewing hacks transform ordinary projects into polished creations. Focus on building consistent habits rather than rushing through steps. Your sewing guide to success involves balancing speed with quality through deliberate practice and smart sewing tips. By applying sewing efficiency tips, sewists can substantially enhance their overall performance and productivity.
Frequently Asked Questions (FAQs)
How to get better at sewing fast?
Lightning-fast improvement comes through daily practice with simple projects.
Start with straight seams on cotton fabric. Use sharp scissors and good lighting.
Practice basic stitches like backstitch and slip stitch. Take classes for expert guidance to achieve lightning-fast improvement.
What is the most important rule of sewing?
Measure twice, cut once.
This golden rule prevents costly fabric mistakes and saves time.
You can’t unsew a bad cut, but careful measuring guarantees your pieces fit perfectly together from the start.
What is the hardest thing about sewing?
Precision is the toughest challenge you’ll face. Getting consistent seam allowances, matching points perfectly, and achieving professional-looking curves demands patience and practice that many sewers find frustrating.
What are the big 4 in sewing?
The "Big 4" in sewing refers to the major pattern companies: Simplicity, McCall’s, Butterick, and Vogue.
These companies dominate the home sewing market with their extensive pattern catalogs for clothing and crafts.
What fabric weight works best for beginners?
Think of fabric weight as your training wheels – medium-weight cotton acts as your steady guide.
You’ll want cotton, linen, or flannel around 4-6 ounces.
These forgiving fabrics won’t slip or fray easily while you’re learning.
How do I choose the right thread?
Choose thread that matches your fabric’s weight and color. Cotton thread works for most fabrics. Polyester offers strength and stretch. Match thread color to fabric’s dominant hue for invisible seams.
When should I use different needle types?
Like a craftsman selecting the perfect chisel for delicate woodwork, you’ll switch needles based on fabric weight and thread thickness.
Use heavy needles for denim, fine needles for silk, and specialized needles for stretch fabrics.
How do I fix uneven seam allowances?
Use seam guides or presser foot markings to maintain consistent seam allowance width.
Mark fabric edges with washable fabric marker.
Measure frequently while sewing.
Press seams flat to check evenness before trimming, ensuring consistent results.
Whats the proper way to press seams?
Press seams with proper heat setting for your fabric.
Always press in the direction you sewed, not against the grain.
Use steam sparingly and press rather than drag the iron to avoid stretching fabric.
Conclusion
Ironically, rushing through projects won’t help you learn how to sew better.
The fastest path to improvement requires slowing down and mastering fundamentals first.
Focus on consistent stitching, proper fabric preparation, and investing in quality tools.
Practice straight lines with tape guides and test settings on scraps before starting projects.
Press seams as you work and maintain sharp scissors.
These basic techniques separate amateur results from professional-looking finished pieces, and are crucial for achieving consistent stitching and overall quality.

