This site is supported by our readers. We may earn a commission, at no cost to you, if you purchase through links.

Sew along the first fold line, keeping your stitches even. Fold the binding over the raw edge, tucking it around to the back.
For single-fold binding, stitch in the ditch on the front. For double-fold, secure with a topstitch close to the edge.
Press everything flat for a polished finish. Curves? Clip the edges slightly for smooth results. Once you master this, your edges will look like a pro’s secret weapon.
Table Of Contents
- Key Takeaways
- What is Bias Binding?
- Types of Bias Binding
- How to Sew Single Fold Bias Binding
- How to Sew Double Fold Bias Binding
- How to Join Bias Binding Ends
- Tips for Sewing With Bias Binding
- Making Your Own Bias Tape
- Applying Bias Tape to Continuous Circles
- Practice Projects for Sewing Bias Binding
- Frequently Asked Questions (FAQs)
- Conclusion
Key Takeaways
- Cut bias strips at a 45-degree angle for flexibility, especially on curves, and use a bias tape maker for smooth folding.
- Pin and clip carefully, sew along the crease, then fold and press the binding over the edge for a clean finish.
- For curves, make small clips in the seam allowance to prevent puckering and press with steam for smooth results.
- Join binding ends by cutting at 45 degrees, stitching them together, pressing flat, and refolding for a seamless look.
What is Bias Binding?
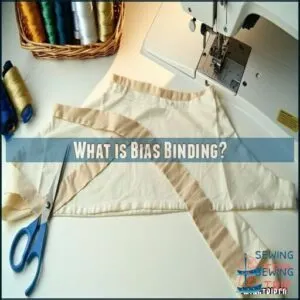
Picture turning raw, fraying fabric edges into crisp, polished masterpieces—that’s the magic of bias binding. Simply put, it’s a strip of fabric cut at a 45-degree angle to the fabric grain (called the bias). Why the angle? It gives the fabric stretch and flexibility, making it perfect for tricky curves or uneven shapes like necklines and armholes.
Transform raw fabric edges into polished perfection with bias binding—flexible, stretchy, and ideal for curves and unique shapes.
Bias binding comes in two main binding types: single-fold (lighter, for seams) and double-fold (more durable, fully encasing edges). You’ll find pre-made options in cotton, satin, or blends, but making your own lets you match or contrast colors perfectly.
Learning to sew bias binding opens up a world of sewing techniques. Neatly binding fabric edges, finishing seams—bias tape smooths it all out, giving your projects that store-bought look. Whether batch-sewing or experimenting, it’s a simple way to elevate your work beautifully! Mastering continuous bias techniques can greatly improve the overall quality of your sewing projects.
Types of Bias Binding
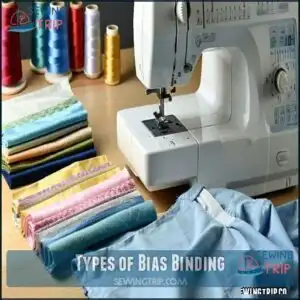
In the context of bias binding, you’ll typically work with either single fold or double fold options.
Understanding the difference helps you pick the right type for neat, durable edges on your projects.
Single Fold Bias Binding
Single fold bias binding is an excellent choice when you want to bind fabric edges neatly while keeping things lightweight and clean.
It’s especially handy for curved areas like necklines or armholes where precision matters.
To sew bias binding, start by pinning the unfolded edge of your bias tape to the fabric’s raw edge, right sides together.
Use these steps for success:
- Prep the tape: Steam press your bias tape to shape it for curves.
- Align carefully: Match the inner crease of the tape with the fabric edge.
- Stitch slowly: Sew along the crease with a short stitch (1.5-2mm for control).
- Handle corners: Clip into your binding for a sharp pivot.
- Press and finish: Fold over edges, then hand-stitch for polished results.
Practice these sewing tips, and you’ll master binding fabric edges in no time!
Double Fold Bias Binding
Double fold bias binding is your go-to for polished results. It’s like putting the finishing touches on a fancy gift—clean, seamless, and totally professional-looking.
To start, align the wider side of the binding underneath your fabric edge. Pin or clip it for stability—double fold clips are great here because they skip pinholes. Trim any extra fabric for a clean fit, then sew along the tape’s crease line for that tidy folded edge finish.
Wrap the binding over the raw edge, tucking everything neatly inside. Press as you go—ironing does wonders for sharp folds and crisp lines. For curved seams, snip tiny notches into the edge to help it flex better.
Here are some quick tips:
- Choose wider tape for fewer struggles with bulky fabrics.
- Keep folds clean with lots of pressing.
- Notches = smoother curves.
- Clips beat pins every time, ensuring a more professional-looking finish with clean and seamless results.
How to Sew Single Fold Bias Binding
Sewing single fold bias binding might seem tricky at first, but with the right steps, you’ll get clean, professional edges.
Start by carefully marking and pinning the binding in place, then sew and press it for a polished finish.
Marking and Pinning
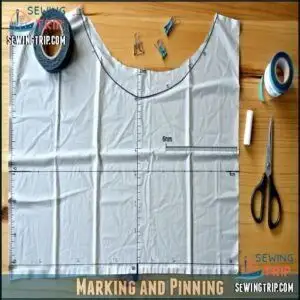
Getting flawless edge alignment starts with accurate fabric marking. Grab fabric chalk or a disappearing ink pen and mark a guide 6mm from the raw edge. This simple step sets you up for smooth sewing bias strips later.
Now for pin placement—keep those pins perpendicular to the bias tape edge and spaced no more than 5cm apart. This trick stabilizes the fabric and prevents awkward shifts while sewing edges.
If you’re working with curves, clip into the seam allowance at small intervals. This lets the fabric spread evenly, avoiding puckering.
Taking a few minutes to handle marking and pinning carefully will make sewing a breeze. Think of it as the prep that guarantees perfection! It involves careful marking and pinning to ensure a smooth process.
Sewing and Pressing
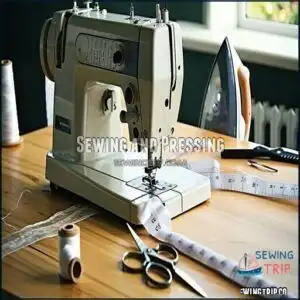
Once your fabric preparation is done and the bias tape is pinned, it’s time to sew! Align your machine’s needle with the crease. Use a straight stitch and keep a steady pace, especially on tricky curves. Small, careful adjustments will prevent puckering and guarantee smooth edge finishing.
After stitching, grab your pressing tools to shape the bias tape. Set your iron to a suitable heat, press the binding over the raw edge, and smooth out any wrinkles. Use the iron’s tip for tight corners.
Here’s how to achieve neat edges:
- Use a press cloth to protect delicate fabrics.
- Press without dragging to avoid distortion.
- Work methodically around curves.
- Check the seam allowance consistency.
- Finish by ironing from the right side to ensure a professional finish and prevent errors in seam allowance.
How to Sew Double Fold Bias Binding
Double-fold bias binding creates a clean, durable finish that’s perfect for quilts, garments, and more.
You’ll pin it carefully, trim excess fabric, and follow simple folding techniques to guarantee smooth edges every time.
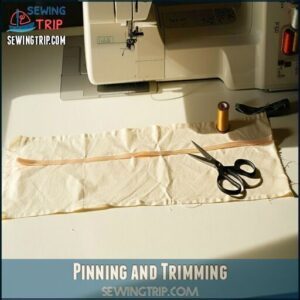
Pinning and Trimming
Accuracy takes center stage when you align your bias tape to the fabric’s edge. This step sets the foundation for clean, professional results in sewing bias tape.
Use flathead pins or binding clips to secure the tape snugly, spacing them about an inch apart to keep everything steady during sewing. Before reaching for scissors, check that your tape lays smooth and straight for proper edge preparation.
Now, it’s time to trim. Maintain at least a 1/4-inch seam allowance, especially around challenging curves. Keep folds neat and crisp to guarantee fold precision when sewing later. For those tricky corners, sharp scissors are non-negotiable for smooth curve management.
- Pin securely to avoid shifting.
- Trim with clean, intentional cuts.
- Maintain a consistent seam allowance.
- Guarantee folds stay sharp and aligned.
A little patience goes a long way here!
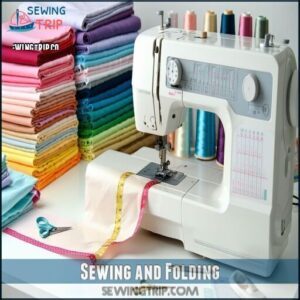
Sewing and Folding
When working on double fold bias tape, folding techniques are your best ally.
Carefully fold the bias strips over the seam allowance to enclose raw edges completely.
A folding tool can help you create clean, sharp folds, but pressing with an iron is just as effective—don’t skip this step!
To secure the bias tape, sew along the crease where the folded edge overlaps.
Go slowly, especially on curves.
Clip the seam allowance every few inches on curves to prevent puckering and help the fabric lie flat.
Sewing tools like pins or clips will keep everything in place as you work.
These simple sewing techniques can transform your edge finishing into a polished, professional-looking result.
Mastering the bias tape technique is essential for achieving high-quality finishes on various sewing projects.
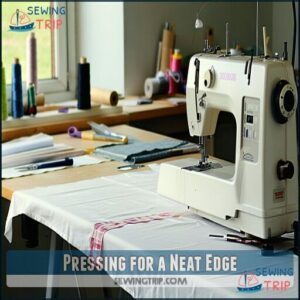
Pressing for a Neat Edge
Pressing is the secret sauce for flawless edge finishing.
After sewing, grab your iron and set it to the fabric’s recommended heat.
Use a pressing cloth to protect delicate fabrics and avoid shine.
Focus on the seam allowance, ironing directly where the bias tape folds over the edge.
This will sharpen the folds and create a precise, polished look.
For tricky curves, take it slow.
Work in small sections, gently easing the fabric to shape it smoothly.
Finger pressing before using the iron can boost control and guarantee perfect folds.
Don’t rush—let the fabric cool before moving it.
Pressing sets your folds and locks in that professional finish.
With these binding tricks, you’re one step closer to sewing mastery!
How to Join Bias Binding Ends
To join bias binding ends neatly, start by cutting the ends at a 45-degree angle for a seamless finish.
Fold and secure the excess binding inside to hide raw edges before sewing, which helps to achieve a seamless finish.
Cutting and Securing Ends
Neatly joining bias tape ends can take your sewing skills up a notch.
Start by mastering End Trimming: cut both ends of the bias binding at a 45-degree angle using sharp scissors or a rotary cutter. This Bias Cutting guarantees the ends fit like perfect puzzle pieces, avoiding lumps or gaps.
Next, use clips or pins to hold the Folded Edges securely in place—this is one of the best Securing Tips to prevent shifting. Sew the ends together with short, precise stitches, aligning edges carefully.
Once stitched, press the seam open to facilitate smooth Edge Finishing. For polished results when sewing bias binding, don’t rush; the effort is worth it.
- Tip: Always trim dog-ears before pressing seams.
Folding to Hide Excess Binding
When it’s time to tackle excess fabric in your bias tape, folding is your secret weapon for a polished look. Start by folding the bias tape lengthwise, making sure the raw edges are enclosed. Secure it with pins to hold everything steady.
For a professional-looking Folded Edge Finish, tuck the seam allowances inside carefully. Smooth out the edges as you go—think of it like wrapping a gift neatly. Whether you’re doing a Binding Closure or finishing with a double fold, make certain Seam Concealment is tidy.
Focus on Edge Folding techniques to achieve Hidden Stitches that keep your sewing bias tape strips flawless. Neat folds make all the difference!
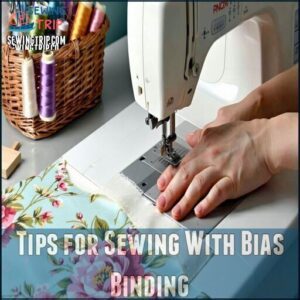
Tips for Sewing With Bias Binding
When sewing with bias binding, choosing the right width and material can make all the difference for a smooth finish.
Take your time on curves—clip seam allowances and under-stitch to keep everything neat and secure.
Recommended Width and Material
Finding the perfect binding widths and fabric choices can make sewing more fun.
Opt for flexible options like 1/2-inch or 3/4-inch bias tape for smooth fabric edge finishing. Lightweight cotton options are versatile, while satin alternatives add flair.
- Use cotton or linen for everyday projects.
- Try silk for edgy accents.
- Match fabric weight to your garment.
- Avoid bulky materials—they’ll fight curves.
- Pre-test fabrics to check their stretch.
Using a bias tape maker can substantially improve the quality of your bias binding. Stay mindful of your binding strip width and sewing precision. See the difference a thoughtful material selection makes!
Starting and Clipping Curves
Curved seams can feel tricky, but with a few sewing bias binding techniques, they’re manageable.
To handle sewing curves, start by securing the bias tape along the edge with small pins or clips.
For smooth edge finishing, use curve clipping—make tiny snips into the seam allowance, just shy of your stitching line.
This lets the bias tape bend naturally without puckering, and by lightly folding the tape as needed, you can adjust as you sew.
Think of it like coaxing the fabric to cooperate, and keep your pace steady, and soon sewing corners and curves will feel like second nature.
Under-stitching for a Neat Look
Understitching is one of the best sewing tricks for smooth, professional results with bias tape. It keeps folded edges crisp and prevents bias tape from rolling over.
Follow these steps for flawless edge stitching:
- Sew the bias tape to your fabric, aligning raw edges neatly.
- Press the seam allowances toward the bias tape.
- Stitch close to the folded edges, catching the seam allowance underneath.
- Finally, press the tape flat for seamless, polished edges.
This simple technique makes sewing bias binding and finishing seams a breeze, providing smooth results!
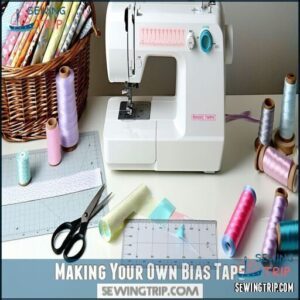
Making Your Own Bias Tape
Making your own bias tape lets you choose the perfect fabric and width for your project.
With a few tools and some careful cutting, you’ll have customized binding ready in no time.
Gathering Supplies and Fabric
You’re ready to make your own bias tape, so let’s get your sewing essentials in order. Start with fabric selection. Lightweight cotton works best—solids or small prints make for versatile bias tape. Cut your fabric at a 45-degree angle to guarantee flexibility, especially around curves.
Next, gather your sewing tools. Keep fabric scissors, a rotary cutter, cutting mats, and pins nearby. For precision, an 18mm bias tape maker is a game-changer. Don’t forget tailor’s chalk for marking straight, grain-perfect lines before cutting.
Choose your thread wisely—it should match or complement your project. This is where creativity meets practicality. Simply preparing your fabric and sewing supplies thoughtfully now guarantees smoother stitching and polished edges later. It’s like setting the stage for sewing success! Using a bias tape maker can greatly improve the quality of your bias tape.
Using a Bias Tape Maker
A bias tape maker is a game-changer for neat and quick results in your sewing projects. This folding tool guarantees clean edges and saves time.
Using a high-quality bias tape maker from a reliable Bias Tape Maker can substantially improve your sewing experience.
Here’s how to use it:
- Pick the right size bias tape maker for your project.
- Cut fabric strips on a 45° angle and thread them through the tool.
- Gently pull the fabric as it folds while pressing the edges with a hot iron.
- Let the folded tape cool for crisp results.
- Practice with various widths for precise bias tape sewing every time.
The key to achieving professional-looking results is to follow these steps carefully and use the right tools, making the sewing experience more enjoyable.
Cutting and Joining Strips
When creating your own bias tape, strip preparation is key. Start by cutting your fabric into 1 ½-inch strips on the bias—that perfect 45-degree angle to the fabric grain. This facilitates flexibility for continuous binding, perfect for curves or mitred corners. Use a rotary cutter for clean edges and steady hands—precision counts here.
To join strips, align them at a 90-degree angle, right sides together. Pin carefully, sewing with a ¼-inch seam allowance. Always backstitch for durability. Once joined, press the seams open with low heat to avoid distortion.
| Step | Tool Needed | Pro Tip |
|---|---|---|
| Cutting Strips | Rotary Cutter | Use a ruler for straight edges. |
| Aligning Strips | Pins/Clips | Match grainlines for accuracy. |
| Sewing Seams | Sewing Machine | Backstitch for added strength. |
| Pressing Seams | Iron and Board | Crisp seams ensure neat folding. |
With practice, you’ll master cutting and joining strips like a pro!
Storing Bias Tape
Keeping your bias tape organized saves you time and frustration during sewing projects.
Use these clever ideas for storing bias tape:
- Wrap bias tape rolls neatly around bobbins or cardstock to prevent tangles.
- Store them in labeled storage boxes or organizer systems for easy access.
- Use tape dispensers for hassle-free unraveling.
- Avoid over-folding by using gentle folding techniques to prevent creases.
Properly cutting the bias tape strips is essential for a professional finish.
With proper storage, your bias binding supplies stay tidy and ready for any project.
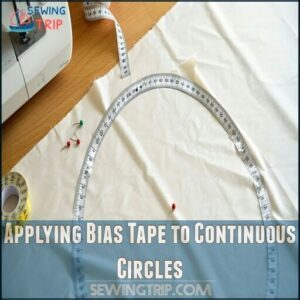
Applying Bias Tape to Continuous Circles
Applying bias tape to a continuous circle might seem tricky, but it’s all about technique and patience.
With careful pinning and smooth stitching, you’ll create a clean, polished edge that fits perfectly around curves.
Measuring and Joining Bias Tape
To get bias tape just right, measuring and joining strips takes care and precision.
Use a tape measure along the edge you plan to bind. Cut each strip end at a 45-degree angle, then sew them together for a smooth, continuous strip.
- Measure accurately to avoid shortages.
- Align edges perfectly before sewing.
- Pin first to keep strips in place.
- Press seams flat for a smooth finish.
- Test stretch on scrap fabric beforehand.
Pinning and Sewing The Tape
Align the bias tape with your fabric edge, ensuring smooth, wrinkle-free tape alignment.
Secure it with pins along the curve—keep the tape taut but not stretched. Use handy sewing tools for tricky spots.
Stitch near the fold using a sewing machine binding technique and straight stitches for consistent edge finishing.
Topstitch for durability—practice makes mitered corners flawless!
Pressing and Refolding
Once you’ve sewn the tape, guide the seam allowance toward the bias binding. Use pressing tools like a steam iron to smoothen and shape the tape neatly over edges, embracing natural curves.
Protect delicate fabrics with a pressing cloth as you refold and crease the tape.
- Press for perfection: Make certain smooth, lump-free folds by ironing gently.
- Mind the seam allowance: Let it sit flat within the binding.
- Master fold techniques: Refold the tape to sandwich raw edges, achieving polished edge finishing.
Edgestitching for a Finished Look
After pressing, it’s time for edgestitching to secure your bias tape.
Position the fabric so the needle runs snugly along the tape’s inner edge.
This step enhances stitch quality and edge finishing.
Use steady hands and adjust stitch length for polished results.
Topstitching with vibrant threads can add personality, blending function with flair.
Precision matters—smooth sewing edges neatly guarantees a professional touch.
Mastering these binding techniques transforms simple edges into standout designs, making your sewing bias binding tutorial projects look clean and intentional.
To achieve professional-looking seams, understanding decorative edges is essential for any sewing project.
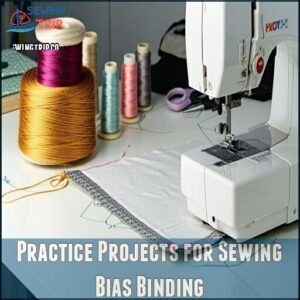
Practice Projects for Sewing Bias Binding
Practicing bias binding on small projects helps you build confidence and perfect your technique. Start with simple tasks like necklines or sleeves to master smooth edges and clean finishes.
Neckline Practice – York
When perfecting curved edges, the York neckline is an ideal practice ground for sewing bias binding. It lets you apply varied bias binding methods while experimenting with bold designs.
Choose lightweight cotton lawn or voile for smooth handling and vibrant results. Create visual interest using bias strips in chevron patterns for the straight front or scalloped designs along the shoulders.
Master small techniques like topstitching the front for clean lines or blind hemming the shoulders for an invisible finish. Adjusting the neckline depth or binding sleeve openings adds customization to your sewing project.
- York Techniques to try: Mix contrasting or patterned bias tape for flair.
- Sewing Tips: Press each fold for crisp edges.
- Fabric Choice: Lightweight materials handle curves best.
Adding Contrast – Kenedy’s Neckline and Sleeve Hem
Adding contrast to Kenedy’s neckline and sleeve hem is an easy way to elevate your sewing game. Start by thinking about contrast binding: a bold orange bias tape on navy fabric creates drama, while cream on blush feels elegant.
Pair your fabric wisely—lightweight cotton lawn is perfect for clean, crisp edges and smoother sewing curves.
For a polished look, use narrow double-fold bias binding to enhance the neckline and armholes. Try playful hemming techniques like zigzag or decorative stitches to add personality. Want to go extra? Stitch beads or pearls along the edge for unique edge finishing.
Here’s your guide:
Focus Tips Why It Works
Color Choices
Edge Finishing
Hem Details
Frequently Asked Questions (FAQs)
How do you sew bias binding?
Imagine taming fabric edges like a pro.
Align the bias binding’s raw edge to your fabric, right sides touching, and sew.
Fold it over, press, and sew again, ensuring a neat, polished finish.
How to sew the final pieces of bias binding together?
To join the final bias binding pieces, overlap the ends, cut at a 45° angle, and stitch them together.
Open the seam, press flat, refold, and sew the binding down for a seamless finish.
What is bias binding?
Bias binding is like the stretchy yoga pants of sewing—cut on the fabric’s bias, it flexes around curves and edges.
It’s perfect for finishing raw edges, adding durability, and giving projects a polished look.
How do you fit a bias binding?
To fit bias binding, align its unfolded edge with your fabric’s edge, right sides together.
Sew along the crease, fold it over the edge, and secure it with another stitch.
Take your time—it’s worth it!
How to attach a bias binding?
Pin the bias binding along the edge, raw sides together.
Stitch along the fold, wrap it over, and pin again.
Sew close to the edge.
Remember—slow and steady wins the sewing race!
How to sew bias binding trim?
Fold the bias binding around your fabric’s edge, aligning raw edges.
Sew along the first fold, then flip it over.
Secure the binding with another seam, ensuring it hugs the edge snugly for a clean finish.
How to sew bias binding on seams?
Align the binding’s raw edge with the seam, right sides together.
Sew along the crease, fold it over the seam, and press.
Stitch again to secure, ensuring smooth edges without puckering for a polished finish.
What is the formula for bias binding?
Think of bias binding like a bridge that connects your fabric’s edges.
To calculate its width, multiply the finished edge by
For length, total edge measurement divided by binding width guides fabric needed.
How do I prevent puckering on curves?
Ease the bias binding around curves by making small v-shaped clips in the seam allowance.
Go slowly as you sew, adjusting the fabric gently.
Pressing carefully with steam afterward helps smooth any stubborn puckers.
Can I use bias binding on stretchy fabrics?
Yes, you can use bias binding on stretchy fabrics.
Its flexibility handles curves beautifully.
Just stabilize the stretch fabric with a walking foot or lightweight interfacing, and avoid pulling while sewing for a smooth finish, using bias binding to ensure the best results.
Conclusion
Mastering how to sew bias binding might seem tricky at first—kind of like taming an unruly thread—but with practice, it’s surprisingly manageable.
Start slow, stay precise, and trust the process. Whether you’re sewing single-fold for subtle details or double-fold for sturdy edges, each step builds in the direction of those professional results.
Don’t forget to clip curves and press everything neatly. With time, bias binding won’t just finish your projects—it’ll elevate them.
Grab some fabric and start practicing today!

