This site is supported by our readers. We may earn a commission, at no cost to you, if you purchase through links.
To make continuous bias binding from a rectangle, you’ll need to follow a few steps:
First, prepare your materials by pre-treating the fabric and washing it according to the appropriate method for its fibers.
Then, cut your fabric into a parallelogram shape and mark the left and right sides.
After that, sew the rectangle in half along the bias line, fold one half over the other, and sew along the folded edge.
Press the seam open and cut the folded rectangle into bias strips.
Finally, feed the strips through a bias tape maker, pulling slowly and pressing as you go along for a neat finish.
Table Of Contents
Key Takeaways
- Pre-treat the fabric to prevent unexpected shrinkage during the cutting and sewing process.
- Cut the fabric into a parallelogram shape and mark the left and right sides.
- Sew the fabric in half along the bias line, fold one half over the other, and sew along the folded edge.
- Feed the strips through a bias tape maker, pulling slowly and pressing as you go along for a neat finish.
How to Make Continuous Bias Binding From a Rectangle?
To make continuous bias binding from a rectangle, you can use a technique that involves sewing two seams and cutting the fabric twice. This method can be quicker and more efficient than traditional methods, especially when you need a long piece of binding.
Materials and Preparation
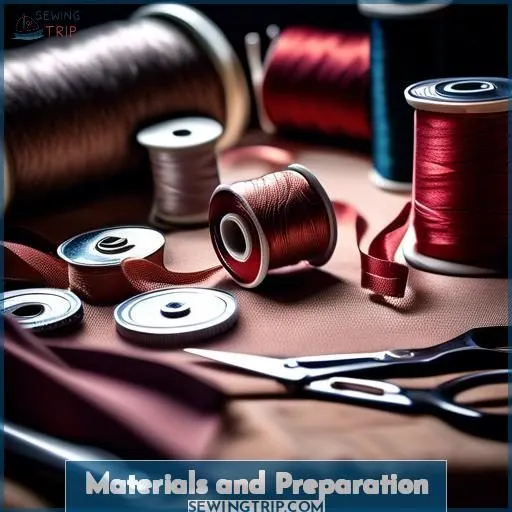
Before embarking on your project, it’s imperative to pretreat your fabric to obviate unexpected shrinkage during the cutting and sewing process. This step safeguards the preservation of your project’s intended dimensions and form.
To pretreat your fabric, you can either subject it to machine washing or hand washing. For cotton fabrics, which are susceptible to shrinkage, it’s prudent to launder them in tepid water and dry them at an elevated temperature to maximize shrinkage. If your fabric is a natural fiber such as linen or wool, it’s advisable to launder it in scalding water and machine dry it before commencing your project.
For delicate fabrics like silk or those that can only be dry-cleaned, it’s paramount to ascertain the preshrinking method on a remnant of the fabric initially to guarantee it doesn’t suffer water spotting or moisture damage. Some fabrics may not necessitate preshrinking, so it’s pivotal to adhere to the fabric’s care instructions.
Moreover, if your fabric exhibits a tendency to fray, you can serge or apply a zigzag finish to the cut edges to forestall fraying in the washer and dryer.
Upon completion of the preshrinking process, you can proceed with the cutting and sewing process, confident that your project will retain its intended dimensions and form.
Cutting
Alright, let’s slice into the heart of bias cutting. Imagine your fabric as a trusty sidekick, prewashed to dodge any future shrinkage surprises. Lay it out, smooth as a lake at dawn, ready for the rotary cutter’s dance.
Now, fold that square into a triangle, press it like you mean it, and mark your left and right—A and B. With a swift cut along the diagonal, you’ve got a parallelogram that’s the starting block of your binding strip racetrack.
Marking Lines
To mark the lines for cutting bias binding from a rectangle, follow these steps:
- Open the fabric layer and lay it flat on a table with the wrong side up.
- Measure and draw parallel lines at 1” increments (or the desired width), starting from the ironed crease.
- Use a clear plastic ruler and tailor’s chalk (or fabric pencil) for marking.
- Draw as many strips as needed for the project.
Remember to use a ruler for accuracy and choose a chalk or pen that provides a clear line for marking. If you prefer a pen, make sure it’s permanent and won’t smudge or fade during the cutting process.
When measuring bias, it’s essential to find the fabric’s true bias and mark it with a straight line. The fabric bias is located diagonally, at a 45-degree angle from the crosswise and lengthwise edges. To determine the exact bias, fold the crosswise edge over so that it’s aligned parallel to the selvage edge (or the lengthwise grain). Iron the diagonal folded edge to crease the bias line. This crease line will serve as the initial starting point for measuring and marking the bias strips.
Sewing
To make continuous bias binding from a rectangle, follow these steps:
- Cut the rectangle into two equal halves along the bias line.
- Fold one half over the other, aligning the edges.
- Sew along the folded edge.
- Press the seam open.
- Cut the folded rectangle into bias strips.
To make the bias strips continuous, sew them together end-to-end, ensuring that the folded edges align. You can use a bias tape maker to create a neat, finished edge.
Remember to use a rotary cutter and mat to cut the bias strips, rotating the tube as needed. This method allows you to create long lengths of bias binding without the need for sewing individual strips together.
Sew Along the Drawn ¼” Seam Line Where Numbers Match
Sew along the drawn ¼” seam line where numbers match to create continuous bias binding. Press the seam allowance open and flat before cutting along the marked lines, starting at zero. Use a single fold bias binding for a neat finish.
Shorten Stitch Length and Manipulate Tube as Sewing
When stitching your fabric binding, it’s imperative to reduce the stitch length. This subtle adjustment transforms the process, particularly when you’re grappling with those bias edges into compliance. Here’s the rationale:
- It averts seam beginnings from escalating into epic battles.
- It minimizes thread remnants, maintaining a tidy work environment.
- It empowers you to maneuver small pieces with feline agility, unlocking a myriad of pattern options for various projects, ranging from quilt binding to baby bib binding.
Press Seam Allowance Open and Flat
To press seam allowances open and flat, follow these steps:
- Set the seam: Press the seam flat as it was sewn, allowing the stitches to sink into the fabric and smoothing out any tension issues.
- Determine the pressing direction: Press the seam to the darkest fabric to avoid shadowing on the lighter fabric.
- Press from the right side: Press from the right side of the fabric to avoid creating a pleat at the seam line.
- Press the seam open: Once the seam is flat, press it open to create a seam allowance.
Remember to use the correct setting on your iron to prevent damaging the fabric.
Finishing
To make continuous bias binding from a rectangle, follow these steps:
- Cut along the marked lines, starting at zero.
- Feed the strip through a bias tape maker.
- Pull slowly and press as you go along.
By following these steps, you can create a continuous bias binding that’s useful for binding curves and adding a decorative finish to your quilt.
Cut Along the Marked Lines, Starting at Zero
To cut continuous bias binding from a rectangle, follow these steps:
- Determine the width of the bias binding: Multiply the desired finished width of the binding by 2 to get the width of the binding strip. For example, if you want a 1-inch finished width, you need a 2-inch wide binding strip.
- Cut the rectangle: Lay your fabric square flat on a cutting mat, right side down. Cut the predetermined size square from your binding fabric. In our example, we need to cut a 21-inch by 21-inch square.
- Fold the rectangle: Fold the upper left corner down to meet the lower right corner to create a triangle. Press the fold. Then, fold the lower left corner up to meet the upper right corner. You’ll now have a second fold at the left and should still have a triangle in front of you.
- Cut along the folded edges: Using a rotary cutter and mat, cut along the folded edges of the triangle to create the bias strips. Make sure to cut on the true bias angle, which is the angle between the two folds.
- Join the strips: Sew the bias strips together end to end using a standard sewing machine foot. You can also use a rotary cutter and mat to cut the strips to the desired width.
- Press the seams: After sewing the strips together, press the seams open to guarantee the binding lies flat.
- Attach the binding: Fold the binding in half lengthwise, with the wrong sides together. Press the fold, taking care not to stretch the binding. Then, attach the binding to your project using a sewing machine or by hand.
Remember to use a rotary cutter and mat for cutting the binding strips and to press the binding well before attaching it to your project. This will help ensure a neat and professional finish.
Feed the Strip Through a Bias Tape Maker
Feed the strip through a bias tape maker to create continuous bias binding for your rectangle or square fabric. Use a quilting ruler to mark the desired width and offset joining straight edges for accurate results. Sew seam allowances and press open the seam. Pull slowly and press as you go along for a neat finish.
Pull Slowly and Press as You Go Along
To create continuous bias binding from a rectangle, you can follow these steps:
- Calculate the Bias Binding: To determine the fabric size needed for your bias binding, you can use the standard formula, which states that the fabric square size is equal to the square root of the area of your bias tape, plus 1/2 for seam allowance.
- Cutting Bias Strip: Cut along the marked line to create a continuous long strip of bias fabric. Make sure to use a ruler and mark the lines at the desired bias tape width.
- Sewing Strips Together: If you need more binding length, you can sew long strips of fabric on the bias and then feed them through the bias tape maker.
- Finishing: Once you have your continuous bias binding, you can press it into a single or double fold and sew it to your project.
Remember to use sale or clearance fabrics for binding and add ¼ to the strip width for projects with batting.
Hints and Tips
To make continuous bias binding from a rectangle, you can follow these tips:
- Use sale or clearance fabrics for binding to save money.
- Add ¼” to the strip width for projects with batting to ensure proper coverage.
- Baste edges together before attaching binding to prevent fraying and guarantee accuracy.
These tips will help you create a neat and professional finish for your quilting projects, while also being cost-effective and efficient.
Use Sale or Clearance Fabrics for Binding
Concerning fabric choice for binding, contemplate employing sale or clearance fabrics to economize without sacrificing quality. These fabrics can be equally appropriate for mass binding as more expensive alternatives. To create unending bias binding from a rectangle, you can utilize square or rectangle fabric. If your undertaking entails batting, augment ¼” to your strip width to warrant adequate coverage.
Add ¼” to Strip Width for Projects With Batting
To guarantee precision and uniformity in your quilt blocks, it’s advisable to add ¼ to the strip width for projects that include padding. This modification offsets the thickness of the padding material and assists in maintaining consistency in the completed quilt blocks.
Baste Edges Together Before Attaching Binding
Before attaching binding, tack edges together to guarantee a seamless fit. This step is pivotal for fabric preparation and aids in attaining the targeted bias tape width and seam allowance. Tacking additionally improves productivity and precision in the binding process.
Alternative Methods
If you’re looking for alternative methods to make continuous bias binding from a rectangle, consider these options:
- Prewash or Preshrink Fabric: Before cutting, prewash or preshrink your fabric to prevent shrinkage and guarantee accurate measurements.
- Use Sale or Clearance Fabrics: Take advantage of discounted fabrics to save money on your binding.
- Add ¼” to Strip Width for Projects With Batting: If your project involves batting, add ¼” to your strip width to account for the extra bulk.
- Baste Edges Together Before Attaching Binding: This step can help guarantee a more accurate and even binding.
Tools and Equipment
Materials:
- Scissors
- Ruler
- Tailor’s chalk or pen
- Sewing machine
- Bias tape makers
- Rotary cutter and mat (optional)
Equipment:
- Bias tape maker (optional)
Scissors
Scissors are a key tool for quilters, and the choice of scissors can have a large impact on the accuracy and efficiency of your cutting. Here are some tips for using scissors effectively in quilting:
- Fabric Selection: Choose scissors with sharp blades that can easily cut through the fabric you’re working with. For quilting, a pair of sharp dressmaker’s shears is usually enough for most tasks.
- Cutting Technique: When cutting fabric, always cut away from your body to avoid accidental cuts. Keep the lower blade of your scissors in contact with the table for stability, and use smaller scissors, like embroidery scissors, for curves and corners.
- Rotary Cutter Use: If you’re using a rotary cutter, remember to use it together with a ruler and a cutting mat to make sure accurate cutting. Always use the same ruler for a project, or at least the same brand, to avoid differences in measurements.
- Bias Tape Maker: When using a bias tape maker, feed the strip through slowly and press as you go to make sure an accurate and even fold.
- Safety Measures: Always store your scissors in a sheath or case when not in use to prevent accidental cuts. If you’re working with children, invest in a few pairs of sewing safety gloves to protect their fingers.
- Ergonomics: Consider ergonomic scissors with soft-grip handles and a spring-action design that opens the blades after each cut. These can be especially helpful for those with arthritis or those undertaking large projects.
Ruler
In the realm of quilting, a ruler is an indispensable tool for precise cutting and measurement. A ruler with distinct markings for ¼ and ⅛ increments is necessary, particularly when cutting rectangles for quilting and patchwork. Seek rulers that provide half an inch or not, based on your preference. Some rulers, such as the Quiltlines ruler, display unbroken red lines for ¼ and red ‘notches’ on the inch lines. Others, like the Creative Grids ruler, have black numbers for the ‘plus-half’ measurements on two sides and white for the whole numbers on two sides.
When cutting triangles for your quilt, it’s essential to initially cut a square 4⅞ x 4⅞. For those embarking on quilting, these measurements will be used when cutting triangles for your quilt. To create a square (measuring 4 x 4), composed of two contrasting colored triangles, joined diagonally, begin by cutting a square 4⅞ x 4⅞.
When aligning your ruler on fabric, strive to cut along two sides before relocating the ruler. This facilitates more accurate and efficient cutting compared to repeatedly repositioning your ruler or fabric. Utilize any diagonal markings on your ruler as well. They’re invaluable for precisely trimming half square triangles, marking a perfect 45º angle for connecting strips for quilt binding, and numerous other techniques.
Rulers come in diverse sizes and types, such as extensive 6½ x 24½ rulers for cutting long strips from yardage, 6½ x 12½ rulers for squaring up yardage and cutting strips from smaller fat quarters and layer cakes, and 6½ square rulers for squaring up smaller blocks. Creative Grids rulers are renowned for their conspicuous markings and are a popular selection among quilters.
Tailor’s Chalk or Pen
After mastering the ruler, grab your tailor’s chalk or pen. These marking mavens guarantee your bias binding lines are sharp as a tack, leaving no room for uncertainty.
Sewing Machine
In terms of sewing, having a properly functioning sewing machine is essential. The sewing machine is the hub of your sewing station, and its performance can greatly affect the quality of your work. Here are some tips on how to use your sewing machine efficiently:
- Check the needle tension: Adjust the needle tension to make sure that it’s suitable for the fabric you’re working with. A higher tension is typically recommended for lighter fabrics, while a lower tension is better for heavier ones.
- Bobbin winding: Winding a bobbin correctly is critical for proper sewing. Be sure to wind the bobbin in the correct direction, which is clockwise for most machines. Also, make sure you’re using the right type of bobbin for your machine.
- Thread guide: Always use the thread guide on your sewing machine to make sure accurate threading. This will help you achieve consistent stitches and prevent thread tangles.
- Presser foot: Select the correct presser foot for the task. Different feet are designed for different tasks, so make sure you’re using the appropriate one for your project.
- Seam guide: If your machine has a seam guide, use it to help you sew straight lines and maintain consistent seam allowances.
- Sewing speed: Adjust the speed of your sewing machine to match the fabric you’re working with. Slower speeds are typically recommended for thicker fabrics, while faster speeds can be used for lighter ones.
Bias Tape Makers
To create continuous bias binding from a rectangle, you can use a bias tape maker. These tools are designed to fold and press bias strips for you, saving time and effort. They come in various widths, including 1/4, 1/2, 3/4, and 1. To use a bias tape maker, follow these steps:
- Cut your fabric into bias strips, ensuring they’re wide enough for the bias tape maker you have. For example, if you have a 1/2 bias tape maker, cut your fabric strips 1 inch wide.
- Fold the tip of the fabric at a 45-degree angle and feed it into the wider end of the bias tape maker.
- Pull the strip through the bias tape maker, pressing the sides of the tape together as it comes out. This will create single fold bias tape.
- Once you have pulled all the tape through, stop pressing and remove the machine.
- Roll the finished bias tape and store it for later use.
Bias tape makers are a convenient tool for quilters and sewists who want to create their own custom bias tape. They can be found at various retailers, including Joann Fabrics, where they may be on sale or part of a buy-one-get-one-free deal.
Efficiency and Streamlining
Tube piecing, enhanced strip piecing, and other streamlining techniques can make your quilt-making faster, more efficient, and accurate. By mastering these methods, you’ll be able to reduce bias edge stretching and unveil new pattern possibilities.
Tube Piecing: Sewing on Tubes for Flat Pieces
Tube piecing is a game-changer for quilters. By sewing on tubes for flat pieces, you can minimize seam starting, manage small pieces more sanely, and reduce thread clipping. This method is all about efficiency and streamlining your quilt-making process.
Enhanced Strip Piecing
- Efficiency: Minimize seam starting and inaccuracies
- Tube Piecing: Use tubes to sew flat pieces
- Strip Piecing: Manage small pieces more sanely
- Avoid bias edge stretching
- New pattern possibilities
Checkerboarding
To checkerboard your bias binding, you’ll need to cut your fabric on the bias and then sew the strips together. This method allows for more efficient use of fabric and can create unique patterns for your binding. Remember to press the seams open after sewing for a crisp finish.
Gridded Accumulation
After becoming proficient in checkerboarding, delve into gridded accumulation. This technique simplifies the management of small pieces and allows for effective cutting, revealing countless pattern options and novel applications of bias tape.
Shorten-and-widen Maneuver, Multi-tape, Angling, and Rectangulating
To become proficient in the art of continuous bias binding, it’s essential to comprehend and utilize various techniques. One such technique is the shorten-and-widen maneuver. This entails decreasing the width of your binding strips and subsequently increasing them to create a seamless, even edge.
Another technique is multi-tape binding, which involves utilizing multiple strips of binding to create a more stable and secure edge. Angling techniques can also be employed, enabling you to handle bias edges more efficiently.
Finally, squaring tips can help you manage and manipulate your binding strips for ideal results.
Benefits and Results
Making continuous bias binding from a rectangle offers several benefits: it leads to faster, more efficient, and accurate quilt-making, reduces bias edge stretching, and opens up new pattern possibilities.
Faster, More Efficient, and Accurate Quilt-making
By mastering tube piecing and enhanced strip piecing, you’ll streamline your quilt-making process. Tube piecing involves sewing on tubes for flat pieces, eliminating the need for new gadgets.
Strip piecing is enhanced, allowing any angles and minimizing seam starting and inaccuracies. Fabric cutting with seam matching guarantees accuracy. These methods result in faster, more efficient, and accurate quilt-making, reducing bias edge stretching and opening up new pattern possibilities.
Reduced Bias Edge Stretching
Reducing bias edge stretching is like taming a wild fabric beast. Here’s your secret arsenal:
- Use a bias stabilizer
- Apply interfacing
- Spritz with starch
- Embrace steaming and ironing
Master these, and you’ll keep your fabric in line, every time.
New Pattern Possibilities
Experience the joy of pattern exploration with continuous bias binding! Create unique curves, fractional blocks, intricate mosaics, and abstract designs. Set free your creativity and master the art of quilting.
Frequently Asked Questions (FAQs)
What is the difference between continuous bias binding and traditional bias binding?
Continuous bias binding is like hitting two birds with one stone; it creates long strips from a single piece of fabric, unlike traditional bias binding, which requires sewing multiple short strips together. Efficiency at its finest!
How does the technique of making continuous bias binding from a rectangle differ from the method of making it from a square?
To make continuous bias binding from a rectangle, you’ll need to follow a slightly different process compared to making it from a square. Here’s a step-by-step guide:
- Start with a rectangle of fabric, ensuring the width is evenly divisible by 5 and add ½” to that measurement.
- Lay the fabric right side up on your cutting mat, and use the grid markings on your ruler to find the 45° angle.
- Cut diagonally across the fabric, starting from the top left corner for right-handed people or the top right corner for left-handed people.
- Flip one triangle piece over, placing it right sides together with the other triangle, lining up the straight (non-bias cut) edges.
- If you started with a rectangle, make sure the bottom corner lines up. If you started with a square, adjust the fabric for proper sewing.
- Sew the binding down, starting at the corner and continuing around the fabric.
- When you get back around to where you started the binding, stop stitching about 6” from where the two ends will meet, leaving about 12” between where you started stitching and where you stopped.
- Mark the exact point where the end of the binding meets the start.
- If your binding is 2½” wide, mark the binding 2⅜” beyond the point where the binding meets. If your binding is 2¼”, mark the binding 2⅛” beyond the point where the binding meets.
- Cut away the excess binding.
- Line up the bias edge on the fabric closest to you with the pencil line on the opposite edge of the fabric and pin in place.
- Continue lining up the pencil markings at the ¼” seam intersections along the width of the fabric.
- Sew the seam and then press flat.
- Cut the binding along the pencil lines.
- Press the binding flat.
Remember to use a ruler and pencil to mark the ¼ seam allowance along the straight (non-bias cut) edge on the wrong side of the fabric. With the fabrics right sides together, slide the fabric so the end of the pencil line matches up with the edge of the fabric opposite it and you have dog ears at the corners. Sew a ¼” seam and press it open. Mark the cutting lines using a ruler and pencil, beginning at the bias cut edge and working left to right for right-handed people or right to left for left-handed people. When you reach the opposite side of the fabric, cut off any excess fabric that’s less than 2½” from the last line you marked. Mark the ¼” seam intersections on both the upper and lower edges of the fabric. Fold the fabric in half right sides together along the width, bringing together the edges where the pencil markings begin and end. Slide the bias cut edge to the first marked line. Using the pencil markings, sew the seam and then press flat. Finally, cut the binding along the pencil lines and press it flat.
What are the benefits of using continuous bias binding instead of traditional bias binding?
Continuous bias binding offers several advantages over traditional bias binding. It uses less fabric than straight grain binding, as it requires only a single layer of fabric on the outside edge, whereas straight grain binding exposes a single thread on the outside edge, which can wear down more quickly.
Additionally, continuous bias binding can better accommodate curves and tight corners, as it has more give and can be easier to manipulate around these areas. It’s also recommended for quilt edges with curves, waves, or scallops, as the slight give of the diagonal fibers accommodates these edges beautifully and creates a smooth turned edge.
Finally, continuous bias binding can create a longer-lasting edge, as it involves more fibers in the outer fold, reducing stress and abrasion on individual warp fibers.
Can the technique of making continuous bias binding be used for quilting projects?
To make continuous bias binding from a rectangle, you can use the following technique:
Cut and sew a square to create a parallelogram. Draw lines parallel to the long bias edges and offset the edges before sewing them together. This method allows you to create a continuous bias strip without the need to cut and sew individual bias strips, saving time and effort.
How does the length of the binding affect the process of making continuous bias binding?
The length of the binding impacts the process of making continuous bias binding in several ways. First, the longer the binding, the more fabric you’ll need to cut and sew together. This can increase the time required and demand more fabric. Additionally, longer binding may necessitate more cautious handling to guarantee that the seams align correctly and the binding is consistent.
Conversely, shorter binding may be more manageable and require less fabric, but you may need to create multiple individual strips to attain the desired length. Ultimately, the binding’s length will hinge on the specific project you’re working on and your individual preferences and skill level.
Conclusion
Making continuous bias binding from a rectangle can noticeably improve your quilting experience, offering quicker, more efficient, and accurate results. By following the steps outlined in this article, you’ll be able to minimize bias edge stretching and explore new pattern possibilities. Remember to use sale or clearance fabrics for binding, and consider adding ¼ to strip width for projects with batting.
With the right tools and techniques, you’ll master the art of continuous bias binding and enhance your quilting projects to the next level.

