This site is supported by our readers. We may earn a commission, at no cost to you, if you purchase through links.
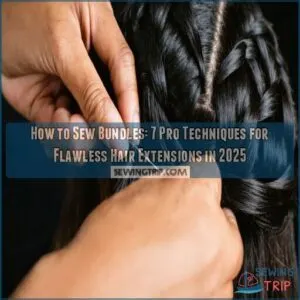
Choose a curved needle and strong weaving thread, preferably color-matched to the bundles. Knot the thread, then anchor it by looping through the braid’s edge.
To sew, use an overcast stitch, threading the needle under the braid and weft, pulling snug after each pass. Repeat until the weft is secure, ensuring no gaps.
Pro trick: fold the weft at ends instead of cutting to reduce shedding. For style tips, there’s more to explore, and using a pro trick can make a difference.
Table Of Contents
Key Takeaways
- Prep your natural hair with clean, moisturized cornrows as a secure base for the bundles.
- Use a curved needle and strong thread with an overcast stitch to attach the wefts securely without gaps.
- Fold the weft at the ends instead of cutting to avoid shedding and keep the installation durable.
- Maintain the style with gentle washing, conditioning, and regular trims to prevent tangling and dryness.
Sewing Bundles Basics
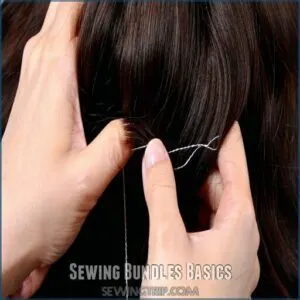
You’ll need a curved needle, sturdy thread, and properly cornrowed hair to create a secure foundation for your bundles.
The key to flawless sew-in extensions lies in maintaining consistent tension as you weave the thread through both the weft and your braided base.
Choosing Right Hair Type
Choosing the right hair type for your sew-in bundles is essential for achieving natural-looking results.
The secret to stunning sew-ins lies in selecting hair types that blend seamlessly and elevate your natural beauty effortlessly.
Virgin hair offers durability and versatility, while Remy hair prevents tangling due to intact cuticles aligned in one direction.
Consider your natural hair texture when selecting hair bundles—straight, wavy, or curly extensions should complement your own hair density.
Match hair color carefully, and remember that human hair allows for styling flexibility that synthetic hair can’t provide.
For high-quality options, consider purchasing authentic hair bundles.
Preparing Natural Hair
Proper scalp cleansing forms the foundation of a successful bundle installation. Before sewing in hair bundles, thoroughly wash and detangle your natural hair to remove product buildup.
Thoroughly cleanse and prep your scalp—healthy hair starts with a clean foundation for flawless, long-lasting sew-in extensions.
Apply a moisture treatment to prevent dryness under your protective style. Create neat cornrows as your base—not too tight to avoid scalp health issues, but secure enough to hold extensions.
Remember, well-prepped natural hair guarantees your sew-in lasts longer and feels comfortable. To make certain extensions are secure, consider using a curved needle for attachment, ensuring a secure and long-lasting style.
Selecting Needle and Thread
The right needle and thread combo makes or breaks your sew-in.
Choose a C-shaped curved needle (size 4-6) for easy maneuvering through cornrows.
Pair it with strong nylon thread that matches your hair color for invisible stitches.
Black thread works with darker hair, while clear or beige suits lighter shades.
You can find a variety of options online.
Remember, thicker thread increases stitch strength and overall durability factors when sewing hair wefts.
How to Sew Bundles
Every successful hair extension installation begins with mastering the bundle sewing process. Once your natural hair is prepped with cornrows, you’re ready to sew your bundles for a flawless finish.
To sew hair bundles properly:
- Thread your curved needle with matching thread, creating a secure knot at the end to prevent slipping during bundle placement.
- Position the weft at the nape of your neck along the cornrow, then insert the needle through both the track and cornrow using consistent thread tension.
- Continue sewing in a continuous pattern around your head, maintaining 1/2-inch spacing between stitches for security without tightness.
Remember that proper sewing patterns make the difference between amateur and salon-quality results. Many DIY enthusiasts find that taking their time with this step prevents that telltale "wiggy" look professionals avoid.
Sewing Techniques Guide
You’ll master essential sewing methods from the overcast stitch to micro twists that create a natural finish.
These techniques will help you secure your bundles properly while achieving customized looks with side parts and strategic leave-outs for a seamless blend.
Overcast Stitch Method
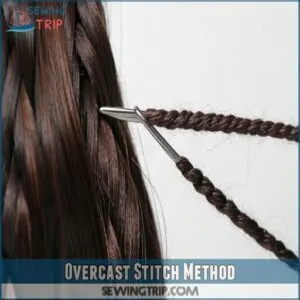
The overcast stitch is your foundation for bundle sewing techniques.
Thread your curved needle with double thread and insert it through both the cornrow and weft. Pull with consistent thread tension to secure the hair bundle in place.
Make uniform 1/2-inch stitches, ensuring weft security throughout. This method offers excellent stitch durability and prevents those beginner mistakes of loose tracks that can shift or show, providing secure and durable results.
Micro Twists for Natural Look
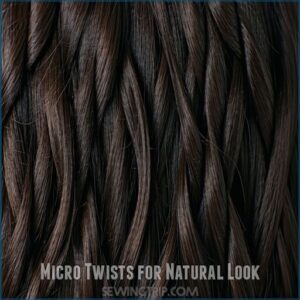
Micro twists can transform your bundle installation into a natural-looking style that blends seamlessly with your hair texture.
These small, defined twists create dimension while allowing for versatility in styling options.
- Choose twist size based on your desired fullness (smaller twists create more volume)
- Use proper parting techniques for even distribution of extensions
- Match hair texture when blending bundles for consistency
- Experiment with styling options like updos or loose styles to achieve your desired fullness and create a personalized look with versatility in styling.
Creating Side Part and Leave-Out
Creating a side part and leave-out for your sew-in requires careful planning. You’ll need only two bundles to achieve this natural look.
| Part Placement | Leave-Out Size | Styling Tips |
|---|---|---|
| Deep Side | 1-2 inches | Heat protect before blending |
| Middle | 2-3 inches | Curl both for seamless blend |
| Zigzag | 1 inch | Use pomade for edges |
| C-shaped | 1.5 inches | Flat iron for matching texture |
| Asymmetrical | Variable | Braid at night for longevity |
Securing wefts close to the part guarantees invisible sewin methods while allowing versatile styling options. To keep the style fresh, consider bi-weekly scalp cleaning for better maintenance and a fresh style.
Popular Sewing Styles
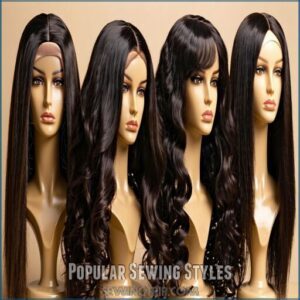
You’ll find that different hair textures require specific sewing methods to achieve natural-looking results with your extensions.
From body wave and straight styles to loose waves and curly patterns, each technique offers unique benefits for creating customized, seamless looks that blend perfectly with your natural hair.
Body Wave and Curly Styles
After mastering the essential sewing techniques, you’ll want to explore the most popular styles.
Body Wave and Curly hair bundles create dramatic looks that turn heads. When working with these textures, proper bundle construction guarantees lasting curl definition and volume enhancement.
- Feel the confidence that comes with perfectly installed curls that bounce with your every step
- Experience the joy of waking up to manageable waves that require minimal styling
- Enjoy the freedom of versatile styles that shift from day to night effortlessly
Straight and Loose Wave Styles
While curly styles offer volume, straight and loose wave styles deliver sleek sophistication with minimal effort.
For seamless blending with your natural hair, choose bundles that match your texture perfectly. Straight styles allow for versatile styling options—from sleek ponytails to elegant updos.
When working with loose wave hair bundles, you’ll appreciate their styling versatility and how they maintain shape after heat styling. Regular maintenance tips include gentle brushing and using light oils to maintain shine.
Customizable Hairstyles
Customizable hairstyles let you express yourself while achieving a polished appearance.
With sewing machine hair or a traditional sew-in method, you can tailor the style using hair bundles. Mix textures, play with color options, or adjust length variation for styling versatility. Guarantee seamless texture blending and volume control for natural results.
Straight stitching is fundamental for most sewing projects.
- Experiment with layers: Add depth and dimension.
- Combine textures: Blend curly and straight wefts.
- Use ombre or highlights: Try bold color shifts.
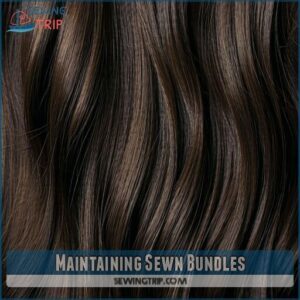
Maintaining Sewn Bundles
Keeping your sewn bundles looking flawless starts with proper care, like washing them gently and avoiding buildup.
Regular trims and moisturizing will help prevent tangling and maintain a sleek, natural appearance.
Washing and Conditioning
Regular hair washing guarantees extensions shine and last longer.
Pick alcohol-free hair products for scalp health and smooth extensions.
Choose conditioner types that moisturize, not weigh down.
Wash bundles every 7-10 days and air-dry for best results.
To help prevent tangling, consider using thread conditioning methods.
Avoid soaking extensions upside-down.
Here’s a quick guide:
| Step | Key Product | Tip |
|---|---|---|
| Shampooing | Gentle cleanser | Massage gently, don’t rub hard. |
| Conditioning | Lightweight balm | Focus on ends for hydration. |
| Drying | Microfiber towel | Pat-dry to prevent frizz. |
Preventing Tangling and Dryness
Keep hair bundles tangle-free with proper hydration methods and nighttime protection.
Use a wide-tooth comb as your go-to detangling tool, and choose lightweight, alcohol-free products for ideal hair care.
Prioritize scalp health by gently moisturizing, ensuring your hair weft stays smooth.
Avoid excessive product buildup after hair washing to maintain softness and longevity in your hair maintenance routine.
Regular Trimming and Maintenance
Maintaining your sewn-in hair bundles is like nurturing a long-term friendship—it needs regular care.
Trim extensions every 4-6 weeks to combat split ends and preserve Extension Longevity. Use sulfate-free products to avoid Product Buildup, and stick to a consistent Night Routine to protect Scalp Health.
To maintain hair health, consider using gentle, sulfate-free options.
For sustained results, periodic Professional Care guarantees your sew-in hair stays flawless and natural-looking.
Frequently Asked Questions (FAQs)
What order to sew in bundles?
Think of sewing bundles like building a sturdy bridge—start at the back, working from bottom to top.
Secure each weft row tightly to cornrows, spacing evenly for natural flow and seamless blending.
Is it better to sew or glue weave?
Sewing weaves lasts longer, looks more natural, and protects your hair better, while gluing is quicker but can damage your scalp and hair.
If you value durability and health, sewing’s the smarter choice.
Should I wash bundles before sew in?
Yes, always wash bundles before a sew-in.
It removes factory residue, dust, and chemicals, ensuring they’re clean, soft, and tangle-free.
Use sulfate-free shampoo, rinse thoroughly, and air-dry to keep them fresh and ready.
How many bundles of hair do I need for a full sew in?
For a full sew-in, you’ll need 2-3 bundles for a natural, fuller look on long hair.
If your hair’s shorter or you want extra volume, grab 3-4 bundles to achieve perfection.
How long does it take to sew bundles with closure?
A sew-in with bundles and a closure usually takes 2-4 hours, depending on the stylist’s skill and braid pattern.
Patience pays off; it’s all about getting that flawless, long-lasting style you’ll love.
Is it difficult to sew bundles with closure?
It’s not overly hard, but it takes practice to align the closure properly.
You’ll need patience, steady hands, and a good eye for detail to guarantee everything looks seamless and natural.
Are there any special tools needed to sew bundles with closure?
Think of sewing bundles with closure like assembling a puzzle; you’ll need a curved needle, strong nylon thread, scissors, clips, and a wig cap.
These tools keep your work neat, secure, and professional-looking.
What are the different hairstyles I can achieve with sew in bundles with closure?
You can rock sleek straight styles, voluminous curls, chic bob cuts, or layered waves.
Add highlights or go daring with bold colors.
Versatility lets you switch effortlessly from casual vibes to glam looks.
What type of hair should be used for sew in bundles with closure?
Your hair’s like a canvas—choose quality human hair bundles, like virgin or raw hair, for sew-ins with closure.
They’re durable, natural-looking, and versatile.
Match the texture and color for a seamless blend!
How can I prevent scalp irritation during installation?
Use a protective scalp oil or barrier gel, like molding gel, before installation to create a shield.
Avoid tight braiding, and make certain clean tools to reduce irritation.
A patch test prevents unexpected product reactions.
Conclusion
Mastering how to sew bundles is easier with practice and preparation.
By focusing on proper tools, like a curved needle and strong thread, and techniques such as overcast stitching, you’ll guarantee a secure, natural result.
Protect your style by folding the weft at the ends, rather than cutting, to prevent shedding.
With consistent maintenance—washing, conditioning, and trimming—your bundles can stay flawless for weeks.
Now, you’re ready to confidently create stunning, long-lasting hair extensions.

