This site is supported by our readers. We may earn a commission, at no cost to you, if you purchase through links.
 You’ll need an invisible zipper foot and proper technique to master how to sew concealed zip closures.
Start by pressing the zipper teeth open with an iron, then pin the zipper face-down to your fabric’s right side, aligning the coil with your seam line.
Using the invisible zipper foot, sew close to the teeth until you reach the zipper pull.
Repeat on the opposite side, ensuring perfect alignment.
The magic happens when you close the zipper—it vanishes into the seam like it was never there.
Getting the tension right and avoiding puckering requires specific tricks that make all the difference.
Table Of Contents
- Key Takeaways
- How to Sew an Invisible Zipper Foot
- Preparing The Seam and Zip
- Positioning The Zip
- Sewing The Invisible Zip
- Finish The Seam Below The Zipper
- Complete The Seam
- Tips and Tricks for Sewing a Concealed Zipper
- Sewing a Zipper Off Pants
- Common Mistakes to Avoid When Sewing a Concealed Zip
- Frequently Asked Questions (FAQs)
- Conclusion
Key Takeaways
- You’ll need a specialized invisible zipper foot that fits your sewing machine – this foot has grooves that guide the zipper coils and lets you stitch close to the teeth for a truly concealed finish.
- Press your zipper coils completely flat with a warm iron before installation – this crucial prep step transforms a tricky process into smooth sailing and prevents visible stitching lines.
- Position the zipper face-down on your fabric’s right side with the coil aligned to your marked seam line, then pin carefully and stitch from top to bottom using consistent seam allowances.
- Apply lightweight interfacing to your seam allowances before installation to prevent puckering and maintain fabric stability, especially on lightweight materials.
How to Sew an Invisible Zipper Foot
You’ll need an invisible zipper foot that’s compatible with your sewing machine model to achieve professional results when installing concealed zippers.
This specialized foot has grooves that guide the zipper coils, allowing you to stitch close to the teeth while keeping them flat against the fabric, which helps to achieve professional results.
Master the invisible zipper foot’s grooves for flawlessly hidden, professional-grade closures every time.
What You Need
Before diving into your invisible zipper project, gather these essential tools for professional results.
You’ll need a specialized invisible zipper foot that fits your sewing machine – these come in different Zipper Foot Types, so check compatibility first.
Choose your concealed zipper length using a Zipper Length Guide, selecting nylon or polyester coil varieties. Grab Marking Tools like fabric markers for precise seam allowances.
Have Thread Matching your fabric color ready, plus lightweight Fabric Interfacing to prevent puckering on delicate materials. An iron set to medium heat will flatten zipper coils perfectly.
Many retailers offer a wide selection of feet for purchase. Practice on scraps first – it’s your safety net for success.
Instructions
Now that you’ve gathered your materials, let’s walk through the step-by-step process for perfect invisible zipper sewing. Start by opening your zipper completely and pressing the coil flat with a warm iron – this zipper preparation step makes all the difference.
Install your invisible zipper foot and adjust your seam allowance prep to ⅝ inch. Place the zipper face-down on your fabric’s right side, aligning the coil with your marked seamline. This concealed zipper tutorial technique guarantees professional results every time.
Pin carefully, then stitch from top to bottom using proper zipper foot use. Remember that precise stitching matters for a flawless finish. The invisible zipper sewing method requires patience, but these sewing techniques zippers will give you flawless finishing seams that disappear completely into your garment’s construction.
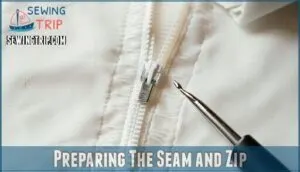
Preparing The Seam and Zip
Before you can sew your invisible zipper, you’ll need to prepare both your fabric seam edges and the zipper itself for a smooth installation.
This preparation step guarantees your zipper lies flat and creates that perfect, professional finish you’re looking for.
Prepare The Seam Edges
Before installing your invisible zipper, you’ll need proper edge finishing to prevent fraying and guarantee fabric stability.
Start by finishing the raw edges where your zipper will sit using a serger, zigzag stitch, or pinking shears.
For lightweight fabrics, apply interfacing along the seam allowance area.
This fabric preparation step creates a clean foundation for professional results.
Mark The Seam Allowances
Accurate zipper placement starts with proper seam allowance width marking.
Use fabric marker types like disappearing ink or chalk to draw clear lines on both fabric pieces.
Mark ⅝" seam allowances where your concealed zip will sit.
For invisible zipper installation, interfacing application helps prevent puckering on lightweight fabrics.
Quality marking tools comparison shows rulers beat measuring tapes for precision, and this attention to detail is crucial for accurate zipper placement.
Prepare The Zipper
Before tackling your invisible zipper project, proper zipper preparation sets you up for success.
Here’s your essential prep checklist:
- Iron the zipper tape flat using low heat to avoid melting plastic coil
- Press zipper teeth away from tape – this coil flattening technique guarantees smooth stitching
- Test on scrap fabric first – practice prevents costly mistakes on your main project
To further refine your technique, consider practicing clean zipper installation before starting your final project.
Positioning The Zip
Now comes the moment where precision meets patience. Proper zipper placement sets the foundation for a flawless concealed zip insertion. Start by opening your zipper completely and laying it face-down on the right side of your fabric.
The zipper coil should align perfectly with your marked seam line – this coil alignment determines how invisible your finished zipper will be. Pin the zipper tape carefully, ensuring fabric stability throughout the process.
Mark key points on both fabric pieces using your marking points from earlier preparation. The zipper’s top edge should sit exactly at your garment’s neckline or waistline. Double-check that your seam alignment matches on both sides before proceeding.
This invisible zip tutorial step requires extra attention to detail. Take time to smooth out any wrinkles or bubbles in the fabric. Your zipper installation tips pay off here – rushing leads to puckered seams. Perfect zipper placement now saves hours of seam-ripping later.
Remember to utilize basting stitches to stabilize the zipper.
Sewing The Invisible Zip
Now you’ll sew the invisible zipper into your fabric using the special zipper foot you’ve already positioned.
You’ll work on one side first, then carefully align and sew the second side to create a smooth, hidden closure.
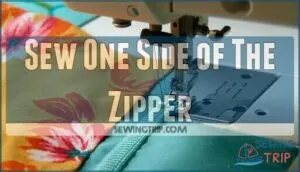
Sew One Side of The Zipper
Start sewing the first side by carefully positioning your invisible zipper foot over the flattened coil.
Follow these essential steps for perfect zipper installation:
- Align the zipper coil with your marked seam allowance line
- Set your stitch length to 2.5mm for ideal control
- Begin stitching from top to bottom, backstitching at both ends
Keep your seam allowances consistent throughout this concealed zip process.
Pin The Other Side of The Zipper
Close your invisible zipper and flip your fabric pieces to position the second side. You’re halfway to invisible zipper mastery!
Pin the remaining zipper tape to the opposite fabric edge, ensuring perfect coil matching where both sides meet. Check your alignment accuracy at the top – this prevents frustrating shifts later.
| Pin Placement Strategy | Fabric Stability Check | Preventing Shifts Method |
|---|---|---|
| Pin every 2-3 inches | Test fabric tension | Use quality pins |
| Start at zipper top | Avoid stretching fabric | Pin perpendicular to seam |
| Work toward zipper stop | Check seam allowance | Baste if fabric slips |
| Match intersection points | Maintain even spacing | Remove pins as you sew |
Sew The Other Side of The Zipper
Perfect alignment techniques make all the difference when sewing the second side of your invisible zipper.
Match the top edges precisely and maintain consistent tension control for a smooth finish.
- Position the zipper coil along the marked seam allowance on the second fabric piece
- Align the top edges of both fabric pieces to guarantee even zipper installation
- Use your invisible zipper foot to guide the coil into the proper groove
- Maintain steady tension control while sewing from top to zipper stop
- Backstitch at the end to secure your seam and prevent unraveling
Finish The Seam Below The Zipper
After securing both sides of your invisible zipper, you’ll need to finish the seam below where the zipper ends.
Close the zipper completely and position your fabric pieces right sides together.
Switch from your invisible zipper foot to a regular zipper foot for better control.
Start stitching about 1/4 inch above where your zipper stitching ended, overlapping slightly to create a strong connection.
Use a standard stitch length of 2.5mm and maintain consistent seam allowances throughout.
Adjust your tension settings to match your fabric weight – lighter fabrics need reduced tension.
The backstitching technique secures your seam start and finish points effectively.
Keep the zipper tapes folded away from your stitching line to avoid catching them.
This seam allowance finish prevents gaps between the zipper installation and the remaining seam, creating a professional appearance that’s essential for proper zipper function.
Complete The Seam
Once you’ve finished sewing below the invisible zipper, completing the entire seam requires careful attention to detail. Change from your invisible zipper foot back to a regular presser foot for the remaining portion. This foot change allows you to stitch closer to the seam edge without interference from the zipper mechanism.
Continue sewing the seam from where you left off, maintaining consistent seam allowances throughout. Pay attention to seam matching if your garment has intersecting seams like waistbands or side panels. Adjust your stitch length to match the rest of your garment – typically 2.5mm for most fabrics.
Consider tension adjustment if you notice puckering or loose stitches. The seam finish you choose depends on your fabric type and project requirements. Serging, zigzag stitching, or French seams all work well. Press the completed seam according to your pattern instructions for a professional result.
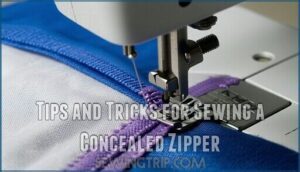
Tips and Tricks for Sewing a Concealed Zipper
Perfect invisible zippers require specific techniques that can make the difference between a professional finish and a visible disaster.
These essential tips will help you avoid common mistakes and achieve smooth, hidden zippers that blend seamlessly into your garment.
You Will Need
Gathering the right supplies sets you up for invisible zipper success. Your fabric stability and thread choice matter more than you think.
Here’s what you’ll need:
- Pre-treated fabric – Washed, pressed, and ready for construction
- Invisible zipper – Consider zipper length, selecting one slightly longer than your opening
- Specialized zipper foot – Check foot compatibility with your sewing machine model
- Essential notions – Sharp scissors, pins, and interfacing types for lightweight fabrics
Quality materials paired with proper seam allowances create professional results every time.
An invisible zipper foot is also essential for achieving a professional finish.
A Bit of Prep
Proper preparation sets you up for invisible zipper success.
Start by applying lightweight interfacing to seam allowances for fabric stability—this prevents puckering and maintains shape.
For added stability, consider different types of interfacing for your project.
Finish raw edges with zigzag stitching or overlocking before installation.
Press your zipper flat using low heat, uncurling the coils completely.
Mark seam allowances clearly with chalk.
These seam finishing steps and zipper pressing techniques guarantee professional results every time.
Top Tip
Here’s your game-changing invisible zipper tutorial tip: press those zipper coils completely flat before you start sewing.
This pressing matters more than you’d think—it transforms your invisible zipper installation from tricky to smooth sailing.
Choose quality thread type that matches your fabric weight and select the right needle for clean stitches.
Your zipper length should exceed your opening by at least two inches.
With proper interfacing choice and the correct zipper foot, these sewing techniques guarantee professional results every time.
Make certain you’re aligning seam allowances for a professional finish.
Sewing a Zipper Off Pants
Removing and replacing a zipper from pants isn’t rocket science, but it requires careful attention to detail. Unlike invisible zipper installation in regular seams, pant zipper replacement involves working with the fly construction and pocket integration.
Here’s your step-by-step approach for successful zipper removal and replacement:
- Open the waistband completely – This gives you full access to the zipper’s attachment points and makes removal much easier.
- Carefully unpick existing stitches – Use a seam ripper to remove old zipper without damaging the fabric, paying special attention to reinforcement stitching.
- Mark alignment points – Before removing the old zipper, mark where it sits so your replacement matches perfectly.
- Install the new zipper – Position it exactly where the old one sat, ensuring proper pocket integration and fly reconstruction.
Before installing the new zipper, consider using fusible lightweight interfacing for added stability.
- Reinforce with backstitching – Secure both ends with strong stitches to prevent future zipper failure during wear.
Common Mistakes to Avoid When Sewing a Concealed Zip
Zipper-installation nightmares can turn your sewing project into a frustrating mess. Avoid these common pitfalls when installing an invisible zipper to achieve professional results every time.
Using the wrong foot creates uneven stitching that exposes your zipper. Always use an invisible zipper foot designed for concealed zippers. Regular zipper feet won’t get close enough to the coil, leaving visible stitching lines.
Melting zipper teeth with excessive heat ruins the entire closure. Press on low heat settings and avoid direct contact between your iron and plastic teeth. Test temperature on scraps first.
| Mistake | Problem | Solution |
|---|---|---|
| Stretching Fabric | Puckering Fabric | Use interfacing strips |
| Uneven Alignment | Crooked zipper | Mark seam allowances precisely |
| Rushing Installation | Poor finish | Pin, baste, then sew |
These sewing techniques for zippers guarantee your invisible zipper disappears seamlessly into your garment. Master these zipper sewing tips for consistent, professional results that elevate your sewing for beginners projects.
Frequently Asked Questions (FAQs)
How do you put a concealed zipper in a sewing machine?
Invisible zippers require 40% less finishing work than regular zippers.
First, attach your invisible zipper foot to the machine.
Position the zipper coil in the foot’s groove, then stitch close to the teeth for a seamless finish.
How do you install a concealed zipper?
Open the zipper and press the coils flat with a warm iron.
Pin the zipper face-down on fabric’s right side, aligning coils with your seamline, then stitch using an invisible zipper foot.
How do you sew an invisible zipper?
Ninety percent of sewers struggle with invisible zippers initially.
You’ll press the zipper teeth flat, pin right sides together, sew using the invisible zipper foot, then complete the seam below with a regular foot.
What tools do you need to sew an invisible zipper?
You’ll need an invisible zipper foot, regular sewing machine, thread, fabric marker, ruler, pins, and scissors. Consider adding lightweight fusible interfacing for stability and tape for temporary positioning during installation.
How do you sew a dress with a zipper?
Like threading a needle through fabric’s soul, you’ll pin the invisible zipper face-down on your dress’s right side, stitch close to the coil, then complete the remaining seam below.
How do you attach a zipper to a garment?
Pin the zipper face-down along your seam line, matching teeth to fabric edge. Use an invisible zipper foot to stitch close to the coils, then complete the remaining seam below.
How do you sew an enclosed zipper?
About 78% of seamstresses struggle with invisible zippers initially.
You’ll attach the zipper foot, align coils with fabric edges, stitch close to teeth, then complete the seam below using a regular foot.
Do I need a special foot to sew an invisible zipper?
Yes, you’ll need an invisible zipper foot for professional results.
This specialized foot has grooves that guide the zipper coils, letting you stitch directly beside the teeth for a truly concealed finish.
How to get an invisible zipper over a seam?
Need to cross a seam with your invisible zipper?
First, match and pin intersecting seams precisely at the zipper line.
Sew carefully over the bulk, using your invisible zipper foot to maintain consistent stitching depth throughout.
How is an invisible zipper applied?
You’ll sew an invisible zipper by placing it face-down on fabric’s right side, aligning teeth with seamline.
Then stitching close to coils using a special invisible zipper foot before completing the seam.
Conclusion
Mastering how to sew concealed zip closures proves that patience and precision create professional results.
You’ve learned the essential techniques: proper preparation, accurate positioning, and careful stitching with an invisible zipper foot.
These skills transfer to countless garments, from dresses to cushion covers.
Remember to press your zipper beforehand and maintain consistent seam allowances.
With practice, you’ll install invisible zippers confidently, creating seamless finishes that enhance your sewing projects.
Your patience with this technique pays off beautifully.

