This site is supported by our readers. We may earn a commission, at no cost to you, if you purchase through links.
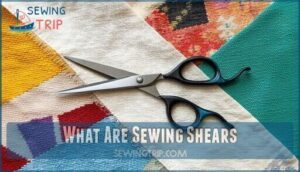 Sewing shears are your fabric-cutting workhorses – specialized scissors with longer blades (7-12 inches) and asymmetrical handles that let you slice through material without lifting it from your cutting surface.
Unlike regular scissors that’ll leave you frustrated with frayed edges, these precision tools feature sharper, more durable blades designed specifically for textiles. You’ll find different types: dressmaking shears for general cutting, pinking shears that create zigzag edges to prevent fraying, and heavy-duty tailor’s shears for thick fabrics like denim.
The uneven handle design isn’t just aesthetic – it gives your fingers and thumb the perfect grip for extended cutting sessions. Choosing the right pair transforms your sewing from amateur hour to professional-grade results.
Table Of Contents
Key Takeaways
- You’ll need different shears for different jobs – dressmaking shears for lightweight fabrics, tailor’s shears for heavy materials like denim, and pinking shears to prevent fraying with their zigzag cuts.
- Shears aren’t just fancy scissors – they feature asymmetrical handles, longer blades (7-12 inches), and a specialized design that lets you cut fabric without lifting it from your work surface.
- Start with one quality pair and build gradually – invest in good dressmaking shears first since they handle most fabric weights, then add pinking shears and specialty tools as your sewing skills develop.
- Proper care keeps them cutting like new – use your shears only on fabric (never paper), clean them after each use, store them in protective cases, and get them professionally sharpened annually.
Types of Sewing Shears
You’ll find four main types of sewing shears, each designed for specific cutting tasks that’ll make your projects easier and more professional-looking.
From lightweight dressmaking shears that glide through cotton to heavy-duty tailor’s shears that power through thick wool, choosing the right type means you won’t struggle with fabric that bunches or frays, making your work easier.
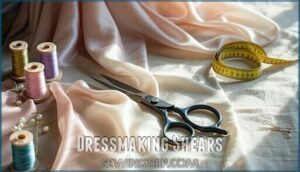
Dressmaking Shears
Dressmaking shears are the gentle giants of fabric cutting, specifically designed for lightweight fabrics like cotton, silk, and delicate materials.
Gentle giants that glide through delicate fabrics with precision, making every cut feel effortless and professional.
These sewing shears feature shorter, lighter blades than their heavy-duty cousins, making them perfect for precise fabric cutting without hand fatigue.
- Ergonomic design reduces strain during extended cutting sessions
- Superior blade material maintains sharpness through countless projects
- Enhanced handle comfort fits naturally in your grip
- Exceptional cutting precision creates clean edges on delicate fabrics
- Lightweight construction prevents wrist exhaustion during detailed work
Dressmaker shears excel at tracing curves and intricate patterns where fabric scissors might feel clunky or overpowered.
You can easily find specialized dressmaking shears online.
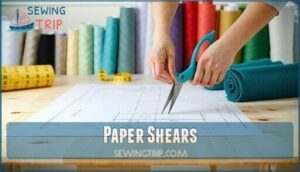
Paper Shears
Cutting sewing patterns demands specialized paper shears designed for precise pattern cutting work.
These scissors feature long, narrow blades that excel at curve precision while maintaining blade sharpness through multiple DIY projects.
You’ll protect your fabric cutting shears from dulling by using dedicated paper weight tools.
Smart sewers invest in separate scissor types – paper shears handle patterns while sewing shears tackle fabric exclusively.
This is because paper contains abrasive minerals that can damage blades and affect the quality of your sewing work, making it essential to use the right tools for each task to ensure precise pattern cutting and maintain the longevity of your sewing shears.
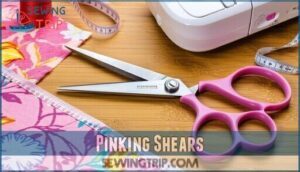
Pinking Shears
Since the 18th century, pinking shears have transformed fabric finishing with their distinctive zigzag bite.
These specialized sewing shears feature serrated blades that create a 3mm zigzag pattern, effectively preventing fraying by shortening loose thread lengths.
Unlike regular fabric scissors, pinking shears use blade serrations to seal edges as you cut.
Perfect for various fabric types—from delicate silks to heavy tweeds—these scissor types excel at cutting seam allowances and creating decorative edges.
The pinking angles work especially well along fabric bias, where fraying typically occurs most.
While heavier than standard fabric scissors, they’re worth the investment for serious sewers.
These shears are also useful for edging paper flowers in craft projects.
Here’s what makes pinking shears essential:
- Time-saving edge finishing – Cut and seal simultaneously
- Versatile fabric compatibility – Works on lightweight to heavy materials
- Professional results – Creates clean, durable seams without overlocking
Think of them as your fabric’s best friend—they’ll keep those pesky threads in line while adding a polished touch to your projects.
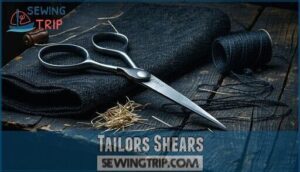
Tailors Shears
When you’re wrestling with thick wool or multiple layers of canvas, tailors shears become your secret weapon.
These heavy-duty champions feature longer blades—often 10-12 inches—crafted from premium blade material that slices through heavy fabrics like a hot knife through butter.
Professional usage demands superior handle ergonomics, and these sewing shears deliver with asymmetrical grips that reduce hand fatigue during marathon cutting sessions.
Unlike lightweight dressmaker shears, tailor scissors pack serious muscle for demanding projects.
Master proper sharpening techniques to maintain their razor-sharp edge, and you’ll discover why professionals swear by these fabric scissors for challenging materials.
Shears Vs Scissors
You’ve probably wondered if there’s actually a difference between shears and scissors, and the answer might surprise you.
While scissors have matching handles and equal blade lengths under 10 inches, shears feature different-sized finger holes and longer blades that can stretch up to 12 inches for heavy-duty fabric cutting.
Handle Sizes and Blade Lengths
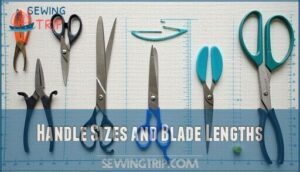
Understanding the differences between sewing shears and fabric scissors starts with examining their handle sizes and blade lengths. These design features aren’t just aesthetic choices—they directly impact your cutting performance and comfort.
Handle Size Ergonomics play a major role in reducing hand fatigue during extended cutting sessions. Shears feature asymmetrical handles with one larger finger hole and one smaller thumb hole, while scissors have equally-sized handles. This ergonomic design gives you better control and reduces strain.
Blade Length Impact becomes obvious when you’re cutting large fabric pieces. Here’s how different measurements affect your work:
| Blade Length | Best For |
|---|---|
| 4-6 inches | Detail work, curves |
| 7-8 inches | General fabric cutting |
| 9-10 inches | Long straight cuts |
| 11+ inches | Heavy fabrics, multiple layers |
| Pinking shears | Seam finishing, decorative edges |
Hand Size Matters when selecting tools. Smaller hands might struggle with heavy tailor’s shears, while larger hands need substantial tools for Leverage and Length. The Cutting Task Suitability depends on matching your tool to the job—longer blades cut more fabric per stroke, while shorter blades offer precision for intricate work.
Fabric Scissors
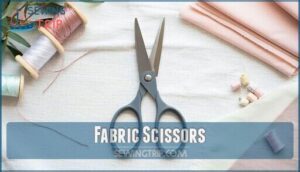
Fabric scissors bridge the gap between general-purpose scissors and specialized sewing shears. You’ll find these versatile tools feature symmetrical handles and blades, making them comfortable for both left and right-handed sewers.
Unlike their shear cousins, fabric scissors maintain equal-sized finger holes while delivering the cutting precision you need for most sewing projects.
These sewing tools excel at cutting lightweight to medium-weight fabric types. Professional dressmaker shears offer superior sharpening techniques, but fabric scissors provide excellent value for everyday fabric cutting tasks without breaking your budget.
| Feature | Fabric Scissors | Traditional Shears |
|---|---|---|
| Handle Design | Symmetrical loops | Asymmetrical sizing |
| Blade Material | High-carbon steel | Premium steel alloys |
| Handle Ergonomics | Universal comfort | Hand-specific fit |
Other Scissor Types
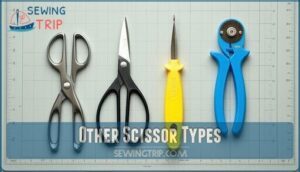
Beyond traditional shears, you’ll find specialized cutting tools like snip scissors and rotary cutters that handle specific sewing tasks with surprising efficiency.
These compact helpers tackle everything from trimming threads to cutting long, straight lines through multiple fabric layers, making your sewing projects faster and more precise.
Snip Scissors
Snip scissors are the unsung heroes of your sewing toolkit.
These petite powerhouses excel at thread trimming and notching fabrics with surgical precision.
Their compact 3-4 inch blades deliver razor-sharp cuts that larger fabric scissors can’t match in tight spaces.
You’ll reach for ergonomic snips constantly during small projects and detail work.
Keep a pair stationed at your sewing machine for instant thread cleanup between seams.
Their blade sharpness makes quick work of embroidery floss, appliqué edges, and those pesky thread tails that seem to multiply.
Unlike bulky dressmaker shears or tailor scissors, snip scissors fit comfortably in your palm for hours of fatigue-free cutting.
They’re perfect for precision tasks where fabric cutting tools would be overkill.
Think of them as your sewing shears’ nimble sidekick, ready to tackle the finishing touches that transform good projects into great ones.
Rotary Cutters
Beyond snip scissors, rotary cutters revolutionize fabric cutting with their rolling circular blades.
These ergonomic rotary cutters glide smoothly across cutting mat types, from self-healing surfaces to gridded rulers, making precise cuts through multiple fabric layers simultaneously.
You’ll find rotary blade sizes ranging from 28mm for detailed work to 45mm for general sewing projects.
The rolling motion reduces hand fatigue compared to traditional fabric cutting tools, especially during lengthy quilting sessions.
Rotary cutter safety becomes paramount—always engage the safety lock when not actively cutting.
Titanium coated blades offer enhanced durability.
Blade replacement frequency depends on usage, but dull blades tear fabric rather than slice cleanly.
Keep spare blades handy and change them when cutting feels labored.
These cutting tools pair perfectly with acrylic rulers for straight lines, transforming how you approach sewing projects with speed and accuracy.
Selecting Shears
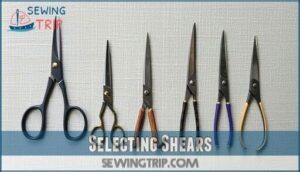
You’ll need to match your shears to both your hand size and the fabrics you’ll be cutting most often, since a heavy tailor’s shear that’s perfect for denim might feel clunky if you have smaller hands or mainly work with cotton.
Start with one versatile type that fits your current projects, then gradually build your collection as your sewing skills and fabric choices expand.
Matching Shears to Fabric Weights
Your fabric choice determines which sewing shears you’ll need. Heavy-duty shears can damage delicate materials, while lightweight tools struggle with thick fabrics.
- Dressmaker shears work perfectly for lightweight fabrics like cotton, silk, and rayon
- Denim shears and canvas shears handle heavyweight fabrics including wool, multiple layers, and tough materials
- Embroidery scissors provide precise control when cutting fabric types requiring delicate handling
Match your tool to your fabric types for clean, professional results every time.
Choosing Based on Hand Size
Finding sewing shears that match your hand size prevents hand fatigue and guarantees comfortable cutting sessions.
Ergonomic handles and proper blade length make all the difference in your sewing experience.
| Hand Size | Recommended Blade Length | Handle Style |
|---|---|---|
| Small hands | 6-7 inches | Lightweight ergonomic handles |
| Medium hands | 8-9 inches | Standard grip comfort design |
| Large hands | 9-10 inches | Heavy-duty ergonomic shears |
| Petite fingers | 5-6 inches | Narrow handle openings |
| Arthritis concerns | 7-8 inches | Soft-grip, spring-loaded handles |
Test shear weight and handle ergonomics before buying – your wrists will thank you later!
Adding Pinking Shears and Paper Shears
Once you’ve matched shears to your hand size, it’s smart to expand your toolkit with specialized cutting tools.
Pinking shears should be your next purchase since their serrated blades create zigzag edges that prevent fraying on cotton and linen fabrics. Paper shears are equally valuable for pattern cutting, featuring shorter blades that navigate tight curves with precision.
You can easily purchase pinking shears online for convenience.
Here are four key benefits of adding these specialized sewing tools:
- Pinking uses include seam finishing – The zigzag cut seals fabric edges without additional hemming or binding work
- Edge finishing becomes effortless – One clean slice stops fraying immediately, saving time on multiple projects
- Pattern cutting gets more accurate – Dedicated paper shears keep your fabric scissors sharp while handling delicate pattern pieces
- Tool longevity improves dramatically – Using the right scissors for each material prevents blade damage and maintains cutting performance
Starting With One Type and Building Collection
Start with dressmaking shears as your Essential First Shears since they handle most fabric weights effectively.
Consider Budget Considerations by investing in quality over quantity initially. Gradual Expansion works best—add pinking shears next for seam finishing, then tailor scissors for heavy fabrics.
Focus on Task Prioritization by identifying what you’ll cut most often. Proper Collection Maintenance includes dedicated fabric-only use and regular cleaning.
Building your sewing tools arsenal gradually guarantees you’ll have the right sewing shears for every project without breaking the bank.
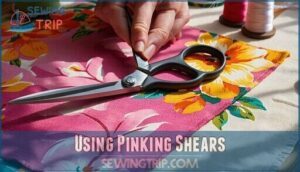
Using Pinking Shears
You’ll find pinking shears incredibly handy for preventing fabric edges from fraying and creating professional-looking seam finishes.
These zigzag-edged tools cut fabric with their distinctive serrated blades, making them perfect for grading seam allowances and finishing raw edges without the need for additional hemming.
Preventing Fraying
When you snip fabric with pinking shears, those zigzag teeth create tiny peaks that dramatically reduce fraying.
The serrated blades limit how far loose threads can unravel, making them perfect for edge treatments on woven fabrics.
This cutting technique works like built-in seam finishes, giving you cleaner fabric edges without extra stitching or fabric stabilization methods.
Proper techniques minimize pinking shears fraying, which is an important consideration for working with woven fabrics.
Cutting Seam Allowances
Pinking shears transform seam allowance cutting from tedious chore into satisfying one-step solution. You’ll love how these zigzag blades trim and finish raw edges simultaneously, saving precious sewing time.
- Grading Seam allowances – Cut different lengths to reduce bulk in thick fabrics
- Layering Seams – Trim each seam layer at varying heights for smooth finishes
- Seam Finishes – Create professional-looking edges that resist fraying
Your fabric shears handle straight cuts perfectly, but pinking shears excel at seam work.
They’re particularly brilliant for Clipping Curves and Notching Corners where traditional cutting tools struggle.
These specialized sewing shears make seam allowance management effortless.
Inside Straight Seam
When working inside straight seams, pinking shears become your secret weapon for professional finishes.
The zigzag cut prevents unraveling while maintaining seam integrity. Simply trim both fabric layers together after stitching, leaving enough seam allowances for pressing techniques.
| Seam Type | Cutting Method | Best Practice |
|---|---|---|
| French Seams | Trim to 1/8 inch | Grade layers carefully |
| Flat Fell | Pink raw edges | Reinforce seams first |
| Bound Seams | Clip before binding | Use sharp tailor scissors |
This approach keeps your sewing shears working efficiently for clean, lasting results.
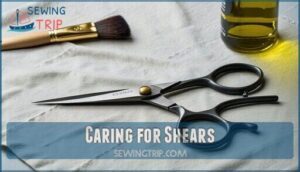
Caring for Shears
You’ve invested in quality shears, so proper care will keep them cutting smoothly for years to come.
Simple maintenance habits, like using them only on fabric and keeping the blades clean, will protect your investment and guarantee every cut stays precise.
Cutting Motion and Blade Maintenance
Precision in cutting technique transforms good sewing shears into exceptional tools.
Use smooth, firm motions when cutting fabric—never force or press hard, which signals dull blades needing attention.
Your shears should glide effortlessly through material without lifting or bunching fabric.
Regular blade sharpening maintains peak performance.
Professional sharpening annually keeps edges razor-sharp, while oiling frequency should occur monthly at the pivot screw.
Wipe clean after each use for rust prevention, since moisture destroys steel quickly.
Watch for alignment issues—blades shouldn’t flop open when held by one handle.
Properly maintained sewing shears feel balanced and controlled.
When cutting techniques become laborious, it’s sharpening time.
Remember: sewing maintenance isn’t optional—it’s essential for professional results.
Proper Storage and Cleaning
After every sewing session, you’ll want to give your shears the TLC they deserve.
Wipe blades clean with a soft cloth, removing lint and threads that can dull the edge.
Store your sewing shears in protective sheaths or cases to maintain blade alignment and prevent nicks.
Apply a drop of oil monthly to the pivot point for smooth operation and rust prevention.
These simple cleaning methods and safe storage practices will keep your essential sewing tools performing like new for years.
What Are Sewing Shears
You’ve probably noticed that sewing shears look different from regular scissors, and there’s a good reason for that.
Sewing shears are specialized cutting tools designed specifically for fabric, featuring longer blades, bent handles, and asymmetrical finger loops that help you make clean, precise cuts without lifting or bunching your material, which is a key aspect of using sewing shears.
Kai 10 Inch Sewing Scissors
Why do professional seamstresses reach for Kai 10-inch sewing scissors? These sharp scissors feature hardened steel blade material that maintains cutting performance through multiple fabric layers.
The ergonomic design reduces hand fatigue during extended cutting sessions.
Key benefits include:
- Superior fabric compatibility from silk to heavy denim
- Professional shears quality with replaceable handle grips
- Easy maintenance tips like hand sharpening and blade rotation
Fiskars Pinking Shears 8 Inch Orange
With Fiskars’ orange-handled pinking shears, you’ll tackle fabric edges like a pro.
These 8-inch scissors deliver sharp zigzag cuts that stop fraying in its tracks.
The bright orange handles aren’t just for show—they’re easy to spot in your sewing kit.
| Feature | Benefit |
|---|---|
| Fiskars Ergonomics | Comfortable grip reduces hand fatigue |
| Orange Color | Easy identification in tool collection |
| Blade Sharpness | Clean cuts through multiple fabric layers |
| Fray Prevention | Zigzag edges limit thread unraveling |
Mundial 8-inch Left Handed Trimmers
Left-handed sewers know the struggle of finding quality tools designed for their needs.
Mundial’s 8-inch left handed shears solve this problem with bent blades that let you see your cutting line clearly.
The nickel-plated steel construction delivers exceptional blade sharpness and Mundial durability.
These tailor scissors feature left-handed ergonomics with comfortable handles that reduce hand fatigue during extended cutting sessions.
Guggenhein Nine Inch Professional Tailor Shears
Guggenhein’s nine-inch professional tailor shears deliver premium quality that outlasts flashier competitors.
These sewing shears feature ergonomic metal handles that stay comfortable during extended use, making them ideal for cutting heavy fabrics like denim and canvas.
Their professional sharpening capability means you’ll enjoy years of precise cuts. Despite their affordable price, these tailors shears perform like expensive dressmaking shears, proving that smart design beats marketing hype.
Karen Kay Buckley Perfect Scissors Purple
These purple sewing shears pack precision into a compact 4-inch frame.
You’ll love their soft-grip handles that ease arthritis discomfort during extended cutting sessions.
The ergonomic design makes appliqué work and template cutting feel effortless.
Their micro-serrated blades grab fabric securely, preventing slipping while you create intricate shapes.
Perfect for detailed sewing projects where dressmaking shears would feel clunky and oversized.
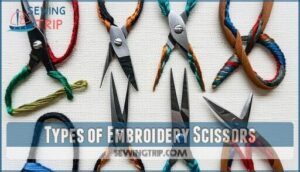
Types of Embroidery Scissors
Embroidery scissors come in specialized designs for precision work.
Straight-blade scissors handle general thread trimming, while curved blade options navigate around delicate applique designs.
Duckbill scissors protect fabric with their unique flat bottom blade, perfect for snipping close to surfaces.
Spring action models reduce hand fatigue during repetitive cuts.
Stiletto scissors feature ultra-sharp points for intricate cutwork.
Blunt-ended applique scissors prevent accidental fabric damage during detailed sewing projects.
One popular option is Gingher’s applique scissors, known for needlework.
These specialized embroidery scissors guarantee clean, precise cuts that regular sewing shears simply can’t match.
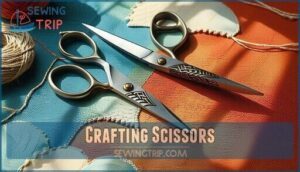
Crafting Scissors
Beyond traditional sewing shears, crafting scissors open up a world of creative possibilities for your fabric projects.
These specialized tools feature stainless steel blades in decorative patterns like scallop, zigzag, and wave designs that add artistic flair to your work.
Unlike standard fabric scissors, crafting scissors prioritize cutting accuracy through specialty blades that create consistent decorative edges every time.
When comparing brands, look for handle ergonomics that reduce hand fatigue during detailed work.
The blade material should be high-quality stainless steel to maintain sharpness through multiple projects.
Japanese crafting scissors stand out for their exceptional sharpness and compact size, making them perfect for intricate corner work and detail cutting.
For longevity, it’s important to bear in mind scissors’ blade sharpness.
These versatile tools cut more than just fabric – they handle paper, leather, vinyl, and foam board with ease.
Whether you’re adding decorative edges to quilting projects or creating unique embellishments, crafting scissors transform ordinary cuts into eye-catching design elements that elevate your sewing projects.
With their ability to add artistic flair and create consistent decorative edges, they are a valuable addition to any sewing kit.
Should You Buy Scissors or Shears for Sewing
If you’re torn between scissors and sewing shears, choose shears every time. Your cutting needs dictate this decision more than budget considerations alone.
Shears offer specialized features that regular scissors simply can’t match. The longer blades of fabric shears slice through material with fewer strokes, while bent handles keep your hand positioned above the fabric.
This design prevents the lifting and bunching that happens with standard scissors. Dressmaking shears work beautifully for lightweight fabrics, while tailor scissors handle heavy materials with ease.
Your skill level doesn’t matter here – even beginners benefit from proper tools. Project types ranging from simple hems to complex garments demand clean, precise cuts that only shears provide.
Storage space might be a concern, but investing in quality sewing shears pays dividends in professional results. Regular scissors used on fabric can lead to fraying and uneven cuts.
Start with one good pair of fabric shears, then expand your collection as your sewing journey evolves. Your future self will thank you.
Frequently Asked Questions (FAQs)
What is a sewing shears?
Sharp scissors specifically designed for cutting fabric, sewing shears feature longer blades, bent handles, and asymmetrical finger loops.
They’re your go-to tool for clean, precise cuts that won’t fray or damage delicate materials.
What is the difference between sewing scissors and dressmaker shears?
Sewing scissors have equal-sized handles and shorter blades, making them versatile for general tasks.
Dressmaker shears feature asymmetrical handles, longer blades, and specialized design for precise fabric cutting and professional results.
What are shears used for?
You’ll use shears for cutting fabric with precision and accuracy. They’re designed to slice through multiple layers of material cleanly, prevent fraying, and create professional-looking edges in your sewing projects.
What are tailor shears used for?
Like a surgeon’s scalpel for fabric, tailor shears are your heavy-duty cutting champions.
You’ll use them to slice through thick materials like denim, canvas, and wool with precision.
They’re built for serious sewing projects requiring power and control.
How often should sewing shears be sharpened?
You’ll need to sharpen your shears every 6-12 months with regular use, or when they start pulling fabric instead of cutting cleanly. Heavy users might need professional sharpening more frequently.
What are the benefits of spring-loaded sewing shears?
Spring-loaded shears automatically reopen after each cut, reducing hand strain and fatigue during repetitive cutting tasks.
They’re perfect for quilters and sewers who cut frequently, as they minimize repetitive motion injuries while maintaining precision.
What brands of sewing shears do professional sewers recommend?
Good tools make good work," as craftspeople say.
Professional sewers consistently recommend Gingher, Kai, and Fiskars for their exceptional sharpness and durability.
You’ll find these brands in most serious sewing rooms worldwide, known for their exceptional quality.
How can you tell if your sewing shears need to be replaced?
Your shears need replacing when they crush fabric instead of cutting cleanly, create jagged edges, require excessive pressure, or won’t cut through single layers smoothly.
Dull blades that snag or tear fabric signal it’s time for new ones.
Can sewing shears be sharpened at home?
Sharpening sewing shears at home isn’t impossible, but it’s tricky territory.
You’ll need specialized whetstones and steady hands.
Most sewers find professional sharpening services deliver better results without risking blade damage.
What blade angle is best for precision?
You’ll find 20-30 degree blade angles work best for precision cutting.
This sharp angle slices through fabric fibers cleanly without dragging or fraying edges, giving you those crisp, professional cuts every seamstress craves.
Conclusion
Theory says expensive shears automatically mean better results, but you’ve discovered that’s not always true.
What’re sewing shears really about? They’re precision tools that match your specific needs – whether you’re cutting delicate silk or heavy canvas.
Your perfect pair combines proper blade length, comfortable grip, and quality construction within your budget.
Start with good dressmaking shears, add pinking shears for finishing touches, and build your collection gradually.
Quality cutting tools transform frustrating fabric work into enjoyable, professional-looking projects.
- https://www.arcos.com/en_US/scissors/sewing
- https://www.reddit.com/r/Tailors/comments/10j7t76/what_is_the_difference_between_tailor_scissors/
- https://sewcanshe.com/10-best-sewing-scissors-what-you-need-to-stay-sharp/
- https://www.stitchclinic.com/best-types-of-scissors/
- https://www.thecreativecurator.com/difference-between-shears-and-scissors-sewing/

