This site is supported by our readers. We may earn a commission, at no cost to you, if you purchase through links.
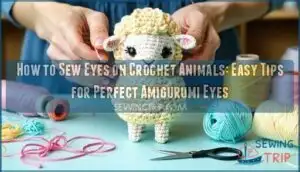
First, decide on the type of eyes—embroidered, safety, felt, or crocheted.
Once chosen, position them symmetrically to bring your amigurumi to life.
Use pins to test placement before sewing—this guarantees no lopsided faces!
For embroidery, try simple stitches like French knots or overcast stitches.
Felt or crocheted eyes can be glued or stitched securely.
If safety is a concern, sewn eyes are kid-friendly and durable.
Don’t rush—neat stitches make a huge difference!
Keep experimenting, and soon, every creation will have its own quirky charm.
With practice, you’ll master the technique, and your amigurumi will come to life with kid-friendly eyes.
Table Of Contents
Key Takeaways
- Test eye placement with pins to ensure symmetry and the desired expression before sewing.
- Choose the right type of eyes—embroidered, felt, or crocheted—for safety and durability, especially for young kids.
- Use consistent thread tension for embroidery and keep knots hidden within the body for a clean finish.
- Enhance eye details with techniques like adding shine spots, layering stitches for 3D effects, or customizing shapes for unique expressions.
Sewing Eyes Basics
Sewing eyes onto your crochet animals might seem tricky at first, but it’s all about picking the right type, size, and placement.
Picking the perfect eyes transforms your crochet creations, adding charm, personality, and life with the right type, size, and placement.
With a few simple tips, you’ll have those amigurumi faces looking just the way you want in no time.
Choosing Eye Type
Choosing the right eye type for your crochet animal depends on safety first, aesthetic appeal, and project suitability.
Embroidered crochet eyes are safest for kids, while safety eyes offer a polished look.
Felt adds softness, and yarn eyes are cost-effective for beginners.
Consider pre-made crochet options for a professional finish.
Match your skill level to the method—there’s no one-size-fits-all approach, just what works best!
Eye Size Determination
Eye size affects your amigurumi’s personality and proportions. Think about the character’s expression and head size before choosing. Play with crochet eye size or felt templates to test what fits best. Yarn thickness impacts size too—thinner yarn creates smaller eyes.
For consistent results, follow a guide for standard amigurumi eye sizes.
- Use paper or felt circles to plan size.
- Consider proportional eye spacing.
- Test sizes on your crochet animal face.
- Prioritize template accuracy to ensure your amigurumi has the desired expression.
Eye Placement Techniques
Start by finding the perfect spot for your crochet animal’s eyes. Use pins as markers to test symmetry and expression. Experiment with template variations to adjust placement until it looks just right.
Check character references for guidance, ensuring proportion balance with the face. Accurate eye placement transforms your project, so don’t rush this step—it’s worth the effort!
Securing them requires knot security measures to prevent loosening, which is a critical step to ensure your crochet animal looks great and the eyes stay in place with proper security.
Sewing Eyes on Crochet
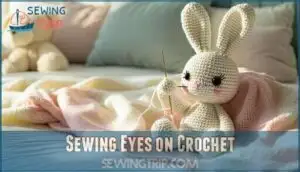
Sewing eyes onto your crochet animals brings them to life, adding charm and personality.
With the right techniques, you’ll create eyes that are secure, safe, and perfectly placed every time.
Preparing Amigurumi for Eyes
Before sewing crochet eyes, prep your amigurumi for success! Make certain the stuffing density is just right—firm but not bulging.
Use pins to test crochet eye placement until you find the perfect look. Block the shape with gentle molding to secure the base and hide seams.
- Adjust stuffing to prevent distortion.
- Test eye spacing with pins first.
- Shape evenly for symmetry.
Embroidering Eye Details
To embroider crochet eyes, use embroidery thread and horizontal stitches to cover the eye area evenly.
Add vertical stitches for 3D effects or enhancing shape, and fill gaps carefully.
Choosing the right thread color options can greatly enhance the final appearance.
Adding shine spots with white yarn gives life to your creation.
Keep tension consistent, and customize size based on your crochet amigurumi eyes.
Eye embroidery takes patience, but it’s worth it!
Using Felt or Crocheted Eyes
For a fun and safe option, felt eyes offer simplicity, while crocheted eyes provide durability and texture contrast.
Felt safety comes from their soft, child-friendly material.
Crocheted eyes, stitched with care, create a sturdy alternative.
Experiment with material sourcing for unique looks, and both methods work great as a crochet eye alternative, adding charm without needing to embroider crochet eyes.
Embroidery Techniques
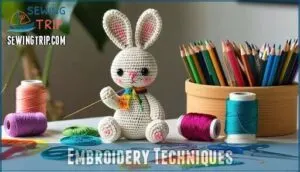
Embroidery techniques let you create cute, safe, and customizable eyes for your crochet animals.
With just a needle, thread, and a little patience, you can stitch eyes that bring your amigurumi to life.
Horizontal Overcast Stitches
Horizontal overcast stitches are a game-changer for embroidery eyes. They look polished while letting you control stitch density and tension.
Horizontal overcast stitches transform your embroidery, offering smooth, polished results while letting you master tension and create flawless crochet eyes.
Follow these quick tips:
- Keep tension even for smooth horizontal stitches.
- Overlap edges slightly to avoid gaps.
- Use the overlap technique for secure, seamless results.
- Secure stitches tightly to prevent unraveling later.
Master this embroidery technique to level up your sewing and achieve polished results!
Adding Shine Spots
To add charm to your embroidery eyes, include shine spots for a realistic reflection effect.
Use white yarn, choosing a size variation to suit the amigurumi’s design. Highlight placement directly where light would naturally hit, based on the light source.
With your needle and thread, create small, even stitches, ensuring they blend seamlessly into the sewing eyes process.
Experimenting with thread choices can further enhance the eye’s realism, as silk threads add shimmer, using natural light for guidance and creating a realistic effect.
Using French Knots
If you’ve tackled shine spots, it’s time to master the French knot—a small detail with big impact.
Focus on knot size and density for balanced results.
Knot placement can make or break your character’s expression, so secure amigurumi eyes carefully.
Use color variation for depth, and follow this timeless crochet eye tutorial to perfect your yarn eyes.
Customizing Eye Appearance
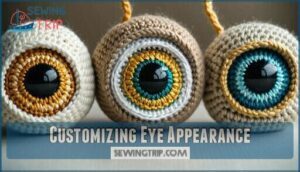
You can make your crochet animals truly unique by customizing their eyes with small yet creative adjustments.
From adding depth with 3D effects to tweaking their shape, these simple techniques can bring your amigurumi to life, making them more engaging and personalized with customizing their eyes.
Adding Vertical Stitches
Vertical stitches help sew crochet eyes by adding dimensionality and stitching correction for a polished look.
To enhance texture, layer these over your horizontal stitches, creating depth illusions that make yarn eyes crochet designs pop.
Secure amigurumi eyes carefully while experimenting with custom detailing.
This simple Amigurumi Eyes Embroidering Tutorial trick transforms basic shapes into expressive, character-filled features with minimal effort, making them truly pop.
Creating 3D Effects
Making your Amigurumi eyes pop is all about layering stitches to create a 3D effect.
Start by adding raised details with sculpting yarn over your existing embroidery.
This depth illusion brings life to dimensional eyes and enhances eye placement.
For extra texture, try overlapping stitches from the Amigurumi Eyes Embroidering Tutorial.
These techniques work wonders, especially with felt eyes, and can help create a more realistic appearance by adding dimensional details.
Enhancing Eye Shape
To perfect your eye embroidery, enhance the shape with small adjustments. Focus on symmetry while layering stitches for fullness.
Use embroidery techniques creatively:
- Slightly overlap stitches to hide gaps and add dimension.
- Incorporate white outlines for clarity or extra pop.
- Add vertical stitches over horizontal ones for a subtle 3D effect.
These tips help refine eye placement and bring charm to your crochet animals!
Safety Eyes Alternatives
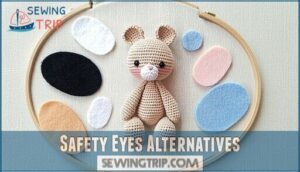
If you’re making toys for little ones, safety eyes mightn’t be the best option. Instead, try felt or embroidered eyes for a secure and adorable alternative.
Using Felt Eyes
Felt eyes are a great crochet eye alternative, especially for childproof crochet animals.
Cut neat circles or layered felt shapes to match your design. Felt eye safety improves by stitching or gluing securely.
For durability, choose high-quality felt and consider sewing around the edges. You can find a variety of crochet supplies online.
Attaching felt eyes gives you endless options for unique, expressive, and adorable characters while keeping things safe.
Embroidering Eyes
If felt eyes don’t feel right, embroidery offers a safe, creative option.
Begin with a large needle and black embroidery thread, ensuring thread tension stays even.
For eye symmetry, use pins to mark placement. Sew small, tight stitches, hiding knots within the amigurumi body, which works as a perfect crochet eye alternative.
This method works perfectly for customizing expressions while keeping everything secure and durable.
Combining Techniques
Why settle for one method when you can mix and match? Combining techniques, like felt with eye embroidery or adding texture contrast using yarn embroidery, creates hybrid eyes full of charm.
Using a tapestry needle, blend stitches for a style fusion that feels unique. Material blending adds depth and makes your amigurumi pop—perfect for personalized creations!
Many crafters also use raw edge techniques for unique effects, which can add a special touch to your work.
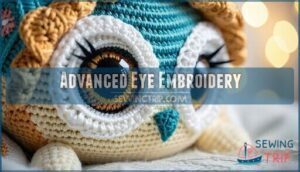
Advanced Eye Embroidery
You can take your crochet animals to the next level by mastering advanced embroidery techniques like adding eyelids and lashes.
These steps let you create realistic, expressive eyes that bring your amigurumi to life.
Embroidering Eyelids
When embroidering eyelids on amigurumi, start by deciding eyelid shapes and thickness to match your character’s expression.
Use embroidery thread or yarn in colors complementing the eye embroidery.
Advanced shading adds depth, highlighting emotion and realism.
A tapestry needle helps you control placement.
Keep stitches close for smooth lines, ensuring precise expression control with every detail.
Experimenting with different threads can help you achieve the desired look, and thread weight influences the final design.
Adding Eyelashes
Adding eyelashes to your crochet animal eyes gives them personality and charm. Use embroidery thread to adjust eyelash length and thickness for your desired look.
Experiment with angle and material to match the style. Eyelashes can enhance any eye embroidery or attach safety eyes for a polished effect.
- Use black or dark thread for contrast.
- Keep eyelashes symmetrical.
- Try curved or straight angles.
- Secure knots well to avoid loose threads.
Creating Realistic Eyes
A character’s charm lies in their eyes, so focus on proportions and subtle shading for realism.
Use embroidery thread and a tapestry needle to layer stitches, creating depth illusions and light reflection.
Add highlights for expressions that pop and blend thread shades for natural tones.
Careful eye embroidery turns simple features into enchanting details, giving life to your amigurumi, with subtle shading creating a more realistic appearance.
Frequently Asked Questions (FAQs)
What can I use for eyes on a stuffed animal?
In the case of adding eyes, the sky’s the limit!
Use embroidery, felt, safety eyes, or buttons.
For young kids, skip small parts and stick with sewn or embroidered options to keep it safe.
How to fix uneven eyes after embroidery?
To fix uneven embroidered eyes, adjust by adding extra stitches to the smaller eye or gently removing excess from the larger one.
Use the first eye as a guide to balance size and placement.
What is the best thread tension for beginners?
Keep your thread tension snug but not too tight.
You want the stitches to stay secure without squishing the yarn.
Think firm but gentle, like tying a shoe—tight enough to hold, not strangle.
Can embroidered eyes be removed and re-stitched?
Yes, you can remove embroidered eyes and re-stitch them.
Just snip the thread, carefully pull it out, and start fresh.
It’s like giving your crochet animal a makeover—no harm, just improvement!
How to avoid visible knots on amigurumi?
Hide knots by threading your needle through nearby stitches or the amigurumi’s body, pulling the knot inside.
This keeps things tidy and invisible.
Think of it as tucking secrets away where no one looks!
What are effective ways to test eye expressions?
Seeing is believing!" To test eye expressions on your crochet animal, pin felt or paper cutouts in various positions.
Adjust distances and shapes until the character’s personality shines through.
Experiment for playful, serious, or curious looks.
Conclusion
Don’t worry if it takes a few tries to master how to sew eyes on crochet animals—practice makes progress!
Taking the time to choose the right eye type, placement, and techniques guarantees your amigurumi has charm and personality.
Whether you opt for embroidered eyes, felt, or crocheted ones, focusing on clean, symmetrical stitches is key.
Experiment with different styles, and soon your crochet animals will have their own unique expressions that truly bring them to life!

