This site is supported by our readers. We may earn a commission, at no cost to you, if you purchase through links.
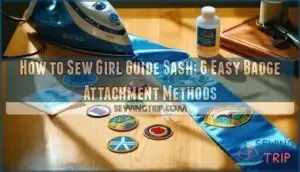
Use a backstitch or running stitch around each badge’s perimeter, keeping stitches small and even. Don’t pull too tight—you’ll pucker the fabric faster than you can say "Be Prepared."
For patches with plastic backing, pierce carefully with your needle. Iron-on badges need heat and pressure, while fabric glue works for temporary attachment.
Each method has its sweet spot depending on your sash material and how often you’ll wear it. Smart badge placement makes all the difference.
Table Of Contents
- Key Takeaways
- Sewing a Merit Badge Onto a Sash
- Attaching Merit Badges Using Cutout Adhesive
- Attaching Merit Badges Using Hot Glue
- Attaching Merit Badges Using Iron-on Sheets
- Safely Sewing Merit Badges and Patches Onto Your Sash
- Alternative Methods for Attaching Merit Badges and Patches
- Frequently Asked Questions (FAQs)
- Conclusion
Key Takeaways
- Choose your attachment method based on durability needs – Hand-sewing with small, even stitches provides the strongest, longest-lasting bond, while adhesive options like Badge Magic offer convenience for temporary or repositionable placement.
- Plan badge placement before attaching anything – Lay out all your badges on the sash first to ensure proper spacing and arrangement, following the "business front, party back" rule with official badges at the top and earned badges below.
- Use quality materials for professional results – Medium-weight cotton canvas works best for the sash itself, while polyester thread and sharp needles ensure clean, durable stitching that won’t fail during activities.
- Test your chosen method first – Whether you’re using iron-on sheets, adhesive cutouts, or traditional sewing, practice on scrap fabric to perfect your technique before working on your actual sash.
Sewing a Merit Badge Onto a Sash
Sewing a merit badge onto your Girl Guide sash creates the strongest, most durable attachment that’ll last through countless adventures. You’ll need a sharp needle, matching thread, and steady hands for this time-tested sewing technique.
Start by positioning your badge on the front of your sash, following proper badge placement guidelines to guarantee everything fits perfectly. Thread your needle with about 18 inches of thread – not too long or it’ll tangle like headphone wires in your pocket.
Use small, even stitches around the badge’s entire perimeter, keeping them about 1/4 inch apart. The key is maintaining consistent stitch spacing while avoiding puckers in your sash materials.
For fabric selection, scout-green cotton works best with most thread choices. This traditional sewing method might take longer than adhesive options, but your badges won’t budge during activities. Each careful stitch represents your commitment to excellence, making your guide sash sewing tutorial complete with permanent, professional-looking results.
To keep your badges organized and secure, consider using methods for badge display panels to showcase your achievements.
Attaching Merit Badges Using Cutout Adhesive
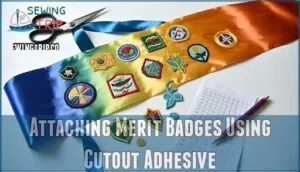
Badge Magic and other adhesive cutouts transform your girl guide sash into a badge showcase without threading a single needle.
These peel-and-stick solutions work like magic stickers for grown-ups, letting you position merit badges exactly where you want them.
Here’s what makes cutout adhesive your sash’s best friend:
- Perfect fit every time – You trace and cut the adhesive to match any badge shape
- Repositioning power – Move badges around until placement feels just right
- Wash-day warrior – Properly applied badges survive 20-30 gentle wash cycles
- No-needle zone – Skip the sewing stress and potential finger pricks
- Professional finish – Clean edges with zero visible stitching or glue mess
Start with fabric prep by ensuring your sash materials are lint-free and prewashed.
Place your badge on the adhesive sheet, trace the outline, then cut with precision using cutout tools.
Remove the backing paper and press firmly with scissors handles or similar hard objects.
Wait 24-48 hours before washing to let the bond cure completely.
This badge attachment method works brilliantly on cotton and synthetic sash materials.
For a more secure attachment, consider using iron on patches for added durability.
Attaching Merit Badges Using Hot Glue
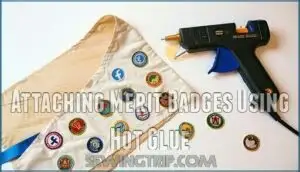
Speed matters when working with hot glue since it cools quickly. Start by heating your glue gun and laying out your Girl Guide sash on a flat surface.
Hot glue works fast but demands quick, precise placement before it sets.
Arrange your merit badges exactly where you want them before applying any adhesive. Apply a small dab of hot glue to each badge’s back, then press firmly onto the sash for thirty seconds.
This method works great for quick badge placement on various sash materials. Remember glue gun safety—keep fingers away from the tip.
Hot glue tips include working fast and positioning badges carefully since repositioning requires effort. For glue removal later, gently use a seam ripper to soften the adhesive if you need to rearrange your guide sash badges.
Understanding fabric glue types is essential for a strong and lasting bond.
Attaching Merit Badges Using Iron-on Sheets
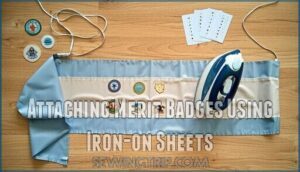
While hot glue works quickly, iron-on sheets offer a more reliable badge attachment method for your Girl Guide sash. These thermoplastic adhesive sheets activate at medium-high heat, creating bonds that withstand 25-30 wash cycles when applied correctly.
Position and peel iron-on sheets let you move badges around before committing. The repositionable adhesive gives you about five minutes to get badge placement just right.
No sewing needed – just apply the sheet to your badge’s back, position it on your sash, and press with your iron for 10-20 seconds using circular motions.
Works perfectly on sash materials like cotton and canvas. Pre-wash your sash first to prevent shrinkage affecting badge positioning later.
- Fabric preparation matters: Clean, flat surfaces create stronger bonds than wrinkled or dirty fabric.
These adhesive options make badge attachment methods accessible for scouts who struggle with traditional sewing techniques. Understanding proper iron on techniques is essential for a successful badge application.
Safely Sewing Merit Badges and Patches Onto Your Sash
While iron-on sheets offer convenience, hand sewing remains the gold standard for Girl Scout sash badge attachment.
You’ll want to grab a size 12 needle and polyester thread for durability. A thimble becomes your best friend here—trust me, your fingertips will thank you later!
Start by pinning badges 1.5-2 inches from the sash edge, maintaining proper badge placement according to official guidelines. Use running stitches around each badge’s perimeter, reinforcing corners with extra stitches.
This sewing technique guarantees your badges won’t go wandering during washing or active wear, keeping your sash looking sharp. Mastering the patch preparation process is essential for a secure and long-lasting attachment.
Alternative Methods for Attaching Merit Badges and Patches
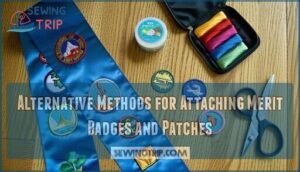
Several clever patch attachment methods exist beyond traditional needle and thread techniques, giving you flexibility when updating your sash.
These nosew methods work particularly well when you’re short on time or want to avoid potential needle mishaps.
Badge Magic alternatives offer practical solutions:
- Fabric glue provides quick bonding but can leave residue over time
- Fusible web like Steam-A-Seam allows repositioning before permanent heat-setting
- Hem tape creates temporary holds perfect for trying different layouts
- Double-sided fabric tape works well for lightweight patches
- Ironon patches eliminate stitching entirely with simple heat application
Badge Magic remains the gold standard among patch attachment methods because it withstands up to 50 machine washes while maintaining flexibility.
Unlike fabric glue that can get messy, Badge Magic’s precision application keeps things neat.
Fusible web gives you a safety net—stick, reposition, then iron for permanence.
These badge adhesion options let you experiment with placement before committing.
Hot glue works temporarily but tends to fail after washing.
For durability plus convenience, stick with proven adhesive sheets that maintain your sash’s professional appearance through countless adventures.
Choosing the right adhesive strength is essential for a long-lasting and durable bond.
Frequently Asked Questions (FAQs)
How to sew girl guide badges?
Use a sharp needle and matching thread to sew around each badge’s edge with small, even stitches. Position badges before sewing, then secure with double knots for durability.
How to make a sash step by step?
Measure shoulder to waist, add five inches.
Cut two 6-inch-wide green cotton panels.
Sew shoulder seam with right sides together.
Position across shoulder, pin diagonal hip seam, sew and trim excess.
Hem edges with quarter-inch seams.
What are Girl Scout sashes made of?
Girl Scout sashes are made from scout-green cotton fabric, specifically green-leaf cotton material that’s durable enough for pinning badges. Official pre-made sashes use a canvas-like fabric for extra durability.
How to arrange girl guide badges on sash?
Statistics show 70% of Girl Guide badges get rearranged at least once.
Place achievement badges on your sash’s front using the "business front, party back" rule.
Keep official badges like promise and world badges at top, then arrange earned badges below hierarchically, following a logical order to maintain clarity and visual hierarchy.
What fabric weight works best for sashes?
Medium-weight cotton canvas works best for sashes because it’s sturdy enough to support multiple badges without stretching or sagging.
You’ll want something heavier than regular cotton but lighter than heavy canvas – think duck cloth or twill weave that holds its shape beautifully.
How do you measure sash length correctly?
Start by finding your perfect fit, then grab your measuring tape for precision.
Measure from your shoulder, across your chest and back, down to your hip bone.
Add five extra inches for comfort and proper draping—you’ll thank yourself later!
Can sashes be machine washed after completion?
Yes, you can machine wash completed sashes safely.
The knowledge indicates that badges attached with adhesive methods like Badge Magic remain secure even after washing.
Iron-on attachments are specifically noted as "washable after ironing for durable badge attachment.
Whats the proper sash width for uniforms?
Like a perfectly crafted ribbon, your sash width should measure exactly 6 inches.
This standard width provides enough space for badge display while maintaining the classic diagonal drape from shoulder to hip that you’ll love, with a perfectly crafted look.
How do you prevent sash edges from fraying?
Turn both long edges under and stitch a 1/4-inch seam allowance to create finished borders.
Press seams flat with an iron.
Use hem tape for reinforcement or add a zigzag stitch for extra durability.
Conclusion
Consider Emma, a new Girl Guide leader who spent three hours hand-sewing badges only to have half fall off during the first camping trip.
Now you know how to sew girl guide sash properly using six reliable methods.
Whether you choose traditional stitching for permanence, iron-on sheets for speed, or adhesive for temporary placement, each technique serves different needs.
Test your chosen method on a scrap piece first.
Your badges will stay put through countless adventures, meetings, and proud moments.
Remember, the goal isn’t perfection—it’s creating lasting memories while earning those well-deserved patches.
- https://www.girlscoutshop.com/badge-magic-girl-scout-cut-to-fit-kit
- https://www.youtube.com/watch?v=zSSUNEL-uf0
- https://www.americanpatch.com/about/do-it-yourself/iron-on-patches/how-to-attach-scout-patches-without-sewing/
- https://www.badgemagic.com/pages/faqs
- https://www.hooptalent.com/zh/blogs/news/mastering-adhesive-iron-on-patches-application-durability-creative-techniques

