This site is supported by our readers. We may earn a commission, at no cost to you, if you purchase through links.
Making your own jeans isn’t just about saving money, it’s about creating something that fits your body perfectly and reflects your personal style. Store-bought denim rarely delivers on both functionality and fit, leaving you with waistbands that gap, thighs that pull, or lengths that bunch awkwardly at your ankles.
When you sew your own jeans, you control every detail, from the weight of the denim to the exact placement of each pocket. The process takes patience and precision, but it’s more accessible than you might think. With the right pattern, quality fabric, and a few specialized tools, you can craft a pair of jeans that rivals anything you’d find on store shelves—and they’ll fit better than any off-the-rack pair ever could.
Table Of Contents
Key Takeaways
- Sewing your own jeans gives you complete control over fit and style, solving common issues like gapping waistbands and poor proportions that plague store-bought denim.
- Success starts with matching your pattern to your body shape and taking at least five key measurements, with 82% of sewists reporting better results when they create a muslin test garment first.
- The right tools make all the difference—you’ll need denim needles (size 100/16 or 110/18), heavy-duty thread, a rotary cutter with self-healing mat, and a machine with enough motor power to handle six-layer seams.
- Professional-looking jeans depend on mastering specific techniques like topstitching with 3.5-4.5mm stitch length, reinforcing stress points with bartacks, and using a hump jumper to navigate bulky seams without breaking needles.
Choosing The Right Jeans Pattern and Fit
Finding the right jeans pattern is like discovering a recipe that works perfectly for your taste, your skill level, and the way you want your jeans to fit. You’ll need to think about your body shape, compare pattern options, and decide whether you’re starting from scratch or using a favorite pair as your guide.
Let’s walk through the key considerations that’ll help you choose a pattern you’ll actually enjoy sewing.
Considering Body Shape and Style Preferences
Before you even cut fabric, consider your body shape and fitting jeans to your unique measurements. Pear-shaped sewists often find bootcut patterns balance proportions, while 71% of apple-shaped wearers choose high-waisted styles. Rectangle figures benefit from shaped pockets and decorative stitching. Understanding your shape helps with finding perfect jeans.
Consider these factors:
- Your inseam and rise measurements for proportional cutting
- Style preference trends matching your body shape guide
- Pattern adjustments needed for custom fit metrics
- Multi-zone alterations for waist, rise, and curves
- Satisfaction metrics showing 82% success with body-matched patterns
Comparing Pattern Instructions and Reviews
Once you’ve found jeans sewing patterns that suit your shape, dig into instruction clarity and user satisfaction ratings before committing. The Megan Nielsen Dawn Jeans pattern scores 4 out of 5 for clarity, while Sew Over It best Jeans earns praise for step-by-step visuals.
Check reviews for fit consistency and design features—82% of sewists report success when pattern selection matches verified community feedback on jeans construction challenges and pattern limitations. The Dawn Curve Jeans pattern is also notable for its extensive size range.
Adjusting Patterns for Custom Fit
After reviewing pattern feedback, you’ll improve your jeans pattern for a custom fit through precise body measurements and fitting adjustments. Over 94% of successful projects start with at least five measurements—waist, hip, thigh, and inseam—before any alterations begin. Blending between sizes, especially at waist and hip, improves proportions for 79% of sewists.
Your fitting process should include:
- Creating a muslin test garment for iterative adjustments
- Adding 1-inch seam allowances on sides for flexibility
- Documenting fit changes at each round
This garment fitting approach delivers jeans that truly fit your body.
Using Existing Jeans as a Pattern Template
If you already own jeans that fit perfectly, you can trace them into a custom jeans pattern. This method hits 88% fit accuracy when you follow the original measurements carefully.
Start by marking grain alignment on your denim thickness, then trace each pattern piece with proper seam allowances. Smooth your template lines to within 2mm for precise sewing jeans results.
Selecting The Best Denim Fabric
Choosing the right denim fabric sets the foundation for jeans that fit well and last for years. The fabric you pick affects everything from how comfortable your jeans feel to how easy they’re to sew.
Let’s break down the key decisions you’ll need to make when selecting your denim.
Stretch Vs Non-Stretch Denim
Choosing between stretch and nonstretch denim sets the foundation for your entire project. Stretch denim, blending 98% cotton with 2% elastane, generally offers about 15% more elasticity and immediate comfort, perfect if you’re chasing mobility and shape retention.
Nonstretch denim delivers peerless durability and that custom fit you’ll earn over time, though it needs a proper breaking-in period to truly mold to your body.
Choosing Fabric Weight and Texture
Denim weight classes shape your project from the start, and the right choice transforms your jeans. Lightweight denim under 8 ounces suits beginners and breathable garments, while midweight fabric at 8–12 ounces balances structure with comfort for classic jeans. Heavyweight options over 14 ounces demand industrial needles and patience but reward you with unparalleled durability.
Texture variations like slub weaves add character to your denim fabric selection.
Sourcing Quality Denim and Pocket Lining
Your denim fabric selection starts with reliable suppliers who prioritize fabric durability and ethical sourcing. Look for vendors offering transparent information about weaving processes and wash resistance—these details matter when you’re investing time in a handmade garment.
When choosing pocketing fabric, consider:
- Cotton lining materials for breathability and comfort against skin
- Polyester blends balancing durability with lightweight feel
- Pre-treated options reducing shrinkage after multiple washes
Quality denim weight specifications and clear fabric selection guidance separate superior suppliers from mediocre ones.
Pre-washing and Preparing Denim
Before you cut a single pattern piece, pre-washing your denim locks in its final size and prevents post-construction surprises. Raw denim shrinks dramatically—sometimes up to 10%—without the sanforization process, while color crocking fades with each wash.
Run your fabric through three wash-and-dry cycles, securing edges with pinking shears to prevent raveling. This fabric softening step also removes sizing chemicals, making your denim easier to handle during construction.
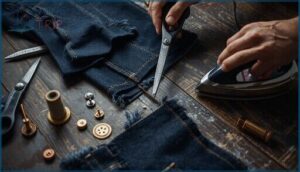
Essential Tools and Supplies for Sewing Jeans
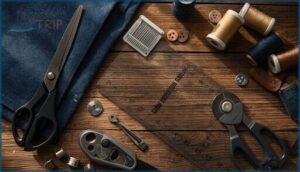
You can’t build a solid pair of jeans without the right gear in your toolkit. The difference between a frustrating project and a satisfying one often comes down to having proper needles, cutting tools, and equipment that can handle denim’s tough personality.
Let’s walk through the must-have supplies that’ll set you up for success.
Denim Needles and Heavy-Duty Thread
Your sewing machine won’t stand a chance without the right armor. Specialty denim needles, paired with core-spun thread offering high tensile strength, dramatically cut seam failure rates—up to 65% fewer skipped stitches compared to standard supplies.
For heavyweight denim, reach for a size 100/16 or 110/18 needle. Check your needle size guide, match thread strength to fabric weight, and you’ll avoid the frustration of broken sewing needles mid-project.
Rotary Cutters, Mats, and Marking Tools
Sharp, clean cuts separate amateur work from pro-level jeans. A 45mm rotary cutter paired with a self-healing mat slashes fabric cutting time by 60%, and you’ll keep your pattern pieces accurate when marking tools stay sharp and visible.
- Rotary cutter safety means retracting blades after every pass—protecting fingers and extending cutter blade lifespan by months.
- Mat self-healing layers prevent warping and reduce blade dulling by 40%.
- Marking tool accuracy improves with chalk wheels or wash-out pens, ensuring seams align perfectly.
- Ergonomic considerations matter during long cutting sessions—your wrists will thank you.
Sewing Machine Requirements for Denim
Your home sewing machine needs muscle to handle denim’s density. Motor power rated at 0.7 amps or higher punches through six-layer seams without jamming, while needle handling capabilities accommodate size 100/16 needles that penetrate heavyweight fabric.
Adjustable presser feet tackle bulky intersections where skipped stitches plague weaker machines, and stitch selection beyond basic straight seams lets you topstitch like the pros.
Machine durability with metal internals outlasts plastic alternatives by years.
Pressing Tools and Seam Gauges
Beyond machine power, pressing tools and seam gauges transform home denim into pro-grade work. Wood clappers absorb steam while flattening topstitching, and seam gauge accuracy keeps your 5/8″ allowances consistent across every seam.
Wool pressing mats retain heat for faster results, while pressing cloth materials protect fabric from shine. These denim pressing techniques separate amateur jeans from finished pieces that rival store-bought quality.
Step-by-Step Jeans Construction Process
Now that you’ve gathered your tools and supplies, it’s time to roll up your sleeves and start building your jeans from the ground up.
The construction process follows a logical sequence, where each step builds on the last to create a sturdy, professional-looking garment.
Let’s walk through the key stages that’ll take you from cut fabric pieces to a finished pair of jeans you can wear with pride.
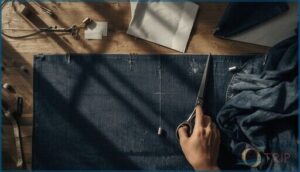
Cutting Out Pattern Pieces Accurately
Before you begin cutting out jeans pattern pieces, take time to lay everything out with intention—this is where precision meets peace of mind. A well-planned fabric cutting strategy prevents mistakes and saves denim.
- Press your fabric flat and identify the fabric grain before placing any pattern pieces
- Use pattern weights to secure pieces while marking fabric with chalk or pen
- Cut with sharp cutting tools like fabric shears or a rotary cutter for clean edges
- Transfer notches dots and markings carefully, creating your cutting plan for accuracy
Sewing Front and Back Pockets
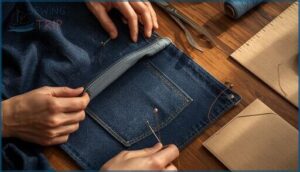
Once your pattern pieces are ready, it’s time to tackle pocket construction. For front pockets, start by staystitching the curved pocket facing at 5/8″, then clipping and pressing those curves smooth. Attach the pocket bag using a French seam for added durability.
Back pockets benefit from template usage—press folds sharp, pin for pocket placement, and then topstitch around the edges. Add bartacks at the corners for solid reinforcement.
| Pocket Type | Key Technique |
|---|---|
| Jeans front pockets | French seam construction |
| Front pocket facing | Staystitching and understitching |
| Jeans back pockets | Paperboard template pressing |
| Topstitching techniques | Double-row for strength |
| Reinforcement methods | Bartacks at stress points |
Constructing The Fly and Installing Zipper
With pockets complete, you’re ready for the fly facing and zipper shield. Baste the crotch seam from the waist to where the fly facing curves, clip those curves diagonally, then press open.
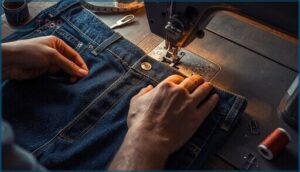
For jeans zipper installation, align your front fly zipper with the crotch edge and secure with topstitching techniques. Finish with bartack placement at stress points for seam reinforcement—this ensures your zipper fly lasts.
Assembling Legs, Inseams, and Side Seams
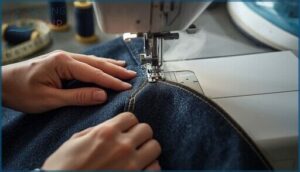
After sewing the inseam, you’ll bring each leg’s front and back pieces together, right sides facing. Sewing the inseam creates that smooth crotch curve, and you can choose flat-felled seams for durability or overlock construction for less bulk. Press the seam allowances toward the front leg.
Then tackle sewing side seams, matching top and bottom edges carefully. Proper inseam pressing, stitch density, and seam finishing will give you professional results.
Attaching Waistband, Belt Loops, and Yoke
With your legs assembled, you’re ready to master waistband construction, belt loops, and sewing the yoke. Proper waistband alignment prevents puckering, while loop reinforcement with bartacks resists over 6 pounds of tension. Yoke functionality shapes the seat perfectly, and machine requirements like denim needles help guarantee durability measures hold strong.
- Press your jeans waistband in half before attaching with a 3/8-inch seam allowance
- Position five belt loop construction pieces strategically for balance
- Use heavy-duty machines with walking feet to handle thick layers
- Topstitch waistband and loops for lasting professional finish
Mastering Jeans Sewing Techniques
Once you’ve assembled your jeans, the real magic happens in the finishing techniques. These methods are what separate homemade jeans from store-bought quality, giving your project that professional edge and long-lasting durability.
Let’s walk through the key techniques that’ll take your denim work to the next level.
Topstitching for Durability and Style
Topstitching transforms your jeans from homemade to handcrafted. You’ll want a size 100/16 or 110/18 needle paired with heavier topstitching thread in the needle and regular thread in the bobbin for achieving professional topstitching.
Set your stitch length between 3.5mm and 4.5mm, and consider using specialized presser feet for precision. This seam reinforcement distributes stress across high-wear areas, making your essential jeans sewing toolkit complete while adding that signature decorative appeal.
Reinforcing Seams With Bartacks and Rivets
Think of bartacks and rivets as the unsung heroes protecting your jeans at denim stress points. Understanding bartack vs rivet reinforcement evolution helps you choose wisely, especially since rivet placement issues like scratching furniture have shifted most sewists toward creating bartack reinforcements instead of installing rivets hardware.
Key locations for metal hardware and bartack stitch density:
- Pocket openings need dense bartacks to withstand 400 pounds of pressure from repeated hand insertion
- Belt loop ends require horizontal bartacks across the fabric grain to prevent tearing
- Zipper bottoms benefit from safety bartacks that act as fail-safes against fabric separation
Preventing Skipped Stitches on Thick Seams
Nothing derails a perfect seam faster than skipped stitches on thick denim layers. Start with proper needle size—a 90/14 denim needle for standard fabric, 100/16 for heavyweight. Lengthen your stitch to 3-4.5mm and increase presser foot pressure.
For stitch causes like improper threading or worn needles, regular needle maintenance makes all the difference. Machine settings and equipment impact matter just as much as seam management techniques.
Using a Hump Jumper and Pressing for a Professional Finish
When hemming jeans or crossing bulky seams, a hump jumper slips under your presser foot for seam leveling—it prevents needle breakage and ensures consistent stitching across uneven layers. This fabric stabilization tool transforms tricky spots into smooth sailing.
Follow up with professional pressing using moderate heat on both fabric sides, setting each seam flat. These sewing techniques for enhanced durability deliver that coveted professional finish every time.
Top 5 Tools for Sewing Jeans
You can’t build a solid pair of jeans without the right gear in your sewing arsenal. The tools you choose will make the difference between wrestling with denim and gliding through each seam with confidence.
Here are five must-have tools that’ll set you up for success, whether you’re cutting your first pattern piece or topstitching that final waistband.
1. Fiskars Original Orange Handled Scissors
When you’re cutting out denim pieces, you need scissors that won’t quit halfway through your project. The Fiskars Original Orange Handled Scissors deliver outstanding blade sharpness and cutting performance that slices through thick layers without hesitation.
Their ergonomic design reduces hand fatigue during extended cutting sessions, while the precision-ground stainless steel maintains its edge even after repeated use.
With handle durability backed by a lifetime warranty and user reviews praising their reliability, these scissors belong in every serious sewer’s collection of sewing supplies and materials and equipment needed for jeans construction.
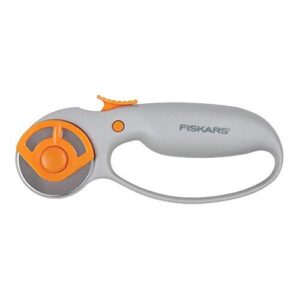
2. Fiskars Classic Loop Rotary Cutter 45mm
The Fiskars Classic Loop Rotary Cutter 45mm takes over when you’re cutting out pattern pieces from heavy denim. Its blade sharpness manages multiple fabric layers with impressive precision, while the ergonomic design fits naturally in your hand whether you’re right- or left-handed.
User reviews consistently praise its material versatility across different weights of denim during fabric preparation. The safety features—including a sliding lock button—protect you between cuts.
When you’re prepping denim fabric, this cutter gives you the control and reliability your tools and supplies for jeans demand.
3. Fiskars Eco Cutting Mat Board Large
You’ll need a reliable surface for cutting and preparing fabric, and the Fiskars Eco Cutting Mat Board Large delivers with its 24″ x 36″ cutting mat size. Its self-healing quality closes small cuts automatically when you maintain it properly—clean off fabric threads regularly and keep your rotary blade sharp.
The polypropylene material is recyclable, while grid markings at 1-inch intervals with bias lines simplify precise cuts. When you’re weaving through tools and supplies for jeans, proper mat maintenance extends its lifetime warranty coverage considerably.
4. Dritz Mark B Gone Pen Combo
Precision matters when transferring pattern markings to denim fabric, and the Dritz Mark B Gone Pen Combo gives you two marking tools in one package. The blue pen works beautifully on light fabrics with water-soluble ink removal, while the white pen marks dark denim with a simple damp cloth wipe.
You’ll appreciate the marking precision for button placements and pocket locations during your sewing tutorial work. Test fabric compatibility on scraps first, and avoid heat before removing marks to maintain pen durability and combo value throughout your sewing techniques projects.
5. Jean Denim Machine Needles Size 16
Your sewing machine needs the right needle to handle heavyweight denim fabric without bending or breaking mid-seam. Size 16 denim needles feature a reinforced blade that punches through thick layers with confidence, making them essential for your sewing machine setup when tackling 12-ounce denim or heavier.
A needle size guide shows they pair perfectly with heavy-duty thread compatibility, reducing needle breakage causes like skipped stitches. Denim weight matters when choosing between sizes 14 and 16, and brand performance reviews consistently recommend SCHMETZ for reliable sewing jeans projects.
Frequently Asked Questions (FAQs)
What can you sew with denim?
Like clay in a sculptor’s hands, denim transforms beyond jeans into jackets, skirts, tote bags, quilts, and home decor.
Upcycling denim trends fuel craft items and accessories, making this durable fabric endlessly adaptable for creative sewing projects.
Can a sewing machine sew jeans?
Yes, your sewing machine can handle denim fabric with proper needle requirements and machine setup. Motor power matters when tackling fabric layers, though machine limitations may call for industrial alternatives on heavyweight projects.
How to sew jeans?
Start by selecting your denim fabric and jeans sewing patterns that match your body shape.
Master tool mastery with proper needles, then focus on seam construction techniques, pattern adjustment, and finishing details for professional results.
Are jeans easy to sew?
It’s like climbing your first mountain—achievable but not exactly a breeze.
Your skill requirements matter most: beginners face a steep learning curve, with only half completing wearable jeans initially due to sewing complexity and common pitfalls.
Can you sew jeans with a regular sewing machine?
You can sew jeans with a regular sewing machine using light to medium denim fabric, proper denim needles (size 90/14-100/16), heavy-duty thread, and appropriate sewing techniques like adjusting stitch length and presser foot pressure.
What is the best stitch for sewing jeans?
A straight stitch works best for sewing jeans construction seams, while topstitching length between 5 and 4 mm adds durability. Proper needle size and tension adjustment prevent puckering, ensuring strong, professional-looking results.
How to stitch jeans at home?
You can absolutely stitch jeans at home with the right denim fabric, a sturdy sewing machine, proper needles, and mastering essential sewing techniques like topstitching, seam finishes, and hardware installation.
What are the best resources for sewing your own jeans?
Pattern databases, online communities, sewing blogs, video tutorials, and fabric suppliers offer jeans sewing tutorials, denim fabric resources, and construction guides.
Books provide detailed steps, helping you master every technique confidently.
How to sew a pair of jeans?
Making jeans is like building a house—you need the right foundation. Start with denim selection and jeans sewing patterns, then master pocket styles, fly construction, seam finishing, and hemming options for complete success.
Can you sew jeans on a sewing machine?
Yes, you can sew jeans on a regular sewing machine with denim needles and proper thread strength. However, machine limitations and motor power affect fabric layers—thicker seams may require industrial-grade equipment.
Conclusion
Sure, you could spend another Saturday trying on fourteen pairs of jeans that don’t fit, or you could learn how to sew jeans that actually work with your body. The choice seems obvious.
Once you’ve mastered the basics—pattern adjustments, proper topstitching, and reinforced seams—you’ll wonder why you ever settled for mass-produced denim.
Your sewing machine is ready. Your fabric is waiting. Time to make something that actually fits.

