This site is supported by our readers. We may earn a commission, at no cost to you, if you purchase through links.
A single bolt of fabric, roughly 36 centimeters wide and 11 meters long, forms the foundation of every traditional kimono. This tanmono measurement hasn’t changed in centuries, and it shapes everything about how you’ll approach your first kimono project.
The beauty of kimono construction lies in its geometric simplicity—straight seams, rectangular panels, and minimal curves—which makes it surprisingly accessible even if you’ve only sewn a few projects before. Cotton fabric offers a forgiving starting point, while silk rewards you with that signature drape and luxurious hand feel.
Once you understand the basic measurements and master a few essential techniques like collar attachment and sleeve assembly, you’ll discover that creating a wearable kimono doesn’t require years of experience, just patience and attention to detail.
Table Of Contents
Key Takeaways
- Traditional kimono construction uses a single bolt of fabric (tanmono) roughly 36 cm wide by 11 meters long, with geometric straight seams that make the garment surprisingly accessible for beginners who choose forgiving cotton over silk.
- Cotton fabric costs under $10 per yard and tolerates machine washing and pressing mistakes, while silk demands dry cleaning, steady hands, and costs $15–80 per yard—making cotton the smart choice until you’ve mastered basic construction techniques.
- Essential accuracy comes from pre-washing fabric to account for 3–10% shrinkage, maintaining 1–1.5 cm seam allowances for future alterations, and using precise measurements (height, yuki, hip) to draft panels that ensure proper drape and comfortable movement.
- Decorative techniques like sashiko embroidery (2–3 stitches per centimeter in geometric patterns) and shibori dyeing (resist techniques using indigo) transform a basic kimono into personalized textile art while strengthening seams and adding cultural depth.
Choosing The Right Fabric for Kimono Sewing
Picking the right fabric is the first step to creating a kimono that feels both comfortable and authentic. You’ll want to think about tradition, fabric width, and what suits your skill level.
Here’s what to keep in mind as you get started.
Traditional Japanese Fabrics and Widths
You’ll find that traditional Japanese kimono fabric, called tanmono, was historically woven in narrow strips—around 35–40 cm wide by 12–13 meters long—because that span matched a weaver’s arm reach on a handloom. This historical width logic shaped kimono construction techniques for centuries.
Traditional Japanese kimono fabric was woven in narrow 35–40 cm strips because that width matched a weaver’s arm reach on a handloom
Cotton fabric and silk dominate the market, with tsumugi and chirimen weaves offering durability and beautiful drape. Tsumugi silk, known for its distinct textured surface, was historically popular among commoners due to its affordability.
When yardage planning, expect to use one full bolt per garment.
Cotton Vs. Silk for Beginners
For your first kimono, cotton fabric beats silk on every beginner-friendly metric. Cotton won’t slide under your presser foot the way lightweight silk does, it costs a fraction per yard—often under $10 compared to silk’s $15–80 range—and you can toss it in the washing machine without worry.
Silk demands dry cleaning, lower iron temps, and steady hands. Silk offers natural thermoregulation capabilities, cooling when warm and insulating when cold.
Save silk for project number two, once you’ve conquered cotton’s forgiving weave and built your sewing confidence.
Fabric Preparation and Pre-washing Tips
Once you’ve chosen your cotton, pre-wash it to prevent surprises later. Natural fibers commonly shrink 3–10% in that first cycle, so you’ll need extra yardage for your kimono panels.
Test colorfastness on a five-centimeter square soaked for thirty minutes—reds bleed easily. Wash at your planned care temperature, then press to restore grain alignment before cutting.
Proper washing parameters now protect your finished garment’s fit.
Avoiding Fabrics With Nap or One-way Designs
After pressing, turn your attention to fabric directionality. Napped cloth like velvet or one-way prints cause visual mismatches when panels run opposite directions—flowers upside down on sleeves, shading differences across fronts.
For beginner fabrics in kimono making, choose scattered ditsy florals or abstract weaves that look identical rotated 180 degrees. This fabric selection simplifies cutting, promotes waste reduction through flexible layout, and keeps your sewing techniques focused on construction rather than motif alignment.
Essential Tools and Supplies for Kimono Making
You don’t need a fully stocked workshop to sew a beautiful kimono, but having the right tools makes the process smoother and more enjoyable. The straight seams and simple construction mean you can start with basics you might already own.
Here are five essential supplies that will help you measure, mark, cut, and assemble your kimono with confidence.
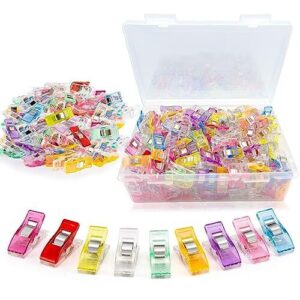
1. Colorful Quilting Sewing Fabric Clips Set
When you’re holding long seams together during garment construction, colorful quilting sewing fabric clips provide ergonomic benefits that traditional pins can’t match. These transparent clips protect your fabric from permanent pinholes while holding layers securely, and clip durability varies across brands.
A typical set composition includes 100 to 200 pieces, offering excellent cost comparison value for kimono sewing patterns. You’ll appreciate how they reduce finger strain during fabric selection and assembly.
Look for clips with engraved seam guides to simplify your sewing techniques and maintain consistent seam allowances throughout your project.
Best For: Home sewers and quilters working on multi-layer projects like kimonos or quilts who want to avoid damaging delicate fabrics with pins while reducing hand strain during long sewing sessions.
- Holds fabric securely without leaving permanent pinholes, making them ideal for delicate or loosely woven materials
- Easier on your hands than traditional pins—less finger strain when you’re clipping and unclipping along long seams
- Great value with 100-200 pieces per set at budget-friendly prices, plus many include helpful seam guide markings
- Some customers report the clips break more easily than higher-end brands, especially with repeated use
- Limited to holding about 0.5 inches of fabric thickness, so they won’t work for very thick or bulky seam allowances
- Quality can be inconsistent across generic sets, meaning durability varies from batch to batch
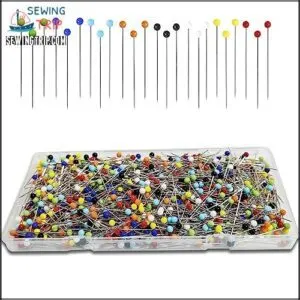
2. Colorful Ball Glass Head Sewing Pins
Glass head pins offer heat resistance that plastic alternatives can’t deliver, making them essential when you’re pressing seams during kimono construction. These pins withstand hot irons during sewing tutorials without melting, unlike plastic-headed versions that can ruin your work.
Standard dimensions of 0.60 mm diameter and 30 mm length suit most sewing techniques, though longer 45-48 mm pins work better for layered fabric. Colorful heads improve pin visibility against your material, and sharp nickel-plated shafts glide smoothly without causing fabric damage. If you have nickel allergy concerns, seek specially coated options.
Best For: Sewers working on projects like kimonos or quilts that require frequent pressing and pinning of multiple fabric layers, especially those who need pins that won’t melt under a hot iron.
- Heat-resistant glass heads let you iron right over them without melting or leaving marks on your fabric
- Colorful heads make the pins easy to spot against different materials, saving you time when you’re working
- Sharp nickel-plated tips glide through fabric smoothly and hold layers securely in place
- Some users report receiving pins with mixed sharpness—a few can be dull right out of the package
- The nickel plating may cause issues for people with nickel allergies or sensitivities
- Not ideal for very delicate fabrics like silk or chiffon, where finer pins would be better
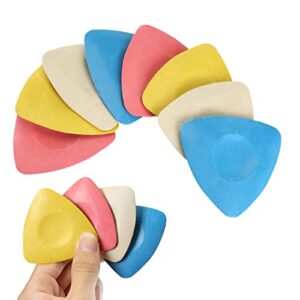
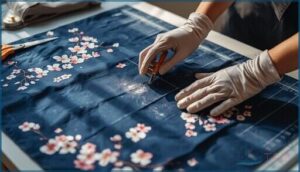
3. Mr Pen Tailors Chalk Set
Tailor’s chalk creates temporary, washable lines on fabric that guide your cuts and seams without leaving permanent marks. The Mr. Pen set includes eight triangular pieces in four colors—white, yellow, red, and blue—so you can maintain visibility accuracy on both light and dark kimono fabrics.
The triangular shape keeps edges sharp for precise pattern transfer, especially when marking narrow seam allowances typical in kimono construction. These chalk pieces work alongside dressmakers’ carbon paper for detailed sewing techniques.
Test chalk removability on a scrap first, since fabric marking can vary with different materials.
Best For: Beginner to intermediate sewers working on kimono or other garment projects who need clear, removable fabric markings across different fabric colors.
- Four colors provide good contrast on both light and dark fabrics, making pattern lines easy to see during cutting and assembly
- Triangular shape maintains sharp edges as it wears down, allowing precise marking of narrow seam allowances
- Washable formula removes with water or laundering, leaving no permanent marks on finished garments
- Chalk pieces can break or crumble easily if too much pressure is applied during marking
- Removability may be inconsistent depending on fabric type, so testing on scraps is necessary
- Some colors like yellow may be too light to show up clearly on certain fabrics
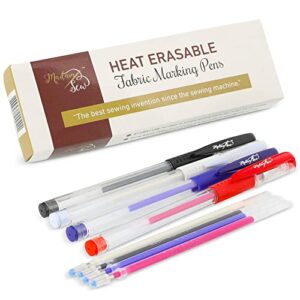
4. Heat Erasable Fabric Marking Pens Set
Heat-erasable marking pens give you crisp, clean lines that vanish with a hot iron, eliminating the guesswork that comes with chalk. The Madam Sew set offers four color options—black, blue, red, and white—with 0.7mm tip precision for detailed kimono construction. Each pen includes refill availability to extend your marking toolkit.
Test fabric compatibility on scraps first, since ink reappearance below 4°C can occur on certain materials. These pens excel at marking seam allowances and placement lines, making sewing techniques for beginners more manageable throughout your kimono project.
Best For: Sewists, quilters, and embroidery fans who want precise, temporary fabric markings that disappear quickly with heat.
- Fine 0.7mm tip makes detailed lines for seams, curves, and embroidery easy.
- Four-color set plus refills lets you mark on almost any fabric and lasts a long time.
- Marks vanish with an iron, with no washing or pretreatment needed.
- White ink may work poorly or be hard to see on some dark fabrics.
- Possible ghost marks or ink reappearance if used on certain materials or stored cold.
- Some users report issues with pen durability and ink not working out of the box.
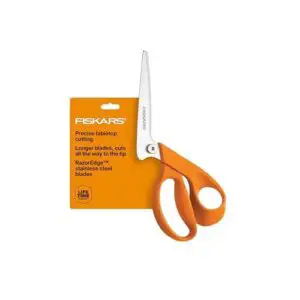
5. Fiskars RazorEdge Fabric Shears Seam Ripper
Ever thought a single tool could shape your sewing workflow? The Fiskars RazorEdge Fabric Shears Seam Ripper delivers ultra-sharp blade sharpness and ergonomic design, letting you cleanly snip silks or slice through cotton for kimono panels.
Its clever handle keeps fabric flat, so mistakes are rare, but if you do need a seam ripper, switching functions is simple.
Durability testing backs the long-lasting blades, making this tool ideal for sewing, precision seam ripping, or fabric versatility, whether by hand or with a sewing machine.
Best For: Dedicated sewists, quilters, and crafters who need sharp, durable shears and an integrated seam ripper for precise fabric work.
- Ultra-sharp, long-lasting stainless-steel blades for clean cuts on a variety of fabrics.
- Ergonomic handle and unique shape keep fabric flat and reduce hand strain during long projects.
- Dual function as shears and seam ripper simplifies sewing tasks and saves time.
- Handle and size may feel too large or bulky for those with smaller hands.
- Minor discomfort can occur around the knuckles during extended use.
- Not suited for anyone who prefers smaller, lighter scissors.
Step-by-Step Kimono Sewing Instructions
Now that your fabric and tools are ready, here’s how to bring your kimono to life. We’ll walk through each stage, from measuring all the way to finishing touches. Let’s look at what to expect, step by step.
Measuring and Drafting The Kimono Pattern
Measuring for a kimono pattern isn’t guesswork—it’s methodical and rewarding. Start with accurate Body Measurements: height, yuki, and hip. Use these to guide Panel Calculations and Sleeve Proportions.
Precision in Collar Drafting and attention to Seam Allowances anchor your sewing pattern. With these Pattern Making basics, you’ll shape the foundation for sewing a beautiful, wearable kimono.
Cutting The Fabric Panels
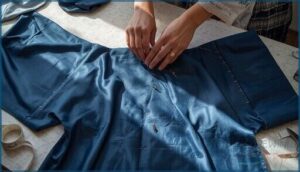
Once your pattern is drafted, it’s time to cut. Fabric cutting demands precision—your grain alignment should stay within 1/8 inch for proper drape. Use sharp cutting tools like rotary cutters or fabric shears, and apply marking techniques with tailor’s chalk or heat-erasable pens. Layering methods help you cut multiple panels at once.
Mark, measure twice, cut once—your kimono sewing patterns depend on it.
| Panel Type | Width | Length |
|---|---|---|
| Body (women) | 14 inches | 60 inches |
| Sleeves | 18 inches | 40 inches |
| Collar | 4 inches | 60 inches |
Assembling Body and Sleeves
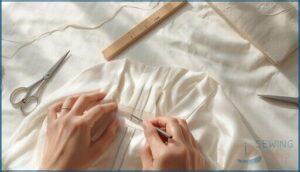
Now you bring your cut panels together—this is where the kimono takes shape. Sleeve attachment points sit roughly 22.5 cm from the edge, aligning with the shoulder fold. When you join body and sleeves, panel proportions matter: a 2.5 cm width change ripples into a 10 cm shift in your finished span.
- Sleeve Attachment Points: Position sleeves symmetrically at the shoulder line for balanced drape.
- Fit and Movement: Hip-based widths guarantee comfortable arm motion without pulling at joins.
- Machine Stitch Settings: Test 2.5 mm stitch length on scrap fabric to secure seams without puckering.
Sewing Seams and Finishing Edges
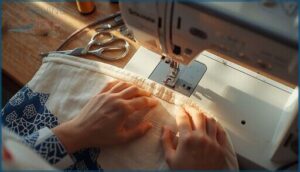
With your panels aligned, you’ll lock them with durable joins. Traditional Japanese sewing techniques favor seam allowances of 1 to 1.5 cm, letting you alter and reuse fabric later. Flat-felled seams excel for lightweight cotton yukata—they enclose raw edges and show higher breaking strength under stress than plain seams. Serger stitch settings simplify edge finishing options: a three-thread overlock simultaneously trims, stitches, and overcasts.
Reinforcing stress points—underarm openings and shoulder joins—prevents splitting during wear. Test stitch length on scrap before committing; machines set to 2.5 mm generally balance seam strength with fabric flexibility. Enclosed seam types like flat-felled reduce fraying without adding bulk, which is important for garment construction that prizes comfort and longevity.
| Seam Type | Best For |
|---|---|
| Flat-felled | Lightweight cotton, high strength |
| French seam | Sheer fabrics, clean interior |
| Overlock (3-thread) | Standard edges, moderate bulk |
| Rolled hem | Delicate overlays, compact finish |
| Five-thread safety | Heavy or ravel-prone textiles |
Techniques for Hemming and Neckline Construction
Your seams are secure; now perfect the edges. Kimono hemming starts with a double-fold: press fabric 1 cm, then 2 cm, and topstitch 3 mm from the inner fold. Neckline staystitching—1/2 inch from the raw edge—controls stretch before collar attachment. Traditional collar dimensions run 11 cm wide before folding. Japanese sewing techniques emphasize precise seam techniques:
- Mark hem allowances with a sewing gauge for even turns.
- Staystitch curved necklines from shoulder to center front.
- Cut collar panels 11 cm wide, tapering at the edges.
- Align collar seams where sleeve and shoulder meet.
- Position collar 2–5 cm behind the natural neckline.
Adding Traditional and Decorative Details
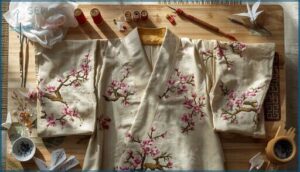
Once you’ve sewn the basic structure of your kimono, you can add traditional embellishments that bring character and cultural depth to your garment.
These decorative techniques range from simple hand-stitched patterns to more involved dyeing processes, plus practical touches like belts and pockets.
Here’s how to incorporate these finishing details into your project.
Sashiko Embroidery Basics
Sashiko embroidery transforms your kimono into a work of art, blending sashiko history with modern applications. This Japanese technique uses simple running stitches—about 2–3 per centimeter—to create geometric patterns. You’ll need sashiko thread, a long needle, and cotton fabric. The stitch techniques follow a 3:2 front-to-back ratio, keeping each line even across your design.
Material selection matters—tightly woven cotton works best for DIY sewing projects. Online sashiko embroidery tutorials guide beginners through moyōzashi patterns, and you can practice on scrap fabric before working on your sewing kimono. The technique strengthens seams while adding visual interest, making it ideal for visible mending and decorative touches on your handmade Japanese kimono.
| Tool | Purpose |
|---|---|
| Sashiko thread | Non-divisible cotton for clean lines |
| Long needle | Loads multiple stitches efficiently |
| Cotton fabric | Pre-washed base for pattern design |
| Palm thimble | Pushes needle through layers smoothly |
Shibori Dyeing Techniques
Shibori dyeing transforms plain fabric into Japanese textile art using resist techniques that date back to 756 CE. You’ll bind, fold, or clamp cloth before submerging it in indigo dye—a method perfected during Japan’s Edo period.
Indigo preparation requires careful pH adjustment and temperature control to achieve dye fastness ratings of 4–5 on cotton.
Pattern variations include kanoko (spotted), arashi (storm-like diagonal), and itajime (geometric) methods, each offering modern applications for your handmade kimono.
Creating a Matching Obi or Belt
To complete your DIY kimono, you’ll draft an obi pattern that balances traditional proportion with modern practicality. Start by taking your waist measurement over the finished kimono, then add about 5 cm ease for comfortable overlap.
- Cut your obi fabric choice 15–30 cm wide depending on formality level
- Apply medium-weight interfacing reinforcement to prevent collapsing
- Make sizing adjustments by extending belt length for multiple wraps
- Follow care instructions—wash cotton obi at 30–45 °C, avoiding direct sunlight
Japanese kimono sewing patterns benefit from precise fabric selection and pattern drafting techniques that honor weaving traditions while accommodating home construction methods.
Optional Pockets and Personalization Tips
You can transform a basic kimono into your signature piece by adding in-seam or patch pockets about 5 cm below the waist—fabric choices like cotton lining reduce bulk.
Embroidery designs, appliqué techniques, and custom closures let you personalize sleeves, chest panels, and pocket edges.
DIY sewing tips for kimono sewing patterns encourage bold fabric choices and unique weaving or print combinations that reflect your style.
Frequently Asked Questions (FAQs)
What fabric is best for a DIY kimono robe?
Cotton leads the pack for DIY kimono robes—it’s affordable, forgiving, and machine-washable. Silk brings luxury drape and sheen but demands delicate care.
Seasonal fabrics like gauze suit summer; budget options include rayon blends mimicking silk’s flow.
How long does it take to make a kimono?
The answer depends entirely on your approach. A simple cotton yukata can be sewn in a weekend at home, while traditional hand-crafted silk kimonos require over a year of preparation, weaving, and finishing.
Do I need a pattern to make a kimono robe?
You don’t need a kimono pattern, but it helps. Patternless advantages include adjusting fit using sizing formulas, though experience needed varies.
PDF pattern options offer yardage charts and sewing pattern design clarity for beginners.
How much does a DIY kimono robe cost?
A DIY kimono robe generally costs $20–40 using midrange cotton fabric and basic notions, with minimal tool investment and energy consumption under five cents. Overall savings increase as you complete more sewing projects.
Are there any additional supplies needed to make a kimono robe?
You’ll want pattern weights to hold your fabric steady, a thimble for hand-stitching, seam sealant for raw edges, and good lighting for precise work.
An ironing board helps press seams flat throughout construction.
How do I determine my kimono size?
Unlike Western clothing, traditional kimono sizing hinges on your height measurement—specifically, the distance from your neck vertebra to ankle bone. For proper wrap overlap, measure around your hips, then consult Japanese kimono size charts matching your height and girth allowance.
Fabric selection for kimonos and fit adjustments depend on these sewing patterns for authentic Japanese clothing construction.
Can I use a sewing machine or hand-sew?
You can choose either approach: sewing machines complete seams nearly three times faster than hand sewing, while traditional hand-sewn running stitches preserve fabric integrity and replicate authentic Japanese construction methods for kimonos.
How much fabric do I need to buy?
Fabric width and wearer height drive yardage needs for Japanese kimono. You’ll generally need 3–5 yards of 44-inch fabric for adults, or 6 meters of traditional narrow fabric, with sizing adjustments for design variations.
What are common mistakes beginners make when sewing?
Think of sewing as building a house—one crooked wall throws everything off. Beginners often stumble over fabric selection, cutting accuracy, seam allowances, machine setup, and training deficiencies, all affecting garment sewing success.
How do I care for my finished kimono?
Your finished kimono deserves gentle care.
Machine wash cotton at 30°C with low spin speed, air dry away from sunlight, and store flat in breathable boxes to preserve fabric and seams for years.
Conclusion
Your first kimono won’t be perfect, and that’s exactly as it should be. Each seam teaches you something the next one will benefit from, each panel cut reveals how fabric behaves under your hands.
You’ve learned how to sew kimono using techniques that bridge centuries, transforming rectangular cloth into wearable geometry. The tools rest within reach, the fabric waits on your table, and the pattern exists in your understanding now. What comes next belongs entirely to you.
- https://artsandculture.google.com/story/the-ancient-history-making-and-wearing-a-kimono-the-kyoto-museum-of-traditional-crafts/cAWBOL4nVSotIw?hl=en
- https://www.thecollector.com/the-evolution-of-the-japanese-kimono/
- https://www.janome.co.jp/ir/pdf/janome_report_2022_en.pdf
- https://datahorizzonresearch.com/kimonos-market-52660
- https://ora.ox.ac.uk/objects/uuid:80d0a41f-fdf0-41a8-a7cd-16c3b1f07845/files/m12b1a7c89e9661078331e6d16cad3e33

