This site is supported by our readers. We may earn a commission, at no cost to you, if you purchase through links.
You’ll need a heavy-duty sewing machine, leather needles, and polyester thread to handle this thick material.
Start by cutting your vinyl carefully with sharp scissors, then use tissue paper underneath while sewing to help the vinyl glide smoothly.
Set your machine to a longer stitch length and reduce pressure to prevent puckering.
Work slowly and steadily – rushing leads to wrinkled, unprofessional results.
The key is preparing your workspace and understanding how this slippery material behaves differently than regular fabric.
Master these fundamentals and you’ll discover specialized tricks that transform challenging vinyl into crystal-clear, weatherproof windows.
Table Of Contents
Key Takeaways
- Get the right materials first – You’ll need 20-30 mil gauge vinyl, heavy-duty needles (16/100 to 18/110), UV-resistant polyester thread, and a Teflon or walking foot to prevent the vinyl from sticking to your machine.
- Prep your vinyl properly – Let vinyl sheets lay flat for 24 hours before cutting to eliminate wrinkles, and always place tissue paper underneath while sewing to help the material glide smoothly through your machine.
- Adjust your machine settings – Use a longer stitch length (around 3.0), reduce presser foot pressure, and work slowly to prevent puckering and ensure clean, professional-looking seams.
- Plan for durability – Space grommets 8-12 inches apart using brass or stainless steel hardware, add 10-15% extra material for mistakes, and store your finished windows flat with fabric separators to prevent damage.
Preparing Marine Vinyl
Before you start sewing marine clear vinyl windows, you’ll need to properly prepare your vinyl material for the best results.
Getting the right gauge and handling your vinyl sheets correctly from the start will save you time and frustration during the actual sewing process, which involves careful preparation.
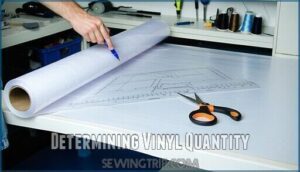
Determining Vinyl Quantity
Getting the right amount of marine clear vinyl prevents costly mistakes and reduces material waste.
You’ll need accurate measurements plus extra material for seam allowances and potential errors.
- Use a vinyl calculator to determine exact Project Size requirements based on your window dimensions
- Add 10-15% extra material to account for cutting errors and Future Projects
- Consider Roll Width limitations when planning your layout to minimize waste
- Account for seam allowances of 1-2 inches on all sides for proper installation
Choosing Vinyl Gauge
Vinyl gauge determines your project’s success.
Choose 20-30 mil for ideal thickness balancing sewing difficulty with durability factors.
Thinner gauges (16 mil) offer easier handling but compromise longevity.
Thicker options (30-40 mil) provide superior marine clear vinyl windows but require heavy-duty machines.
Consider gauge vs clarity tradeoffs and cost comparison when selecting marine vinyl windows for your boat.
For intricate detailing on vinyl projects, consider using the best vinyl cutters for precise designs.
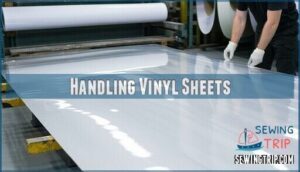
Handling Vinyl Sheets
Once you’ve selected your vinyl gauge, proper sheet handling makes the difference between frustration and success.
Unroll your marine vinyl sheets and lay them flat for 24 hours before cutting—this simple flat storage technique eliminates stubborn wrinkles that plague rushed projects.
Clean sheets with mild soap and water during pre-sewing cleaning to prevent debris from causing scratches, which is a crucial step for scratch prevention that protects your investment.
This step ensures smooth sewing of marine vinyl windows, ultimately leading to smooth sewing and a successful project.
Sewing Marine Clear Vinyl
Now you’re ready to tackle the actual sewing process with your marine vinyl properly prepared.
The key to success lies in mastering three essential techniques: precise cutting, effective wrinkle removal, and proper machine setup.
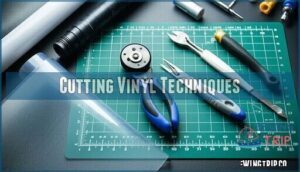
Cutting Vinyl Techniques
Proper cutting techniques make all the difference when working with marine vinyl. Sharp tools and steady hands prevent frustrating mistakes that waste expensive material.
Here are five key cutting techniques for marine vinyl:
- Mat and Ruler Setup – Use a cutting mat with ruler for straight, measured cuts that prevent slipping
- Rotary Cutter Use – Roll the rotary cutter in one smooth motion for clean edges on thick vinyl
- Scissors vs. Rotary – Choose rotary cutters for precision, sharp scissors for curved cuts only
- Cutting Thick Vinyl – Apply firm, consistent pressure when cutting 60-80 gauge vinyl to avoid jagged edges
- Minimizing Errors – Mark your cutting lines clearly before making any cuts to avoid costly mistakes
Removing Wrinkles From Vinyl
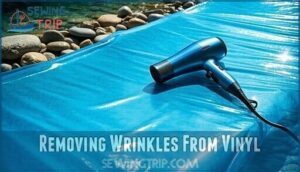
Since vinyl naturally relaxes with gentle heat, you’ll find sunlight exposure works best for removing stubborn wrinkles from marine vinyl fabric.
Place your clear vinyl fabric flat in direct sun for 30-60 minutes, securing edges with weights. For quick fixes, use a hair dryer on low heat, keeping it 6-12 inches away while moving constantly.
Understanding the causes, such as extreme temperature changes, can help prevent wrinkles. Gauge matters – thicker vinyl requires more controlled heat application than thinner materials, and recognizing this can aid in preventing wrinkles and applying the right amount of gentle heat.
Sewing Machine Setup
Your sewing machine settings can make or break your marine vinyl project. Start with a longer stitch length around 3.0 to prevent tearing the material.
Install a Teflon foot or walking foot for smooth feeding across the vinyl surface. Adjust your tension settings slightly looser than normal fabric.
Choose a heavy-duty needle designed for leather or vinyl. Regular machine maintenance keeps everything running smoothly during tough sewing jobs, ensuring a successful project with smooth feeding.
Selecting Sewing Materials
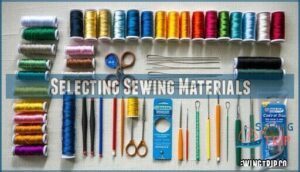
You’ll need the right materials to sew marine vinyl successfully and avoid common mistakes that can ruin your project.
The correct thread, needle, and helper materials make the difference between professional-looking windows and frustrating failures.
Choosing The Right Thread
Your thread choice determines your project’s longevity when sewing marine vinyl.
UV-resistant polyester thread outperforms nylon thread by years in marine environments.
Choose V-92 thread weight for maximum strength and sewability.
Match thread color to your binding for professional stitch appearance.
Marine grade options are specifically designed for harsh conditions.
Quality polyester thread maintains integrity through saltwater exposure and sun damage, making marine sewing projects last.
Selecting Needle Type
When sewing marine vinyl, your needle choice makes or breaks the project.
Heavy-duty needle sizes 16/100 to 18/110 work best for marine sewing tools.
Leather needles with cutting points pierce thick vinyl cleanly, preventing tearing that ballpoint needles cause.
Thread compatibility matters—match your heavy fabric needles to polyester thread for durability.
Skip standard needles; they’ll snap under pressure.
For a wider selection, consider purchasing reliable options for heavy-duty and durable sewing needs.
Using Tissue Paper
Place tissue paper over your vinyl before sewing marine vinyl to help with thread feeding and prevent your machine from sticking.
This tear-away stabilizer acts as a barrier between the vinyl and your presser foot, making sewing clear vinyl much smoother.
Remove the paper after completing your stitches. Paper alternatives like Press and Seal work too for boat window sewing projects.
After sewing, remember to address sewing machine cleaning to remove paper debris, which is an important part of maintaining your sewing machine and ensuring smooth operation.
Attaching Vinyl to Boat
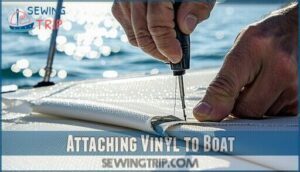
Once you’ve prepared your vinyl and gathered your materials, it’s time to attach the windows to your boat’s canvas structure.
This final step transforms loose vinyl sheets into functional, weatherproof windows that’ll keep you dry while maintaining clear visibility on the water.
Measuring and Cutting Vinyl
Getting accurate measurements sets you up for success when sewing clear vinyl window material. Your new marine clear vinyl windows need precise dimensions to fit properly and look professional.
Start by positioning your old window as a pattern template against the clear vinyl material. This gives you the exact shape and size needed for replacement:
- Hold the old window firmly against the vinyl gauge surface
- Trace around edges with a vinyl marking pencil for visibility
- Add 1/2 inch seam allowance on all sides for binding attachment
- Double-check measurements before making any cuts
Use a rotary cutter with a sharp blade for precision cutting. This cutting tool creates cleaner edges than scissors and prevents the vinyl from shifting during cuts, ensuring your cutting vinyl process produces professional results. To prevent damage, consider proper storage techniques for your vinyl.
Binding Vinyl Edges
After cutting your vinyl to size, you’ll need proper binding techniques to create professional edges.
Cut marine-grade fabric strips two inches wide for each edge. Fold and hem half an inch along both long edges of your fabric strips.
Position the hemmed binding with raw edges aligned against the vinyl edge. Your stitch placement should secure the binding while maintaining clean corners.
Use reinforcement methods like double-stitching at stress points for durability in harsh marine conditions.
Installing Grommets
With your edges properly bound, you’ll need grommets for securing your marine vinyl windows.
Space grommets 8-12 inches apart along the edges, staying at least one inch from the border.
Choose brass or stainless steel grommets in size 2 for most boat window installation projects.
A proper grommet setting tool guarantees correct installation.
Use a rotary punch for clean holes, then set grommets with a die tool for professional marine sewing results.
Maintaining Marine Vinyl
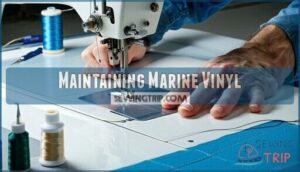
Your marine vinyl windows won’t last forever, but proper maintenance can extend their life substantially. Regular care and timely repairs keep your boat’s visibility clear and your investment protected.
Patching Small Holes
Small holes in your marine vinyl windows don’t spell disaster.
A small tear doesn’t mean you need new windows – simple patches can save your investment.
Quick vinyl hole repair using clear adhesive patches stops tears from spreading.
Cut a patch slightly larger than the damage, clean both surfaces, then apply with firm pressure.
These invisible patch techniques blend seamlessly when done right.
For a quicker fix, you might consider using fabric glue options.
For added strength, consider reinforcement options like backing material to prevent hole enlargement during future use, and use firm pressure for a secure fix.
Replacing Damaged Vinyl
When window discoloration or deep scratches make repair impossible, boat window replacement becomes your best option.
This DIY feasibility project costs less than replacing entire dodgers. Remove old vinyl by scoring edges, then cut new clear vinyl using your damaged piece as template.
Marine vinyl sewing requires proper gauge selection—30 to 60 works best.
Professional marine vinyl repair techniques guarantee your boat window replacement lasts years, preventing future crack prevention issues.
Cleaning and Storage Tips
Proper marine vinyl care starts with gentle cleaning using mild dish soap and freshwater rinses every two weeks.
Store your vinyl windows correctly to prevent permanent damage and extend their lifespan. To keep them in good condition, regular cleaning helps prevent damage from plasticizer evaporation.
Essential maintenance steps:
- Vinyl Cleaning Solutions – Use specialized vinyl window cleaner with UV protection, avoiding ammonia or bleach
- Proper Folding – Store flat with fabric separators between panels; never fold or allow vinyl-to-vinyl contact
- Temperature Control – Keep stored vinyl in climate-controlled environments to prevent brittleness and cracking
Frequently Asked Questions (FAQs)
Can I sew marine vinyl with a regular sewing machine?
Wonder if your trusty home machine can tackle thick marine vinyl.
You’ll need to make adjustments, but it’s definitely possible with the right approach and preparation.
Use 10-20 gauge vinyl, sharp leather needles, lengthened stitches, and Teflon feet for success.
Can clear vinyl be sewn?
Yes, you can sew clear vinyl successfully.
Use heavy-duty needles, polyester thread, and adjust your stitch length to
Apply tissue paper over vinyl to prevent sticking and guarantee smooth feeding through your machine. heavy-duty
Can you hand sew marine vinyl?
When push comes to shove, you can absolutely hand sew marine vinyl, though it’ll test your patience.
Use heavy-duty needles, strong polyester thread, and expect sore fingers from pushing through thick material.
What do I need to sew marine vinyl?
You’ll need a heavy-duty sewing machine, 16-18 gauge needle, UV-resistant polyester thread, Teflon presser foot, sharp rotary cutter, and tissue paper for smooth feeding through your machine.
How much does marine vinyl cost per yard?
Marine vinyl prices typically range from $99 to $44 per yard, depending on gauge and quality.
Clear vinyl starts lower at $05 per yard, while specialty upholstery grades can reach $43 per yard for premium options.
Can regular sewing machines handle thick vinyl?
Regular machines struggle with thick vinyl, often causing needle breaks and skipped stitches.
You’ll need heavy-duty needles, longer stitches, and walking feet.
Industrial machines like Sailrite’s Ultrafeed handle thick vinyl effortlessly without problems, using features that prevent skipped stitches.
What causes vinyl windows to turn yellow?
UV exposure and age cause vinyl windows to yellow over time. Non-UV-resistant vinyl degrades faster, losing its clear appearance within a few years of sun exposure.
How long do marine vinyl windows last?
Marine vinyl windows typically last 3-7 years depending on UV exposure and maintenance quality. UV-resistant vinyl extends lifespan by 2-5 years compared to standard materials, making it worth the investment.
Can vinyl be sewn in cold weather?
Like wrestling a stubborn zipper in winter, cold weather makes vinyl stiffer and harder to handle.
You’ll need patience—let vinyl warm to room temperature first, then use sharper needles and slower stitching for best results.
Conclusion
Mastering how to sew marine clear vinyl windows transforms boat maintenance from expensive professional repairs into manageable DIY projects.
You’ve learned the essential techniques: proper vinyl handling, correct machine setup, and quality materials selection.
Remember that patience beats speed every time with this material, and your first window might take longer, but each project builds your skills.
With these proven methods, you’ll create durable, crystal-clear windows that withstand harsh marine conditions while saving hundreds of dollars.
- https://www.marinevinylfabric.com/blogs/marine-vinyl-blog/how-to-remove-wrinkles-from-vinyl-heat-vs-sunlight-methods
- https://www.reddit.com/r/upholstery/comments/r62oai/any_tips_on_removing_creases_from_marine_vinyl/
- https://boatloverstowel.com/blogs/news/boat-window-cleaning
- https://www.youtube.com/watch?v=YVjyRJzTQcU
- https://forums.sailboatowners.com/threads/on-yellow-oxidized-isinglass-dodgers-etc.25123/

