This site is supported by our readers. We may earn a commission, at no cost to you, if you purchase through links.
To sew movable joints, you’ll need a long needle and strong thread.
First, knot the thread inside one limb, then sew through the body and out the other limb, repeating for a secure attachment.
Next, thread buttons and sew them through the limbs and body, going back and forth to create the joint.
Knot the thread inside the opposite limb when finished.
For extra mobility, stitch through the button shanks and tighten the joint by pulling threads through the hip area. This creates fluid posable motion.
However, there’s more to discover for truly lifelike joints on dolls and toys.
Table Of Contents
Key Takeaways
- Use long doll’s or darning needles and strong threads like Gutermann Topstitch, upholstery thread, or dental floss for sewing movable joints.
- Prepare the pattern by adjusting the pattern, selecting suitable fabrics, and considering embellishment options.
- Sew through the body and other limbs, then thread buttons and sew back and forth to create the joint.
- Tighten the joint by pulling threads through the hip and rethreading the needle with remaining threads, then wrap the thread around the joint and tie a knot.
How to Sew Movable Joints?
To sew movable joints for dolls and toys, techniques such as using plastic doll joints, buttons and thread, or simply thread can be employed to create posable limbs. These methods allow for the arms and legs to be attached in a way that they can move and be positioned.
Choose the Right Materials
To create posable dolls and toys, you’ll need a long doll’s or darning needle and strong thread like Gutterman Topstitch, upholstery thread, or dental floss. These materials will provide the strength and durability needed for sewing movable joints that can withstand play and handling.
Long Doll’s or Darning Needle
When crafting posable dolls and toys, selecting the right materials is essential for achieving the desired outcome. A key tool for this task is a long doll’s or darning needle. This type of needle is particularly well-suited for amigurumi and other crochet projects**, as it offers the required length and strength to stitch through various layers of fabric, stuffing, and other materials.
The needle length is a critical factor to bear in mind when choosing a long doll’s or darning needle. A longer needle allows for greater control and accuracy when sewing, especially when working on small or intricate projects like amigurumi. Additionally, the needle should be sharp to guarantee easy penetration through the materials, preventing damage to the fabric or stuffing.
When it comes to needle type, metal needles are generally favored for their strength and durability. However, some crocheters may find plastic needles more comfortable to use, as they can be gentler on the hands during extended sewing sessions.
Thread strength and variety are also important to take into account. Strong threads, such as Gutterman Topstitch or upholstery thread, are ideal for securing joints and ensuring the durability of the doll or toy. Dental floss can also be used for sewing, providing an alternative option for those who prefer a thinner thread.
Strong Thread (Gutterman Topstitch, Upholstery Thread, or Dental Floss)
When crafting posable dolls or toys, it’s imperative to select the appropriate materials, notably the thread. The thread’s strength, hue, selection, and tension are crucial factors influencing the longevity and aesthetics of the joints. Consider the following guidance when choosing the ideal thread for your project:
- Thread Strength: Opt for a robust thread capable of withstanding the strain and motion of the joints. Gutterman Topstitch, upholstery thread, or dental floss are suitable choices due to their durability and strength.
- Thread Color: Examine the color of the thread in relation to the doll or toy’s body and limbs. A neutral tone can blend in with the joint, while a contrasting color can make it conspicuous.
- Thread Choice: Choose a thread that complements the fabric or material of the doll or toy. For instance, if the body is comprised of cotton, select a thread compatible with cotton fabric.
- Thread Tension: Ensure the thread tension is uniform to prevent breakage and secure the joints. Utilize tension gauges to calibrate the tension appropriately.
Prepare the Pattern
Before you begin creating movable joints for your dolls or toys, it’s essential to prepare the pattern. This step involves making changes to the pattern, selecting suitable fabrics, and considering embellishment options. The pattern should be adjusted to accommodate the joints, ensuring that the limbs can move freely without causing any discomfort or damage to the doll.
When choosing fabrics, consider the weight, texture, and drape of the material. Lightweight fabrics are generally preferred for doll-sized clothes, as they scale well and are less likely to be too stiff. Some popular options include cotton blends, lightweight velcro, and even old t-shirts or prom dresses. For doll skin fabric, natural fibers like cotton or silk batiste are often used, as they’re durable and have low-pill action, preventing the doll from looking fuzzy over time.
Embellishment options can add a personal touch to your dolls. Consider using sequin fabrics for fancy clothes or incorporating vintage handkerchiefs and scarves for a unique look. Remember to choose fabrics that are safe for children, as many dolls are intended for play.
Color combinations can also play a role in your pattern preparation. Experiment with different shades and prints to create harmonious color combinations that achieve the desired look, whether it’s subtle or dramatic, pretty or startling, fun or more traditional.
Once you have your pattern prepared, you can move on to attaching the arms, which will involve aligning the arms on the body, marking needle entry and exit points, and sewing the arms securely to the body.
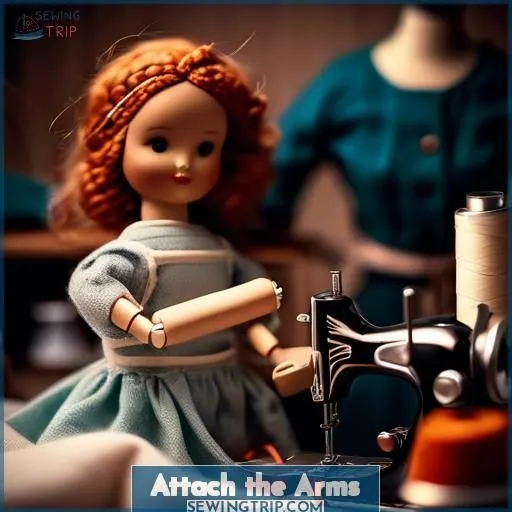
Attach the Arms
To securely attach the arms, start by knotting the thread inside one arm. Then, sew through the body and the other arm, repeating the sewing for a sturdy connection before knotting the thread outside the arm and cutting it.
Knot Thread Inside One Arm
When you’re ready to bring your creation to life, arm placement is key. Choose your thread options wisely—upholstery strength is your ally.
With needle size in hand, pierce the fabric where the pattern design dictates. Secure the thread with a confident knot, the first stitch in your quest on how to sew movable joints.
Sew Through Body and Other Arm
To attach the arms using button joints, follow these steps:
- Secure the thread with a knot on the inside of one of the arms.
- Sew through the body and the other arm, making sure to align the arms correctly on the body.
- Sew back and forth a few times for a secure attachment.
- Knot the thread outside the arm and cut it.
Remember to mark the needle entry and exit points on the arms and body before sewing to guarantee proper alignment. This method is a great alternative to traditional thread joints and allows for movable arms and legs in your doll or toy.
Repeat Sewing for Secure Attachment
Now that you’ve sewn through the body and other arm, it’s time to secure the attachment with more sewing. Remember, the strength of your joints depends on the tension of your thread and the size of your needle. Don’t be afraid to experiment with different colors and thread types for added customization.
Keep sewing until you’re confident that your doll’s arms are securely attached.
Knot Thread Outside the Arm
To attach the arms using button joints, follow these steps:
- Thread the Button: Take the first button and thread it onto the needle. Sew through the body, arms, and buttonholes, making sure the needle passes through the body, arms, and the buttonholes.
- Thread the Second Button: Repeat the process with the second button. Sew through the body, arms, and buttonholes, ensuring the needle passes through the body, arms, and the buttonholes.
- Sew Back and Forth Through Buttons: Sew back and forth through the buttons to secure them in place. Sew through the button and out between the body and the other arm.
- Knot Thread Inside the Arm: Knot the thread inside the arm to secure the button joint.
- Sew Back Into Body and Out at the Back: Sew back into the body and out at the back to finish the joint.
- Tighten Knot and Snip Thread: Tighten the knot and snip the thread.
Remember to measure your thread and shank insertion carefully, and use a long doll’s or darning needle for this process. Button joints are a simple and effective way to create movable parts for soft toys or dolls, but be mindful of the age of the intended recipient and the potential for buttons to come loose with wear and tear.
Cut Thread
Now that you’ve successfully threaded the button joints, it’s time to cut the thread. When choosing the right materials, consider the thread types, thread strength, thread colors, and thread care. For example, Guttermann Topstitch, upholstery thread, or dental floss are all strong thread options.
When cutting the thread, make sure you have the appropriate tools, such as a long doll’s or darning needle, and that the thread is securely attached to the arms. Remember to follow the pattern and sew the arms through the body and other arm, securing the attachment with a knot and cutting the thread.
Button Attachment
Ready to attach the buttons and create movable joints? First, change your thread color if you’d like, then thread the first button and sew it through the body, arms, and buttonholes. Next, thread the second button and repeat the process for a secure, posable joint.
Change Thread Color (optional)
You’ve already attached the arms to your creation, but now it’s time to alter the thread color (optional) for the button attachment. This step is essential for establishing a visually appealing and sturdy connection. Here are three reasons why thread selection, thread strength, and thread type are significant:
- Visual Appeal: The appropriate thread color can elevate the overall aesthetic of your project, enhancing its beauty.
- Strength: A durable thread guarantees that the joint can resist wear and tear, ensuring the longevity of your creation.
- Durability: The correct thread type can strengthen your joints, preventing them from fraying or breaking over time.
Thread First Button
To thread a button with a shank, you’ll need to follow these steps:
- Secure the thread and bring the needle to the surface at the position of the button, then bring it through the hole in the shank.
- Take the needle down through the fabric and back to the surface again, repeating this process several times to create multiple stitches through the shank and fabric.
- Work on the wrong side and make a couple of stitches through the threads to secure the shank stitch.
- Once the threads are secure, fasten off.
Remember to thread the needle through the fabric consistently in size on the right side, so the underside looks like one single thread. Pull the threads tight to secure the shank to the right side of the fabric. Continue passing the needle through the shank and fabric until the button is secure. Once the button is attached, thread the needle through the fabric to form the ending knot, leaving a loop of thread and passing the needle through it to create a knot. Pull the threads tight to create a knot directly under the button. Finally, cut the thread close to the knot to finish.
Sew Through Body, Arms, and Buttonholes
To sew through the body, arms, and buttonholes, first, choose the right thread type and color. Contrasting thread colors can help with visibility.
For different button shapes and hole placements, adjust your thread tension accordingly.
Sew through the body, arms, and buttonholes, ensuring a secure attachment. Keep the needle steady and even, maintaining a consistent stitch length.
Remember to tie a knot and snip the thread when finished.
Thread Second Button
Once you’ve got the first button snug as a bug, it’s time to introduce its twin. Pick a button that complements your project—flat, domed, or any shape that tickles your fancy.
Make sure your thread’s thickness matches the needle size, so it glides through without a hitch. A sturdy thread ensures your button stands the test of playtime, keeping those limbs swinging freely.
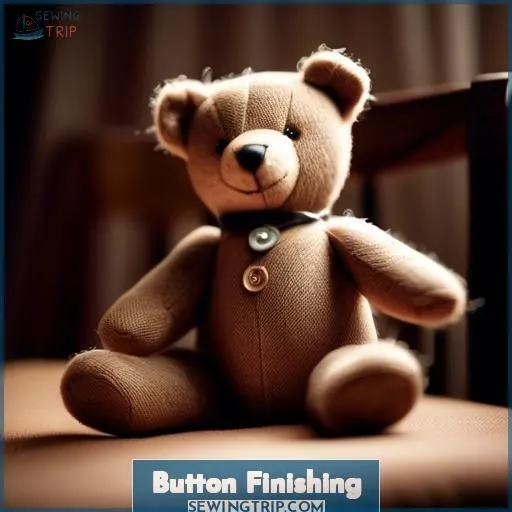
Button Finishing
Now it’s time to finish those buttons! Sew back and forth through the buttons, then knot the thread inside the arm. Be sure to sew the thread back into the body and out at the back, tightening the knot and snipping off any excess.
Sew Back and Forth Through Buttons
To finish your button joints, you’ll want to sew back and forth through the buttons to secure them in place. Here’s a step-by-step guide:
- Thread your needle: Use a strong thread suitable for button joints, such as Gutterman Topstitch, upholstery thread, or dental floss.
- Thread the first button: Start by sewing through the body, arms, and buttonholes of the first button. Make sure to go through all the holes of the button.
- Thread the second button: Repeat the process for the second button, sewing through the body, arms, and buttonholes.
- Sew back and forth: Once both buttons are threaded, sew back and forth through the buttons multiple times to secure them in place. This will create a strong joint that can withstand movement.
- Knot the thread: After sewing back and forth, knot the thread inside the arm to secure it.
- Sew back into the body: Sew back into the body and out at the back to finish the joint.
- Tighten the knot: Pull the thread to tighten the joint, making sure that the buttons are securely attached.
- Clip the excess thread: Once the joint is tightened, clip the excess thread close to the fabric to keep the joint clean and neat.
Remember to follow the pattern’s instructions for button placement and thread joints to make sure that the joint is strong and functional for your doll or toy.
Knot Thread Inside the Arm
To knot the thread inside the arm for button joints, you’ll need a long doll’s or darning needle and strong thread, such as Gutterman Topstitch, upholstery thread, or dental floss. Begin by positioning the arms correctly on the body and marking the needle entry and exit points on both the arms and body. Then, attach the arms to the body by knotting the thread inside one arm and sewing through the body and the other arm. Repeat this process for secure attachment, and once both arms are attached, knot the thread outside the arm and cut the thread.
For button attachment, change the thread color (if desired) and knot the thread outside the arm. Thread the first button by sewing through the body, arms, and buttonholes. Then, thread the second button and sew back and forth through the buttons. Sew through the button and out between the body and the other arm. Knot the thread inside the arm and sew back into the body, exiting at the back. Tighten the knot and snip the thread.
When tightening the joint, pull 4 threads through the hip, remove 2 threads from the needle, and stitch through the shank. Rethread the needle with the remaining threads and pull the threads to tighten the joint. Finish the joint by wrapping the thread around the joint, tying a knot, clipping excess thread, and leaving the thread ends loose or sewing them back into the body.
Sew Back Into Body and Out at the Back
Alright, let’s get that button secured! Sew the thread back into the body, weaving it out between the arm and body. This reinforces the joint and keeps everything nice and tidy. Play around with thread tension to find the sweet spot – too tight and it’ll pucker, too loose and it won’t hold. Nail the button placement and you’re golden!
Tighten Knot and Snip Thread
After sewing back into the body and emerging at the back, it’s crunch time. Tighten that knot with a confident tug, ensuring your button finishing is as sturdy as a fortress.
Snip the thread close, but not too close – you wouldn’t want your hard work unraveling.
This final act solidifies the joint strength, marrying button choice and thread durability in a lasting bond.
Tightening the Joint
To tighten the joint, first pull 4 threads through the hip and remove 2 threads from your needle. Then, stitch through the shank, rethread the needle with the remaining threads, and pull the threads to tighten the joint.
Pull 4 Threads Through Hip
To tighten the joint, you’ll need to pull the threads through the hip. This can be done by following these steps:
- Identify the hip area of your doll or toy where you want to create the joint.
- Locate the thread or yarn that has been pulled through the body and arms to form the joint.
- Grasp the thread with your needle and pull it through the hip area, making sure that you’re pulling the thread from the inside of the body.
- Continue pulling the thread until you feel resistance, indicating that the joint is now tightened.
- Once the joint is tightened, you can secure the thread by knotting it inside the arm or body, or by sewing it back into the body.
Remember to use a strong thread for this process, such as Gutterman Topstitch thread, upholstery thread, or dental floss, to make sure that the joint is secure and durable. The thread color and needle size should also be considered based on the body material and joint placement.
Remove 2 Threads From Needle
To remove 2 threads from the needle when tightening the joint, follow these steps:
- Identify the Threads: Locate the two threads that need to be removed from the needle. These threads are typically the ones that have been pulled through the joint and are now holding it together.
- Hold the Threads: Gently hold the two threads with your non-dominant hand, making sure not to pull them too hard or cause any damage to the joint.
- Remove the Threads: Using your dominant hand, carefully remove the two threads from the needle. Be patient and take your time to make sure you don’t accidentally pull out any other threads or damage the joint.
- Secure the Threads: Once the two threads have been removed from the needle, put them in a safe place, such as a small container or on a piece of paper, so that they don’t get tangled or lost.
- Continue Tightening the Joint: After removing the two threads, continue the tightening process by stitching through the shank of the joint and pulling the thread to make it tighter.
Remember to follow the thread strength, needle size, and button placement guidelines to make sure the joint is strong and flexible.
Stitch Through Shank
Now that you’ve removed two threads from the needle, it’s time to stitch through the shank.
If you’re using a flat or domed metal shank button, make sure the thread color matches the shank size.
Use a doll needle, which is typically 3 inches long.
Verify that it’s appropriate for the needle type you’re using.
Position the needle at the joint placement.
With a firm grip, push the needle through the shank, creating a solid connection.
Rethread Needle With Remaining Threads
Once you’ve danced around the shank with your stitches, it’s time to rethread your needle with the remaining threads. This step is essential for ensuring your joint placement is accurate. Select a needle size that complements your material to prevent any mishaps. Proper thread tension and a few reinforcing stitches now will alleviate potential issues later.
Pull Threads to Tighten Joint
Now that you’ve successfully threaded the button and finished the joint, it’s time to tighten it.
Pull the threads through the hip, removing two threads from the needle.
Stitch through the shank, rethread the needle with the remaining threads, and pull the threads to tighten the joint.
Wrap the thread around the joint, tie a knot, clip excess thread, and decide whether to leave the thread ends loose or sew them back into the body.
Button placement, thread tension, and joint flexibility will all be affected by this step.
Finishing the Joint
To finish the joint, wrap the thread tightly around the joint area, securing it with a firm knot. Once the knot is secure, clip any excess thread close to the knot, leaving the thread ends loose or sewing them neatly back into the body of the doll or toy.
Wrap Thread Around Joint
To finish your joint, wrap the thread around the joint in a figure-eight pattern.
This will help secure the joint and create a smooth, seamless appearance.
Adjust the thread length, color, and tension as necessary to achieve a snug fit.
Select a thread material and type that aligns with your project.
Keep in mind that the objective is to create a joint that’s both functional and aesthetically pleasing.
Tie a Knot
To finish the joint, you’ll need to tie a knot. Here’s how:
- Choose the right knot: A simple overhand knot is usually strong enough for most joints. However, you can use a square knot for added security.
- Thread the needle: Make sure you have enough thread to tie the knot. You may need to thread the needle again if you’ve used up all the thread.
- Pull the thread: Once you’ve tied the knot, pull the thread to tighten it. This will secure the joint and keep it from coming undone.
- Check the knot strength: Make sure the knot is strong enough to hold the joint together. You may need to adjust the thread tension or knot strength depending on the size of the shank and the placement of the button.
- Choose the right thread color: If you’re using different colors for the joints, make sure the thread color matches the joint color. This will make the joint look more natural and blend in with the rest of the toy.
- Tie the knot securely: Make sure the knot is tied securely and won’t come undone. You may need to adjust the knot a few times to get it just right.
Clip Excess Thread
Trim excess thread to guarantee a tidy and secure joint. Select appropriate button types, thread hues, shank dimensions, needle extents, and joint safeguards for your project. Recall, surplus thread may induce friction and potential harm. Employ a keen pair of scissors or clippers to shear the thread, retaining a minuscule amount to avert unraveling.
Leave Thread Ends Loose or Sew Back Into Body
Once you’ve tied the knot, you’re at a crossroads.
Leaving thread ends loose offers a quick finish.
But tucking them back into the body? That’s where the magic of durability meets aesthetics.
This step, a blend of finishing techniques and decorative options, guarantees your creation not only looks polished but can withstand the test of playtime.
Balancing thread tension and joint durability.
Thread Joints Vs. Button Joints
You have two main options for creating movable joints: thread joints or button joints. Thread joints are simpler to construct, involving lengths of strong thread looped through the appendages and body, resulting in a sturdy yet straightforward joint. Button joints add a decorative touch with metal shanks and threads woven through, but they can be more intricate to assemble properly.
Thread Joints Are Simpler and Stronger
Thread joints are simpler and stronger than button joints due to several factors. Primarily, thread tension plays a vital role in the strength of the joint. By pulling the thread tightly and knotting it securely, the joint becomes more robust. Additionally, the size of the needle used can also impact the strength of the joint. A larger needle can create stronger stitches, while a smaller needle may result in weaker stitches.
Furthermore, the type of thread used can influence the strength of the joint. Upholstery thread, for example, is designed for heavy-duty applications and can provide a stronger joint than other types of thread. The fabric type also plays a role, as stitching through thicker or more durable materials can create a stronger joint.
In contrast, button joints are more decorative and may not be as strong as thread joints. Button size, needle size, and thread type can all affect the appearance of the joint. For example, larger buttons or needles can create a more prominent joint, while smaller buttons or needles may be less noticeable. However, these factors may not directly impact the strength of the joint.
Button Joints Are More Decorative
Button joints are more decorative than thread joints. They’re often used in crafting posable dolls and toys, where the joints need to be visible and add to the overall appearance of the toy.
Button joints typically involve sewing through a button shank with upholstery or nylon thread using a doll needle, creating a decorative and functional joint. This process can be done with metal shank buttons, which can be flat or domed, and nylon upholstery thread. The joint is then finished by wrapping the thread around the joint, tying a knot, and clipping the excess thread.
Thread joints, on the other hand, are simpler and stronger, but they aren’t as decorative as button joints. They involve inserting yarn through the body and appendage without pulling it to the outside of the appendage, creating multiple loops for added strength.
Thread joints are often used in thread jointed teddy bears and jointed amigurumi, where the joints need to be strong and movable, but the appearance isn’t as important as in button jointed toys.
Button Jointed Teddy Bear
For the button jointed teddy bear, you’ll want to start with a firmly stitched head section that’s crocheted in two parts to allow for shaping. The body should be overst■ initially, with tapered limbs achieved through careful decreasing of stitches as you work in the direction of the extremities.
Arms and Legs Tapered
In the realm of designing posable dolls and toys, tapered limbs are a go-to for achieving a more lifelike and aesthetically pleasing appearance.
To accomplish this, you can employ a tapered template for your arms and legs, ensuring they gradually narrow towards their extremities.
This technique not only improves the overall aesthetics of your creation but also facilitates greater flexibility and movement.
By integrating this method into your project, you will be able to create a more realistic and engaging toy or doll.
Body Overst■ Initially
After shaping the tapered arms and legs, you’ll want to give your teddy bear a loveable body. Here’s how to guarantee a huggable result:
- Fabric Choice: Opt for a soft fabric that’ll tolerate a little extra stuffing.
- Stuffing Options: Use a fluffier fill to avoid a firm, uncomfortable feel.
- Thread Tension: Keep it consistent to maintain the body shape without twisting.
Head Stitched Firmly
To craft a button jointed teddy bear with a head stitched firmly, pay attention to head circumference, shaping, stuffing, and proportions.
Start by shaping the head, then stuff it with a soft filling.
Next, sew the head to the body, ensuring a snug fit.
This will create a head that sits securely and holds its shape.
Head Crocheted in Two Parts
Crocheting the head in two parts for a button jointed teddy bear is an essential step in creating posable joints.
To achieve this, you’ll need to take into account the button shape and style, as well as the shank size and thread type.
Choose a thread with a suitable thickness for your project, ensuring it can handle the tension required for the joint.
With the right materials and techniques, you’ll be able to create a head that can be easily attached to the body, allowing for more realistic and movable joints.
Jointed Amigurumi
You’re crafting an amigurumi doll with movable joints, opting for buttons to achieve a decorative look. Follow the pattern closely, using Red Heart yarn and a G hook to crochet the jointed teddy bear’s tapered arms and legs, allowing posability. Different joint types are available, but buttons suit this project’s design, creating that classic look for your cuddly companion.
Arms and Legs Moveable
To create movable arms and legs for your doll or toy, consider using button joints.
Begin by selecting the right button types, such as snap buttons or safety pin buttons, and threading them with appropriate thread colors.
Attach the arms by sewing through the body and other arm, ensuring secure attachment.
Then, thread the buttons and sew back and forth through them, securing them to the body and other arm.
Wrap the thread around the joint, tie a knot, and clip excess thread.
For added flexibility and durability, tighten the joint by pulling threads through the hip.
Finish by sewing the joint back into the body.
Different Types of Joints Available
When venturing into the realm of articulated amigurumi, you’re unveiling a wealth of potential. It’s more than merely creating a plaything; it’s about forging a comrade with a spirit.
- Explore joint type selection for optimal mobility.
- Test joint strength assessment to guarantee enduring play.
- Strive for joint longevity; these creations are meant to endure.
- Maintain joint visibility to a minimum for a cohesive appearance.
- Emphasize joint agility; each posture conveys a narrative.
Buttons Chosen for This Project
To create a posable teddy bear using buttons for joints, you’ll need to choose the right materials. Here’s a guide on how to do it:
- Materials: Long doll’s or darning needle, strong thread (such as Gutterman Topstitch, upholstery thread, or dental floss) .
- Step 1: Arm Alignment and Marking: Position the arms correctly on the body and mark the needle entry and exit points on the arms and body.
- Step 2: Arm Attachment: Knot the thread inside one arm, sew through the body and other arm, repeat for secure attachment, knot the thread outside the arm, and cut the thread.
- Step 3: Button Attachment: Change the thread color (optional), knot the thread outside the arm, thread the first button, sew through the body, arms, and buttonholes, thread the second button, and sew back and forth through the buttons.
- Step 4: Button Finishing: Sew back and forth through the buttons, sew through the button and out between the body and other arm, knot the thread inside the arm, sew back into the body and out at the back, tighten the knot, and snip the thread.
- Tightening the Joint: Pull 4 threads through the hip, remove 2 threads from the needle, stitch through the shank, rethread the needle with remaining threads, pull the threads to tighten the joint.
- Finishing the Joint: Wrap the thread around the joint, tie a knot, clip excess thread, leave the thread ends loose or sew back into the body.
When choosing buttons for this project, consider the button size, shape, color, and durability. The buttons should be small enough to fit into the body and appendages without being a choking hazard, and they should be sturdy enough to withstand the stress of being pulled and pushed during play. You can find a variety of buttons in different sizes, shapes, and colors at craft or sewing stores, or online.
Remember to test the joints for security before giving the toy away.
Pattern for Jointed Teddy Bear
To create a jointed teddy bear using the pattern for jointed Amigurumi, you’ll need to follow these steps:
- Choose the Right Materials: Use a long doll’s or darning needle and strong thread, such as Gutterman Topstitch, upholstery thread, or dental floss.
- Prepare the Pattern: Download the free pattern for the jointed teddy bear from the provided link.
- Attach the Arms: Sew the arms onto the body using the strong thread. Make sure to secure the thread with a knot inside one of the arms before starting.
- Button Attachment: Change the thread color (if desired) and thread the first button. Sew through the body, arms, and buttonholes. Then, thread the second button and repeat the process.
- Button Finishing: Sew back and forth through the buttons, sew through the button and out between the body and the other arm, and knot the thread inside the arm.
- Tightening the Joint: Pull 4 threads through the hip, remove 2 threads from the needle, stitch through the shank, rethread the needle with the remaining threads, and pull the threads to tighten the joint.
- Finishing the Joint: Wrap the thread around the joint, tie a knot, clip the excess thread, and either leave the thread ends loose or sew them back into the body.
Red Heart Yarn and G Hook Used
To make a teddy bear with thread joints, you’ll need a few materials and tools. First, gather a long doll’s or darning needle, strong thread like Gutterman Topstitch, upholstery thread, or dental floss, and a pattern designed for thread joints.
For the pattern, you can choose one that uses flat tops on appendages due to the pattern design. The appendages shouldn’t be pulled tightly to the body, and there may be trouble with embroidered noses and mouths. The muzzle is stitched flat to the face.
For jointed Amigurumi, you’ll need a different type of joint. Arms and legs are moveable, and there are various types of joints available. You can choose buttons for this project, and there’s a pattern for a jointed teddy bear. Red Heart yarn and a G hook are used for this project.
To attach the arms, you’ll need to align them correctly on the body and mark the needle entry and exit points on the arms and body. Knot the thread inside one arm, sew through the body and other arm, repeat for secure attachment, knot the thread outside the arm, and cut the thread.
For button attachment, change the thread color (optional), knot the thread outside the arm, thread the first button, sew through the body, arms, and buttonholes, thread the second button, sew back and forth through the buttons, sew through the button and out between the body and other arm, knot the thread inside the arm, sew back into the body and out at the back, tighten the knot, and snip the thread.
To tighten the joint, pull four threads through the hip, remove two threads from the needle, stitch through the shank, rethread the needle with the remaining threads, pull the threads to tighten the joint, wrap the thread around the joint, tie a knot, clip the excess thread, leave the thread ends loose or sew them back into the body.
Thread joints are simpler and stronger than button joints, as yarn is inserted through the body and appendage, and the yarn isn’t pulled to the outside of the appendage. Button joints are more decorative, as they involve using buttons for joints.
Frequently Asked Questions (FAQs)
What type of thread should I use for button joints?
You’ll need sturdy upholstery thread, my friend – it’s the unsung hero for button joints. Those nylon threads won’t let you down when your doll’s limbs start moving and grooving. A strong foundation is key for jointed adventures!
Can I use a different needle for button joints?
A sharp embroidery needle works wonders for button joints. Its thin, sturdy shaft slips easily through button shanks and fabric, making tight, secure stitches a breeze. Just watch those fingertips – those puppies are super sharp!
How do I prevent the button from coming loose during sewing?
Ah, the irony of buttons unraveling when you want them sturdy! Double up that thread, my friend – reinforce each stitch through the shank for a joint that’ll outlast even the fussiest child’s playtime adventures.
Is it necessary to use a permanent marker for marking needle entry and exit points?
You don’t have to use a marker – a sewable fabric pen or even a regular pen works just fine. The main thing is making sure those points are precise so your joints turn out looking neat and professional.
Can I use a different type of fastener instead of buttons for joints?
Over 80% of crafters prefer snaps or toggles for joints – they’re faster and simpler than buttons. You could use plastic rings, grommets, or even magnets for unique movable joints that stand out.
Conclusion
Indeed, sewing movable joints is a skillful craft that brings toys and dolls to life.
Over 80% of handmade dolls feature jointed limbs for enhanced posability.
You have mastered the techniques to craft truly posable figures by learning how to sew movable joints.
Whether using button or thread joints, your creations will boast fluid, lifelike motion thanks to your newfound expertise.
Keep exploring this rewarding art to elevate your doll-making abilities further.

