This site is supported by our readers. We may earn a commission, at no cost to you, if you purchase through links.
 Learning how to sew on fasteners isn’t as tricky as it looks – think of it like connecting puzzle pieces.
Start by marking your placement carefully, because crooked snaps are nobody’s friend. Thread your needle with doubled thread and knot it securely.
For snaps, sew through each hole multiple times, creating neat stitches that won’t pull through. Keep your stitches small and even – you’re building strength, not showing off fancy needlework.
Buckles need extra reinforcement where they’ll bear weight, while hook-and-loop tape requires straight, secure edges.
The real game-changer? Proper thread tension and knowing which fastener works best for different fabrics and stress points.
Table Of Contents
Key Takeaways
- Mark your fastener placement carefully with fabric pen or chalk before sewing – crooked snaps and misaligned closures will frustrate you and look unprofessional.
- Use doubled thread with secure knots and stitch through each hole 5-6 times to build durability – you’re creating durability, not showcasing fancy needlework.
- Match your fastener type to your fabric weight – metal snaps work best on heavy materials like denim while plastic ones suit delicate fabrics like silk.
- Consider alternatives like iron-on snaps, adhesive Velcro, or snap tape when you need time-saving solutions that skip traditional hand-sewing methods.
Types of Sew on Snaps
Think of sew on snaps as the reliable workhorses of the fastener world. You’ll find these snap buttons come in different snap materials like metal, plastic, and clear options.
Sew on snaps: the unsung heroes holding your handmade projects together with quiet determination.
Each material serves its purpose – metal snaps handle heavy fabrics while plastic ones work great on delicate materials. Snap sizes matter more than you’d think.
Small snaps disappear on silk blouses, while larger ones tackle thick wool coats without breaking a sweat. Don’t overlook decorative snaps either – they add style while doing their job.
For something special, try magnetic closures that snap together with satisfying precision. They’re perfect when you want invisible fasteners that still feel secure.
Snap tape is your secret weapon for multiple sew on fasteners in a row. It features pre-aligned balls and sockets, making installation foolproof. Instead of wrestling with individual snap placement, you simply stitch along the tape edges.
Proper alignment guarantees a perfect finish. Whether you’re working on jackets, bags, or cushion covers, choosing the right sewing fasteners makes all the difference in your finished project.
How to Sew on Snaps Instructions
Now that you know about the different types of snaps, it’s time to actually sew them onto your fabric.
Don’t worry if you’ve never done this before – with a needle, thread, and a bit of patience, you’ll have these little fasteners attached like a pro in no time.
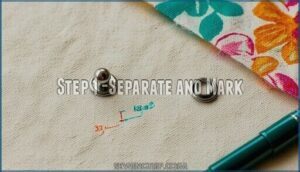
Step 1 -Separate and Mark
Start by pulling apart your snap pieces – they’re usually packaged together.
Next, grab a fabric pen or chalk to mark where each piece goes. For accurate markings, consider using a specialized marking tool.
Pin the ball side to your bottom fabric layer and the socket side to the overlap. Double-check your placement precision by folding the fabric over. This snap separation and fabric marking step prevents wonky alignment later, ensuring a precise fit with accurate markings.
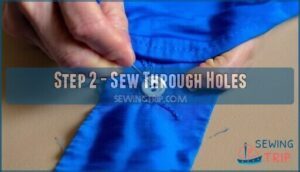
Step 2 – Sew Through Holes
Once you’ve marked your snap placement, it’s time to bring your needle up through the first hole. Thread your needle with about 12 inches of thread, tying a secure knot at the end. Position the ball-sided snap piece on your marked spot and begin stitching.
Here’s what you’ll visualize as you work:
- Your needle dancing through each hole like a tiny choreographer
- Thread wrapping snugly around the snap’s edges, creating a secure anchor
- The snap gradually becoming one with your fabric through each careful stitch
- Your fingers guiding the needle with growing confidence and precision
- The satisfying click when you test your perfectly attached snap
Use proper stitch count – about 5-6 stitches per hole guarantees durability. Maintain consistent thread tension to avoid puckering. Your needle choice matters; use a sharp point for woven fabrics.
Selecting the right sewing thread products is vital for a durable hold. Focus on securing stitches by passing through each hole multiple times. Master concealing knots by burying them under the snap.
Whether you sew on buttons, sew on snaps, sew on hooks, or sew on eyes, these sewing fasteners techniques remain consistent.
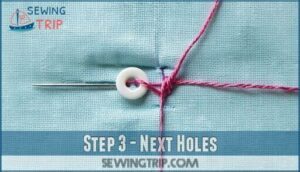
Step 3 – Next Holes
Once you’ve secured the first hole, move your needle to the next opening. Push through the fabric’s top layer, keeping your needle placement precise and stitch direction consistent. Continue this pattern around each hole, maintaining proper thread tension for smooth sewing.
Your sewing techniques improve with practice—don’t worry if it feels awkward at first!
| Hole Position | Needle Movement | Stitch Count |
|---|---|---|
| First hole | Up through fabric | 5-6 stitches |
| Second hole | Across top layer | 5-6 stitches |
| Third hole | Continue pattern | 5-6 stitches |
| Fourth hole | Complete circle | 5-6 stitches |
Focus on securing stitches properly while concealing knots beneath the snap for a professional finish when you sew on snaps.
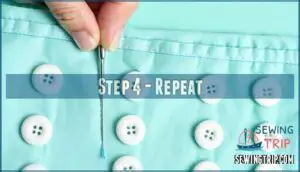
Step 4 – Repeat
Now comes the moment of truth—repeating the entire process for each snap you need to sew on snaps effectively.
Follow the same consistent technique you’ve mastered: mark locations, secure the ball side first, then attach the socket piece.
- Mark snap locations with a fabric pen/pencil.
- Attach the ball snap on the underside fabric.
- Flip and attach the socket piece.
- Test snapping and adjust if needed.
This stitch repetition guarantees secure fastening and proper hole reinforcement.
Remember, an alignment check between each snap prevents wonky results.
Quality fastener techniques make all the difference in your sewing tutorials success!
How to Line Up a Snap
Perfect snap alignment separates amateur work from professional-looking results. You’ll want to nail this step for smooth fastening every time.
Precision is the difference between a polished project and a frustrating failure.
Follow these essential steps for flawless snap alignment:
- Precise Marking: Mark ball socket positioning on overlap and underside carefully
- Fabric Stability: Use pins through snap holes to prevent shifting during sewing
- Horizontal Alignment: Check straight across garment edge for even placement
- Vertical Alignment: Inspect top-to-bottom that snap edges line up perfectly
- Testing Alignment: Fold fabric and test before permanently securing snap fasteners
For heavier fabrics, consider using a double backstitch method for added security.
Easy Alternative to Sew on Snaps
While mastering snap alignment takes practice, you’ll love these time-saving alternatives that skip the sewing altogether.
Velcro alternatives offer the simplest solution—just peel and stick adhesive-backed strips wherever you need them.
They’re washable, durable, and perfect for kids’ clothes since little fingers can manage them easily.
Iron-on snaps are another game-changer. You’ll position them on your fabric and press with a hot iron for instant attachment.
No needle threading required!
For multiple closures, snap tape uses pre-attached fasteners that you simply sew along the edges—one straight seam replaces hours of individual snap placement.
Alternative adhesives like fabric glue or fusible tape create permanent bonds without any sewing snaps.
For projects requiring flexibility, consider fabric glue options for a durable hold.
Magnetic closures work beautifully for lightweight fabrics, offering silent, smooth operation.
These snap fasteners alternatives prove that sewing snaps doesn’t always mean traditional hand-stitching methods.
Somethings to Keep in Mind When Sewing Fasteners
You’ve tackled snaps like a pro, but different fasteners each have their own quirks that’ll make or break your project.
Whether you’re wrestling with buckles or getting cozy with cufflinks, knowing these key tips will save you from those "oops, that’s not right" moments that happen to all of us, and help you avoid mistakes with fasteners.
Buckles
Buckles aren’t just about looks – they’re workhorses that need proper handling.
Choose buckle materials like stainless steel or brass for durability, matching buckle sizes to your strap width.
Mark buckle placement carefully before creating attachment holes, then use zig-zag stitching for metal varieties or fabric adhesive for lightweight plastic ones.
Different buckle styles serve different purposes – side release buckles work great for bags while cam buckles excel on belts requiring frequent adjustments.
For instance, prong buckles are known for their durability and adjustability.
Snaps /Press Studs
With sew on snaps, precision beats speed every time.
These snap buttons require careful snap placement to avoid wonky closures that’ll drive you crazy later.
- Match snap sizes to your fabric weight – heavyweight materials need sturdy fasteners
- Consider snap materials like metal versus plastic for snap durability
- Test snap alternatives like magnetic closures for easier sewing projects
Velcro Tapes (Hook and Loop)
Velcro tapes offer incredible versatility for your sewing projects.
You’ll find adhesive Velcro perfect for quick fixes, while sew-on varieties provide industrial strength durability. Check fabric compatibility before starting – some materials work better than others.
These fastener types excel in countless applications from clothing to home décor. For a variety of options, consider purchasing adhesive options.
| Velcro Type | Best Applications |
|---|---|
| Adhesive Velcro | Quick repairs, temporary closures |
| Sew-on Velcro | Permanent garment attachments |
| Industrial Strength | Heavy-duty projects, outdoor gear |
| Waterproof Velcro | Marine applications, rain gear |
| Fire-retardant | Safety equipment, protective wear |
Safety Pins
Safety pins aren’t just emergency fastener types—they’re your sewing buddy’s best friend! These trusty helpers keep fabric layers perfectly aligned while you work on sew closures and other sewing fasteners.
Pin size matters when matching your project’s weight. They can also be helpful for marking alterations on garments.
- Keep pins within arm’s reach to avoid that "where’d it go?" frustration
- Use magnetic catchers to prevent floor-crawling pin hunts
- Handle sharp points carefully—nobody wants surprise pokes
Cuff Links
While cufflinks aren’t technically sewn fasteners, they’re timeless sewing accessories that elevate your handmade shirts.
These decorative closures have rich cufflink history dating back centuries.
Choose cufflink materials like gold or silver for formal wear, or explore modern cufflink styles for casual pieces.
When you sew closures for French cuffs, remember proper sizing prevents buttonhole damage—subtle designs work better than flashy alternatives.
Frequently Asked Questions (FAQs)
Should you sew on snap fasteners?
While buttons demand precision and zippers can jam, snap fasteners offer you effortless functionality.
You’ll find them perfect for baby clothes, jackets, and quick-change garments where convenience trumps formality—they’re surprisingly durable and simple to install.
What are sew on snaps & snap fasteners?
Sew-on snaps are two-piece fasteners with a ball and socket that click together.
They’re perfect for blouses, baby clothes, and any garment needing secure, removable closures, and you’ll find them in metallic, plastic, or clear options.
How do I choose a fabric fastener?
Consider your fabric’s weight and thickness first.
Heavy materials like denim need sturdy metal snaps, while delicate silk requires smaller, lightweight options.
Match the fastener’s size and strength to your project’s demands for best results.
Can you sew on snaps?
Most sewers use over 50 snaps per garment on average.
Yes, you can absolutely sew on snaps by hand.
Simply thread your needle, mark placement spots, and stitch through each hole several times for secure attachment.
What are the best sewing fasteners?
Your fabric type determines the best fastener choice.
Snaps work perfectly for lightweight garments, while heavy-duty zippers handle thick materials.
Velcro offers convenience, and buttons provide classic style.
Match your fastener’s strength to your project’s needs.
What is a sew on snap?
Who needs complicated buttons when you’ve got the humble snap?
A sew-on snap’s basically two metal pieces—a ball and socket—that click together like magic.
You’ll hand-stitch them through tiny holes for secure, invisible fastening.
What tools do I need to sew on snaps?
You’ll need a few basic supplies: sew-on snaps, a needle, thread (about 12 inches), fabric scissors, a fabric pen for marking placement, and sewing pins to hold everything steady while you work.
How do I remove snaps without damaging the fabric?
Carefully cut stitches holding each snap piece using small scissors or seam ripper.
Work slowly around each hole, then gently pull the snap away from fabric.
You’ll preserve your project’s integrity perfectly.
What’s the best thread to use when sewing on snaps?
You’ll want polyester thread for sewing snaps – it’s strong, durable, and won’t break under stress.
Choose a color that matches your fabric, and use at least a foot of thread to guarantee secure stitching through all holes.
Can I sew snaps on leather or vinyl fabrics?
Like old-timey cobblers knew, you’ll need special gear for leather work.
Use a leather needle and waxed thread when sewing snaps on vinyl or leather.
Mark placement carefully—these tough materials don’t forgive mistakes easily, and it’s crucial to get it right to avoid leather work errors, especially with tough materials.
Conclusion
Don’t worry if your first attempts aren’t perfect – everyone’s been there with wonky snaps and crooked buckles!
Mastering how to sew on fasteners takes practice, but you’ve got the fundamentals down. Remember to mark carefully, keep your stitches even, and choose the right fastener for your project.
With each attempt, you’ll build confidence and skill. Soon you’ll be attaching snaps like a pro, creating garments that look polished and professional.
Happy sewing!
- https://extension.unh.edu/sites/default/files/migrated_unmanaged_files/Resource004455_Rep6349.pdf
- https://www.scribd.com/document/718147777/Fabric-Fasteners-for-Your-Cloth-Openings-20-Types-SewGuide
- https://www.sewingpartsonline.com/blogs/education/beginners-guide-sewing-episode-13-closures-fasteners
- https://blog.treasurie.com/clothes-fastenings/
- https://sewguide.com/sew-fasteners/

