This site is supported by our readers. We may earn a commission, at no cost to you, if you purchase through links.

First, clean your patch to prevent shrinkage, then position it over the area needing repair or decoration. Secure temporarily with fabric adhesive spray or pins.
Thread your needle with a double strand, knot the end, and start with a running stitch around the patch edges. Keep stitches consistent—about 10-12 per inch—and overlap onto the patch by 1/16 inch for secure attachment. The whip stitch works perfectly for reinforcing edges, while the slip stitch creates nearly invisible seams.
Your thread tension matters more than you’d think for professional results.
Table Of Contents
Key Takeaways
- Gather quality supplies first – You’ll need sharp scissors, matching thread, proper needles, and fabric adhesive spray to secure patches temporarily before stitching.
- Pre-wash and position carefully – Clean your patch to prevent shrinkage, then use pins or fabric spray to hold it in place while you work around the edges.
- Master basic stitches for durability – Use running stitch for lightweight patches, whip stitch for edge reinforcement, or slip stitch for nearly invisible seams with 10-12 stitches per inch.
- Focus on professional finishing touches – Match thread colors to your patch, overlap stitches by 1/16 inch onto the patch fabric, and maintain consistent tension to prevent puckering or loose edges.
Essential Tools for Sewing on Patches
Before you start sewing patches onto your favorite jacket or jeans, you’ll need the right tools to make the job smooth and professional-looking. Having quality supplies on hand will save you from frustration and guarantee your patches stay put through countless washes and wear.
Needles, Threads, and Thimbles
In the context of hand sewing patches, you’ll need three trusty companions for the journey ahead. Choose a standard needle that won’t fight through fabric, strong polyester or cotton threads that match your patch, and a protective thimble to save your fingertips from becoming pincushions.
Quality sewing supplies make all the difference in achieving professional results. Using the right sewing needle types is essential for a successful sewing experience.
Temporary Fabric Adhesive Sprays
With fabric bonding spray adhesives, you’ll secure patches temporarily without pins pricking your fingers. These temporary fixes from sewing supplies stores let you position patches perfectly before stitching.
Most fabric glues wash out easily, though check adhesive removal instructions first. Your sewing studio services might recommend specific brands that won’t gum up your needle or stain fabrics during sewing education classes.
Using the right fabric adhesive is essential for a strong bond.
Needle Pullers and Scissors
Sharp scissors and reliable needle pullers make tough sewing jobs manageable. When threading becomes frustrating or cutting fabric feels like wrestling, these tools restore your confidence.
Proper use of cutting tools is essential for achieving professional results in sewing and patching.
- Sewing Shears – Invest in quality fabric cutters with 8-10 inch blades for clean, precise cuts
- Hand Trimmers – Keep small scissors nearby for snipping threads and detail work
- Needle Threaders – These tiny helpers slide thread through needle eyes with ease
- Scissor Sharpening – Maintain your tools regularly at local sewing studio services
- Needle Pullers – Rubber grips help extract stuck needles from thick patches without finger strain
Choosing The Right Patch Material
Your patch material determines how long your repair lasts. Cotton twill works best for uniforms and everyday wear—it’s tough and processes embroidery beautifully. Felt won’t fray, making it perfect for beginners tackling decorative projects. Canvas manages heavy-duty jobs on workwear and outdoor gear. Polyester fights moisture and UV damage while maintaining flexibility. Choose cotton blends for comfort or synthetic fabrics for extreme durability.
When selecting fabrics, consider the fabric selection guide to guarantee the best results for your embroidered patches.
How to Prepare Your Patch and Garment
Before you start stitching, proper preparation saves you from headaches later and guarantees your patch stays put for years. You’ll want to clean your patch, check your garment for any damage, and secure everything in place before threading your needle.
Cleaning and Pre-Washing Patches
Nobody wants their patches to shrink after attachment, turning your masterpiece into a wonky mess. Pre Wash Methods prevent Patch Shrinkage by removing manufacturing chemicals and excess dyes.
Gentle hand-washing preserves Color Preservation while achieving proper Fabric Prep. For stubborn marks, tackle Stain Removal before sewing.
This simple step saves countless headaches and keeps your fabrics looking professional.
Repairing Tears Before Patching
Before placing your patch, address any existing tears through proper tear assessment and damage control. Small holes need garment reinforcement to prevent further spreading once you start stitching.
Here’s your pre-repair techniques checklist:
- Clean torn edges – Trim loose threads and frayed fabric with sharp scissors
- Apply fabric stabilization – Use interfacing or backing fabric behind larger tears
- Test stitch tension – Practice on scrap fabric to avoid damaging weakened areas
Even experienced sewers from sewing classes know that rushing this step often leads to bigger problems. Your sewing machine and sewing skills won’t help if the foundation isn’t solid.
Professional sewing services always prioritize this step for lasting results. To guarantee a strong bond, consider using patch sewing techniques that match your jacket’s material and style.
Pinning or Adhering The Patch in Place
Everyone struggles with keeping patches in the right spot while sewing. Before you start stitching, you’ll need to secure your patch using either pins or fabric adhesive. Both methods offer excellent Patch Placement Tips and create reliable Fabric Bonding for professional results.
| Method | Best For |
|---|---|
| Straight Pins | Lightweight fabrics, temporary placement |
| Fabric Spray Adhesive | Heavy patches, permanent positioning |
| Fabric Glue Stick | Delicate materials, easy repositioning |
These Secure Attachment Methods prevent shifting during sewing, whether you’re hand-stitching or using a sewing machine. Many sewing classes teach both Pinning Techniques and Adhesive Types, helping you master these essential sewing skills through hands-on practice in sewing workshops.
Step-by-Step Guide to Sewing on Patches
Now you’re ready to turn that perfectly positioned patch into a permanent part of your garment. With your needle threaded and patch secured, you’ll master the basic stitching techniques that make patches look professional rather than like a quick fix from summer camp.
Threading The Needle and Knotting
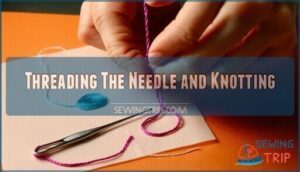
Start by choosing strong polyester or cotton thread that matches your patch color for a uniform look. Cut approximately eighteen inches of thread—too long creates tangles, too short means constant re-threading. **Thread Selection matters for durability.
** If you struggle with threading, needle threaders are lifesavers for Hand Sewing projects.
Tie a secure knot at the thread’s end using proper Knot Tying technique to guarantee Stitch Security throughout your work.
Starting and Securing Your Stitch
Once your needle’s threaded, position the patch where you want it and insert the needle from underneath the fabric. Pull it through until your knot catches against the base material – this anchors your first stitch securely.
Keep stitch tension consistent but not too tight, as this prevents puckering. Your knot techniques and proper stitch anchoring create the foundation for durable patches that won’t come loose.
Common Stitch Types for Patches
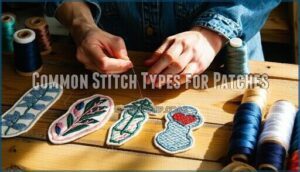
Choose your stitch based on your patch material and desired look.
Running Stitch works for lightweight patches—simple in-and-out motions create clean lines. Whip Stitch secures edges perfectly, wrapping thread around patch borders. Blanket Stitch adds decorative flair while preventing fraying. Slip Stitch creates nearly invisible seams for professional results.
Each technique transforms your patching game completely.
Finishing and Cutting Your Threads
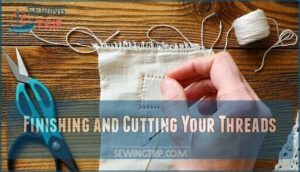
Once you’ve completed your final stitch, create secure knots by wrapping the thread around your needle several times before pulling through. This locks everything in place like a trusty anchor. Trim threads close to the fabric using sharp cutting tools, leaving just enough tail to prevent your hard work from unraveling.
Check thread tension isn’t too tight to avoid puckering. To prevent further issues, consider using thread conditioner tips to maintain your threads.
Tips for a Professional Patch Application
You’ve mastered the basics, but a few professional touches will make your patch look store-bought instead of homemade.
These finishing techniques separate amateur work from expert craftsmanship, ensuring your patches stay put and look polished for years to come.
Matching Thread Colors and Stitch Length
Perfect thread selection makes all the difference between amateur and professional-looking patches. Use Thread Color Theory to match your patch—choose contrasting colors for visibility or exact matches for subtlety. Color Matching Tools help you nail the perfect shade every time.
Set your Stitch Length Control to 10-12 stitches per inch on medium fabrics, adjusting for Fabric Texture Impact.
Preventing Frayed Edges
Frayed edges can turn your patch from polished to ragged overnight. For solid edge reinforcement, overlap your stitches by at least 1/16 inch onto the patch fabric itself. This fabric stabilization technique locks down loose threads before they start their escape act.
Maintain consistent thread tension throughout your sewing—too loose lets fibers wiggle free, while proper seam finishing keeps everything neat and professional-looking.
Using a Sewing Machine Vs. Hand Sewing
Deciding between machine speed and hand precision depends on your project’s needs. Sewing machines deliver lightning-fast results—completing patches in under five minutes—while hand sewing offers unparalleled control for tricky curves and delicate fabrics.
- Machine Speed: Finish three patches in just 10 minutes instead of spending your entire afternoon
- Hand Precision: Navigate awkward corners and thick layers without fabric bunching or needle breaks
- Stitch Quality: Achieve uniform, professional lines with machines or create custom decorative patterns by hand
- Fabric Handling: Hand sewing won’t skip stitches on challenging materials like thick denim or leather
Avoiding Damage to Garments
Protecting your garment during patch application prevents costly mistakes and preserves fabric integrity. Whether you’re using sewing machines or hand sewing, gentle handling makes all the difference. Test stitch tension on scraps first—tight stitches can pucker delicate fabrics like silk.
| Fabric Type | Protection Method | Common Pitfall |
|---|---|---|
| Delicate silks | Use tissue paper backing | Over-tensioned stitches |
| Heavy denim | Reinforce seam areas | Needle breakage |
| Knit fabrics | Stabilize with interfacing | Fabric stretching |
Understanding fabric selection basics is essential for achieving professional results in garment construction. Proper garment care during sewing prevents tears and maintains professional results across all sewing patterns and projects.
Where to Learn and Shop for Sewing Supplies
Whether you’re a complete beginner or looking to expand your skills, finding the right resources can make all the difference in your patch-sewing journey.
You’ll discover plenty of local studios and online communities ready to guide you through techniques while helping you source quality supplies that won’t break the bank.
Local Sewing Studios and Workshops
Looking beyond your living room, local sewing studios and workshops offer hands-on guidance that transforms beginners into confident patch-sewers. Philadelphia Studios like SEWSEW STUDIO provide expert instruction through structured sewing classes and flexible workshop schedules.
These sewing communities create supportive environments where you’ll master techniques alongside fellow enthusiasts, with studio rentals available for practice sessions.
Online Sewing Classes and Communities
You’ll find outstanding resources through online sewing schools like Sew It Academy, serving over 800,000 students worldwide with video courses and community patterns. Virtual workshops connect you with expert instructors, while sewing forums and blogs offer real-time advice from fellow crafters. These online tutorials make mastering patch techniques accessible from anywhere.
Many beginners start with online sewing classes to develop their skills and confidence in sewing.
Trusted Sources for Fabrics and Tools
Home Sew stands out among fabric suppliers with sixty years of sourcing experience, offering curated selections from luxurious silks to durable denims. Their supplier relationships guarantee competitive prices on quality materials.
For vintage machines and specialty tools, established sewing studios often stock hard-to-find notions. Check tool reviews before investing in machine supplies, and shop fabric stores that prioritize material quality over quantity.
When working with sewing equipment, understanding proper machine tool maintenance is essential for extending the life of your devices.
Frequently Asked Questions (FAQs)
Can I sew on a patch using a sewing machine?
Absolutely, it’s like having a trusty sidekick! You can sew patches using a machine with a straight or zigzag stitch. Just secure the patch with pins first, then stitch around edges slowly for neat results.
What type of thread should I use for sewing on patches?
Use strong polyester or cotton thread for durability. **Standard thread works perfectly fine.
Match the thread color to your patch for uniform blending, or choose contrasting colors for bold design effects.
How do I remove a sew-on patch if I want to replace it?
Like unraveling a mystery, carefully cut the thread securing your patch using small scissors or a seam ripper. Gently pull away any remaining threads, then smooth the fabric where your old patch once lived.
What should I do if my patch starts to come loose after sewing?
Don’t panic—loose patches happen! Reinforce weak spots by adding extra stitches around edges where it’s pulling away. Remove and re-sew completely if it’s substantially loose for best results.
Can patches be sewn on leather jackets?
Leather’s tough reputation might intimidate you, but here’s the secret: patches absolutely can be sewn onto leather jackets! You’ll need heavy-duty needles, strong thread, and patience for those thick layers.
How do you sew curved or round patches?
Curved patches require careful pinning and frequent repositioning. Start at the patch’s center, working outward in small sections. Ease fabric gently around curves, making tiny adjustments to prevent puckering and maintain smooth edges.
Whats the best way to remove old patches?
Absolutely savage old patches cling desperately to fabric! Use a seam ripper to carefully cut stitches, then gently pull away remnants. Heat from a hair dryer softens stubborn adhesive patches before peeling them off completely.
Can iron-on patches be hand sewn instead?
Yes, you can hand sew iron-on patches instead of using heat. Just treat them like regular patches—pin them down and stitch around the edges using a straight stitch or blanket stitch for security.
How do you sew patches on stretchy fabrics?
Pin the patch firmly to prevent shifting, then use a ballpoint needle and stretch stitch or zigzag stitch.
Don’t pull the fabric taut while sewing—let it relax naturally to maintain its stretch.
Conclusion
Where once you might’ve dreaded torn clothes, you’ll now see opportunities for creative expression. Mastering how to sew on patches transforms everyday repairs into unique style statements.
You’ve learned the essential techniques—from proper preparation to professional finishing touches. Practice makes perfect, so don’t worry if your first attempts aren’t faultless.
With these skills, you’ll confidently tackle any patching project, whether fixing favorite jeans or adding decorative flair to jackets.
- https://docs.google.com/forms/d/1GAQr3Kn1cURCVHUA82hAga1Wv8DCH0IuqDLRUrOpN7M/viewform?ts=63f4f653&entry.1515682415=https://www.merriam-webster.com/dictionary%2Fsew
- https://premium.britannica.com/mw-unabridged/?utm_source=mw&utm_medium=inline-def&utm_campaign=evergreen
- http://mailto:hello?subject=SIA%20Question
- https://maps.google.com/?daddr=7051%20Germantown%20Ave
- https://www.ultrapatches.com/blog/durability-of-different-patch-types/


