This site is supported by our readers. We may earn a commission, at no cost to you, if you purchase through links.
 Darts in sewing are triangular folds you stitch into fabric to create shape and structure.
They’re your secret weapon for transforming flat fabric into pieces that hug the body’s natural curves. You’ll typically find darts at bust points, waistlines, and shoulder blades—anywhere fabric needs to conform rather than hang straight.
Think of them as fabric origami that gives your garments that custom-fit feel. You can sew different types, including single-point, double-point, and curved darts, each serving specific shaping needs.
Master this fundamental technique, and you’ll notice the dramatic difference between clothes that fit and clothes that flatter.
Table Of Contents
Key Takeaways
- You’ll use darts to transform flat fabric into three-dimensional shapes that contour to your body’s natural curves, creating garments that don’t just fit but flatter.
- Different types of darts serve specific purposes—standard darts for basic shaping, French darts for elegant bust-to-waist lines, curved darts for smoother contouring, and double-ended darts for balanced fabric distribution.
- You can master dart techniques by marking accurately, folding precisely, sewing from wide end to point with adjusted stitch length, and pressing properly over a tailor’s ham for professional results.
- You’ll find darts most commonly at bustlines, waistlines, and shoulder areas where they remove excess fabric while adding structure and design elements to your garments.
Darts in Sewing Basics
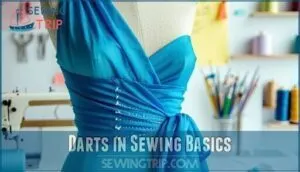
You’ll find that darts are your secret weapon for transforming flat fabric into garments that actually fit your body’s curves.
They’re simply folded wedges of fabric that, when stitched, create the three-dimensional shape needed to contour around your bust, waist, and other areas where fabric would otherwise bunch or hang awkwardly.
Definition and Purpose
In the realm of sewing, darts are essential wedges of folded fabric that transform flat material into three-dimensional garments.
They’re your secret weapon for creating perfectly fitted clothes that flatter the body’s curves.
- Removes excess fullness where fabric would otherwise bunch
- Shapes fabric to contour your body’s natural lines
- Creates design aesthetics through strategic placement
- Adds structure to garments that might otherwise hang limply
You’ll find darts most commonly in fitted clothing where body contouring matters most.
Anatomy of a Dart
Every dart consists of three essential components that work together to create shape.
The dart legs form the V-shaped lines that determine how much fabric is folded, while the dart point (also called the apex) marks where stitching ends.
Between them runs the centerline fold where you’ll actually fold your fabric.
Understanding this basic anatomy helps you master the seam line placement for perfectly fitted garments.
Proper marking guarantees accurate dart placement for a professional finish to achieve a well-made garment with perfectly fitted results.
Types of Darts
Now that you know the basic structure of darts, let’s look at their various types.
Darts come in several forms, each serving specific fitting needs.
Standard darts are single-pointed and commonly used for bust and waist shaping.
You’ll also find curved darts that follow body contours, French darts that combine waist and bust shaping, and double-pointed darts (also called fish-eye darts) that create subtle curves in fitted garments.
What Are Darts For
Transforming flat fabric into garments that hug your curves is the primary purpose of darts in sewing. When you add darts to your projects, you’re creating three-dimensional shape from two-dimensional fabric, basically sculpting clothing to match the human form.
Darts remove excess fabric in key areas, allowing garments to contour to your body’s natural silhouette. Beyond fit and shape, they serve as design elements that can enhance your garment’s visual appeal through strategic placement.
Fabric manipulation through darts adds structure and improves garment functionality, preventing awkward bunching or sagging. You’ll find darts particularly useful when sewing fitted bodices, skirts, and trousers that need to accommodate curves.
Body contouring becomes possible without complex construction techniques, making darts an essential skill for creating professional-looking, well-fitted clothing that flatters the wearer’s unique shape. Achieving a perfect fit may require adjusting dress bust darts for ideal shaping.
Sewing Darts Techniques
You’ll master sewing darts with the right techniques that transform flat fabric into flattering, three-dimensional garments.
From marking and folding to stitching and pressing, these essential methods guarantee your darts create professional-looking contours that perfectly fit the body’s curves, using techniques that help you master sewing darts.
Marking Darts on Fabric
Before starting your sewing project, accurate dart marking is essential for proper garment shaping.
You’ll need fabric marking tools like chalk, water-soluble pens, or tailor’s tacks to transfer pattern markings precisely. When marking curved darts, use small dots along the lines to guarantee smooth shaping.
Double-check your dart placement against your pattern to prevent marking errors that could affect your garment’s fit. For delicate fabrics, consider using tailor’s chalk for accuracy and to ensure the best results with proper garment shaping.
Folding and Pinning Darts
Precision is the heartbeat of successful dart folding.
To properly fold your darts, match the dart legs at the edge and fold fabric through the dart point along the centerline.
Secure with pins perpendicular to the fold, with one pin specifically crossing the apex, this fabric manipulation technique guarantees perfect dart leg alignment before sewing.
Remember, proper pin placement prevents shifting and guarantees your dart point will be precise when stitched.
Sewing Darts Step-by-Step
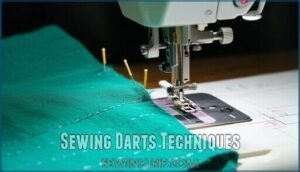
Once you’ve pinned your dart correctly, it’s time to stitch. Start sewing from the wide end using a medium stitch length (2.5), gradually decreasing to 1.0-1.5 as you approach the tip.
Don’t backstitch at the point—instead, sew off the edge, lift the presser foot, and pull threads through to anchor. Choosing the correct sewing machine needles is also essential for achieving a smooth and professional dart finish.
Knot threads by hand for a clean finish that won’t distort your carefully shaped dart.
Pressing Darts for Finish
Once your darts are sewn, proper pressing transforms them from flat stitches to three-dimensional shaping elements. The way you press matters as much as how you sew them.
For professional-looking darts, consider the following steps:
- Press over a tailor’s ham to maintain the curved shape
- Direct bust darts downward, vertical darts toward center
- Trim fabric bulk if needed, leaving adequate seam allowance
- Use steam sparingly on delicate fabrics to avoid distortion
A tailor’s ham alternative could also be used.
Dart Types and Uses
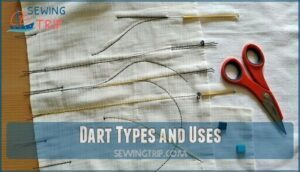
You’ll find several types of darts that serve different fitting purposes in garment construction, from standard triangular darts for basic shaping to specialized French and curved darts for more complex contouring.
Each dart type has its ideal placement and use, helping you transform flat fabric into garments that follow your body’s natural curves.
Standard Darts
Now that you’ve learned how to sew darts properly, let’s look at the most common type you’ll encounter.
Standard darts are triangular-shaped folds that open at one end, typically found at the bust or waistline.
You’ll recognize them by their straight dart legs meeting at a single point.
Proper dart length and apex control guarantee these workhorses of garment fitting create the perfect silhouette on any fabric choice.
French Darts
Unlike standard darts, French darts create a more elegant silhouette with their elongated shape.
They start lower on the bodice near the waistline and extend to the bust point, effectively combining bust and waist shaping in one sleek line.
Popular in vintage styles but versatile for modern adaptations too, these darts offer a flattering fit while reducing bulk in your garment.
Try them on a muslin first before adding to your final design.
Curved and Double-Ended Darts
The versatility of curved and double-ended darts offers advanced shaping techniques for your sewing projects.
These specialty darts create beautiful contours that standard darts can’t achieve.
- Curved darts follow a gentle arc to better fit body curves, especially around bust areas
- Double-pointed (fish-eye) darts shape garments without waist seams, creating smooth lines
- Contour dart fitting requires careful marking and slower stitching than straight darts
Both types transform flat fabric into three-dimensional shapes with professional results, utilizing specialty darts and advanced shaping techniques to achieve a polished finish.
Bust and Waist Darts
While curved darts flow naturally with body contours, bust and waist darts work specifically to shape your garments around these key areas.
You’ll find these darts handle the most dramatic curves of the body.
| Dart Type | Placement | Angle | Purpose |
|---|---|---|---|
| Bust Darts | Side seam to apex | Horizontal | Fits fabric around fullest part of bust |
| Waist Darts | Below bust to waistline | Vertical | Creates waist definition |
| Princess Darts | Shoulder to waist | Curved | Combines bust and waist shaping |
| Fish-eye Darts | Above and below waistline | Double-pointed | Balances fabric distribution |
Mastering Dart Sewing Skills
You’ll discover your garment’s true potential when you master the art of sewing darts with precision and confidence.
With practice and attention to detail, you can transform flat fabric into perfectly fitted clothing that showcases your sewing skills.
Common Mistakes to Avoid
Frustration plagues many sewists when darts don’t turn out as planned.
Here are common pitfalls to watch for when sewing darts:
- Uneven legs causing lopsided fabric shaping
- Puckering at dart points from incorrect stitch tension
- Fabric bulging from improper pressing techniques
- Misplaced darts creating unflattering garment fitting
Avoiding these mistakes will dramatically improve your sewing techniques and help you achieve professional-looking dart alterations, leading to overall better garment fitting.
Tips for Perfecting Dart Technique
To perfect your dart techniques, start with accurate marking using chalk or fabric pens. For accurate pattern transfer, consider using specialized marking tools.
Match dart legs carefully, pinning them securely. Keep a consistent stitch length, shortening near the dart tip.
Adjust thread tension to avoid puckering, and use proper pressing tools like a tailor’s ham for smooth, clean lines. Knotting techniques guarantee neatly finished, long-lasting sewing darts.
Converting Darts to Ease
Transforming darts into ease gives your garments a relaxed look while maintaining their shape.
This dart manipulation technique works especially well for skirts and sleeve caps when you want less structure but proper fit.
Here’s how to convert darts to ease:
- Trace your pattern piece with the dart
- Close the dart but add the same amount to the seam
- Distribute the fullness evenly when sewing to achieve a proper fit and maintain the garment’s original shape.
Contouring Darts for Curves
Now that you’ve mastered converting darts to ease, let’s shape fabric to truly hug your curves.
When contouring fabric for body contours, curve darts inward to accommodate outward curves like hips. For a smoother fit, create gentle, curved lines rather than sharp angles.
Understanding ease allowance is key to a comfortable fit. Double-ended shaping works wonderfully for waist and hip areas.
Remember, proper curved dart placement makes all the difference between a good garment and one that fits like it was made for you.
Frequently Asked Questions (FAQs)
What are the uses of darts in sewing?
You’ll find darts indispensable in sewing as they transform flat fabric into 3D shapes that fit body curves.
They remove excess fabric, contour garments to your figure, create style lines, and enhance overall design aesthetics.
They also transform flat fabric, which is crucial for creating garments that fit well and look good.
Why do people sew darts?
You’ll sew darts to shape flat fabric into 3D forms that hug your body’s curves.
They’re essential for creating fitted garments, removing excess fabric, and adding structure where you need it most.
What is the purpose of darting?
Darts help you transform flat fabric into 3D shapes that fit your body’s curves. You’ll eliminate excess material while creating structure in key areas like the bust, waist, and hips.
Where are darts used in sewing?
You’ll find darts primarily in fitted areas like bustlines, waistlines, shoulders, and necklines.
They’re common in women’s clothing but also appear in men’s trousers and custom-made jackets to create three-dimensional shaping.
Why do you need darts?
Like a sculptor shapes clay, you need darts to transform flat fabric into 3D shapes that hug your body’s curves.
They remove excess material and create fitting contours in strategic areas for a flattering silhouette.
What were darts used for?
Darts were used to shape flat fabric into curves, making garments fit the body better.
By removing excess fabric, they turned two-dimensional fabric into three-dimensional forms, giving clothing structure, functionality, and a polished appearance.
What are the benefits of using darts in sewing?
You’ll benefit from darts by transforming flat fabric into 3D shapes that follow your body’s curves.
They remove excess material, create flattering contours, and can even serve as stylish design elements in your garments.
How do I determine the best type of dart for my particular garment?
Consider your garment’s shape and where you need fitting.
Choose straight darts for simple shaping, curved for bust areas, or French darts for elegant lines.
Match the dart type to your fabric’s drape and weight.
What kind of needle should I use for sewing darts?
Nearly 90% of experienced sewists recommend universal needles (size 70-80) for most dart work.
You’ll want to match your needle size to your fabric weight for smooth stitching and perfect dart formation.
How can I make sure that my darts are symmetrical and even?
To guarantee symmetrical darts, carefully mark both sides using pattern notches or templates.
Pin and fold fabric precisely, measure from seams consistently, and use a tailor’s ham when pressing.
You’ll get perfect, even results every time.
Conclusion
Understanding what darts are for in sewing transforms your garment-making journey.
They’re not just stitches, but your pathway to professional-looking clothes that enhance the body’s natural shape.
Whether you’re tackling simple bust darts or adventurous French darts, remember that practice makes perfect.
With these techniques in your arsenal, you’ll create garments that don’t just fit—they flatter.
So grab your pins, thread your machine, and give your fabric the structure it deserves!

