This site is supported by our readers. We may earn a commission, at no cost to you, if you purchase through links.
Pin or clip your Velcro precisely where you want it, then use a zipper foot for clean, bunching-free stitches.
For machine sewing, opt for a zigzag stitch with a 2.0 width and length, testing on scrap fabric first.
If hand-sewing’s more your style, secure the Velcro with clips and use a crisscross stitch for durability. Pro tip: trim corners to reduce bulk and create a polished finish.
With these tricks up your sleeve, you’ll attach Velcro smoother than butter on a hot skillet.
Table Of Contents
Key Takeaways
- You’ll want to choose heavyweight polyester thread and a universal needle (sizes 14-16) to ensure your Velcro stays put through multiple uses.
- When machine sewing, opt for a zigzag stitch with a 2.0 width and length, and always test your settings on scrap fabric first to prevent bunching or uneven attachment.
- Pin or clip your Velcro precisely before sewing, using a zipper foot for clean edges and taking extra care to align the soft loop side inward for comfort and functionality.
- Trim the corners of your Velcro to reduce bulk and create a polished finish, ensuring your fastener looks professional and sits smoothly on your fabric.
Sewing Velcro: Step-by-Step Tutorial
Ready to master the art of sewing Velcro like a pro?
Whether you’re fixing a jacket, creating custom gear, or adding closures to your latest craft project,
this step-by-step tutorial will walk you through everything you need to know about attaching Velcro securely and professionally.
Identifying The Sides of Velcro
When you’re working with Velcro, identifying its sides is vital for successful sewing. The hook side feels rough and rigid, while the loop side is soft and fuzzy.
Touch both sides to feel the hook side’s tiny mechanical hooks are designed to grip the soft loops aggressively.
To make certain of secure attachment, make sure to follow a VELCRO sewing guide.
Always place the soft side inward for comfort and functionality.
Recommended Supplies for Sewing With Velcro
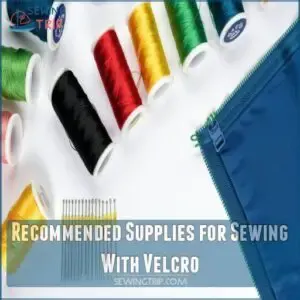
After identifying your velcro’s hook and loop sides, you’ll need the right gear to tackle this fastener project.
- Polyester thread: Your secret weapon against velcro’s friction
- Universal needles (sizes 14-16): Strong enough to punch through stubborn tape
- Zipper foot: Your precision guide for clean, tight stitches
Grab a quality velcro strip that’ll stand up to wear and tear. Choose threads that match your fabric color for a pro finish.
With these tools in hand, you’re ready to transform your project from "meh" to magnificent – no sweat, no stress, just smooth sewing ahead.
Holding The Velcro in Place
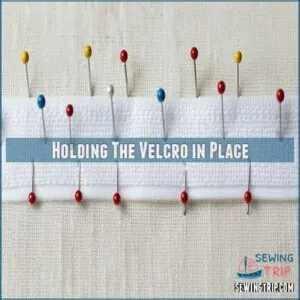
Because Velcro can slip around like a slippery fish, you’ll want rock-solid methods to hold it in place.
Grab some sewing pins, double-sided tape, or fabric clips to secure your Velcro before you start sewing on velcro.
Pro tip: Space pins every few inches for longer strips to prevent shifting and guarantee a precise attachment that’ll stay put.
Stitches for Sewing Velcro
Now that you’ve pinned down your Velcro, it’s time to pick the right stitches.
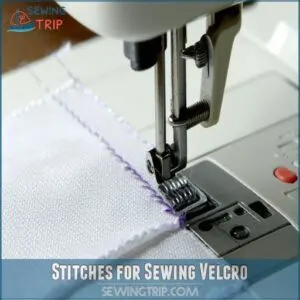
For machine sewing, a zigzag stitch (width 2.0, length 2.0) is your best friend—it grips the hook and loop sides without tearing.
Hand sewers, try a crisscross pattern for rock-solid durability.
Match your thread color to blend seamlessly.
Pro tip: Test different stitch lengths on scrap fabric to troubleshoot before tackling your main project.
Your Velcro’s strength depends on smart stitching.
How to Sew Velcro on a Sewing Machine
Ready to master sewing Velcro on your machine like a pro?
You’ll need the right needle, thread, and a few clever techniques.
to create secure and professional-looking fasteners in no time.
Choosing The Right Needle
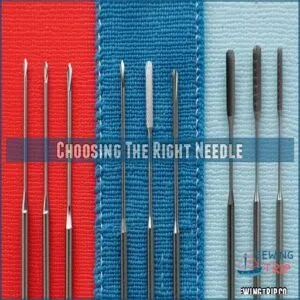
When sewing Velcro, your needle can make or break the project.
Grab a heavy-duty needle like size 14 or 16 universal, or a denim needle for thicker fabrics.
Sharp, strong needles with a thick shaft prevent fabric tears and handle the tough Velcro hooks.
Leather needles work wonders on extra-thick materials, sliding through with surgical precision.
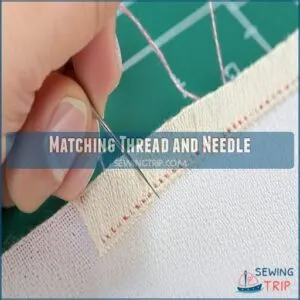
Matching Thread and Needle
Typically, thread choice can make or break your Velcro project.
Here’s your thread and needle game plan:
- Pick polyester thread for rock-solid durability
- Match thread color to Velcro or fabric seamlessly
- Choose needle size (14-16) matching fabric weight
- Use universal needles for most fabric types
- Lubricate needles with beeswax for smoother stitching
Mastering thread selection means your Velcro will look pro-level – clean, strong, and nearly invisible.
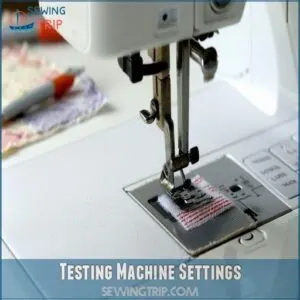
Testing Machine Settings
After matching your thread and needle, grab a scrap of fabric to fine-tune your sewing machine settings.
For the best possible outcome, make sure you’ve properly installed the needle and presser foot, as outlined in the basics of how to a sewing machine.
Pro tip: Most sewers battle tension issues when attaching Velcro, so testing first is your secret weapon.
Adjust your stitch length and tension, watching for skipped stitches or uneven stitching. Run a few test lines, checking how your machine handles the Velcro’s unique texture.
This quick practice run helps your final project look professional and stay securely fastened. Remember, your machine’s sweet spot is just a test away!
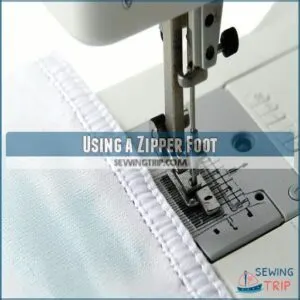
Using a Zipper Foot
Got your machine settings just right? Now grab that zipper foot for precision Velcro attachment!
- Perfectly hugs Velcro strip edges
- Controls stitch placement like a boss
- Eliminates fabric bunching and wobbles
This narrow marvel lets you slide smoothly along tape edges, giving your project a pro finish.
Sewing victory is just a foot swap away!
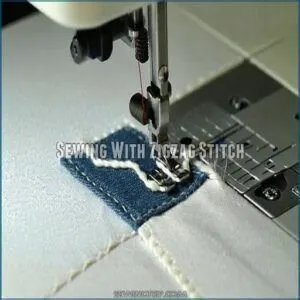
Sewing With Zigzag Stitch
When mastering zigzag stitches for Velcro, you’ll want precise control. Your sewing machine becomes a precision instrument, transforming fabric connections with strategic stitch width and tension.
- Adjust stitch width for maximum Velcro coverage
- Slow down to navigate tricky curves
- Experiment with stitch length to prevent bunching
- Match machine settings to fabric weight
Stitch by stitch, you’re crafting durability. Zigzag stitches and Velcro are key.
Trimming Corners
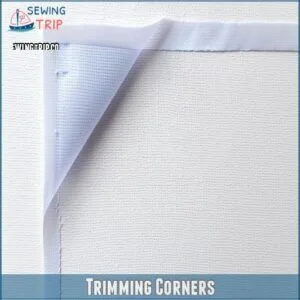
After mastering zigzag stitches, you’ll want to nail those Velcro corners. Trimming prevents bulky edges and keeps your fastener looking sharp. Your sewing machine will glide smoothly without catching.
| Benefit | Result |
|---|---|
| Reduced Bulk | Sleek Finish |
| Smooth Edges | Professional Look |
| Angled Cuts | Clean Application |
| Prevent Fraying | Durable Attachment |
Precision is your secret weapon for corner neatness. Velcro corners are key.
How to Sew Velcro by Hand
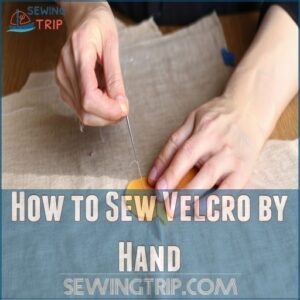
Don’t let the idea of hand-sewing Velcro intimidate you—it’s easier than you might think!
With the right tools and a bit of patience, you’ll be attaching Velcro like a pro,
adding functional and stylish fasteners to all your favorite projects.
Using Clips for Securing Velcro
Grab those plastic clothespins and get ready to secure your Velcro like a pro, making sure to choose the right sew-on Velcro type for your project.
Strategic clip placement is your secret weapon when sewing Velcro by hand. Space clips every inch along the strip, ensuring they don’t damage fabric. Wooden clips and binder clips work great too.
Test on scrap material first to prevent snagging.
Pro tip: Remove clips carefully as you sew to keep your Velcro perfectly positioned and your project looking sharp.
Sewing Edges in a Box Pattern
Your fabric’s strength lies in mastering the box pattern’s art, which can be easily achieved with the right box pattern velcro supplies.
Trace Velcro’s edges with precision, creating a fortress of stitches around each side.
Start at a corner, sew close to the edge, pivot neatly, and reinforce with tight, even stitches. Those mitered corners will make your project look pro.
Creating X Stitch Through Tape
Once you’ve pinned your Velcro, master the X-stitch technique to lock it down tight.
Pierce the tape diagonally, creating a sturdy cross-pattern that anchors the fastener securely.
Select a thick needle capable of punching through tape without shredding.
Backstitch each arm’s end for extra reinforcement.
Keep stitches taut and precise, ensuring your Velcro stays put through repeated use.
Sewing Wide Strips
When you’ve conquered those X-stitches and want to tackle wide Velcro strips, slow and steady wins the race.
Pin the strips lengthwise first, then stitch across the width.
Finally, sew diagonally through the tape for extra reinforcement.
Keep those stitches even to prevent puckering – wide strip challenges require precision and patience.
Tips for Sewing Velcro
Want to master sewing Velcro like a pro?
These handy tips will help you choose the right materials.
align your fasteners perfectly, and create strong, neat attachments.
that’ll make your projects look polished and professional.
Choosing High-Quality Velcro
Pick the right Velcro and you’ll save yourself a world of headaches down the line. Quality matters more than you might think in this case.
- Choose brands with thick, durable nylon
- Look for high-density polyester hook backing
- Test hook strength before committing to a project
Your fabric deserves the best Velcro you can find.
Using Polyester Thread
Polyester thread’s your go-to for sewing Velcro—stronger than cotton and tough against breakage. It handles machine washing like a champ.
Match thread color to your Velcro for a polished finish or use light gray for white Velcro. Wax it for fewer tangles while hand-sewing. You can find a wide variety of polyester thread velcro options online.
Check this quick thread guide:
| Thread Type | Strength | Best For |
|---|---|---|
| Cotton | Weak, breaks easily | Lightweight fabrics |
| Polyester | Strong, durable | Sewing Velcro, heavy fabrics |
| Waxed Polyester | Tangle-free | Hand-sewing projects |
Coating Needle in Beeswax (optional)
When working with on stubborn velcro, your secret weapon is beeswax—a tiny miracle for smooth sewing.
Here’s why this natural lubricant rocks your sewing world:
- Slides needles through fabric like a hot knife through butter
- Prevents needle friction and fabric damage
- Reduces thread tension and breakage
- Increases needle precision and sharpness
- Transforms tricky sewing into a breeze
Simply press your needle into a beeswax block before stitching, and watch the magic happen.
Aligning Velcro Before Sewing
Often, successful Velcro placement starts with precise alignment before sewing.
Press your Velcro pieces together, ensuring they match up perfectly like puzzle parts.
Use sharp pins or masking tape to secure the strips exactly where you want them on different fabric types.
Hand sewing gives you more control for intricate velcro attachment, while machine sewing works best for multiple strips.
Double-check your edge alignment to prevent future frustration and guarantee a rock-solid fastener.
Alternatives to Sewing Velcro
Not a fan of sewing Velcro?
You’ve got plenty of other fastener options that’ll save you time and hassle.
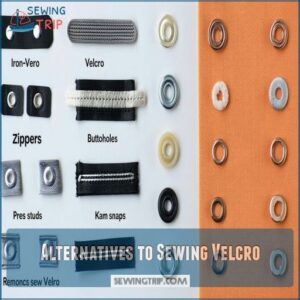
Whether you’re working on a quick craft project or need a professional finish, alternatives like iron-on Velcro, zippers, buttonholes, press studs, and Kam snaps can be your new best friends.
Iron-on Velcro
Tired of endless stitching? Iron-on Velcro is your quick-fix superhero for fabric fastening.
Perfect for kids’ clothing and rapid projects, this no-sew solution bonds instantly with just a hot iron.
Stick it down, press firmly, and you’re ready to roll – crafting made crazy easy!
Zippers
By spring, master zipper installation like a pro.
Choose metal teeth over plastic for durability. Match zipper color to fabric seamlessly.
Engage your zipper foot, stitch slowly, and check alignment.
Practice on scraps first to nail that professional finish. Backstitch ends neatly for a clean, secure close.
Buttonholes
Want a pro-level garment finish? Master buttonholes for a sleek alternative to Velcro:
- Mark precise buttonhole placement
- Machine stitch a clean rectangular shape
- Carefully slice the opening with a sharp seam ripper
Customize sizes and shapes to elevate your sewing game with professional buttonhole techniques.
Press Studs
Press studs are a swift, no-fuss fastener that’ll revolutionize your sewing projects.
Pound these metal wonders through fabric with a stud setter tool, creating instant closures without needle or thread.
Perfect for baby clothes, denim jackets, and delicate garments where Velcro feels too bulky.
| Stud Type | Material | Best For |
|---|---|---|
| Standard | Metal | Heavy Fabrics |
| Plastic | Lightweight | Delicate Garments |
| Coated | Colored | Fashion Accessories |
| Invisible | Clear/Matched | Seamless Designs |
Kam Snaps
After press studs, kam snaps offer lightning-fast fabric fastening.
These versatile sewing tools snap together effortlessly with specialized pliers.
Perfect for garments needing frequent opening and closing, kam snaps deliver durability through multiple washes while providing a sleek, professional finish to your projects.
When choosing kam snaps, consider the importance of fastener compatibility with fabric weight to achieve the best results and maintain performance.
Read More About Fasteners
Rarely do sewists realize the incredible variety of fasteners awaiting their creative touch. Your sewing project deserves the perfect closure, whether you’re working with delicate or heavyweight fabrics.
Zippers offer durability for sturdy garments, while nylon coil options work magic on lightweight materials. Hook and loop tape provides invisible closures, and iron-on interfacing delivers quick solutions without threading a needle.
Get inventive by mixing fastener types – combine buttons with loops or add snaps to zipper ends for unique functionality. Using the right Sewing with Velcro, modern sewing technologies have exploded the range of fastener alternatives, giving you unprecedented freedom to customize your projects.
Consider each fastener’s strength, flexibility, and aesthetic impact. Durability matters most, so test different options on scrap fabric.
Your perfect fastener isn’t just about holding things together – it’s about adding that professional finishing touch that makes your project truly shine.
PIN FOR LATER
Craft your sewing success with these velcro-mastering tips. From baby onesies to pencil pouches, nailing the perfect velcro attachment is an art form waiting to be conquered.
- Choose heavyweight polyester thread
- Select the right needle size
- Prep velcro with precise cutting
- Test stitches on scrap fabric
- Backstitch for ultimate durability
To achieve a strong and secure hold, consider the importance of sewing through sticky velcro. Grab your sewing arsenal and get ready to transform your projects. The secret sauce? Precision and patience.
Start by trimming velcro edges cleanly, matching thread to fabric color. Pro tip: A zigzag stitch works wonders for securing those tricky fasteners. Clip inner corners to reduce bulk and guarantee a smooth finish. Your DIY dreams are just a few stitches away from becoming reality!
Frequently Asked Questions (FAQs)
Can you sew Velcro with a sewing machine?
Sailing through fabric like a seamstress’s trusted compass, your sewing machine can easily attach Velcro.
Choose the right needle, thread, and stitch settings.
And you’ll secure those hook-and-loop fasteners with precision and ease.
How do you sew Velcro?
Pin the Velcro’s soft side to your fabric.
Use a machine with a universal needle and polyester thread.
Sew close to the edges with straight or zigzag stitches, backstitching at the start and end for a secure hold.
How do I use Velcro®?
Cut your Velcro to the right size, with the soft loop side facing inward.
Securely pin it in place.
Then sew close to the edges using small, straight stitches. Backstitch at the start and end for durability.
What is velcro used for in sewing?
Velcro in sewing lets you create quick, adjustable closures on clothing, bags, and accessories.
You’ll love how it makes garments more versatile, allowing easy attachment and detachment without complicated buttonholes or zippers.
How to sew velcro tape?
Stitch your way to connection like weaving friendship bracelets.
Grab sharp needles, select matching polyester thread, and pin soft loop-side first.
Sew close to edges with straight or zigzag stitches, backstitching at ends for a secure bond.
Can you sew Velcro on cotton?
You’ll breeze through attaching Velcro to cotton!
Grab a sharp needle, strong polyester thread.
Sew close to the edges using small straight stitches. Pin carefully, and you’ll have a secure closure in no time.
What is the best stitch to sew on Velcro?
A zigzag stitch works best for Velcro.
Set your machine to a 3-5mm width and 2-3mm length.
This technique grips the fabric securely, prevents fraying, and keeps your Velcro in place through countless uses.
Why won’t my sewing machine sew through Velcro?
Nearly 70% of sewers struggle with Velcro machine challenges.
Your needle might be wrong or dull.
Try a heavy-duty needle, adjust tension, and use polyester thread.
Clean your machine, and slow down your stitching speed for smoother Velcro application.
What is the best way to attach Velcro to fabric?
Pin the softer loop side of Velcro to your fabric first.
Sew close to the edge using small, straight stitches.
Backstitch at the start and end for a secure, durable attachment.
How does sew on Velcro work?
Who knew sticking fabric together could be an art?
You’ll want to choose soft loop Velcro.
Align it precisely, and sew with small straight stitches close to the edges.
Backstitch for durability, and you’re golden.
Conclusion
Mastering how to sew Velcro isn’t rocket science – it’s an art you’ll nail with practice!
Whether you’re a DIY enthusiast or a crafting newbie, these techniques will transform your projects.
Remember, precision is key when attaching Velcro.
Don’t get discouraged by initial mishaps; every stitch brings you closer to fastener perfection.
With the right tools, techniques, and a dash of patience, you’ll be a Velcro-sewing pro in no time. Happy crafting!
- https://www.treasurie.com/collections/purses-handbag-sewing-patterns
- https://bryanhousequilts.com/2024/02/quilting-design-wall/
- https://southernyankeediy.com/projects/diy-decor/no-sew-fabric-crafts-diy-decor-ideas/
- https://www.dpreview.com/forums/post/34281920
- https://blog.treasurie.com/how-to-sew-velcro/


