This site is supported by our readers. We may earn a commission, at no cost to you, if you purchase through links.
To sew pants together, start by joining the inner leg seams. Slip one leg inside the other, right sides facing, and pin along the U-shaped crotch seam. Sew it up, then press those seams open like you’re ironing out life’s wrinkles.
Next, attach the waistband and create a casing for the elastic – it’s like giving your pants a comfy hug.
Don’t forget to sew those side seams and reinforce high-stress areas. Before you know it, you’ll be strutting around in your handmade trousers, feeling like a DIY fashion mogul. And trust me, there’s more to discover in pants-making.
Table Of Contents
- Key Takeaways
- Gather Essential Supplies for Sewing Pants
- Prepare Your Fabric and Pattern
- Cut Out Pants Pieces Accurately
- Sew Pant Legs Together
- Attach Waistband and Create Casing
- Insert Elastic and Close Waistband
- Sew Side Seams and Finish Crotch
- Hem Pants and Add Final Touches
- Frequently Asked Questions (FAQs)
- Conclusion
Key Takeaways
- You’ll want to choose your fabric wisely – it’s the foundation of your DIY pants journey. Think about weight, drape, and care instructions. Remember, nobody wants trousers that feel like sandpaper or shrink to doll-size in the wash!
- Don’t skimp on the prep work. Wash your fabric, iron it smoother than a politician’s speech, and cut your pieces with the precision of a master chef. Your future self will thank you when everything fits together seamlessly.
- When joining those seams, think of yourself as a fabric architect. Take your time, pin everything in place, and don’t be afraid to use your iron. Press those seams open, as this will make a world of difference.
- The waistband is your pants’ crowning glory. Create a comfortable elastic casing, and you’ll be strutting around in custom-fit trousers that hug you in all the right places. Just remember, measure twice, cut once – nobody wants a waistband that’s tighter than last year’s jeans!
Gather Essential Supplies for Sewing Pants
Before you start sewing your pants, you’ll need to round up all the essential supplies.
Let’s take a look at what you’ll need to get your trousers project off to a great start, from picking the perfect fabric to choosing the right thread and elastic.
Choosing the Right Fabric
Choosing the right fabric can make or break your pants-sewing project. You’ll want to think about weight, drape, stretch, and texture.
For most trousers, aim for fabrics between 200-400 gsm or 6-12 oz. Heavier fabrics like denim or corduroy work well for jeans, while lighter options like linen are perfect for breezy summer pants.
Don’t forget to check care instructions – you’ll thank yourself later when laundry day rolls around, especially for delicate fabrics.
Selecting Appropriate Thread and Elastic
Thread-and-elastic selection can make or break your DIY pants project.
You’ll want to match your thread color to your fabric for a polished look.
For elastic, consider comfort first – a 3/4" knit elastic offers great stretch without feeling too tight.
Remember, lighter fabrics call for thinner elastic.
Don’t forget to mark your elastic ends with an X to avoid twisting when threading through the casing.
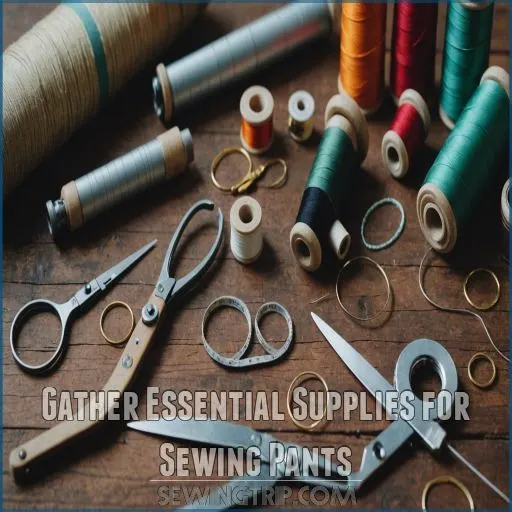
Necessary Sewing Tools and Equipment
To sew pants like a pro, you’ll need a trusty arsenal of tools.
Your sewing machine is the star of the show, but don’t forget its supporting cast!
Grab your fabric shears, measuring tape, and an assortment of needles to tackle any fabric.
A pattern notcher and awl will be your supporting cast for transferring markings.
And remember, a good iron for crisp seams!
Prepare Your Fabric and Pattern
Now that you’ve gathered your supplies, let’s get your fabric and pattern ready for action.
First things first: give your fabric a good wash and dry. Trust me, you don’t want your pants shrinking after all your hard work!
While that’s happening, check your pattern size against your measurements. Patterns can be as finicky as a cat in a bathtub, so don’t be afraid to make adjustments.
Once your fabric’s dry, iron it smoother than a politician’s speech. Then, lay out your pattern pieces, making sure the grainline is straighter than an arrow.
You’re now set to cut!
Cut Out Pants Pieces Accurately
Now that you’ve prepared your fabric and pattern, it’s time to cut out your pants pieces with precision.
This important step sets the foundation for well-fitting trousers, so grab your shears and let’s turn that flat fabric into the makings of your comfy new pants!
Pinning and Cutting Fabric
With your fabric and pattern ready, it’s time to cut out those pants pieces.
Lay your fabric flat, ensuring the grain is straight.
- Pin pattern pieces to fabric, following layout guidelines
- Double-check pattern placement before cutting
- Use sharp scissors or a rotary cutter for clean edges
- Cut with confidence, but take your time
Remember, measure twice, cut once! You’ve got this, future pants pro.
Marking Notches and Darts
Your fabric is pinned and cut, but don’t put those scissors away just yet! It’s time for some pattern wizardry.
Notches and darts are the secret ingredients that’ll transform your flat fabric into shapely pants.
Notches are your sewing roadmap. They’ll guide you through construction, helping you match seams like a pro.
Darts, on the other hand, are the magicians that give your pants that perfect hemmed fit
.
Transferring Pattern Markings
After cutting your pattern pieces, it’s time to transfer those important markings.
Grab your favorite marking tools – tailor’s chalk, fabric pens, or tracing wheels – and get ready to play connect-the-dots on your fabric . Test your tools on a scrap first to avoid unwanted surprises.
For notches, consider clipping or pin-marking for stress-free transfers.
Remember, precise markings now mean smoother sailing later when you’re knee-deep in seams!
Sew Pant Legs Together
Now that you’ve got your pieces cut out, it’s time for the exciting part.
Sewing your pants together is the next step. In this section, we’ll walk you through joining the inner leg seams, pressing them open, and adding some extra durability with topstitching.
It’s easier than you might think, and you’ll be rocking your handmade trousers in no time.
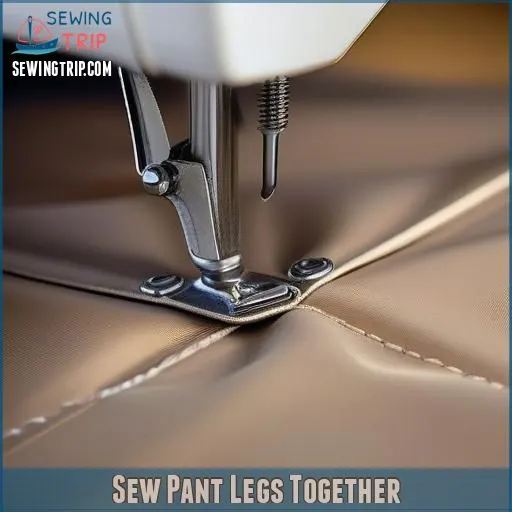
Joining Inner Leg Seams
To join inner leg seams, start by turning one pant leg inside out. Next, slip the right-side-out leg into the inside-out one, aligning the raw edges (Source). You’ll create a fabric tube with right sides facing each other.
- Match center front and back seams, pinning at notches
- Smooth fabric to align inseams, pinning every inch
- Sew along the pinned U-shaped crotch seam, using a 1/2" seam allowance
Don’t forget to double-check your work before stitching!
Pressing Seams Open
Now that you’ve joined those inner leg seams, it’s time to make them lie flat.
Grab your iron and set it to the right temperature for your fabric, then grab your pants and carefully open the seams on a flat surface.
Press them gently, using a flat surface and a hot iron to create a crisp crease . This will help you achieve smooth seams, which are key to professional-looking pants.
No one wants to walk around with puffy leg seams, so take your time when pressing the seams to ensure they lie flat and even.
Topstitching for Durability
Topstitching adds both style and strength to your pants. It’s the secret sauce that makes your DIY trousers look professional and last longer.
Choose a sturdy thread like cotton/polyester or nylon bonded for durability (Source). Set your machine to a longer stitch length and get ready to reinforce those seams!
- Imagine tracing a crisp line along your pant legs
- Picture thread that stands up to countless washes
- Envision seams that won’t unravel, even after marathon wear
- Think of compliments on your "store-bought" looking pants
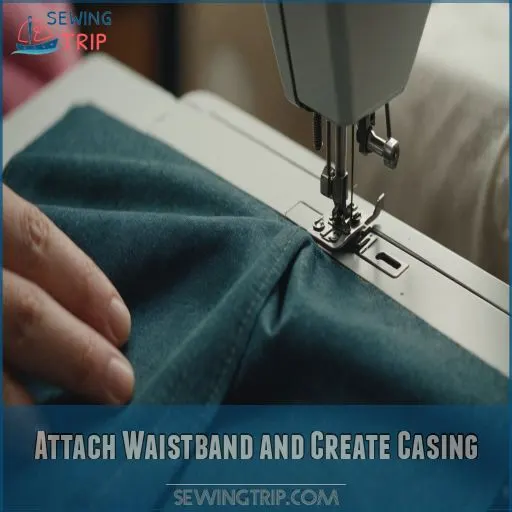
Attach Waistband and Create Casing
You’re almost there! Now it’s time to tackle the waistband, a key step that’ll give your pants that polished, comfy fit you’ve been dreaming of.
Let’s walk through folding, pressing, and creating the elastic casing – trust me, your future self will thank you for taking the time to get this part just right.
Folding and Pressing Waistband
After joining those leg seams, it’s time to tame that waistband. You’ll want to fold and press it like you’re giving your pants a crisp new hairdo.
Start by marking two lines 1/2" from the top and bottom of the back waistband . These will be your topstitching guides later.
Now, fold the waistband in lengthwise, wrong sides together, and press it well with a hot iron.
Sewing Waistband to Pants
Once you’ve prepared your waistband, it’s time to attach it to your pants.
This step can make or break your DIY trousers, so stay focused!
Pin your waistband to the top of your pants, right-sides-together, and sew using the narrow seam on the waistband piece.
Remember, the raw edges should face the same direction.
Don’t rush this part – a well-sewn waistband is the secret to pants that look professionally made. It’s the key to completing a successful DIY trousers project, and a crucial step in completing your DIY trousers.
Creating Elastic Casing
Now that you’ve attached the waistband, let’s create the elastic casing. This step’s like making a secret tunnel for your elastic to hide in!
- Fold the waistband’s top edge inward by 1/4 inch
- Fold again, this time 1-3/4 inches deep
- Press these folds with your iron for a crisp finish
- Edgestitch along the bottom fold, leaving a small opening
Insert Elastic and Close Waistband
You’re almost at the finish line with your DIY pants project.
In this important step, we’ll guide you through inserting the elastic and closing up that waistband.
This process transforms your creation from a fabric tube into a comfy pair of trousers that’ll stay put.
Measuring and Cutting Elastic
Elastic – the unsung hero of comfy pants!
To get that perfect fit, you’ll need to measure and cut your elastic just right. Start by wrapping the elastic around your waist, snug but not too tight. Subtract 1-2 inches from this measurement for a bit of tension.
Choose cotton elastic for durability and cut it with sharp scissors .
Remember, the right elastic tension means no more pants-pulling dance!
Threading Elastic Through Casing
Threading elastic through the casing can be a bit tricky, but don’t worry – we’ve got some nifty tricks up our sleeve.
When working with delicate fabrics, it’s essential to master sewing inseam on pants to prevent fraying and make sure your work looks professional by adding perfectly placed pockets
. For instance, using a 1/2 inch seam allowance can make all the difference in the quality of your trousers.
- Use a safety pin or bodkin to guide the elastic
- Fuse interfacing over seams to prevent snags
- Keep the elastic evenly distributed as you go
Remember, it’s like fishing – sometimes you’ll need patience, but the catch is always worth it!
Securing Elastic Ends
Three simple steps will secure your elastic ends like a pro. First, overlap the ends by about an inch and pin them securely . Then, stretch the elastic and zigzag stitch across the overlap to create a strong bond. Finally, close the waistband opening by hand-stitching or topstitching along both sides.
| Emotion | Elastic Type | Sewing Technique |
|---|---|---|
| Excited | Non-roll | Zigzag stitch |
| Anxious | Braided | Hand-sewing |
| Confident | Woven | Topstitching |
| Relieved | Clear | Serging |
| Proud | Knitted | Coverstitch |
Remember, you’re the boss of your waistband! With these techniques, you’ll achieve that perfect fit every time.
Sew Side Seams and Finish Crotch
You’re in the home stretch now, ready to transform your fabric pieces into real pants!
In this important step, you’ll sew the side seams and finish the crotch area, giving your DIY trousers their final shape.
This step ensures your DIY trousers will hold up to wear and tear.
Aligning and Pinning Side Seams
Precision is key when aligning side seams. Start by turning your pants inside out and matching the front and back pieces.
Pin the seams together, aligning notches and patterns . For a professional finish, consider using French seams.
Remember to ease in curved areas, placing pins at notches first, then edges, before filling in the rest. This technique helps prevent puckering and creates a smooth, well-fitted side seam.
Sewing Curved Crotch Seam
With your pants’ side seams aligned, it’s time to tackle the trickiest part: the curved crotch seam.
Don’t let it intimidate you! Start by pinning the front and back pieces together, right sides facing .
Leave about a 5/8 inch seam allowance as you stitch along the curve .
Take it slow around the bend, adjusting your fabric as needed.
Remember, a smooth curve is key to comfortable pants that don’t bunch or pull.
Reinforcing High-Stress Areas
Reinforcing high-stress areas is your secret weapon for long-lasting pants.
Focus on the crotch seam, where wear and tear love to party.
Double-stitch this important spot about 1/8" apart for extra strength.
Don’t forget to reinforce the fly area with some sturdy bartacks.
For a pro touch, consider adding patches to the inner thighs .
These simple steps will keep your DIY trousers from falling apart at the seams!
Hem Pants and Add Final Touches
You’re in the home stretch of your pants-making journey.
Let’s add those final touches to transform your creation from a DIY project to a polished garment you’ll be proud to wear.
Measuring and Marking Hem Length
Now that your pants are taking shape, it’s time to give them the perfect length.
Grab your measuring tape and a friend – it’s hem-marking time! Stand tall in your soon-to-be-favorite shoes while your buddy measures from the floor up.
For a pro touch, use a chalk hem marker to make sure you have an even line all around.
Remember, different shoe heights can affect where your hem lands.
Folding and Pressing Hem
You’ve marked your hem length, so let’s get folding! Turn your pants inside out and fold the fabric up to your desired length.
Iron the fold with the right heat setting for your fabric – you don’t want to scorch those trousers!
For a professional finish, fold the raw edge under by about 1/2 inch and press again.
This double fold will give you a clean, polished hem.
Sewing Hem and Finishing Seams
With your hem pressed and ready, it’s time to sew it in place. Here’s how to nail that perfect finish:
- Choose your hemming technique: blind stitch for a hidden look or topstitch for a casual vibe
- Match your thread color to your fabric
- Use a smaller stitch length (2.5-3) for durability
- Finish raw edges with a serger or zig-zag stitch to prevent fraying
Remember, practice makes perfect pants!
Frequently Asked Questions (FAQs)
Can you sew a pair of pants?
Threading the needle of possibility, you can certainly sew a pair of pants.
It’s like crafting your own second skin.
You’ll need a pattern, fabric, and basic sewing skills.
Don’t worry, even beginners can create comfy pajama pants, and that’s a great way to practice your basic sewing skills like those outlined in the Peek-a-Boo Pajama Party Pants pattern review
.
How do I choose a sewing pattern for pants?
Consider your measurements and desired fit when selecting a pants pattern.
Compare your hip size to pattern sizes, and check the ease allowance .
Look for styles that match your preferences, like elastic waists or pockets.
How long does it take to sew a pair of pants?
You’ll need 1-2 hours to sew simple elastic-waist pants .
More complex styles with zippers or pockets can take 4-12 hours (Source).
Your skill level and the pattern’s intricacy greatly influence the time required.
How do you sew pants together?
Ah, the joy of turning fabric into leg prisons!
Start by joining the inseams, then the outer seams.
Stitch the crotch curve, attach the waistband, and hem the bottoms.
Don’t forget pockets for your sanity’s sake.
How to sew pant seams together?
Pin the fabric right sides together, aligning the seams.
Sew along the pinned edges with a 1/2 inch allowance.
Press the seams open and finish them by serging or zigzagging for a professional look.
Don’t forget to reinforce and use right sides together for a clean finish.
Which order to sew pants together?
Did you know 80% of sewing time can be saved by following the right order?
Start with darts, then tackle the fly-front zipper. Next, attach pockets and inseams.
How hard is it to sew a pair of pants?
Sewing pants can be tricky, especially for beginners.
You’ll face fitting challenges and potentially complex techniques like installing zippers.
However, with practice and patience, you can master it.
Start with simpler styles like elastic-waist pants to build confidence.
How do you sew ripped pants together?
Ripped pants? No sweat! You’ll be a sewing superstar in no time.
Turn ’em inside out, pin a matching fabric patch, and zigzag stitch around the tear.
Trim excess, flip back, and strut your newly mended threads.
How do I sew a fly front zipper?
To sew a fly front zipper, start by cutting your pattern pieces.
Stitch the center front seam, leaving an opening for the zipper.
Attach the fly facing and shield, then carefully insert the zipper, topstitch, and add reinforcing bar tacks.
Whats the best way to create welt pockets?
For perfect welt pockets, start by marking your fabric precisely.
Cut carefully, fold the welt, and press like a pro .
You’ll be pocketing compliments in no time with these refined beauties adorning your pants!
Should I block my pants after sewing?
Blocking your pants after sewing is a game-changer.
You’ll get a more polished look with improved drape and shape.
It can even fix minor size discrepancies.
Just pin, dampen, and let dry for fab results.
How to sew pants for swimwear or activewear?
You’ll want to use stretchy, quick-drying fabrics like polyester spandex or nylon spandex.
Cut your pattern pieces, sew the legs and gusset, then add a wide elastic waist for a secure fit that stays put while you move.
Any tips for sewing pants for multiple children?
Batch sewing is your secret weapon.
Choose coordinating fabrics and thread colors to streamline the process.
Label cut pieces clearly, and practice makes perfect.
Don’t forget to add fun touches like ribbon markers for easy front/back identification.
Practice makes perfect is key to mastering this skill.
Conclusion
Ready to rock your new DIY pants?
With these 8 simple steps, you’ve learned how to sew pants together like a pro.
From choosing fabric to hemming the perfect length, you’ve mastered the art of trouser-making.
Remember, practice makes perfect, so don’t be discouraged if your first pair isn’t runway-ready.
Keep at it, and soon you’ll be strutting around in custom-fit pants that’ll make your friends green with envy.
So, what’re you waiting for?
Grab that sewing machine and get stitching on common sewing machine stitch problems
!

