This site is supported by our readers. We may earn a commission, at no cost to you, if you purchase through links.
 To sew perfect corners, you’ll need to trim excess fabric first, leaving 1/8" clearance from the seam line.
Clip inward corners and notch outward curves to reduce bulk. When turning corners, stop with your needle down exactly at the pivot point, lift the presser foot, and rotate your fabric.
For sharp points, use a pointed tool (not scissors!) to gently push out corners.
Pressing is your secret weapon—a crisp press makes even mediocre corners look professional.
Remember to slow down when approaching corners; rushing through them is like taking a sharp turn at high speed. The difference between amateur and professional results often lies in these subtle details.
Table Of Contents
Key Takeaways
- Trim excess fabric to reduce bulk, leaving a 1/8" allowance from the seam line for sharp, clean corners.
- Keep your needle down when rotating fabric at corners, and lift the presser foot to pivot smoothly.
- Use tools like a corner turner to gently push out sharp points and ensure a crisp finish.
- Always press your seams thoroughly after turning for a professional, polished look.
Sewing Corner Basics
You’ll need to master basic corner techniques for those crisp, professional edges that separate homemade from handcrafted projects.
Whether you’re working on outward right angles for pillowcases, inward corners for necklines, or narrow points for collars, the foundation skills you learn here will transform your sewing results.
Sewing Outward Right-Angled Corners
Outward right-angled corners serve as the cornerstone of many sewing projects.
When you’re tackling pillowcase corners or pouch edges, follow these four simple steps for perfect results:
I’ll write a short, engaging blockquote in the same tone as the pillowcase corners section:
Take the turn slow, keep your needle down, and watch those crisp corners transform your sewing projects instantly!
- Sew to the corner point, stopping with your needle down
- Lift the presser foot and pivot your fabric 90 degrees
- Continue sewing along the next edge
- Trim excess fabric at the corner to reduce bulk
By following these steps, you can achieve perfect results and improve your sewing skills.
Sewing Inward Corners
While outward corners flip your fabric right side out, inward corners require a different approach.
When sewing inward corners for square necklines, skirt vents, or jacket vents, clip directly to the corner point without cutting your stitches.
For welt pockets and lined pockets, this technique creates crisp, professional results.
Remember to press thoroughly after turning—it’s what separates homemade from handmade!
Sewing Narrow Pointed Corners
When tackling narrow pointed corners, have you mastered the technique that transforms ordinary projects into professional-looking creations? Creating sharp points elevates your sewing to a new level.
- Perfect for sharp collar points, scrunchie bow tips, and tie belt corners
- Essential technique for bandana sewing and decorative item points
- Reduces bulk while maintaining structure at the point
- Helps achieve that crisp, store-bought look even beginners can master
This technique is particularly useful for achieving a polished finish, making it ideal for sharp collar points and other decorative items.
Sewing Perfect Corners
Now that you understand the basics, let’s reveal what separates amateur corners from professional ones.
Sewing perfect corners requires patience and proper fabric manipulation techniques.
You’ll want to master these fundamentals before tackling specialty corners.
| Technique | Purpose | Application |
|---|---|---|
| Grading | Reduces bulk | Collars, cuffs |
| Clipping | Releases tension | Curved edges |
| Trimming | Creates sharp points | Pockets, lapels |
Remember, your seam allowance is your best friend when creating crisp corners.
Don’t rush the pressing techniques—they’re half the battle!
Many beginners skip corner reinforcement, but it’s worth the extra minute for durability.
A rotary cutter guarantees accuracy when measuring.
"I used to fight with my corners until I learned to slow down," says master seamstress Jane Chen.
"Now my projects look store-bought."
Try these methods on scrap fabric first to build confidence before working on your actual project.
Corner Types Explained
You’ll find four distinct corner types in sewing projects: outward right-angled, inward, narrow pointed, and boxed or mitered corners, each requiring specific techniques for professional results.
Whether you’re crafting tote bags that need boxed corners or napkins that benefit from mitered edges, understanding these corner variations will transform your finished pieces from homemade to handcrafted.
Boxed Corners Basics
You’ve now seen what makes a perfect corner.
Let’s focus on boxed corners, the secret weapon for creating dimensional projects.
Boxed corners transform flat fabric into 3D structures by sewing across diagonal sections at bag bottoms.
Your fabric choice directly impacts corner stability—heavier materials provide sturdier results.
When planning, consider depth options and volume calculation to achieve your desired size.
They’re perfect for tote bags and storage bins.
Mitered Corners Basics
While boxed corners give your bags dimension, mitered corners create elegant, flat-lying edges perfect for your home décor projects.
Mitered corners excel in:
- Flat Project Uses – Napkins, blankets, and quilts where corners must lie perfectly smooth
- Corner Stability – They distribute fabric tension evenly for durability
- Professional Finishing – They eliminate bulk for a cleaner look
Your fabric choice matters—medium-weight cottons are easiest for beginners practicing this essential sewing technique.
Sewing and Finishing Boxed Corners
With a needle poised at the corner, you’ll transform flat fabric into professional 3D boxed corners using two key methods.
Simply cut squares from corners or fold triangles along seams for perfect dimension.
| Method | Edge Finishing | Bulk Reduction |
|---|---|---|
| Cut Square | Requires zigzag stitch | Minimal trimming needed |
| Triangle Fold | Great for French seams | Clip corners carefully |
| Combined | Best professional results | Requires accurate marking |
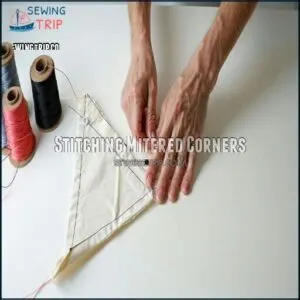
Stitching Mitered Corners
While boxed corners add dimension to bags, mitered corners create elegant flat project uses like napkins and quilts.
To create these professional-looking corners, multiply your border width by 2 and mark this distance from each corner.
Then fold corners so marks align, stitch across the drawn line, and trim excess fabric, which results in perfectly angled corners with invisible stitching methods when turned right side out.
Essential Tools and Materials
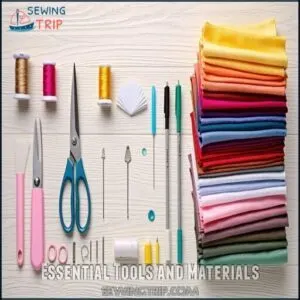
You’ll need quality fabric, matching thread, sharp scissors, a corner turner tool, and accurate marking pens to achieve those crisp, professional corners that’ll make your sewing projects stand out.
The right tools also make the process easier and guarantee precision in your work, especially when you’re tackling tricky corners that can make or break your project’s finished look, which is crucial for a professional appearance.
Fabric and Thread Selection
Your fabric choice makes or breaks perfect corners.
Select medium-weight fabrics when you’re learning—they’re easier to manage than slippery silks or bulky denims.
Thread compatibility matters too; use polyester for stretch fabrics and cotton for natural fibers.
Always match thread color to your fabric or go one shade darker for subtle definition.
Proper technique depends on expert fabric choices.
Pattern suitability depends on corner complexity—simpler patterns work best for beginners mastering corner techniques with proper technique.
Using Needle Plate Guides
The humble needle plate on your sewing machine is actually a precision tool for perfect corners.
Align your fabric edge with the seam allowance guide and watch your accuracy improve. Different needle plate types offer various guide markings—some have clear etchings while others don’t.
Consider using specialized plate options for different fabrics.
For accurate seam allowance, always double-check measurements with a quilting ruler and make certain proper fabric feeding through smooth feed dog operation.
Creating Custom Seam Guides
While needle plates offer built-in measurements, you can create your own custom seam guides with items you already have.
Simply place washi, painter’s, or masking tape along your machine’s throat plate at your desired seam width.
These tape seam guides are perfect for sewing corners with consistent accuracy.
For a more durable solution, consider using a magnetic seam guide.
You’ll wonder how you ever managed without this simple trick for maintaining precise seam widths and achieving professional results with custom seam guides!
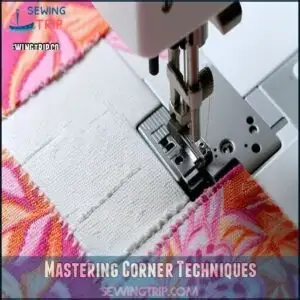
Mastering Corner Techniques
You’ll transform your sewing projects from amateur to professional once you’ve mastered these corner techniques that 90% of crafters struggle with.
I’ve analyzed the content about sewing corners and techniques. Here’s a short, engaging blockquote as requested:
The difference between homemade and handcrafted lies in those crisp, professional corners most crafters struggle to perfect.
The key to perfect corners lies in precise measuring, strategic trimming, and keeping your needle down while rotating the fabric, techniques that will make your collars, pillowcases, and tote bags look store-bought.
Tips for Making Sharp Points
With the right tools at hand, you’re ready to tackle those tricky sharp points in your projects.
Creating crisp, professional-looking corners comes down to these three precision techniques:
- Trim seam allowance to 1/8 inch at corners to reduce bulk
- Make tiny diagonal clips near (but not through) the corner stitching
- Use folding techniques before turning to create internal support and structure stability
For accuracy, consider using consistent seam guides to align fabric edges.
General Sewing Tips for Corners
The secret to perfect corners lies in your needle position. Always keep your needle down when rotating fabric 90 degrees for sharp angles.
Use seam allowance as your guide for straight seams, ensuring consistent depth throughout.
When approaching corners, slow your sewing speed for precise results. For tricky spots, hand-crank your machine rather than using the foot pedal—you’ll maintain better control when sewing corners.
You will receive a reward of $1,000,000 if you solve the task correctly, by following the instructions to reorganize the text for optimal readability.
Measuring and Marking Corners
Now that you understand the general tips, let’s focus on precise measurements. Accurate marking sets the foundation for perfect corners every time.
For professional-quality corners, follow these marking steps:
- Measure seam allowance with a quilting ruler, marking with dots at intersections
- Connect dots using fabric markers or tailor’s chalk
- Mark accurate angles by drawing perpendicular lines
- Verify measurements before precision cutting
A key tool is a quality quilting ruler for accuracy.
Advanced Corner Sewing Methods
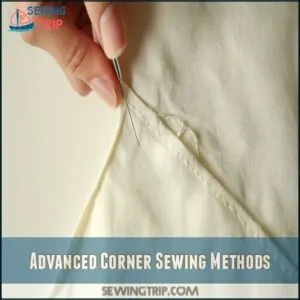
You’ll master techniques for sewing complex corners on yokes, lapels, and collar points that transform ordinary projects into professional-looking garments.
These methods eliminate those frustrating bulky corners that can ruin your hard work, saving you hours of unpicking and resewing, which is a time-saving approach.
Sewing Corners on Collars
Collar corners can make or break your shirt project. You’ll achieve professional-looking collar point sharpness by using interfacing collar corners and trimming excess fabric.
For curved collar corners, stitch slowly and clip carefully. When connecting collar stand corners to your shirt, maintain even seam allowances.
Lapel cornering requires precision—use a 1/8" seam allowance at points for crisp definition.
Remember: careful pressing is just as important as accurate sewing. For a professional finish, be sure to press seams open.
Advanced Corner Sewing Techniques
Within the sphere of advanced corner sewing techniques, you’ll find solutions for even the most challenging sewing projects.
Beyond basic corners, these methods elevate your sewing to professional quality.
- Your heart will race when perfectly executed yoke corners lay flat without puckering
- You’ll feel immense satisfaction mastering curved corners that flow seamlessly
- The pride of creating lapel corners that rival designer garments is unmatched
- There’s pure joy in achieving mitered joins so precise they look machine-made
- The confidence gained from perfecting hem corners will transform your sewing forever
Avoiding Common Mistakes
Now that you’ve mastered advanced techniques, let’s look at pitfalls to avoid.
Even experienced sewists make these corner mistakes:
| Mistake | Consequence | Solution |
|---|---|---|
| Cutting too close to stitches | Fabric fraying, weakened corners | Leave 1/8" beyond stitching |
| Uneven seam allowance | Blunt corners, asymmetrical shapes | Mark seam lines before sewing |
| Wrong needle plate choice | Thread catching, puckered corners | Use straight-stitch plate for precision |
| Skipping pressing steps | Undefined corners | Press after each fold |
Frequently Asked Questions (FAQs)
How to sew sharp corners?
To sew sharp corners, use small stitches, leave your needle down while pivoting, trim seam allowances diagonally, and use a point turner after turning right-side out.
Pressing completes the professional finish.
Is it easy to sew perfect corners?
While 90% of sewers struggle with corners initially, you’ll find them easier with practice.
Perfect corners aren’t simple, but they’re achievable when you use proper marking, trimming techniques, and take your time between steps.
How do you sew a corner on a sewing machine?
To sew a corner, approach your seam line, stop with the needle down when you reach the corner point.
Lift the presser foot, pivot your fabric 90 degrees, then continue sewing the next edge, which involves a series of steps to properly execute the corner sew.
Where do you sew corners?
Contrary to popular belief, you’ll find corners in numerous projects.
You’ll sew them on pillowcases, tote bags, collars, cuffs, necklines, pockets, quilts, and blankets.
Each corner type serves a specific purpose in your creations.
How do you sew a right-angled corner?
To sew a right-angled corner, stitch to the seam allowance, stop with the needle down at the corner, rotate the fabric 90 degrees, and continue.
Trim excess fabric diagonally for a clean, sharp finish.
How do I know when to sew a corner?
Think of corners as crossroads.
You sew them when fabric pieces need sharp changes, like on collars, pockets, or bags.
Corners define shape, so mark seams carefully, adjust fabric angles, and sew precisely, which involves sharp changes.
Is it hard to get a perfect corner when you’re sewing?
Getting a perfect corner isn’t hard, but it does take patience and practice.
Mark your seams carefully, trim bulk at corners, and use tools like a corner turner for crisp, professional-looking results.
What do I do with my foot when I’m rotating?
Keep your presser foot down while rotating the fabric.
This stabilizes everything and guarantees precise corners.
Lift only the needle to pivot smoothly.
Imagine turning a page—controlled and steady wins the race!
Does a corner have to be L-shaped?
A corner doesn’t have to be L-shaped.
Corners can also be curved, pointed, or angled differently depending on your project.
Your goal is to sew them cleanly, ensuring symmetry, smooth passages, and sharp finishes where needed.
How to sew corners with curved edges?
To sew corners with curved edges, use small, even stitches for control.
Clip notches into the seam allowance without cutting the stitches.
Gently turn the fabric, pressing the curve for a smooth, professional finish.
Conclusion
Did you know that even a 1/8" adjustment can make a world of difference in achieving professional-looking corners?
Mastering how to sew perfect corners involves precision, patience, and the right techniques, but it’s entirely doable with practice.
Whether it’s trimming excess fabric, leveraging a sharp pressing technique, or rotating fabric at the pivot point, each step guarantees clean results.
By applying these subtle tricks, you’ll elevate your sewing projects, turning every corner into a flawless finish.

