This site is supported by our readers. We may earn a commission, at no cost to you, if you purchase through links.

Burning your fingertips while pulling a hot dish from the oven happens more often than most cooks care to admit. Store-bought pot holders wear out quickly, lose their heat resistance after a few washes, or feel too bulky to grip properly.
Learning how to sew pot holders gives you control over thickness, fabric choice, and heat protection—plus you can make them match your kitchen or gift them to friends who’ll actually use them.
The process takes about an hour once you understand fabric layering and insulation materials. With the right batting combination, your homemade pot holders can handle temperatures up to 190°C while staying flexible enough for everyday use.
Table Of Contents
- Key Takeaways
- Essential Materials for Sewing Pot Holders
- Choosing The Best Insulation Materials
- Cutting and Preparing Your Fabric Pieces
- Step-by-Step Assembly Instructions
- Adding and Sewing Bias Binding
- Personalizing and Customizing Pot Holders
- Top 4 Tools and Materials for Pot Holders
- Frequently Asked Questions (FAQs)
- Conclusion
Key Takeaways
- Homemade pot holders need proper insulation layering—combining Insul-Bright with cotton batting blocks up to 90% of radiant heat and handles temperatures up to 190°C, far outperforming store-bought options that lose effectiveness after washing.
- Pre-washing your cotton fabric before cutting prevents the 2-4% shrinkage that ruins fit, while maintaining a consistent quarter-inch seam allowance and double-stitching corners boosts durability by roughly 22%.
- Accurate fabric preparation with sharp rotary cutters and a non-slip mat reduces waste by 15-20%, and using Wonder Clips instead of pins every 2-3 inches prevents puckering when working through thick batting layers.
- Bias binding finished with a reinforced hanging loop and topstitching 2-3mm from edges prevents rolling after washing, turning a functional pot holder into something durable enough to gift with confidence.
Essential Materials for Sewing Pot Holders
Getting your materials together before you start sewing makes the whole process smoother and more enjoyable.
You’ll need a few basic items that work together to create a pot holder that’s both safe and functional. Let’s look at what you’ll want to gather for this project.
Choosing Suitable Outer Fabrics
You’ll want quilting cotton or cotton fabric with a tight weave for your outer layer—it’s heat-resistant and holds up beautifully. Look for fabric weight around 5–6 oz/yd² to balance durability with comfortable handling.
Kitchen-themed fabric or bold prints hide stains well, while breathability factors matter for safe textile crafts.
Pre-shrink before cutting to maintain shape after washing.
Selecting Insulating Batting
Thermal insulation makes all the difference between a safe pot holder and a scorched hand. InsulBright delivers heat resistance up to 190°C—about 15% better than cotton batting alone.
For maximum protection, layer Insul-Bright with natural cotton batting; this combination drops surface temps by 14°C in heat tests. Choose insulated batting materials with reflective cores for reliable fabric safety in your kitchen projects.
Picking The Right Thread and Notions
You’ll need polyester thread for heat resistance—94% of sewers choose it for pot holders because it won’t melt under high temps. For your sewing supplies, grab size 14–16 needles to handle thick batting layers without puckering.
Keep these sewing project essentials on hand:
- High-contrast thread colors for visibility on dark fabrics
- Fine glass-headed pins for precise fabric alignment
- Quality bias binding for durable edge finishes
Match your thread selection to your fabric compatibility and InsulBright layers for seams that hold strong on your sewing machine.
Useful Sewing Tools and Accessories
Beyond thread and needles, a few key tools make pot holder construction smoother. Your sewing machine manages thick layers best with a walking foot attachment. Rotary cutters paired with sewing clips give you clean edges—accurate cutting reduces fabric waste by 15–20%. Keep fabric scissors sharp for bias tape trimming, and consider thread conditioners to prevent breakage when stitching through multiple batting layers. These sewing notions aren’t fancy, but they’ll save you frustration.
Choosing The Best Insulation Materials
The insulation you choose makes all the difference between a pot holder that protects your hands and one that lets heat through. You’ll need to understand what each material does and how they work together to keep you safe.
Let’s look at the most effective options and how to layer them for the best protection.
Types of Thermal Batting
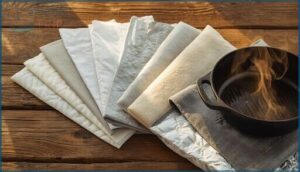
You’ll find several batting materials that protect your hands from heat. Cotton quilt batting offers natural loft and breathes well, while synthetic fibers like polyester resist temperatures up to 250°C without melting. Insulbright stands out with its reflective layer that reduces surface temperature by roughly 10°C. Wool provides flame resistance and excellent heat insulation. Each thermal insulation material brings different strengths to your project.
Insul-Bright Vs. Cotton Batting
When comparing insulation materials, Insul-Bright outperforms cotton batting by blocking up to 90% of radiant heat thanks to its reflective foil layer. Cotton batting offers breathable thermal insulation but loses about 12% effectiveness after repeated washing.
For fabric safety and enhanced heat resistance, Insul-Bright maintains consistent protection across temperatures from -20°C to 230°C, making it the stronger choice for your pot holders.
Layering for Maximum Heat Protection
A three-layer sandwich—outer fabric, thermal batting, and backing—gives you the heat resistance you’re after. Home sewers report that this fabric layering approach, especially with reflective insulation material, cuts heat transfer by up to 25%.
Double-stitching your seams boosts strength by roughly 22%, keeping your quilt batting secure. Aim for 1.25 to 1.75 inches total thickness to meet practical safety standards.
Cutting and Preparing Your Fabric Pieces
Getting your fabric pieces cut accurately is where the real work begins. This step sets the foundation for a pot holder that holds together well and protects your hands properly.
Let’s walk through the measurements, cutting techniques, and simple tricks that’ll make your fabric prep go smoothly.
Measuring and Marking Fabric
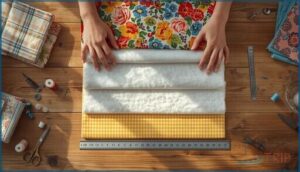
Before your sewing machine comes into play, accurate fabric measurement sets you up for success. Use a ruler or measuring tape—85% of home sewists rely on these tools to guarantee consistent dimensions.
Mark your cutting lines with chalk or a fabric marker for precision, and consider a grid-enabled cutting mat for better alignment.
These simple steps guarantee your sewing project starts on solid ground.
Cutting Outer, Batting, and Backing Layers
Your pot holder’s layers work like a team—each needs the right dimensions. Cut your quilting cotton fabric first, usually 8 to 10 inches square. Next, cut thermal batting and cotton batting about half an inch larger to guarantee full edge coverage.
This extra batting creates a protective border, improving layer alignment and making bias binding easier. Use sharp scissors or rotary cutting tools for clean edges—precision here prevents gaps that compromise heat protection.
Tips for Accurate Fabric Preparation
Want cleaner edges and better fit? Pre-wash your quilting cotton to minimize fabric shrinkage—usually 2 to 4 percent for most blends. Measure twice before cutting; this simple habit prevents costly mistakes.
Use a non-slip cutting mat to reduce fabric shifting by about a third. Maintain a consistent quarter-inch seam allowance throughout your project, and your pot holder will hold up beautifully through repeated use.
Step-by-Step Assembly Instructions
Now that your fabric pieces are ready, it’s time to put everything together. This next part will walk you through assembling your pot holder step by step.
Here’s how you’ll build each layer for a sturdy, heat-safe finish.
Layering Fabrics in The Correct Order
Fabric layering is where your pot holder’s strength and heat resistance really begin. Start with your backing fabric face down, then layer insulated batting, thermal batting, and your chosen outer fabric on top. Keep all edges even, and mind a 0.25-inch seam allowance.
This careful order ensures reliable thermal protection—just what you want for safe, everyday fabric crafting.
Securing Layers With Pins or Clips
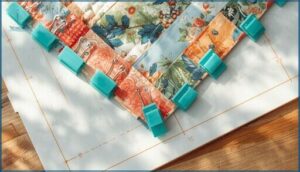
Once your layers are stacked, it’s time to secure them. Use Wonder Clips or pins, spacing them every 2–3 inches along the edges for steady fabric stability.
Pin Placement Strategies matter—clip corners diagonally to prevent puckering. Many sewing tutorials recommend clips for better layer alignment and fewer slips, especially with thicker thermal insulation materials.
This step sets you up for sewing accuracy.
Stitching Layers Together
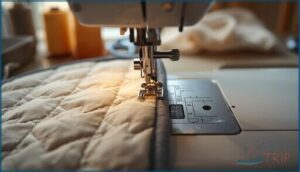
With your layers clipped snugly, it’s time to stitch. Use your sewing machine to quilt through all layers, keeping stitch density around 8–10 per inch for better thermal integrity.
Here’s a quick checklist:
- Check Layer Alignment.
- Set proper Stitch Density.
- Reinforce corners for Seam Reinforcement.
- Watch for Fabric Shifting.
This keeps your DIY Potholders sturdy and safe.
Adding and Sewing Bias Binding
Now that your pot holder layers are sewn together, it’s time to finish the edges with bias binding. This step pulls everything together and gives your project a clean, sturdy finish.
Here’s what you’ll need to do next.
Choosing and Preparing Bias Tape
Ever notice how a crisp edge can make your sewing project look truly polished? That’s the magic of smart Bias Tape Selection.
Opt for cotton bias tape—1/4 inch is a classic Tape Width Option for pot holders. Cut on the bias for flexibility, then press folds sharply.
Prepping your Binding Materials this way ensures smooth, sturdy Edge Finishing every time.
Attaching Binding to Edges
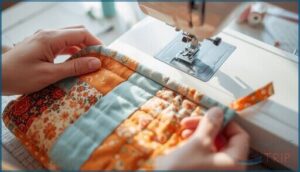
With your pot holder layers ready, line up the bias tape along the edge, keeping a 1/4-inch seam allowance for even Edge Finishing. Use clips or pins every couple of inches for stability.
For crisp corners, practice Corner Mitering—folding at a 45-degree angle. Aim for a 2.0 mm Stitch Density.
These Binding Techniques echo tried-and-true sewing tutorials and patterns.
Creating a Hanging Loop
At the binding’s end, fold a 2.5- to 3.5-inch loop of your remaining bias tape—Loop Materials like cotton twill hold up beautifully under heat. Pin it perpendicular to the pot holder’s edge. Secure with Reinforced Stitches: backstitch twice at each attachment point for Hanging Techniques that withstand daily use. This simple addition transforms sewing projects into functional DIY Potholders.
- Your loop becomes the lifeline between hot pan and burnt fingers
- Each double stitch whispers reliability when you reach for safety
- That small fabric strip carries your care into every meal
Finishing Corners and Seams
Sharp corners make or break your pot holder’s durability. Trim diagonal seams within 3–4 mm of your stitching line—Corner Trimming reduces bulk by up to 35%.
Set your Stitch Length to 2.0–2.5 mm for Seam Reinforcement through multiple fabric layers. Backstitch 6–10 mm where your Bias Binding meets corners.
Edge Finishing with topstitching 2–3 mm from the edge prevents rolling after washing.
Personalizing and Customizing Pot Holders
Once you’ve mastered the basics, you can turn plain pot holders into something that feels truly yours. Small touches like decorative stitching or bright fabric choices make each piece special and fun to use or gift.
Here’s how to add personality to your finished pot holders.
Using Decorative Stitches or Quilt Blocks
You can transform a plain pot holder into something special with decorative stitches or quilt blocks. Try a simple log cabin quilt block for visual interest, or use your machine’s built-in stitch patterns to add texture across the surface.
These sewing techniques work beautifully for DIY potholders—just remember to stitch through all layers before binding. Even sewing for beginners can master basic quilting and design elements with practice.
Selecting Fun Fabric Prints and Colors
Fabric selection is where your pot holder truly comes to life. Choose cotton fabric with prints that speak to you—about 72% of quilters build color palettes around one dominant print. Consider kitchen-themed fabric featuring culinary motifs, or stick with warm reds and oranges that hide everyday stains.
Small-scale patterns under an inch work best, and coordinating your fabric crafts with existing kitchen textiles creates that pulled-together look everyone loves.
Adding Embroidery or Appliqué Details
Ever wondered how a simple pot holder can become a keepsake? Try adding embroidery techniques or appliqué methods for a personal touch. Thoughtful thread selection and stabilizer choices make all the difference—denser stitches or layered fabric embellishments can affect heat protection.
Play with sewing patterns from your favorite sewing tutorial; these beginner sewing projects shine brightest with a dash of creativity.
Gift Ideas and Presentation Tips
Once your DIY potholders are finished, thoughtful gift wrapping can make all the difference. Try recyclable packaging with a custom monogram or handmade tags for a personal touch.
Pairing two pot holders in contrasting fabrics, adding a care card, or using seasonal themes elevates your handmade gift. These small details turn simple handmade gifts into memorable moments of gift giving.
Top 4 Tools and Materials for Pot Holders
You don’t need a ton of fancy equipment to make great pot holders, but having the right tools makes the process easier and the results safer.
A few key items will set you up for success, whether you’re making your first pot holder or your fiftieth.
Here are four essentials that’ll help you create pot holders that actually protect your hands and last through plenty of use.
1. Natural Cotton Quilt Batting Material
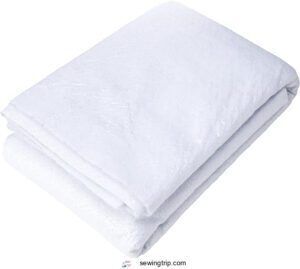
You’ll want cotton quilt batting that offers solid thermal insulation without adding unnecessary bulk. Natural fibers like the 87.5% cotton blend provide breathable layers that wick moisture while protecting your hands from hot pans.
Look for needle-punched batting with a fine scrim—it won’t shift or tear during sewing, and you can quilt up to 10 inches apart. This quilt material delivers reliable heat protection, maintains its loft through repeated washing, and pairs beautifully with cotton outer fabric for a potholder that’s both safe and durable.
Best For: Quilters and crafters who want natural, breathable insulation for potholders, table toppers, and small projects that need reliable heat protection without excessive bulk.
- Natural cotton blend provides excellent thermal resistance (R-1.0 to R-1.5 per inch) while staying breathable and moisture-wicking for comfortable handling of hot cookware
- Needle-punched construction with scrim backing prevents shifting and tearing, maintaining its protective loft through multiple wash cycles
- Allows quilting up to 10 inches apart and works beautifully with cotton fabrics, making it easy to sew without puckering or slipping
- Some users find it thinner than expected, which may require layering multiple pieces for projects needing extra heat protection
- The 34″ x 45″ craft size limits options for larger projects without piecing sections together
- Adds noticeable weight to finished quilts compared to lighter synthetic batting options
2. Colorful Sewing Fabric Clips Set
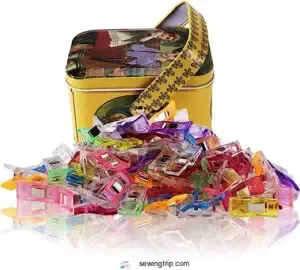
Once you’ve got your batting ready, grab a set of colorful sewing fabric clips to make layering your pot holder a breeze. These little plastic wonders hold multiple fabric layers together without leaving pin marks on your decorative fabric—that’s a win for beginners tackling their first DIY potholders.
You’ll find sets with 24 to 60 clips for around $5 to $12, and they’re reusable project after project. Their flat base feeds smoothly under your presser foot, boosting your sewing efficiency while keeping everything perfectly aligned.
Best For: Beginner sewists and quilters who want to layer fabrics without leaving pin marks on decorative projects like pot holders.
- Hold multiple fabric layers together securely without damaging or marking delicate fabrics
- Reusable across countless projects with a flat base that feeds smoothly under your presser foot
- Affordable at $5 to $12 per set of 24 to 60 clips, making them budget-friendly for beginners
- May break over time when used with thick or heavy fabric layers
- Smaller than expected at 2.7cm long, which might surprise first-time buyers
- Not ideal for heavy-duty or large-scale sewing projects that require stronger hold
3. Insulated Batting For Sewing Projects
Once your fabrics are clipped in place, let’s talk about insulated batting—the real workhorse behind heat resistance in DIY potholders. Insulated batting, like Insul-Bright, combines reflective layers with polyester fibers, boosting thermal insulation where you need it most.
For sewing safety, this material keeps your hands protected from hot pans. You’ll find it easy to cut and flexible for sewing projects.
Pairing different insulator types or adding cotton batting can further improve protection, making your potholder both practical and reliable.
Best For: Crafters and DIYers who want to make heat-resistant kitchen accessories like potholders, oven mitts, and lunch bags.
- Easy to cut, sew, and shape for a variety of projects
- Reflective layer helps keep hot items hot and cold items cold
- Maintains loft and insulation even after multiple washes
- May need extra layers for maximum heat protection in high-heat tasks
- More expensive than standard cotton batting
- Not as effective for extreme temperatures or heavy-duty commercial use
4. Singer 7285Q Quilting Sewing Machine
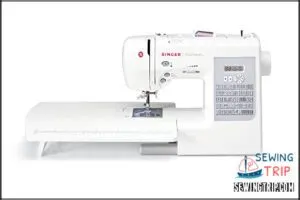
The Singer 7285Q brings 100 built-in stitches and a speed control slider to your potholder sewing project, making thick batting layers manageable. Its 7-piece feed dog system grips dense fabrics securely, while six presser foot pressure settings let you adjust for insulating materials.
With quilting modes and automatic thread control, this sewing machine manages DIY potholders smoothly—whether you’re following a sewing tutorial or creating your own design. The programmable needle position helps you stitch binding edges accurately every time.
Best For: Quilters and home sewers who want an affordable machine with built-in quilting stitches and automatic features for handling thick batting and insulated fabrics.
- 100 built-in stitches including 15 quilting options give you plenty of creative choices for decorative topstitching and custom pot holder designs
- 7-piece feed dog system and adjustable presser foot pressure handle dense layers of batting and insulation without slipping or bunching
- Speed control slider and programmable needle positioning let you work slowly through thick materials with precision on binding and edges
- Some users reported the machine locking up during use, which could interrupt larger projects
- Not built for heavy-duty sewing, so it may struggle with extremely thick material combinations
- Automatic buttonhole feature can be inconsistent, and the bobbin basket durability issues may cause thread tangles
Frequently Asked Questions (FAQs)
What kind of batting to use for potholders?
Regarding batting materials, don’t put all your eggs in one basket—Insul-Bright offers exceptional heat resistance for potholders, while cotton quilt batting adds softness.
For maximum Thermal Insulation and safety standards, layer both insulation materials together.
How many layers of insul-bright for potholders?
You’ll usually need one or two layers of Insul-Bright for effective heat protection in DIY pot holders. A single layer paired with cotton batting offers solid thermal insulation, while double-layering provides maximum potholder safety for high-heat tasks.
What fabric is good for pot holders?
You’ll want 100% cotton fabric or natural fibers like linen—both offer excellent heat resistance and durability.
Cotton blends with polyester compromise thermal insulation, so stick with tightly-woven, high-quality natural materials for safe, heat-resistant pot holders.
How many stitches do you cast on for a potholder?
Sewing a pot holder doesn’t involve casting on—that’s knitting terminology.
For machine sewing, you’ll set your stitch count to 20–22 stitches per inch, ensuring strong seams and proper fabric thickness coverage throughout your potholder sewing project.
How do I prevent my potholders from shrinking?
Pre-wash your cotton and fabric before sewing to minimize fabric shrinkage. This simple step improves dimensional stability and heat resistance.
Choose quality insulated batting and avoid high dryer heat after finishing your pot holder for lasting material selection results.
Can I use a serger instead of a regular sewing machine?
You can use a serger for edge finishing on pot holders—it trims and finishes seams up to three times faster.
A three-thread overlock works best with dense batting layers and provides excellent durability.
Whats the best way to clean homemade potholders?
Machine wash your homemade potholders on a delicate cycle at 40°C, then air dry them completely to prevent mildew.
This gentle cleaning method preserves fabric integrity while removing oils and kitchen grime effectively.
Are there any safety certifications for homemade potholders?
Ironically, no official heat resistance certifications exist for homemade pot holders—unlike commercial products meeting UL thermal testing standards (248–338°F). Your DIY pot holders rely on proper insulating materials and layering techniques rather than regulated safety standards or certification processes.
Similarly, understanding web server errors can help you troubleshoot issues with online sewing guides.
Can I wash handmade pot holders in the machine?
Yes, you can safely machine wash most DIY pot holders. Cotton and polyester blends handle washing cycles at 40–60°C without significant fabric shrinkage, maintaining heat resistance. Always check care labels before laundering handmade kitchen accessories.
How long do homemade pot holders typically last?
With proper care, your handmade pot holders last two to five years. Fabric durability, heat resistance, and sewing techniques—like reinforced quilting—extend lifespan.
Material selection and regular inspections help these DIY pot holders remain functional kitchen accessories longer.
Conclusion
You could keep buying flimsy, mass-produced pot holders that quit after three months—or you could spend an hour creating something that actually protects your hands.
Now that you know how to sew pot holders with proper insulation and sturdy construction, you’ve got kitchen safety tools that won’t let you down mid-casserole.
Your fingers will thank you, and anyone who receives one as a gift won’t quietly toss it in a drawer.

