This site is supported by our readers. We may earn a commission, at no cost to you, if you purchase through links.
 You’ll love how custom-made Roman shades transform your windows with elegance and precision.
To sew Roman shades, start by measuring your window and adding 3 inches to the width and 5 inches to the length for seam allowances.
Cut your main fabric and lining, then sew them together with right sides facing.
Create horizontal channels for dowel rods every 6-8 inches, and attach plastic rings for the lifting mechanism.
Mount a wooden board at the top, and thread your lifting cords through the rings.
Beyond these basics lie clever tricks that’ll help you achieve those crisp, professional folds every time.
Table Of Contents
Key Takeaways
- You’ll need to add 3 inches to the window width and 5 inches to the length for proper seam allowances, then create horizontal channels every 6-8 inches for dowel rods.
- You should take three measurements at the top, middle, and bottom of your window frame, using the smallest width measurement and subtracting 1/8 inch for inside mount installations.
- You’ll want to attach plastic rings 1 inch from each side and space them every 10 inches across the shade, ensuring smooth operation when raising and lowering.
- You must secure your cords with a tensioning device and install cord cleats out of children’s reach for safety, particularly in homes with small children.
Measuring for Roman Shades
Precise measurements are essential for perfectly fitted Roman shades.
Let’s get started measuring your window to determine the ideal size for your new shade.
We’ll cover both inside and outside mount installations, ensuring your beautiful, custom-made shades fit flawlessly.
Inside The Window Frame Installation
When you’re measuring for an inside window frame installation, precision is your best friend.
Take width measurements at the top, middle, and bottom, using the smallest and subtracting 1/8 inch for a snug fit.
Measure the height thrice, too, but go with the largest.
This makes sure your Roman shade hugs the frame perfectly, giving a polished look.
Outside The Window Frame Installation
Now, let’s tackle measuring for outside the window frame installation.
First, grab your measuring tape and measure the width from outside edge to outside edge three times.
Finally, add 4 inches to your largest readout.
For height, measure the frame top to the sill three times and add 2 inches more.
- Double-check measurements
- Secure mounting board
- Use corner braces
- Adjust cord length
Calculating Fabric and Lining Dimensions
Mastering fabric calculations involves understanding how to sew 2 pieces of fabric together to align fabrics right sides together. Mastering fabric calculations feels like piecing together a simple puzzle.
For your shade’s width, just add a dash of 4 inches.
Consider lining width as subtracting 2 inches from the final width.
Play with measurements, not guesswork.
Use this handy table to guide you:
| Element | Fabric Width | Lining Length |
|---|---|---|
| Shade Height | Add to dowel | Minus 1 inch |
| Dowel Allowance | 1.5” per dowel | Not applicable |
| Seam Allowance | Include in width | Not applicable |
No more missteps, just smooth crafting!
How to Sew a Roman Shade
You’re ready to transform your space by making Roman shades, a rewarding project that requires patience and precision.
Start by preparing your materials, then move step-by-step to sew, assemble, and install these elegant window treatments with tools you likely already own.
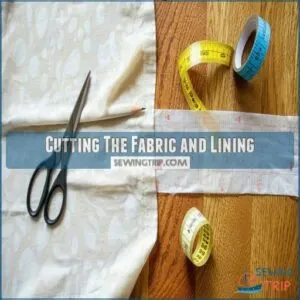
Cutting The Fabric and Lining
You’ve measured your window, so it’s time to cut.
Grab your cutting tools and unfold your fabric.
For fabric width, remember to add 4 inches to your shade size, just as you’d for an outside mount, where you’ll add 4 inches on each side for clearance, as explained in our guide on how to make roman shades.
Consider fabric length, adding 4 inches plus dowel allowances if necessary.
Trim your lining width 2 inches less, with 1 inch shorter length.
Accuracy’s your ally here!
Sewing The Sides and Bottom Fold
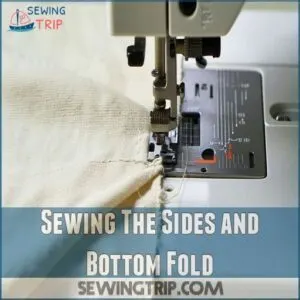
With your fabric and lining cut, start sewing the sides using a ½-inch seam allowance. Use proper sewing machine settings for consistency.
For the bottom fold, fold two inches up in the direction of the back, then press it flat. Make sure clean fabric edges by pressing again after folding over ½-inch. Secure the seam with stitching for a neat finish.
- Align fabric edges accurately
- Maintain consistent seam allowance
- Use pressing techniques for crisp folds
- Double-check sewing machine settings
- Make sure smooth bottom fold techniques
Adding Top Piping and Gussets
Now that your bottom’s neatly folded, let’s add some pizzazz.
Optional piping adds a polished touch.
For a neat finish, consider using a bias-bound edges technique that adds a decorative elegance to your sewing projects. Choose your piping types and use your piping tools for a neat finish.
When selecting dowels, consider shopping for a dowel rod for shades to make sure a smooth operation.
For gussets, measure and sew 8" and then 9½" up from the bottom.
This creates those pretty little pockets for your dowels, making sure a perfectly pleated Roman shade.
Remember precise gusset placement is key for a professional look.
Enjoy the process!
Attaching Plastic Rings and Dowels
When attaching the plastic rings and dowels, make sure everything’s evenly spaced for smooth operation. Here’s how to start:
- Ring placement: 1 inch from each side.
- Ring spacing: Every 10 inches.
- Dowel size: Match the window’s width.
- Dowel types: Consider wood or plastic.
- Ring attachment: Secure firmly with thread.
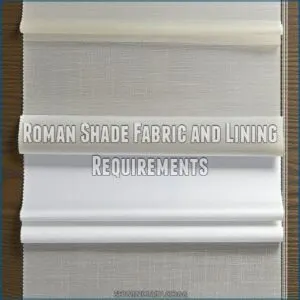
Roman Shade Fabric and Lining Requirements
When selecting the fabric for your Roman shade, consider patterns that complement your room and make sure the material is both translucent and pliable for easy movement.
Lining fabric is important; it should enhance the shade’s structure while avoiding overly stiff materials that might hinder smooth operation.
Choosing The Right Fabric Pattern
Choosing the fabric pattern for your Roman shades feels like picking the perfect outfit for your room.
Think about your color palette and overall room style.
Fabric weight and pattern scale matter too—delicate designs for cozy spaces or bold prints for modern vibes.
Texture contrast adds depth, making your shades pop without overpowering the room’s ambiance.
Selecting Fabric Based on Translucency and Pliability
Selecting the perfect fabric for your Roman shades is like picking the right outfit for a special occasion. Consider translucency and pliability to balance light control and style.
Look for:
- Light control: Choose sheer for bright rooms or opaque for privacy.
- Fabric drape: Makes sure smooth folds.
- Wrinkle resistance: Keeps shades neat.
- Durability: Long-lasting use.
- Sewing ease: Simplifies assembly.
Avoiding Unsuitable Fabrics
Not all fabrics play nice with Roman shades.
Lightweight or sheer materials might sag, while heavy cloth can be too stiff for graceful folding.
Opt for fabric that balances weight and texture; it should drape neatly, resist wrinkles, and maintain colorfastness.
Remember, fabric’s behavior sets the stage for your window symphony, ensuring elegance and functionality.
Lining Fabric Requirements
Steer clear of heavy, textured fabrics unsuitable for Roman shades.
For lining, consider weight, color, purpose, texture, and cost.
You’ll want a lightweight, neutral lining that complements your fabric, reduces light, and protects against fading.
Choose a cost-effective option, balancing quality and budget.
This makes sure your shades hang gracefully while offering practical benefits, enhancing both function and style.
Assembling The Roman Shade
Now you’re ready to assemble your Roman shade! You’ll create the mounting board, attach the shade, add the cords and eye hooks, and finally secure everything to the wall.
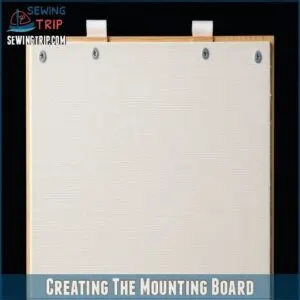
Creating The Mounting Board
Once you’ve picked the right fabric, it’s time to tackle the mounting board.
Start by cutting the 1" x 2" board to match your window’s width.
Wrap it snugly in fabric and secure it neatly.
Don’t skimp on eye hook placement—align them with the rings.
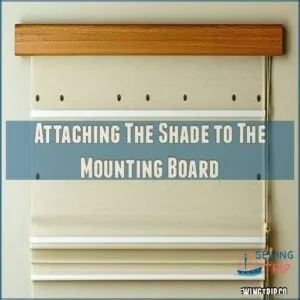
Attaching The Shade to The Mounting Board
Attaching your Roman shade to the mounting board is a breeze. Secure the top of the shade evenly along the board’s length using a sturdy staple gun. Aim for smooth, level alignment:
- Make sure mounting board size matches the shade width.
- Keep fabric taut for a polished look.
- Check eye hook placement is unobstructed.
- Use even spacing for staples.
- Confirm cord attachment is secure.
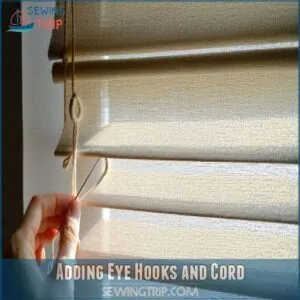
Adding Eye Hooks and Cord
Carefully line up your eye hooks with the plastic rings on your shade, ensuring even spacing.
This alignment keeps the cords smooth and tangle-free.
You can find a variety of eye hooks for shades online, so make sure to choose the right size and material for your project.
Cut the cords to the right length, adding extra for any adjustments.
Thread each cord through its corresponding hooks.
Keep everything tidy and organized—just like a well-kept cord dance party!
Securing The Cords to The Wall
Securing the cords to the wall involves a few simple steps that give you peace of mind and neatness.
Grab a wall-mounted cleat and place it where it’s easy to reach.
Wrap your cords tightly around the cleat, ensuring the cord tension is just right.
This keeps your shade looking sharp and safe, emphasizing proper cord winding and securing.
Hanging and Adjusting The Roman Shade
Once you’ve assembled your Roman shade, it’s time to hang it with precision inside or outside the window frame.
Adjust the cords so the shade operates smoothly, ensuring it sits perfectly in its final position.
Inside The Window Frame Mounting
You’ve got your shade ready, and now it’s time to align it within the window’s embrace. Embrace the inside mount by fixing your shade’s width and hardware placement just right.
- Assess window frame size.
- Spot best bracket spots.
- Position mounting hardware snugly.
- Ensure shade width fits seamlessly.
- Confirm level alignment for smooth operation.
Outside The Window Frame Mounting
Now that your shade’s snug inside the frame, let’s tackle outside mounting.
Measure carefully, adding extra fabric for a perfect fit – be sure to factor in adding a few inches to each side for a seamless look, as suggested in the Roman Shade Tutorial.
Use mounting hardware appropriate for your wall.
Prepare the wall; clean it for a strong hold.
Follow the installation steps precisely.
Your new Roman shade will soon be the envy of the neighborhood!
Remember to check your window trim for any obstructions.
Adjusting The Cord and Pulleys
A fine-tuned Roman shade begins with adjusting the cord tension and pulley alignment for smooth operation.
Check each cord’s length—if they’re mismatched, the shade will slant.
Tug gently, like coaxing the last drop from a ketchup bottle, to make sure the pull is uniform.
If the pulley squeaks or sticks, a quick replacement might be needed for seamless movement.
Finalizing The Shade’s Position
Once the cords are adjusted, stand back and check for even folds and a level finish.
Make sure the shade height matches your window’s style.
If it leans, adjust the cord length or recheck the wall mounting.
Like perfecting a painting, small tweaks bring harmony to your space.
Congratulations, now you’ve got a delightful finish!
Tips and Considerations for Sewing Roman Shades
When sewing Roman shades, you’ll want to prioritize safety, especially in homes with small children.
Carefully selecting appropriate tools and materials, starting with beginner-friendly tutorials, and personalizing your shades can guarantee both functionality and style.
Safety Precautions for Small Children
When crafting Roman shades, keep child safety in mind to avoid string hazards. Here’s how:
- Secure cords with a tensioning device to prevent tangles.
- Install cord cleats out of children’s reach; this aids in cord management and window safety.
- Consider cordless designs or safety liners for added blind safety measures.
Choosing The Right Tools and Materials
Getting the right tools before sewing Roman shades makes the process smoother and satisfying.
You’ll need fabric types that are both durable and aesthetic; for this, you can browse roman shade fabric online at roman shade fabrics.
A sewing machine and measuring tools, such as a rotary cutter or Fiskars Orange Handled Scissors, are essential for precision.
Use a staple gun to secure elements firmly.
Selecting strong cord options guarantees durability, providing both functionality and style to your shade masterpiece.
Starting With Beginner-Friendly Tutorials
Start easy Roman shade projects with confidence.
Before starting, consider watching YouTube tutorials for beginner sewing projects, such as those found in sewing machine tutorials, to master simple ideas quickly:
- Select the best beginner tutorials. Look for guides that simplify complex concepts and showcase straightforward techniques.
- Gather basic supplies. You’ll need fabric, lining, rings, and a sewing machine.
- Practice easy sewing techniques. Begin with simple patterns to build your skills.
Personalizing Your Roman Shades With Unique Styles
Now that you’ve mastered the basics, let your creativity shine through your Roman shade design.
Mix bold fabric choices with unexpected trim combinations, or add unique hardware like vintage pulls.
You can layer patterns for depth, incorporate contrasting borders, or even mix fabrics within the same shade.
Don’t be afraid to experiment – your window treatments should reflect your personal style and home’s character.
Frequently Asked Questions (FAQs)
What is a roman shade?
A Roman shade is a fabric window treatment that folds into neat horizontal pleats when raised and lies flat when lowered.
You’ll love how it combines the soft look of curtains with the functionality of blinds.
How to choose a pattern for Roman Shades?
Consider your room’s style and light needs when selecting patterns.
For large windows, choose smaller prints, while bold patterns work in compact spaces.
Match color schemes and make sure the fabric’s weight suits Roman shade construction.
How do you hang a roman shade on a window?
Like a puzzle piece finding its perfect spot, mount your roman shade by securing the mounting board above your window frame.
Attach corner braces.
Add a cleat to manage the cords safely.
How do you make Roman shades with mini blinds?
Remove mini blind slats, leaving cords intact.
Cut fabric slightly larger than blinds, attach it with fabric glue.
Create pleats by raising blinds and pinning fabric folds.
Secure pleats with hand stitching.
Is it hard to sew Roman shades?
Sewing Roman shades isn’t particularly difficult if you’re comfortable with basic machine sewing.
You’ll need patience for measuring and precise cutting,
but with clear instructions and the right tools, you can tackle this project successfully.
How do you make professional looking Roman shades?
Making professional Roman shades requires precision, just like conducting an orchestra.
You’ll need quality fabric, accurate measurements, careful cutting, and careful attention to ring placement for smooth operation and elegant folds when raised.
How much fabric is needed for Roman shades?
For your Roman shade, add 4 inches to your desired width measurement.
For length, add 4 inches plus 5 inches per dowel.
Don’t forget lining fabric – subtract 2 inches from width and 1 inch from length.
How do you attach fabric to a roman blind?
Did you know 78% of DIY enthusiasts get stuck at fabric attachment?
Start by stapling your fabric to a 1×2" wooden board, then secure rings 10" apart across the width.
Can I make Roman shades without sewing experience?
Yes, you can create stylish Roman shades even without sewing skills.
No-sew tutorials use fabric glue, iron-on tape, or mini blinds as alternatives.
These methods deliver professional-looking results with minimal crafting experience.
How long does a Roman shade project take?
Surprisingly, 90% of DIY-ers complete their first Roman shade in 4-6 hours.
You’ll need about 2 hours for measuring and cutting, 1-2 hours for sewing, and another hour for mounting and hardware installation.
What fabrics work best for kitchen Roman shades?
Choose cotton, linen, or polyester blends that resist moisture and stains for your kitchen shades. You’ll want washable, durable fabrics that won’t fade or warp from heat and cooking steam.
Should I line shades for bathroom windows?
In a world of nosy neighbors, you’ll absolutely want to line bathroom Roman shades.
It’s essential for privacy and moisture protection.
You’ll also get better light control and extend your fabric’s life.
Can existing curtains be converted to Roman shades?
You can transform existing curtains into Roman shades by removing them from the rod, adding plastic rings, dowels, and a mounting board.
When sewing Roman shades, it’s also crucial to ensure that your fabric is accurately marked with darts, using techniques such as marking darts sewing to achieve a tailored fit. Consider the fabric’s weight and pattern placement before starting this project.
Conclusion
Like a well-oiled sewing machine, you’re now equipped with everything needed to sew Roman shades that’ll make your windows shine.
Whether you’re crafting them for your cozy reading nook or sun-drenched living room, these custom window treatments are worth every careful stitch.
Remember, learning how to sew Roman shades takes patience, but the result – perfectly fitted, professionally finished window coverings that reflect your style – makes it all worthwhile.
Ready to start measuring?


