This site is supported by our readers. We may earn a commission, at no cost to you, if you purchase through links.

Start by measuring your desired cuff height and marking it with chalk. Create a clean hem at the bottom edge first, then fold the fabric up to form your cuff.
Press each fold with an iron – this step’s essential for that crisp finish.
Pin the turn up in place and stitch along the inner fold line, catching just enough fabric to secure it without showing on the outside. The secret lies in getting your measurements spot-on and mastering the pressing technique that keeps everything looking professional through countless washes, which is key to a professional look.
Table Of Contents
Key Takeaways
- You’ll get professional results by measuring twice and cutting once – always wear your pants with the shoes you’ll pair them with to ensure accurate inseam measurements and mark both legs symmetrically with pins.
- You need to create a clean hem first, then fold the fabric up to double your desired cuff depth, pressing each fold with an iron to set crisp creases that’ll hold their shape through countless washes.
- You should secure your turn-ups using a large zigzag stitch from the inside, catching just enough fabric to hold everything in place while keeping the stitches completely invisible from the outside.
- You can adapt this technique for different garments – shorts require cutting the pattern shorter and adding cuff extensions, while jeans work perfectly with single or double cuffs that showcase the selvedge edge.
Hem The Bottom
Creating perfect turn ups starts with mastering the bottom hem – your foundation for success. Begin by measuring your desired length with precision, marking it clearly on both legs.
Cut your fabric allowance generously, leaving about 2.5 times your intended cuff depth plus extra for seam allowances. This double hemming approach prevents fraying and creates professional-looking results.
Generous fabric allowance is your insurance policy against hemming disasters – measure twice, cut once, succeed always.
When hemming pants, accuracy matters more than speed. Use sharp fabric scissors to trim excess material, leaving enough fabric for proper edge finishing. Pin your measurements carefully before making any cuts – remember, you can always trim more, but you can’t add fabric back.
To achieve the cleanest cuts, consider investing in quality cutting tools.
For cuffing trousers effectively, make certain both legs match exactly. This turn up tutorial emphasizes checking your work twice before proceeding.
These fundamental sewing techniques create the stable base needed for flawless cuffs that’ll make your tailor jealous.
Fold and Sew The Turn Up
With your hem complete, it’s time to create those crisp turn-ups that’ll make your trousers look professionally crafted.
Start by folding the hem up to exactly half your desired turn-up depth, then press this fold flat.
Hold the fabric firmly at what’ll become the top edge of your turn-up, then fold the trouser leg inward by half the turn-up depth again.
This double-fold technique guarantees proper fabric alignment and creates the classic cuffed look.
Now comes the sewing part of this turn up tutorial.
Use a large zigzag stitch to secure the layers, focusing on stitch visibility – you want it hidden on the outside but functional on the inside.
Pay attention to crease precision as you work, guaranteeing both legs match perfectly.
Layer security is key, so stitch slowly through all fabric layers.
These sewing techniques create durable cuffing trousers that’ll hold their shape through countless wears.
If you’re turning the fabric inside out, use safety pins.
Press Well
Once you’ve sewn your turn ups, proper pressing transforms amateur work into professional results.
Heat up your iron and set it according to your fabric type – cotton handles high heat while delicate materials need gentler settings.
Steam usage makes all the difference here, so fill that reservoir.
Start with the inside crease, pressing firmly to create sharp crease definition.
Work your way around each cuff, holding the iron down for several seconds at each spot.
Don’t just glide over the surface – you’re literally setting the fabric’s memory.
To achieve the best results, consider using specific iron models.
Focus extra attention on that top fold where the turn up meets the trouser leg.
This edge catches everyone’s eye first.
For stubborn fabrics, use a pressing cloth to prevent shine while cranking up the heat.
These ironing techniques separate weekend warriors from tailoring pros.
Your trouser alteration deserves this final flourish.
Measure Carefully
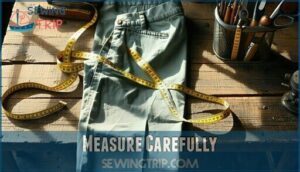
Proper measuring separates amateur alterations from professional results. You’ll want to measure twice and cut once—this old saying rings especially true for turn ups.
Start by wearing your trousers with the shoes you’ll pair them with, since shoe height affects your accurate inseam measurement. Mark your desired length with pins, ensuring symmetrical alignment on both legs.
For consistent hemming results, measure from the crotch seam down to your marked point on each leg. Pre-wash fabric before measuring to prevent shrinkage surprises later.
For accuracy, consider using a flexible measuring tool. When working on striped or patterned pants, pay extra attention to pattern matching at the fold line.
Remember, you can always trim more fabric, but you can’t add it back. This careful measuring approach guarantees your sew turn ups project creates perfectly balanced cuffs that complement your overall look.
Sewing Shorts Turn Ups
Sewing turn ups on shorts requires a different approach than pants since you’ll work with less fabric length.
You’ll need to cut your pattern shorter than desired, attach a cuff extension piece, then fold and assemble the turn up for a clean, professional finish, utilizing a technique that results in a professional look.
Cut Pattern Shorter
Smart sewers tackle pattern alterations before touching fabric. Shortening your shorts pattern prevents fabric waste and eliminates resizing challenges later.
Mark your new cutting line, accounting for cuff depth, then trim the pattern pieces. This design modification streamlines your sewing tutorial process.
- Trace original pattern onto paper before making length reduction cuts
- Calculate cuff depth twice to avoid measuring mistakes during pattern alterations
- Mark cutting lines clearly with contrasting pen or pencil colors
- Save original pattern pieces for future trouser alterations and hemming guide reference
- Test fit mockup fabric scraps to confirm shortened measurements work perfectly
Attach Cuff Extension
After trimming your shorts pattern, you’ll need to create a cuff extension. Choose fabric that matches your shorts for seamless sewing turn ups.
Measure the extension length carefully – it should be twice your desired cuff depth plus seam allowances.
Pin the extension piece along the freshly cut bottom edge, matching seams perfectly. This securing extension step creates the foundation for professional trouser cuffs.
Press the seam flat before moving forward with your turn up hem project.
Fold and Assemble
The folding stage requires careful fabric alignment to create professional-looking cuffed trousers.
Turn under the bottom cuff line and fold your shorts’ layers through the seam cuts, following your sewing guide until you’re ready for the finishing touches.
- Line up seams and edges during the folding process for perfect fabric alignment
- Check cuff depth matches your pattern markings before securing layers
- Iron creases using proper ironing technique before final stitching to guarantee crease precision
Cuffing Jeans
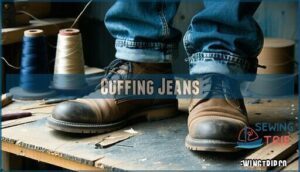
You’ll transform your jeans into stylish cuffed pants by folding the hem upward and securing it with careful stitching.
This technique works best with raw denim that has enough length to create clean, even folds without bunching at your ankles, making it ideal for a stylish look.
Single Cuff
The single cuff brings effortless style to your jeans with minimal effort.
Simply fold up 5cm of fabric above the original hem, creating clean lines that work for both casual and formal occasions.
This cuff placement offers flexibility in cuff width while showcasing your hemming methods skills.
Consider fabric choice when determining how crisp your fold stays throughout wear.
Double Cuff
With double cuffs, you’re doubling down on style and substance.
Start by folding your jeans’ hem up once, creating your first cuff. Then fold again above it for the second layer.
This hemming method adds cuff weight and creates bold styling options. Keep both folds even – uneven cuff height screams amateur.
The extra fabric choice gives your pants alteration serious street cred. Achieving this look may require you to hem jeans properly.
Stacking
Stacking creates a relaxed vibe when you want that effortless, lived-in look instead of formal cuffs.
Let your jeans bunch naturally around your ankles – this clothing alteration technique works best with proper inseam length that’s slightly longer than needed.
The fabric drape creates casual styling magic as extra material pools and creases organically.
This modern aesthetics approach pairs perfectly with sneakers or boots for contemporary shoe pairing.
Your sewing project becomes simpler since you skip hemming entirely.
Just embrace the natural fall and let your pants shortening worries disappear with these essential sewing tips.
Cuff Height Rules
Getting cuffs just right isn’t rocket science, but proportion matters.
Your height, trouser weight, and the occasion all play into finding that sweet spot between sharp and sloppy.
- Proportion Guidelines – Match cuff width to your frame size
- Formal vs. Casual – Dress pants need narrower cuffs than jeans
- Fabric Weight – Heavier materials support wider turn-ups
- Personal Preference – Trust your eye over rigid rules
- Height Considerations – Taller folks can handle bigger cuffs
Top Raw Selvedge Jeans
Raw selvedge denim transforms ordinary jeans into heirloom pieces that tell your story through every fade. When you’re investing in premium denim, brands like Edwin, A.P.C., and Japanese powerhouses deliver exceptional Selvedge Denim Quality that mass-produced jeans simply can’t match.
The magic lies in that narrow, tightly woven selvedge ID running along the seam – it’s your badge of authenticity. Japanese Selvedge dominates the market, with mills creating fabric weights that feel substantial and age beautifully.
Raw Denim Fading develops character over months of wear, creating unique whisker patterns and honeycombs that reflect your movement. While Cone Mills History represents American denim heritage, Japanese craftsmen have perfected the art.
Brands like Nudie, Levi’s premium lines, and Acne Studios offer accessible entry points into raw selvedge territory. These jeans work perfectly with turn ups and cuffs, showcasing that coveted selvedge ID.
The extra fabric weight helps cuffs hold their shape, creating clean lines that elevate your entire look.
Current Style Trends
Turn-ups are having a major fashion moment in 2025, transforming ordinary trousers into statement pieces.
These trendy turnups aren’t just practical—they’re the style detail that separates fashion-forward folks from the crowd.
Here’s how to nail the current cuff game:
- Seasonal Colors – Match your turn-up width to the season’s palette for maximum impact
- Fabric Choices – Heavier fabrics like denim and wool hold crisp cuffs better than lightweight materials
- Turn-up Width – Slim fits need narrower cuffs (1-2 inches), while wide-leg trousers rock deeper folds
- Occasion Styling – Formal events call for precise, pressed cuffs; casual wear allows relaxed, rolled styles
- Designer Influence – Take cues from runway shows featuring everything from contrast-lined cuffs to frayed edges
The slow fashion movement has made cuffs more popular than ever. You’re not just hemming—you’re creating versatile pieces that adapt to changing fashion trends without constant replacements.
Enjoy Your Creation!
Your fresh cuffs deserve a victory lap! Step back and admire your tailoring handiwork. Those crisp hems showcase real sewing skills that’d make grandma proud.
Engaging with sewing can be enhanced through mindset and well-being.
| Wear and Care | Styling Options |
|---|---|
| Gentle wash cycles protect your custom hems | Pair cuffed trousers with boots or loafers |
| Steam press cuffs to maintain sharp edges | Roll sleeves to match your turned-up style |
| Store hanging to prevent crease damage | Mix textures for sophisticated looks |
Do a quick Comfort Check – walk around, sit down, verify nothing pinches. If Alterations Needed, adjust now before wearing out.
Show It Off to friends who’ll appreciate your craftsmanship. You’ve mastered the art of perfect cuffs through patience and precision.
Frequently Asked Questions (FAQs)
How do you sew a turn up?
Measure your desired length, then fold the fabric up twice the turn-up depth. Press well, align side seams, and use a zigzag stitch to secure invisibly from inside.
How do you turn up trousers without sewing?
Picture yourself wielding a magic wand that transforms fabric without a single stitch.
You can create crisp turn-ups using iron-on hem tape or fabric adhesive.
Simply fold, apply heat, and press for instant professional-looking cuffs.
Can you turn up trousers with a sewing machine?
Yes, you can absolutely turn up trousers with a sewing machine.
It’s faster and creates more durable, professional-looking hems.
Use a straight stitch for basic hems or zigzag for stretchy fabrics.
How to turn up trousers?
Transforming saggy trouser hems into crisp, professional turn-ups isn’t rocket science.
Pin your desired length, fold fabric twice the cuff depth, press well, then stitch invisibly along the inner fold for polished results.
How do you sew a turn-up Hem?
Start by folding your hem up half the turn-up depth, then press it flat.
Fold the trouser leg inward by half the depth again, press well, and secure with invisible zigzag stitches.
How do you make a perfect turn-up?
Measure your desired length precisely, then fold fabric to double the turn-up depth. Press crisp creases, align side seams perfectly, and stitch invisibly from inside. Press again for sharp edges.
How to make turn-ups on trousers for beginners?
Like hemming your favorite childhood blanket, creating trouser turn-ups requires patience and precision.
First, you’ll measure twice and cut once, then fold fabric double the desired cuff depth before pressing and stitching securely, which involves precision.
How to turn when sewing?
When you reach corners or curves while sewing, lift your needle while it’s down, raise the presser foot, pivot your fabric to the new direction.
Lower the foot, and continue stitching smoothly, ensuring a smooth transition to maintain even stitching and prevent fabric distortion or bunching.
What is the best stitch for turning up trousers?
Coincidentally, you’ll get the cleanest results using a large zigzag stitch when turning up trousers.
This invisible technique secures the hem perfectly while staying hidden from the outside, creating professional-looking turn-ups every time.
How to do a turned up hem?
Fold your trouser hem up twice the desired cuff height, press it flat, then use a zigzag stitch to secure the layers from inside, keeping stitches invisible from outside.
Conclusion
Perfect timing meets perfect technique when you master how to sew turn ups on your favorite pants.
You’ve now got the skills to transform any pair into a custom-fitted masterpiece.
Remember to measure twice, press thoroughly, and take your time with each fold.
Your patience pays off with professional-looking cuffs that’ll last through countless wears.
Whether you’re hemming jeans or tailoring trousers, these turn up techniques give you complete control over your wardrobe’s fit and style.


