This site is supported by our readers. We may earn a commission, at no cost to you, if you purchase through links.
Velcro closures fail most often because the stitching wasn’t done right in the first place. Those little hook-and-loop strips seem simple enough, but they’re actually thicker and denser than regular fabric, which means your sewing machine might balk if you don’t adjust your approach.
The good news? Once you know which needle to use, how to position the strips, and which stitch pattern creates the strongest hold, you’ll breeze through attaching Velcro to anything from lightweight cotton tote bags to heavy canvas jackets.
The techniques work just as well whether you’re hand-sewing or using a machine, and you’ll avoid the frustration of skipped stitches, broken thread, or strips that peel away after a few uses.
Table Of Contents
Key Takeaways
- Choose the right needle (size 14-16 universal or denim for heavy fabrics) and polyester thread to prevent skipped stitches and thread breakage when sewing through Velcro’s dense material.
- Position Velcro carefully using pins, clips, or washable tape before stitching, then sew around all edges about ⅛ inch from the perimeter with backstitching at start and end points for maximum durability.
- Match your Velcro type to your fabric weight—standard nylon works for everyday cotton while polyester handles outdoor gear better—and select appropriate widths (¾ inch for lightweight, 2 inches for heavy-duty projects).
- Slow your machine speed and use a straight stitch at 2.5-3.5mm length for most projects, switching to zigzag for stretchy fabrics, and always close Velcro before washing to maintain its grip through thousands of uses.
Choosing The Right Velcro for Sewing
Picking the right Velcro can make or break your sewing project. The type you choose depends on your fabric weight, how often you’ll open and close it, and what look you’re going for.
Let’s walk through what you need to know to make the best choice for your work.
Identifying Hook and Loop Sides
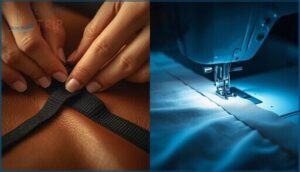
Before you sew Velcro, you need to know which side is which. Run your fingers over each strip—the scratchy side is the hook, and the soft side is the loop. The hook side has rough, stiff hooks that catch fabric, while the loop side feels fuzzy and smooth.
Press them together to test engagement behavior. Generally, place the soft loop side where it touches skin for comfort. The fasteners offer secure yet adjustable closures.
Selecting Velcro Type for Your Fabric
Now that you know hook from loop, it’s time to match the right Velcro to your fabric.
For everyday cotton or blends, standard nylon sew-on tape works beautifully—it’s strong and lasts through countless washes.
If you’re working with boat covers or outdoor gear, choose polyester instead. It resists moisture and UV rays better than nylon, keeping your project secure in harsh weather.
For applications needing durability, consider sew-on Velcro.
Best Widths and Colors for Projects
Once you’ve picked the right type, width and color matter just as much. A 3/4-inch strip works well for lightweight clothing, while 2-inch tape gives you the strength heavy jackets and gear need. Black and white are your go-to choices for most projects, but tactical colors like olive drab blend perfectly with outdoor fabrics. For medical options or children’s items, bright hues add a cheerful touch.
Choose wisely based on:
- Holding power: Wider tape means stronger closures
- Fabric match: Coordinating colors keep your work looking polished
- Retail availability: Standard widths in black or white are easiest to find
Recommended Velcro Brands for Sewing
VELCRO Brand leads the pack with sew-on fasteners that hold up to 15 lbs per square inch—strength you can count on for heavy fabrics. YKK offers impressive durability through 5,000+ cycles, while Industrial Webbing specs meet tough temperature ranges.
Consumer ratings place VELCRO Brand at 8.8 out of 10 for reliability.
Cost comparisons show generic options run 20–30% cheaper, but often sacrifice cycle life.
Essential Tools and Materials Needed
Getting your tools ready before you start makes sewing Velcro easier and helps you avoid headaches. You don’t need a lot of fancy equipment, but a few key items will make a real difference in how your finished project looks and holds up.
Let’s walk through what you’ll want to have on hand.
Best Needles for Sewing Velcro
The right needle size makes all the difference when you’re sewing Velcro. For standard projects, a universal needle in size 14 or 16 works beautifully with most fabrics.
Tackling denim or canvas? Switch to a denim needle for extra strength.
For leather projects, you’ll need a leather needle with its special chisel point.
Titanium-coated needles offer excellent durability when you’re sewing lots of Velcro repeatedly.
Choosing Strong, Matching Thread
Thread strength matters just as much as your needle choice. Polyester thread delivers the tensile strength and abrasion resistance Velcro seams need, outperforming cotton by roughly 20–30% in durability tests.
- Best thread for Velcro: Polyester in Tex 25–40 for garments, Tex 40–92 for heavy-duty projects
- Color matching: Choose thread matching either the Velcro or fabric for invisible seams
- Machine compatibility: Bonded nylon thread resists lint buildup and skipped stitches
- Thread fiber benefits: Polyester repels moisture, preventing weakening during laundering
Using Pins, Clips, or Tape for Placement
Before you stitch, holding Velcro in place prevents shifting and fabric damage. Sewing pins spaced 1.3–2.5 cm apart work well on woven fabrics, but clips exert uniform pressure without piercing delicate textiles.
For mechanical positioning that protects your material, try wash-away basting tape—it eliminates adhesive Velcro residue risks when sewing Velcro onto fabric. Proper preparation now means cleaner seams later.
Optional Tools for Easier Sewing
A few smart additions can transform tricky Velcro work into a breeze. Specialized feet like walking or Teflon models tame thick layers, while adhesive aids—double-sided tape or washable glue sticks—hold pieces steady before you stitch.
For hand sewing, thread lubricant such as beeswax cuts friction by 30%. Visibility tools like chalk markers, titanium-coated machine needles, and household adaptations including Wonder Clips round out essential sewing tools and materials that boost accuracy.
Preparing Velcro and Fabric Before Sewing
Getting your Velcro and fabric ready before you start stitching makes the whole process smoother and your results cleaner. A little prep work now saves you from wonky placement and messy edges later.
Let’s walk through the simple steps that set you up for success.
Cutting Velcro to The Correct Size
When cutting Velcro, you want clean edges that won’t unravel during sewing. Always cut across the tape width—never lengthwise down the middle—to avoid fraying. Sharp fabric scissors work fine, but rotary cutters give you precise measurements on a cutting mat.
For small projects, cut strips about 2 cm shorter than your fabric edge. Round the corners slightly to prevent peeling later when attaching Velcro to fabric.
Marking and Positioning on Fabric
Before sewing velcro, proper fabric marking prevents positioning challenges that throw off alignment accuracy. Use tailor’s chalk or a fabric pencil to mark where each Velcro piece goes—this step alone improves alignment by up to 90%. Measure twice and mark clearly.
When attaching velcro to fabric, secure strips with pins or clips spaced evenly to prevent shifting. This preparation makes hand sewing techniques smoother and ensures both sides meet perfectly when closed.
Trimming Velcro Edges for a Neat Finish
Once your Velcro’s positioned, trimming edges makes all the difference. Cut across the width—not lengthwise—to reduce fraying and keep the woven structure intact. Round corners to about 3 mm; sharp edges snag fabric and skin.
For nylon Velcro, lightly melt trimmed edges with a lighter to seal fibers. This edge sealing and corner rounding creates smoother, longer-lasting closures when attaching Velcro to fabric.
Step-by-Step Techniques to Sew Velcro
Now that your Velcro and fabric are ready, it’s time to actually attach them together. Whether you’re working at a machine or stitching by hand, the process is straightforward once you know a few key techniques.
Let’s walk through the steps so you can sew Velcro confidently and get clean, durable results every time.
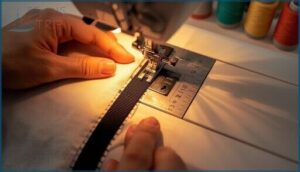
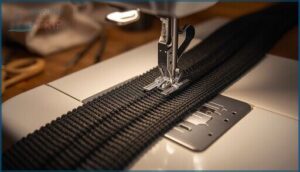
Setting Up Your Sewing Machine for Velcro
Before you start stitching, a few quick machine adjustments will make all the difference. Strong needles and the right settings prevent frustration and keep your seams secure.
- Install a universal needle (size 14 or 16) or a denim needle for extra strength
- Use all-purpose polyester thread for durability
- Set your stitch length to around 3.0–3.5 mm for balanced seams
- Lower your sewing speed to maintain control through the bulk
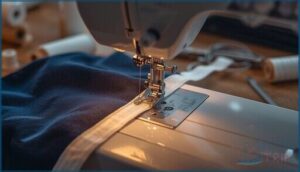
- Attach a zipper foot or standard presser foot, depending on your fabric thickness
Sewing Velcro by Hand Vs. Machine
Once your sewing machine is ready, you’ll need to decide which method fits your project best. Hand stitching works well for tight corners or quick repairs, while machine sewing covers longer strips in minutes.
Here’s a quick durability comparison:
| Method | Best For | Speed Efficiency |
|---|---|---|
| Hand Sewing Velcro | Small repairs, thick leather | Slower, more control |
| Sewing Machine | Long strips, everyday fabric | 5–10× faster |
Your fabric performance and tool requirements will guide your choice.
Stitch Types for Secure Attachment
Your sewing machine gives you several stitch options, each with distinct benefits. A straight stitch works beautifully on woven fabrics—2.5 mm length offers 85% better thread tension.
For stretch knits, zigzag benefits include 40% more flexibility, preventing breakage. Backstitch strength adds 25% tensile hold at seam ends.
On wide strips, try an X-stitch hold for 50% additional grip. Blind hem preserves 75% fabric drape on delicate materials.
Sewing Around Edges and Backstitching
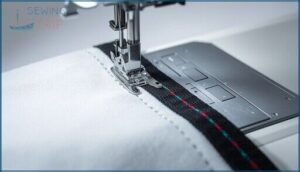
Around the perimeter of your Velcro strip, you’ll stitch about ⅛ inch from the edge—that edge stitch placement anchors all four sides evenly. Machine backstitching at the start and end locks your threads; hand backstitching creates overlapping strength. Studies show seam strength jumps when you cover edges completely.
- Begin at one corner, reversing three to five stitches to secure
- Maintain consistent stitch density of approximately 11 stitches per inch
- Complete a full rectangular frame, backstitching again at the finish
Tips for Thick or Sticky Velcro
When thick or adhesive-backed tape clogs your machine, needle gumming becomes a real headache. Switch to strong needles—size 16/100 or titanium-coated machine needles—and a zipper foot for easier presser feet navigation. Slow your speed to avoid skipped stitches.
Wide Velcro demands stitch reinforcement: add an “X” across the center for bulk handling strength. Wipe your needle occasionally to clear residue while sewing Velcro.
Troubleshooting and Expert Sewing Tips
Even experienced sewers hit a few bumps when working with Velcro. The good news is that most problems have quick fixes once you know what to look for.
Here’s how to handle common issues and keep your Velcro projects looking sharp.
Solving Skipped Stitches and Broken Thread
When your stitches start skipping or thread keeps breaking, you’re facing one of sewing’s most frustrating moments. Here’s how to fix it:
- Replace dull or bent needles after 8 hours of use—worn needles cause half of all skipped stitches
- Check your threading path and rethread completely, since improper threading is the top culprit
- Adjust thread tension down slightly when sewing through Velcro hooks
- Shorten stitch length to 1.5mm for consistent results on hook-and-loop tape
Sewing Velcro on Delicate or Heavy Fabrics
Delicate fabrics need a gentle touch—use Microtex needles (60/8 to 70/10) to reduce puncture damage by up to 60%. For heavy fabrics like denim, switch to size 16-18 needles with 40 wt polyester thread.
Here’s your fabric-to-technique guide:
| Fabric Types | Needle Size Matters | Velcro Placement Tips |
|---|---|---|
| Silk, chiffon | Microtex 60/8-70/10 | Sew to cotton sleeve first |
| Denim, canvas | Denim 16-18 | Zigzag stitch distributes strain |
| Knits, jersey | Ballpoint 75/11 | Test stitch tension control first |
Mount Velcro on a support fabric for fragile fabric support, then attach to your project—this prevents tearing. Heavy fabric reinforcement requires zigzag stitches for better hold.
Avoiding Common Sewing Mistakes
Old needles cause up to 80% of skipped stitches when sewing Velcro—swap yours every 6 hours. Check thread tension before you start, because imbalanced settings pull threads through and weaken seams.
Use stitch lengths between 2.0–3.0 mm to avoid tearing the tape. Round your Velcro corners to prevent lifting, and always backstitch both ends for edge finishing that won’t unravel under stress.
Care and Maintenance After Sewing
Keep your sewn Velcro working like new by always closing the hook and loop before tossing it in the wash. Cold water with mild detergent protects fastening strength through 2,000+ cycles.
- Air dry completely or use low heat to prevent hook damage from adhesive residue
- Brush debris from hooks weekly using a fine-tooth comb
- Store pieces fastened together in cool, dry spots away from your dryer
- Clean loops with another hook piece to remove lint buildup
Frequently Asked Questions (FAQs)
How do you sew Velcro on a sewing machine?
Most sewers don’t realize their machine setup matters more than their skill level.
Set your thread tension between 4-6, install a size 14 universal needle, and use a zipper foot for precise positioning when sewing Velcro onto fabric.
Is sewing Velcro by hand easy?
Hand-sewing Velcro is moderately challenging due to Velcro Thickness and Needle Resistance. Using strong thread, sharp needles, and Thimble Use makes handsewing easier despite requiring extra force. Thread Fraying occurs more with hook sides.
How do I use Velcro®?
Need a fastener that’s flexible? Press the hook side against the loop side until they engage, then pull them apart when you need to adjust.
Velcro Applications offer adjustability options with reliable closure strength for countless projects, from garments to accessories.
How do you sew Velcro with adhesive?
When sewing with adhesive Velcro, use a non-stick needle to prevent needle gumming.
Set longer stitches around 3-5mm, increase presser foot pressure, and clean your needle regularly with alcohol during sewing.
Is there a trick to sewing Velcro?
The biggest trick? Slow down and use a longer stitch length—around 3 mm—to dodge skipped stitches.
A zipper foot keeps your needle tight to the edge, and rounding corners prevents curling like magic.
What is the best stitch to sew Velcro?
A straight stitch works best for most projects—set your machine to 8–10 stitches per inch and sew close to all edges. For stretchy fabrics, try a zigzag stitch instead.
Is Velcro easy to sew?
Think of Velcro like attaching a patch—it’s straightforward when you use the right needle and thread.
Most beginners find sewing Velcro manageable with basic machine skills, though hand-sew feasibility depends on fabric considerations and patience.
Why won’t my sewing machine sew through Velcro?
Your machine likely struggles with thick fabric layers, incorrect needle size, or adhesive buildup.
Check your thread tension, upgrade to titanium-coated machine needles, and make sure you’re using sew-on Velcro—not adhesive-backed.
How to remove Velcro without damaging fabric?
Heat application, mechanical separation, and residue removal protect your fabric. Use alcohol or adhesive removal methods like Goo Gone for post-removal care, avoiding damage while restoring fabric integrity.
What is the best way to wash Velcro?
Always fasten Velcro before washing to avoid snagging.
Use gentle cycles with mild detergent and cold water. Air dry when possible, or tumble on low heat.
Brush hooks regularly to remove lint buildup.
Conclusion
Mastering how to sew Velcro is like learning to ride a bike—awkward at first, but second nature once you’ve done it a few times. You now have the needle size, stitch pattern, and positioning tricks that prevent frustration and create closures that actually last.
Whether you’re hand-sewing a baby bib or machine-stitching a heavy canvas bag, these techniques give you control and confidence. Your next project won’t just look finished—it’ll stay securely fastened through countless uses.
- https://wunderlabel.com/en-gb/blog/p/12-tips-sewing-velcro/
- https://www.tlr-journal.com/wp-content/uploads/2022/02/TLR_2021_34_ISLAM.pdf
- https://www.waloniumtextile.com/nylon-vs-polyester-which-hook-and-loop-tape-material-is-right-for-your-industry.html
- https://www.forcegauge.net/en/solution/force/peel_test/48487
- https://www.mpdhookandloop.com/an-essential-guide-to-sewable-velcro-brand/

