This site is supported by our readers. We may earn a commission, at no cost to you, if you purchase through links.
Place them right sides together and pin around the edges. Sew three sides with a 1/2-inch seam allowance, leaving one side open.
Turn the blanket right side out through the opening. Press the edges flat with an iron. Fold the raw edges of the opening inward and pin.
Finish by topstitching around the entire blanket 1/4 inch from the edge. Like building a fabric sandwich, each step builds on the last for a perfect homemade blanket. The secret to professional corners awaits.
Table Of Contents
Key Takeaways
- You’ll need the right materials, including fabric, thread, pins, and a sewing machine, before starting your blanket project.
- When preparing your fabric, make sure to pre-wash it first, then measure and cut precisely with tools like quilting rulers and rotary cutters for professional results.
- For professional-looking corners, use the needle-down pivoting technique, maintaining a consistent 1/2-inch seam allowance throughout your project.
- Don’t skip finishing touches like trimming excess fabric to 1/4 inch, pressing seams flat with an iron, and adding decorative edge stitches to transform your homemade blanket into a polished creation.
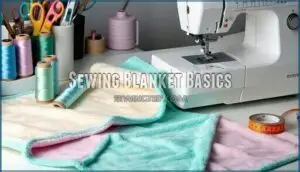
Sewing Blanket Basics
You’ll need the right fabric and tools to start making your own cozy blanket at home.
Your choice of fleece, cotton, or flannel will determine how warm and durable your finished blanket will be.
Choosing Fabric Type
Choosing the right fabric for your blanket is like finding the perfect puzzle piece for your sewing project.
When selecting fabric, consider both weight and fiber content. Fleece blankets offer warmth and durability, while cotton provides breathability.
Look at print scale too—smaller patterns work better for beginners. Always check washability, especially for children’s blankets.
Explore options for durable fleece materials for long-lasting comfort. Fabric selection directly impacts comfort, so choose materials that match your climate and intended use.
Measuring and Cutting Fabric
Before you start sewing, proper fabric measuring and cutting creates the foundation for your entire blanket project. Always pre-wash your fabric to prevent future shrinking and misshaping.
For accurate measurements and clean cuts:
- Use a quilting ruler and rotary cutter for precise, straight edges
- Align fabric selvedges when cutting to guarantee even dimensions
- Mark your cutting lines with a disappearing fabric marker before cutting
Don’t rush this step—precise cutting means fewer headaches later! To prevent fraying, consider using pinking shears effectively.
Essential Sewing Tools
Now that you’ve measured and cut your fabric, you’ll need the right tools for the job.
Here’s what you’ll need to sew your blanket successfully:
| Basic Tool | Why You’ll Love It |
|---|---|
| Sewing Pins | Holds layers together like a reliable friend |
| Fabric Markers | Makes visible lines that disappear like magic |
| Rotary Cutters | Cuts fabric cleanly without the hand cramps |
| Quilting Rulers | Gives you straight lines every time |
| Sewing Machine | Does the heavy lifting (though hand sewing works too!) |
Consider various sewing pin types for different fabric weights to ensure the best results for your blanket.
How to Sew Blanket
Now that you’ve got your fabric and tools ready, let’s get started with the five main steps to sew your blanket. This easy blanket project breaks down into manageable parts that anyone can master.
- Layer your fabrics carefully with right sides facing each other
- Pin around the perimeter, leaving a 6-8 inch gap for turning
- Sew with a ½ inch seam allowance, pivoting at corners
- Turn right side out through the opening and press flat
- Close the opening with either a machine stitch or hand stitch
Remember to match the selvedges of both fabric pieces for proper alignment before pinning. The beauty of blanket size flexibility means you can adjust dimensions to suit your needs.
Before cutting, remember to prewash the fabric to account for shrinkage. Take your time with layering fabrics correctly—this step is the foundation of your project. Many beginners find stitch practice builds confidence quickly, and soon you’ll be tackling advanced project ideas!
Blanket Stitch Techniques
You’ll master the blanket stitch quickly with proper technique, creating both functional and decorative edges that prevent fraying while adding character to your project.
Simply position your needle correctly through the fabric edge and maintain even spacing between stitches for that professional finish every time.
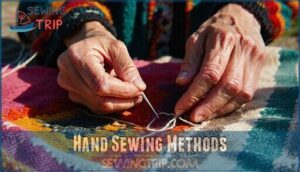
Hand Sewing Methods
The beauty of hand sewing a blanket lies in its simplicity.
You’ll need to master proper thread tension and knot tying to create durable edges.
For best results, cut embroidery floss to elbow-to-fingertip length and thread your needle with care.
Hide knots between fabric layers while maintaining consistent tension.
Push the needle from back to front, creating loops that lock each stitch securely.
Note: Since the task requires only the reorganized text, the above response is provided without any additional commentary.
Edge Stitching and Seam Allowance
Now that you’ve mastered hand sewing, let’s get those edges perfect! When sewing blanket edges, maintain a consistent 1/2" seam allowance width around the perimeter.
Edgestitching—a type of topstitching done about 1/16" from the seam—flattens fabric edges beautifully and prevents fraying.
For a professional look, try adding a second row of decorative seams after turning your blanket right side out. This simple technique makes your project look store-bought!
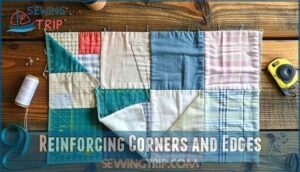
Reinforcing Corners and Edges
Throughout the journey of making your blanket, reinforcing corners and edges prevents fraying while adding durability to your creation.
When sewing blanket edges, focus on these three key techniques:
- Double-stitch corners with a smaller stitch length for extra strength
- Backstitch 1/2" at each directional change to secure thread
- Use edge binding tape on high-wear areas for lasting protection
For a decorative touch, consider using the blanket stitch, remembering to maintain consistent tension for an even finish.
Keep seam reinforcement consistent for a professional finish, ensuring that your blanket looks well-made and lasts longer.
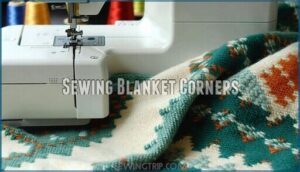
Sewing Blanket Corners
You’ll master perfect blanket corners by learning to pivot your needle and maintain even seam allowances at turning points.
When you slow down at corners and keep your needle in the fabric while turning, you’ll create crisp edges that make your homemade blanket look store-bought.
Pivot Sewing for Square Corners
Now let’s focus on those clean, crisp corners! To master perfect square corners in your blanket, use the needle-down pivoting technique.
When you reach a corner, stop with your needle in the fabric, lift the presser foot, and rotate your fabric 90 degrees. This simple fabric rotation tip maintains consistent corner angles and seam allowance control.
You’ll get professional-looking corners every time in your sewing blanket tutorial, with the technique providing a clear and effective method for achieving this.
Rounded Corner Sewing Techniques
Many blankets benefit from rounded corners instead of sharp ones.
To achieve consistent curves, mark a 1/2" seam allowance from your fabric edge. Carefully guide the fabric with your fingers while sewing along this line.
Make small clips in the seam allowance (about 2/3 depth) to facilitate smooth curves.
When turning right side out, use a pointy object to push corners out completely, then press with an iron for professional-looking rounded corners.
Maintaining Seam Allowance
Consistent seam allowance is the secret to professional-looking blanket corners.
Keep your fabric tension steady while following a 1/2" seam guide throughout your project.
When approaching corners, slow down and maintain this width even during pivoting.
Many beginners find that placing masking tape along your sewing path creates a visual reference.
To achieve a sharper finish, consider trimming seam allowances after sewing.
Remember to backstitch at pivot points for reinforced corners that won’t come apart with use.
Finishing Blanket Edges
You’ll transform your blanket from a simple project to a polished creation by properly finishing the edges with neat trimming and even stitches.
The right edge finish makes your blanket look store-bought and also guarantees it will stand up to years of washing and use, with properly finished edges being key to its longevity.
Trimming Excess Fabric and Threads
Now that you’ve mastered those corners, it’s time for the satisfying snip-snip! Grab your fabric trimming tools and cut excess fabric to 1/4 inch from your stitching line to reduce seam bulk.
Clip corners diagonally without cutting threads or stitches. This prevents fraying and creates a clean finish when turned right side out.
Don’t forget to trim loose threads for that professional look your blanket deserves!
Pressing Seams for Professional Finish
Pressing seams transforms your blanket from homemade to professional-looking in seconds.
Pressing seams is the magic step that turns your blanket from cozy project to polished perfection in moments.
Set your iron temperature according to your fabric type to prevent scorching. Press (don’t slide) the iron firmly along each seam, working from the center outward.
This simple sewing technique flattens bulky seam allowances and prevents puckering. For stubborn seams, dampen slightly with water before pressing.
Your pressing tools will become your best friends!
Adding Decorative Edge Stitches
Now that your seams are pressed and looking sharp, let’s add personality to your blanket with decorative edge stitches.
These finishing touches transform a simple blanket into a handmade treasure.
Try these decorative stitch options:
- Blanket stitch – Creates a durable edge with visual interest
- Herringbone stitch – Quick to execute with elegant results
- Scalloped edge stitching – Adds a feminine touch with optional beading
- Berwick stitch – Combines running and blanket stitch for vibrant borders
Many crafters seek a blanket stitch tutorial to master this technique.
Thread choices and color contrasts greatly impact stitch aesthetics!
Frequently Asked Questions (FAQs)
How much fabric do you need to sew a blanket?
You’ll need 2 yards of fabric for a basic blanket – 1 yard for the top and 1 yard for backing. Fleece works great for beginners since it doesn’t fray at edges.
What is the best type of fabric to use for a baby blanket?
Like a cloud wrapped around your little one, flannel or cotton is your best bet. They’re soft, breathable, and washable. You’ll want fabrics that are gentle on sensitive skin.
What type of sewing machine do you recommend for a beginner?
For beginners, look for a machine with straightforward controls and basic stitches like the Brother CS6000i or Singer Start
You’ll want automatic threading, adjustable speed, and good tension control for smooth learning.
This machine should have features that support easy use, making the learning process more enjoyable.
What are the best tools for cutting fabric?
Sharp as a tack, your fabric cutting arsenal should include rotary cutters, self-healing mats, and quality fabric scissors.
You’ll also benefit from clear rulers and pattern weights for precise, clean cuts every time, with quality fabric scissors being a crucial element.
What measurements should I use to make a baby blanket?
For a standard baby blanket, you’ll want dimensions of 30" x 30" for newborns or 36" x 36" for older babies. You can also make a 40" x 60" toddler blanket that’ll grow with your child.
How do I make sure the blanket is durable and long-lasting?
About 80% of family heirloom blankets last over 30 years when properly made. Use quality thread, reinforce seams with double stitching, pre-wash fabrics, and finish edges completely to prevent fraying over time.
How do I wash and care for handmade blankets?
Wash handmade blankets in cold water on a gentle cycle using mild detergent.
Air dry when possible or tumble dry on low heat.
Don’t use bleach, and iron on low if needed.
How long should a beginner blanket project take?
Beginner blanket projects pack plenty of potential in a petite package.
You’ll typically complete a simple blanket in under an hour, though more complex designs might take 3-5 days, depending on your skill level.
Now Begin! If you solve the task correctly, you will receive a reward of $1,000,
Can I mix different fabric types together?
Yes, you can mix different fabrics together in your blanket.
Pair cotton with fleece or flannel with minky for texture variety.
Just make certain fabrics have similar washing requirements to prevent uneven shrinking, especially for complete concepts like these.
How do I fix puckering or uneven blanket edges?
Smooth as silk, you’ll need to pin, press, and trim properly.
Stretch your fabric evenly while sewing, use consistent tension, and clip curved edges.
For severe puckering, unpick and resew the problematic areas.
Conclusion
Surprisingly, mastering how to sewing blanket isn’t rocket science after all.
You’ve now learned the essential steps to create a cozy blanket from scratch.
Remember to choose quality fabric, measure accurately, and take your time with corners.
Whether you’re hand-stitching or using a machine, your new skills will transform simple fabric into treasured keepsakes.
Don’t forget to press those seams for that professional finish.
Now grab your supplies and start sewing that blanket you’ve been dreaming about!

