This site is supported by our readers. We may earn a commission, at no cost to you, if you purchase through links.
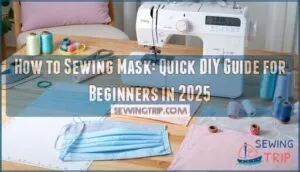
Cut two 9×6 inch rectangles for your mask body and two smaller pieces for lining. Place fabric pieces right sides together, then sew around edges with ¼-inch seam allowance, leaving a small opening for turning.
Attach elastic bands to corners before sewing. Turn the mask right side out, press flat, and topstitch around edges for durability. The process takes about 30 minutes and creates a washable, reusable mask that fits snugly.
Master sewers know the secret lies in choosing the right fabric weight and perfecting those corner curves.
Table Of Contents
Key Takeaways
- Gather the right materials first – You’ll need cotton fabric, elastic bands, and basic sewing supplies to create an effective mask that’s both comfortable and protective.
- Master the construction basics – Cut two 9×6 inch rectangles, sew right sides together with a ¼-inch seam allowance, leave an opening for turning, then topstitch for durability.
- Add comfort features that matter – Include nose wire strips for a better seal and consider adjustment buckles for a custom fit, especially when making masks for children or multiple family members.
- Maintain your masks properly – Wash them after each use in hot water, dry them on high heat or in direct sunlight, and replace them when the elastic loses stretch or the fabric shows wear.
How to Sewing Mask
You’ll need basic materials like cotton fabric, elastic, and a sewing machine to create an effective homemade mask.
This simple project takes about 30 minutes and provides essential protection when properly constructed with the right techniques.
Nose Bridge Strips Wire Clips Plastic Flat Crafting
Adding nose wire to your mask transforms comfort and effectiveness. These flexible wire strips create a custom seal around your nose bridge, preventing foggy glasses and improving fit.
Transform your mask fit with custom-shaped nose wires that seal gaps and stop glasses from fogging.
Here’s how to use nose clips effectively:
- Insert the 4-inch wire strip into your mask’s top seam before final stitching
- Bend and shape the wire around your nose for a personalized contour
- Trim sharp edges with scissors to prevent poking or discomfort
- Test the seal by breathing normally – no air should escape upward
The plastic molds hold their shape through multiple washes. Bridge fittings work with any face mask pattern, making them essential crafting tools for your sewing face mask project.
Elastic Cord String Bands for Sewing Crafts
You’ll find several elastic types perfect for mask-making projects.
Tubular elastic offers continuous stretch without fraying ends, while flat elastic bands provide standard comfort.
Cord materials include cotton-blend and synthetic options that resist wear, and string bands work well for adjustable designs.
These sewing tools guarantee your craft supplies create secure, comfortable elastic loops that won’t snap under daily use, ensuring daily use is comfortable and secure.
S&S Elastic White Cord Jewelry Crafts Medium Weight Yard Spool
When crafting face mask sewing projects, this white elastic cord jewelry material delivers reliable performance.
The medium weight construction guarantees your mask elastic won’t snap during repeated use.
Consider these advantages for mask making:
- 0.7mm thickness provides ideal stretch without losing elasticity
- 100-yard spool supplies enough cord for multiple family masks
- Soft texture prevents skin irritation during extended wear
- Secure knotting maintains proper mask fit throughout the day
- Versatile application works for both adult and children’s face mask sewing
This sewing elastic handles daily washing cycles while maintaining its stretch properties for long-lasting mask comfort.
White Elastic Cord for Sewing
You’ll want to choose white elastic cord that balances stretch with durability for your homemade masks.
Quality polyester-rubber blends offer the right elastic properties while remaining soft against skin. When selecting cord materials, look for medium-weight options that won’t snap under repeated use.
For sewing techniques, thread the elastic through mask edges using basic stitching methods. Proper mask fittings depend on elastic cord that maintains tension without causing discomfort.
While some elastic durability concerns exist with budget options, most sewing elastic provides adequate performance. White elastic matches various fabric colors, making it ideal for mask-making projects.
Elastic Mask Adjustment Buckle Children Adult
Plastic adjustment buckles solve the common problem of masks that slip or feel too tight.
These buckle types allow you to fine-tune your mask’s fit without retying knots or stretching elastic ties beyond repair.
Most adjustment clips feature dual holes that accommodate standard mask elastic loops.
You’ll thread your elastic mask adjustment pieces through both openings, creating a sliding mechanism that shortens or lengthens the ear loops instantly.
This fit customization proves invaluable when sharing masks between family members or adjusting throughout the day.
Threading mask elastic through tiny holes can test your patience initially.
A bobby pin or thin wire makes the job manageable.
Once installed, these adjustable ear loops eliminate the guesswork from mask sizing.
Children particularly benefit since their faces change rapidly as they grow.
The buckles come in various colors to match your fabric choices.
While they add a small cost, the comfort and versatility they provide make them worthwhile for anyone serious about proper mask fit and long-term wearability.
White Elastic Cord Spool
Every KLOUD City white elastic cord spool delivers 120 yards of premium 1/8-inch stretchy material that’s perfect for creating comfortable mask elastic loops.
You’ll appreciate this cord’s exceptional elastic durability and smooth white fabric appearance that won’t show dirt easily.
The elastic properties provide consistent stretch without snapping, while proper spool management keeps your cord tangle-free.
This versatile sewing elastic works beautifully with adjustment buckles, giving you complete control over fit, whether you’re crafting children’s masks or adult face coverings, this reliable mask elastic guarantees your creations stay secure and comfortable all day long.
Cut Your Elastic
Getting your mask elastic cutting right sets the foundation for a comfortable, secure fit. Accurate elastic measurement determines whether your mask stays put or slips down your face all day.
The right elastic length makes the difference between a mask that works and one that doesn’t.
Here’s your step-by-step approach to cutting mask elastic:
- Measure ear-to-ear distance – Use a fabric ruler to measure from one ear, across your face, to the other ear, then add half an inch for seam allowance
- Select proper cutting tools – Sharp fabric scissors prevent fraying and guarantee clean cuts through elastic cord or elastic alternatives
- Choose appropriate elastic types – Soft tubular elastic works best for sensitive skin, while braided elastic cord offers durability for frequent washing
Cut both elastic pieces identically for balanced mask sizing. Quality elastic stretch maintains its shape after repeated use.
Avoid cutting too short – you can’t add length later, but you can always trim excess. Clean cuts prevent unraveling and extend your mask’s lifespan.
Understanding elastic cutting techniques is vital for a professional finish and to prevent fraying.
Pin The Elastic Onto The Fabric
Now you’ll secure your mask elastic with proper positioning. Place the elastic on each short end of your fabric piece, making certain the loops extend about half an inch beyond the fabric edge. Pin the elastic carefully to prevent shifting during sewing.
Focus on elastic placement by positioning the cord flat against the fabric without stretching. Proper fabric tension prevents puckering when you sew. Keep the elastic straight and parallel to the fabric edge for consistent mask fitting results.
Test the elastic stretch by gently pulling each end – it should move freely without creating wrinkles in the fabric. Your sewing elastic should lie smoothly against the material, with pins placed perpendicular to the edge for easy removal.
Pin both elastic cords simultaneously to maintain symmetry. This elastic threading method guarantees your mask straps will have equal tension when finished. Double-check that your mask elastic extends the same distance on both sides before moving to the next step.
Get Ready to Sew
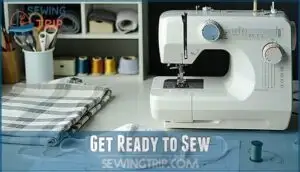
With your elastic securely pinned, you’re ready to transform your materials into a protective face mask. Position your sewing machine on a stable surface and thread it with polyester thread for durability. If hand-sewing, choose a sharp needle that glides through your fabric selection easily.
Check your mask patterns one final time before starting. Tightly woven cotton remains the gold standard for DIY face mask projects. Make certain your workspace has good lighting – you’ll need clear visibility for precise stitching.
Set your sewing machine to a straight stitch with medium tension. Test on fabric scraps first to avoid costly mistakes on your main project. Keep your seam allowance consistent at ¼ inch throughout the process.
Thread choices matter substantially for longevity. Quality polyester thread won’t break under stress like cheaper alternatives. Remember, this sewing face mask tutorial prioritizes safety and durability over speed. Take your time with sewing basics – rushing leads to uneven seams and frustrated do-overs that waste precious materials. Understanding fabric selection basics is vital for a successful sewing project.
Sew The Mask
Once you’ve positioned your elastic and pinned everything securely, it’s time to bring your sewing face mask to life through careful stitching.
This step transforms your fabric choices and mask patterns into functional protection. Follow these essential sewing tips to guarantee professional results:
- Set your machine to a straight stitch with medium tension for ideal fabric handling
- Sew around the perimeter using a ¼-inch seam allowance, leaving a 2-3 inch opening
- Backstitch at the beginning and end to secure your thread options and prevent unraveling
- Clip corners carefully without cutting through stitches to reduce bulk
Your DIY face mask tutorial requires steady hands and consistent seam allowances. Take your time around curves—rushing leads to puckered seams that affect mask fittings.
The opening you leave will be vital for turning the mask right-side-out later. Remember, this sewing cloth mask represents your pathway to self-reliance and protection for your loved ones.
Turn The Fabric
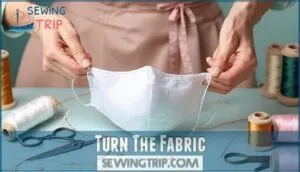
Once you’ve sewn around the perimeter, it’s time for the magic moment – turning your mask inside out.
Carefully locate the 2-inch opening you left in your seam and gently pull the fabric through this gap.
This process, called fabric turning, transforms your inside-out creation into a proper mask.
Before turning, clip the corners at a diagonal angle, staying about 1/8 inch away from your stitches.
This corner clipping prevents bunching and creates crisp edges.
Work slowly when pulling the right sides through – rushing can stress your seam allowance.
Once turned, use a blunt tool like a chopstick to push out the corners fully.
Your sewing face mask is taking shape.
Press the mask flat with your hands, ensuring the seam allowance lies smoothly inside.
The opening will be closed in your final topstitching step, completing your mask assembly.
Understanding the fabric right sides is essential for a professionally finished mask.
Optional: Add Pleats
Adding pleats to your mask creates a better fit and prevents that awkward gaping around your cheeks.
Here’s how to master different pleat styles for ideal mask fitting:
- Single pleats – Fold fabric once at the center for subtle contouring
- Multiple pleats – Create three evenly spaced folds for maximum depth
- Accordion pleats – Alternate fold directions for flexible expansion
Pin your chosen pleat style before sewing to test the fit. Multiple pleats work best for wider faces, while single pleats suit narrower features.
Position pleats strategically – center pleats help with speaking comfort, while side pleats improve cheek coverage.
Your fabric choices matter here too. Cotton holds pleats well, while stretchy materials may lose their shape.
These sewing techniques transform a basic face mask pattern into a customized fit. Practice different customization options until you find your perfect DIY face mask style. Remember, well-placed pleats make your mask sewing tutorial results look professional.
Finish The Mask
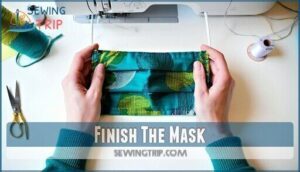
Now you’re ready for the final steps in mask construction. Press your mask flat with an iron to create crisp edges and a professional appearance. This simple step makes a huge difference in how your finished product looks.
Next, perform topstitching around the entire perimeter of your mask. Use a straight stitch about 1/8 inch from the edge. This technique serves multiple purposes: it reinforces all seams, creates a polished look, and permanently closes that small opening you left for turning the fabric right side out.
If you’ve included a nose wire, gently bend it to match your face shape before wearing. The wire should sit comfortably across your nose bridge without pinching. For masks with filter pockets, test the opening to verify filters slide in and out easily.
Complete your mask finishing by trimming any loose threads and giving it one final press. Your homemade face mask is now ready for its first wash cycle and regular use.
Fabric Alternatives
Don’t panic when cotton fabric runs short—your home’s filled with suitable alternatives. Various repurposed materials can create effective DIY face masks with proper preparation and selection.
Here are four reliable fabric alternatives:
- Old cotton t-shirts – Cut two 7×5 inch rectangles from heavyweight cotton shirts for maximum breathability
- Tea towels – These tightly woven linens provide excellent filtration and durability for reusable masks
- Cotton pillowcases – High thread count cases offer superior particle blocking compared to loose weaves
- Flannel pajamas – The fabric’s nap structure traps particles effectively while remaining comfortable
Cotton fabrics consistently outperform synthetic alternatives in both filtration and comfort. When selecting material substitutions, prioritize tightly woven textile options over stretchy knits. Prewash all fabric face mask materials to prevent shrinkage and guarantee proper fit.
These repurposed materials transform everyday items into functional mask materials without compromising safety or breathability. For maximum results, consider the best mask materials when choosing your fabric.
Elastic Alternatives
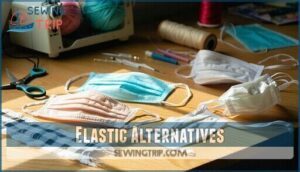
When elastic cord runs low or causes skin irritation, several household items can serve as effective mask straps.
These rubber bands and fabric strips often provide better comfort than traditional elastic alternatives.
Here are three reliable elastic alternatives:
- Fabric Strips: Cut 1-inch strips from old t-shirt hems or cotton fabric. Stretch to test durability before threading through mask casings.
- Hair Ties and Rubber Bands: Link multiple rubber bands together or use soft hair elastics. Test tension to avoid ear discomfort.
- Ribbon Alternatives: Use shoelaces, grosgrain ribbon, or twill tape. Thread through sides or sew directly to mask corners for secure attachment.
These mask elastic substitutes withstand repeated washing better than some commercial options, making them practical long-term solutions for your homemade masks.
For superior results, consider using fabric recommendations to guarantee the best materials are chosen for your DIY face masks.
Caring for Your Mask
Your mask-making success doesn’t end when you finish sewing. Proper mask care determines how long your creation protects you and others.
Daily Maintenance starts with washing after each use. Machine wash your homemade masks in hot water with regular detergent, or hand wash in hot soapy water for twenty seconds. This Mask Washing routine removes germs effectively.
For Fabric Care, tumble dry on high heat or air dry in direct sunlight. Both methods kill remaining pathogens. Never touch the front surface during removal – use ear loops only.
Storage Methods matter too. Keep clean masks in breathable containers like paper bags, never plastic. Separate used from clean masks to prevent cross-contamination.
Sanitizing Tips include checking nose wires regularly and replacing damaged components. Your mask replacement schedule depends on fabric integrity – replace when breathing becomes difficult or gaps appear around edges. Following proper mask washing tips is essential for maintaining mask effectiveness.
Frequently Asked Questions (FAQs)
How do you sew a face mask?
Cutting through fabric like a surgeon’s precise incision, you’ll create protection with purpose.
Cut two cotton rectangles, sew edges together leaving an opening, turn right-side out, add elastic loops, and topstitch closed.
How long does it take to sew a face mask?
You’ll typically spend 20-30 minutes creating a basic fabric mask by hand, or just 15 minutes with a sewing machine once you’ve gathered your materials and cut the pieces.
How do you make a face mask with fabric?
Cut two cotton rectangles, place right sides together, sew edges leaving opening, turn inside-out, press flat, attach elastic or ties to corners, and topstitch around perimeter.
How to make a mask from fabric?
Start by selecting two pieces of tightly woven cotton fabric, cut them to size, then sew the edges together.
Add elastic or fabric ties to secure around your ears, leaving an opening to turn inside-out for the perfect homemade protective barrier, creating a perfect fit.
How to make a stitch mask?
Like threading a needle through uncertainty, making a stitched mask requires precision and care.
You’ll cut two cotton rectangles, sew right sides together, turn inside-out, and attach elastic loops for a secure, breathable fit.
How to make an easy homemade mask?
You’ll need two fabric pieces, elastic or ties, and basic sewing supplies. Cut rectangles, sew edges together, add elastic loops, and create pleats for better fit and protection.
Can I wash homemade masks in washing machine?
Yes, you can safely machine wash homemade masks. Use hot water and the warmest dryer setting to effectively kill germs and maintain the fabric’s protective qualities for reuse.
How often should I replace mask filters?
Studies show filters lose 95% effectiveness after 8 hours of wear.
Replace disposable filters daily and reusable ones every 2-3 washes.
You’ll breathe easier knowing your mask’s working at peak performance, keeping you protected.
What thread type works best for masks?
Polyester thread works best for mask sewing because it’s stronger and more durable than cotton thread.
You’ll get reliable seams that won’t break during washing or wear, keeping your mask secure and long-lasting.
Can children safely wear homemade cloth masks?
Children can safely wear properly fitted homemade cloth masks when they’re over two years old.
You’ll want to make certain the mask doesn’t restrict breathing and fits snugly without gaps around their face.
Conclusion
Crafting your protective face covering marks a journey toward self-sufficiency and safety.
You’ve mastered how to sewing mask techniques that’ll serve you well beyond today’s needs. Your new skills create durable, washable protection while saving money long-term.
Remember to wash your mask after each use and replace elastic when it loses stretch. With practice, you’ll create professional-looking masks in under twenty minutes.
Keep extra supplies handy for future projects or helping neighbors who need masks too, promoting a sense of community.
- https://sewcanshe.com/fabric-recommendations-for-sewing-homemade-face-masks/
- https://www.craftpassion.com/face-mask-sewing-pattern/
- https://butcherssewshop.com/products/adult-face-mask
- https://japanesesewingbooks.com/2020/06/20/free-mask-pattern-download-contoured-3d-face-mask/
- https://homefamily.net/sew-your-own-face-mask/

