This site is supported by our readers. We may earn a commission, at no cost to you, if you purchase through links.
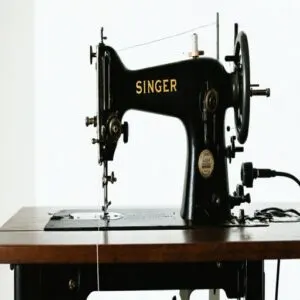
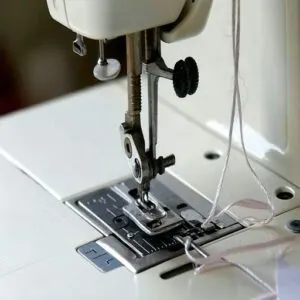
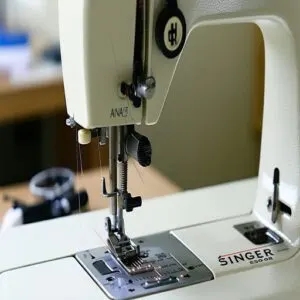
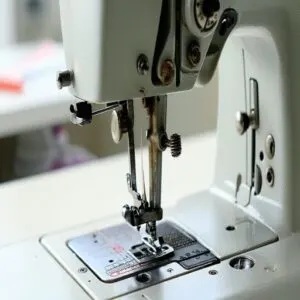
First, turn off the machine for safety (nobody wants accidental stitches!), raise the needle to its highest point using the handwheel, and lift the presser foot.
Place your spool of thread on the spool pin and guide the thread through the top thread guide, then loop it down around the tension mechanism and back up through the second thread guide.
Table Of Contents
Key Takeaways
- Turn off the machine, raise the needle to its highest point, and lift the presser foot before starting to ensure safety and proper alignment.
- Guide the thread through the top thread guide, tension discs, and take-up lever, following the threading path for smooth operation.
- Thread the needle front to back carefully, using a needle threader if needed for easier insertion and to avoid fraying.
- Regularly check for correct tension settings, clean lint from the tension discs, and replace dull needles to prevent stitching problems.
How to Thread a Singer Sewing Machine
You’ll find threading your Singer sewing machine isn’t as tricky as solving a Rubik’s cube once you know the proper steps.
Whether you’re working with a classic mechanical model or a modern computerized version, we’ll show you how to thread your machine correctly in six straightforward steps.
That’ll have you stitching in no time.
Step 1: Power Off and Raise Needle and Presser Foot
Let’s get your Singer sewing machine ready for safety first.
Like a maestro preparing for a performance, you’ll need to prepare your machine.
- Turn the handwheel clockwise to raise the needle to its highest point, ensuring proper threading alignment
- Lift the presser foot lever until it clicks into position
- Double-check that all moving parts are properly positioned and secure
First, locate the power switch and turn it off, then proceed with the steps to ensure everything is in order for threading.
Step 4: Lead Thread Through Lower and Upper Slots of Thread Guide
Your Singer sewing machine’s thread guide acts like a mini-GPS for your thread.
Start by gently guiding the thread into the machine’s lower slot – think of it as the thread’s entry point.
Pull it upward through the guide mechanism adjustment point, then smoothly into the upper slot.
The thread should glide through naturally, without any snags, ensuring proper thread tension for your Singer.
Step 5: Pass Thread Through Second Thread Guide
Now that you’ve mastered the first guide, finding the second thread guide on your Singer sewing machine is a breeze.
The second guide helps maintain proper tension control for smooth stitching.
Here’s what to do:
- Locate the second thread guide above the needle area
- Hold the thread with both hands for better control
- Guide the thread through the slot smoothly
- Pull gently to confirm it’s firmly seated
Step 6: Lead Thread Down and Around Tension Mechanism
The tension mechanism is like your sewing machine’s traffic controller, keeping thread flow perfectly balanced.
The thread from the second guide and bring it down behind the tension discs. Hold the spool gently with your right hand while pulling thread up with your left – this prevents any unwanted tangles.
Let the thread slip smoothly between the tension discs, ensuring proper thread routing throughout your project. If you’re working with a Singer sewing machine, this step sets the foundation for perfect stitches.
Remember to check the mechanism’s cleanliness for smooth operation.
Step 8: Thread Guide(s) Above Needle
Moving up from the tension discs, spot your next target – the thread guide above the needle.
Just like following a treasure map, locate the wire needle clamp guide on your Singer machine’s workspace.
To achieve proper upper threading, pull the thread firmly but gently through the metal or plastic guide sitting directly above your needle – it’s your last checkpoint before the finish line.
- Pull the thread firmly but gently through the metal or plastic guide sitting directly above your needle – it’s your last checkpoint before the finish line
- Double-check the thread sits smoothly in the guide’s groove, avoiding any twists
Step 9: Thread Needle From Front to Back
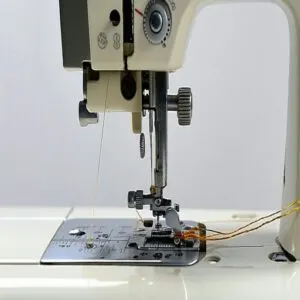
Now that your thread’s properly guided above the needle, let’s tackle the final threading step. Grab your thread with your right hand while steadying the needle with your left.
Point the thread end straight through the needle’s eye from front to back – think of threading a basketball through a hoop.
- Hold thread at a 45-degree angle for easier insertion
- Keep thread end stiff and straight
- Watch for thread fraying or splitting
- Check thread color matches under good lighting
- Give thread a gentle tug to confirm secure threading
If you’re having trouble seeing the eye, try using your machine’s automatic needle threader or a needle threading tool.
Common Thread Problems and Solutions
In Singer sewing machines, thread problems can strike when you least expect them.
Let’s untangle these common issues with simple solutions.
Here are the top thread troubles you might face:
- Thread breakage occurs from incorrect tension settings – adjust your Singer’s tension dial gradually until stitches look balanced
- Combat knot formation by ensuring your presser foot is down before starting to sew
- Fix frayed edges by replacing dull needles every 6-8 hours of use
- Address uneven tension by cleaning lint from tension discs and bobbin area
- Prevent snagging issues by using the right needle type for your fabric
To resolve persistent stitch issues, consult Singer machine maintenance guides regularly.
Remember: even expert sewists face these challenges occasionally.
How to Wind a Bobbin
You’ll need a properly wound bobbin to keep your sewing machine running smoothly, just like a car needs gas to keep going.
Before you start your next sewing project, let’s learn the simple steps to wind your bobbin correctly, which will help prevent those pesky thread tangles and guarantee your stitches appear perfect every time.
Step 1: Place Spool of Thread on Spool Pin
Thread trouble-free sewing starts with proper spool alignment on your Singer sewing machine.
Select the right thread spool and secure it with a cap that fits snugly without restricting movement. The singer threading guide recommends placing the larger spool end toward the back on horizontal pins. Listen for a click – that’s your signal it’s properly seated.
When choosing the correct sewing threads for your project, consider the type of fabric and desired stitch quality.
| Pin Type | Spool Cap Size | Thread Direction |
|---|---|---|
| Horizontal | Large | Clockwise |
| Vertical | Medium | Counter-clockwise |
| Heavy-duty | Extra Large | Model-specific |
| Specialty | Small | Match spool end |
| Quick-load | Universal | Direction-marked |
Step 2: Thread The Bobbin
Now that your spool’s in place, let’s handle bobbin threading singer-style.
Start by pulling thread from your spool, wrapping it counterclockwise around the tension disc. You’ll need about 6 inches of slack for smooth thread bobbins operation.
To achieve ideal results, using a proper bobbin winder is essential for efficient sewing.
- Hold the thread tail firmly while you begin winding to prevent slipping
- Watch for even thread distribution across the bobbin
- Keep your fingers away from moving parts during winding
- Stop when the bobbin’s about 85% full for best tension control
Step 3: Place Bobbin on Bobbin Winding Pin
Let’s tackle the next step in threading your Singer sewing machine.
Take your prepared bobbin and line it up with the bobbin winding pin – you’ll feel a satisfying click when it’s in the right spot.
For perfect bobbin security, press down firmly until it’s snug.
Understanding how to wind a bobbin is essential for this step.
The trick to proper bobbin alignment is making sure the thread tail hangs freely on the right side.
Step 4: Engage The Bobbin Winding Function
With the bobbins securely on the spindle, click the winding pin to the right until you hear a snap – this engages your Singer sewing machine’s bobbin winding function.
Press the foot pedal gently to start winding, keeping an eye on the thread alignment and tension. Control your winding speed for even thread distribution, and stop when the bobbin’s nearly full.
The bobbins size should match your machine’s specifications.
How to Choose The Right Thread for Your Sewing Machine
You’ll want to pick a thread that’s strong enough for your project but won’t jam up your Singer sewing machine like that time you tried using dental floss for an emergency hem repair.
Your thread choice makes a big difference in how well your machine runs, so let’s look at how to match the right thread to your specific Singer model and the fabric you’re using.
Thread Guide Positions
Finding the right thread guide positions on your Singer sewing machine is like following a roadmap to perfect stitches.
Understanding thread types is essential for superior performance.
Start at the first thread guide positioned above the needle apparatus, then locate the second guide nearby – your machine’s manual can help pinpoint its exact spot.
Guide the thread through the canal’s groove, pull it up the other side, and over the take-up lever.
Tension Mechanism Adjustment
Thread tension singer settings can make or break your sewing project’s success.
Located at the bottom of the threading canal, the tension mechanism helps you achieve perfect Thread Balance every time.
Understanding proper thread tension is vital for achieving excellent sewing results.
Here’s what you need to know about Machine Calibration and Stitch Quality.
- Turn the numbered tension dial clockwise to tighten your thread when stitches look loose on top
- Adjust counterclockwise if you notice the bottom thread pulling through to the fabric’s surface
- Start with a tension setting between 5-7 for most fabrics
- Test your Tension Settings on a scrap piece of similar fabric first
- Check both sides of your stitching to confirm proper Fabric Tension
Think of thread tension like tuning a guitar – too tight and it’ll snap, too loose and you’ll get wonky stitches.
Your singer sewing machine manual recommends checking tension before starting each project.
Bobbin Case Loading
Loading the bobbin case on your Singer machine might seem tricky, but it’s actually straightforward when you know the steps.
Simply lift the case cover beneath the needle and get ready for perfect thread tension every time.
- Place the bobbin so it spins counterclockwise for proper spindle placement
- Check bobbin sizing matches your Singer model exactly
- Guide thread through the slot, leaving 6 inches tail
- Verify case security by listening for the "click"
- Test bobbin alignment by gently pulling the thread
Troubleshooting Thread Tension Issues
Now that you’ve got your thread picked out, let’s tackle those pesky tension problems that can turn your sewing dreams into a tangled reality.
Just like Goldilocks, you want your thread tension to be just right. Understanding thread tension issues is essential to achieving the perfect stitch.
Here are the most common singer threading problems you’ll face:
- Loose Loops Below: If you see loops underneath your fabric, your upper thread tension needs tightening. Turn the tension adjustment dial clockwise until those loops vanish.
- Bobbin Thread Showing Above: When bobbin thread peeks through your top fabric, loosen the tension by turning the dial counterclockwise.
- Knotted Mess: If you’re getting bird nests (that’s what we sewists call those thread tangles), your tension’s out of sync. Re-thread both top and bobbin threads.
- Puckered Fabric: When your fabric looks like a tiny mountain range, your thread tension is too tight. Dial it back until the fabric lies flat.
Remember, quality thread prevents most sewing delays and keeps those stitches looking professional.
How to Maintain and Clean Your Sewing Machine
Keeping your Singer sewing machine in pristine condition isn’t rocket science – just three key maintenance steps every six months will do the trick.
Think of it like giving your trusty machine a spa day to keep those stitches flowing smoothly.
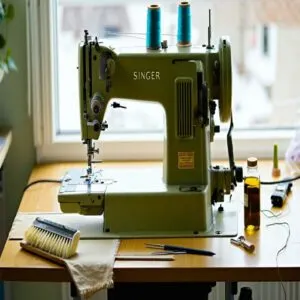
- Dust Removal Tips: Grab your cleaning brushes and gently sweep away lint from the bobbin case. Regular servicing starts here – this simple step prevents thread jams and keeps stitch quality exceptional.
- Machine Oil Checks: Like a well-oiled bike chain, your sewing machine needs lubrication. Add a few drops of sewing machine oil to the moving parts marked in your threading diagram. This prevents wear and keeps everything running quietly.
- Regular Maintenance Schedule: Replace your needle after every major project or 8 hours of use. A fresh needle is like new tires on a car – it prevents snags and keeps your stitches crisp.
Remember to consult your sewing machine threading instructions if you’re unsure about specific maintenance spots. A little care goes a long way in extending your machine’s life.
Frequently Asked Questions (FAQs)
How to thread a Singer sewing machine?
Isn’t it ironic how threading a Singer sewing machine feels tricky, yet it’s simple when broken down?
Follow numbered guides, loop the thread through tension discs, thread the needle front to back, and voilà—you’re sewing!
How to thread the needle on a Singer sewing machine?
Slide the thread through the guide above the needle, then carefully pass it front-to-back through the needle’s eye.
Tug gently to confirm it’s secure.
If threading feels tricky, a needle threader can save the day!
How do you thread a sewing machine?
To thread a sewing machine,
place the thread spool on the pin,
guide the thread through the thread guides,
around the tension mechanism,
through the take-up lever,
and down into the needle’s eye.
What is the best thread for sewing workwear?
Go for polyester or a polyester-cotton blend thread when sewing workwear.
It’s tough, resists wear, and handles stress well.
Avoid cotton-only threads—they snap under pressure.
Think durability, especially for garments built to last.
How to thread a sewing machine for beginners?
Threading a sewing machine might feel like defusing a bomb, but it’s not!
Place the spool, follow the threading path numbers, guide through tension discs, and thread the needle.
Practice makes perfect—soon, it’s second nature!
How to thread spool on Singer sewing machine?
Set your thread spool onto the spool pin, securing it with a cap.
Pull the thread through the first guide, following Singer’s threading path.
Don’t rush—steady hands prevent tangles and keep everything running smoothly!
How do you thread a bobbin on a Singer electronic control?
Pop the spool on the spindle, guide the thread through the bobbin winding tension disk, and wind thread onto the bobbin.
Push the bobbin spindle right, press the pedal, and stop when it’s full.
What should I do if the thread keeps breaking while I’m sewing?
A stitch in time saves nine.
If your thread keeps breaking, check tension settings, thread quality, and threading path.
Confirm the needle’s sharp and suits your fabric.
Dust buildup? Clean it out—it works wonders!
Can I use any type of thread in my Singer sewing machine?
Not every thread works seamlessly with your Singer machine.
Match your thread to your fabric and project, like pairing fine thread with delicate fabrics or stronger thread with thicker materials.
Check your manual for compatibility tips.
How often should I clean and maintain my sewing machine?
Clean your sewing machine every 8-10 hours of use to prevent lint buildup.
Oil it lightly as recommended in the manual.
Regular maintenance keeps stitches smooth and avoids surprises like skipped stitches or jams mid-project.
Conclusion
Threading a Singer sewing machine is like solving a simple puzzle—you just need the right steps.
From powering off to threading the needle front to back, each step builds precision into your sewing process.
Follow these steps carefully, and you’ll be stitching smoothly in no time.
Remember, practice makes perfect, and troubleshooting common thread issues will help you master the art.
With this guide on how to thread a Singer sewing machine, you’re ready to create confidently!
- https://www.wikihow.com/Thread-a-Singer-Sewing-Machine
- https://www.singer.com/manuals
- https://leatherworker.net/forum/topic/55988-how-to-select-the-proper-thread-for-a-material-leather/
- https://singerco.com.au/learn-create/how-to-fix-sewing-machine-tension-issues/
- https://www.sewingmachinefun.com/how-to-thread-singer-sewing-machine/

