This site is supported by our readers. We may earn a commission, at no cost to you, if you purchase through links.
 A hump jumper is a small wedge-shaped tool that keeps your presser foot level when sewing over thick seams.
You’ll place it behind the presser foot before reaching the bulky area, allowing smooth stitching without skipped stitches or broken needles. Start sewing normally, then position the hump jumper as you approach the thick section – it lifts the back of your presser foot to match the fabric’s height.
This prevents your machine from jamming on heavyweight denim hems, quilt bindings, or multiple fabric layers. Remove it once you’ve cleared the thick area and continue stitching.
The secret lies in timing and proper positioning for flawless results.
Table Of Contents
Key Takeaways
- Position the hump jumper behind your presser foot before reaching thick seams – this levels your foot and prevents skipped stitches and broken needles when sewing over bulky areas like denim hems or quilt bindings.
- Stop sewing with your needle down when you’re about three-quarters of an inch before the thick area – then lift the presser foot, slide the hump jumper into position, and continue stitching slowly for smooth results.
- Choose the correct thickness end of your hump jumper based on your fabric’s bulk – use the thick end for heavyweight materials like canvas and the thin end for lighter fabrics to maintain proper presser foot leveling.
- Attach Velcro to both your hump jumper and sewing machine for instant accessibility – this keeps the tool within arm’s reach during projects so you won’t waste time searching for it when thick seams appear.
Using a Hump Jumper in Sewing for Thick Fabrics
You’ll encounter thick seams when sewing jeans, quilts, and heavy fabrics that can cause your machine to skip stitches or break needles.
A hump jumper levels your presser foot over bulky areas, ensuring smooth, even stitching without the frustration of uneven seams, which is crucial for achieving professional-looking results with heavy fabrics.
Benefits of Using a Hump Jumper
A sewing hump jumper transforms your thick fabric projects from frustrating to flawless.
Your thick fabric struggles end when this simple tool levels the playing field.
This simple tool delivers consistent results when tackling challenging seams:
- Prevents Skipped Stitches – maintains even fabric feeding through bulky layers
- Needle Breakage Reduction – supports heavy materials without machine strain
- Enhanced Stitch Quality – keeps presser foot level for professional results
- Smooth Seam Shifts – eliminates jarring bumps in your stitching line
- Beginner-Friendly Sewing – makes thick seam sewing accessible to all skill levels
Whether you’re hemming jeans or creating upholstery, this hump jumper becomes your secret weapon for mastering uneven fabric sewing with confidence.
This tool, also known as a bulky seam jumper, guarantees stitches remain consistent.
How a Hump Jumper Facilitates Sewing on Thick Fabrics
When your presser foot tilts over bulky seams, fabric feeding becomes erratic and needle breaks increase.
Tilted presser feet turn smooth sewing into a battle against broken needles and skipped stitches.
A sewing hump jumper solves this by providing seam leveling that maintains stitch consistency across thick fabric areas. A [powerful motor**](https://sewingtrip.com/sewing-machine-for-thick-fabrics/) is essential for sewing thick layers smoothly.
| Common Problems | Hump Jumper Solutions |
|---|---|
| Skipped stitches | Levels presser foot |
| Broken needles | Reduces fabric stress |
| Uneven feeding | Maintains smooth flow |
| Tilted foot | Keeps foot horizontal |
| Poor stitch quality | Guarantees consistent tension |
This tool’s project versatility shines when sewing over bumps in denim, canvas, or quilted materials. Simply position it under your presser foot’s back before approaching thick seams, and watch your machine handle challenging areas with ease.
Using a Hump Jumper (Jean-A-Ma-Jig)
Three simple steps facilitate smooth sewing with your hump jumper or JeanAMaJig. This tool prevents needle break prevention and fabric feeding issues while ensuring consistent stitch quality.
- Position the hump jumper just before thick seams for proper seam leveling techniques
- Adjust thickness to match your fabric’s bulk
- Sew slowly over bumps using your sewing machine presser foot
- Remove after clearing thick areas
Keep it handy for seamless transitions when sewing over bumps on thick fabric projects becomes effortless. You can find the right tool for your needs on hump jumper sewing.
The right tool and these steps will make sewing over thick areas easy, ensuring consistent stitch quality is maintained throughout your project.
Using a Cardboard Wedge as a DIY Solution
No hump jumper? No problem. Create your own Cardboard Wedge Materials from a sturdy cereal box.
Cut a piece 2-3 inches wide, folding it to match your thick fabric’s height. Wedge Size Matters—test on scraps first. Use Reinforcement Techniques like tape for durability.
Focus on Placement Adjustments behind your sewing machine’s presser foot, avoiding the needle path. This DIY solution handles sewing over seams beautifully.
Consider exploring a cardboard sewing wedge for ready-made options. After completing your project, consider Recycling Cardboard Wedges for future thick fabric challenges.
Step-by-Step Guide to Using a Hump Jumper
Using a hump jumper correctly makes sewing thick seams much easier than you might expect.
You’ll follow five simple steps to position the tool, stitch smoothly, and achieve professional results every time.
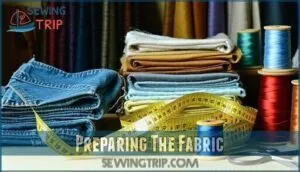
Preparing The Fabric
Before diving into the hump jumper technique, proper fabric preparation sets the foundation for success.
Quality fabric preparation prevents common issues like puckering and uneven seams when working with thick materials.
Here’s your fabric preparation checklist:
- Fabric Selection – Choose compatible thread weights and needle sizes for your thick fabric type
- Pre-washing Fabrics – Wash and dry materials to prevent shrinkage after completing your project
- Cutting Techniques – Use sharp rotary cutters or fabric scissors designed for heavy materials like denim
- Layer Alignment – Pin or baste multiple fabric layers to prevent shifting during bulky seam construction
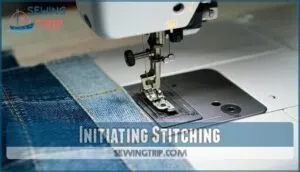
Initiating Stitching
Once you’ve prepared your fabric, begin stitching slowly toward the thick seam. Start your sewing machine at a reduced speed to maintain control over the fabric alignment. Stop when you’re about three-quarters of an inch before the bulky area, keeping your needle down in the fabric.
This pause prevents the presser foot from tilting and guarantees proper needle placement for smooth passages.
| Stitching Element | Before Thick Seam | At Thick Seam |
|---|---|---|
| Initial Speed | Slow, controlled pace | Complete stop |
| Needle Placement | Down in fabric | Down and secured |
| Presser Height | Normal position | Ready for adjustment |
| Fabric Alignment | Straight and guided | Held steady |
Your hump jumper and sewing machine work together when you time this correctly. The presser foot stays level, preventing skipped stitches that plague thick fabric projects.
Remember, mastering sewing techniques means knowing when to pause and prepare for challenging sections ahead.
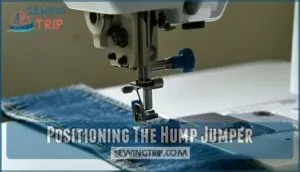
Positioning The Hump Jumper
When you reach the thick seam, stop sewing with your needle down. Lift the presser foot and slide the hump jumper behind the foot, positioning it to match the fabric height difference. Choose the correct side based on your bulky seams’ thickness for secure placement. Proper foot placement guarantees smooth pedal operation.
- Behind the foot – Position the hump jumper directly behind your sewing machine feet before lowering the presser foot
- Before the foot – Sometimes you’ll need to place it in front when approaching thick fabric sections
- Matching thickness – Select the appropriate end of the hump jumper that corresponds to your seam’s height
- Correct side – Use the thicker or thinner end depending on how much lift your presser foot needs
- Secure placement – Make certain the hump jumper sits firmly against the fabric without shifting during positioning
Continuing Stitching
With your hump jumper positioned, slowly stitch across the thick seam while keeping the presser foot level.
The tool prevents your sewing machine feet from tilting, facilitating smooth sewing over bulky seams. Maintain steady fabric alignment as you work through the fabric height difference.
| Stitching Factor | Best Practice |
|---|---|
| Speed | Sew slowly for control |
| Needle Position | Keep needle down when pausing |
| Fabric Grip | Guide fabric gently, don’t pull |
| Thread Tension | Check for consistent stitching |
| Foot Pressure | Maintain even contact with fabric |
The hump jumper creates seamless passages between different fabric thicknesses, preventing skipped stitches that plague thick fabric projects.
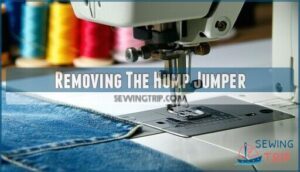
Removing The Hump Jumper
After clearing the thick fabric, the hump jumper will naturally fall off your sewing machine.
This automatic removal makes the process seamless, though you can manually remove it if needed.
- Automatic Removal: The hump jumper falls off naturally as your presser foot moves past the bulky seams
- Manual Removal: Lift the presser foot and slide out the hump jumper when you’ve cleared the thick area
- Timing Check: Remove only after completely passing the thick section to maintain consistent stitching
Tips and Techniques for Using a Hump Jumper
Once you’ve mastered the basic steps, you’ll want to fine-tune your technique for the best results.
These practical tips will help you handle any fabric thickness with confidence and achieve professional-looking seams every time, which will help you to work with confidence.
Adjusting The Hump Jumper for Different Fabric Thicknesses
Getting your hump jumper thickness right makes all the difference. Match your jumper placement to the seam height – thick fabrics need the chunky end, lighter ones the thin side. Test fabric compression on scraps first to avoid surprises.
The right presser foot is essential, and understanding best practices can make a significant difference.
| Fabric Type | Seam Height | Jumper Side |
|---|---|---|
| Denim/Canvas | High bulk | Thick end |
| Quilting cotton | Medium bulk | Thin end |
| Lightweight | Low bulk | DIY shims |
Your sewing machine will thank you for proper leveling sewing foot technique. Make incremental adjustments as you encounter varying fabric thickness throughout your project.
Maintaining Levelness and Even Stitches
With proper seam leveling, your sewing machine transforms from wrestling thick fabric to gliding smoothly over bulky seams.
The hump jumper keeps your presser foot level, guaranteeing consistent stitching and proper fabric feed through even the thickest layers.
- Position the hump jumper directly behind the presser foot when approaching thick seams
- Adjust the hump jumper thickness based on fabric layers to maintain presser foot levelness
- Check under the foot periodically to guarantee proper support on the foot’s underside
- Reposition if you notice shifting fabric or uneven stitches during sewing
Maintaining a level presser foot with the hump jumper prevents skipped stitches and creates even stitches on bulky seams, giving you professional results every time.
Enhancing Control and Stitch Quality
Smart placement of your hump jumper transforms sewing machine performance on thick fabrics.
Position it before bulky seams for consistent stitching and smooth passages. This strategic needle positioning maintains fabric alignment while pressure adjustment prevents skipped stitches.
Practice with different materials builds confidence, ensuring your stitch quality remains professional across challenging projects.
Potential Volume Discounts and Pricing
Hump jumpers typically cost $3.84 to $7.99 individually, but bulk order savings can cut costs by 80%.
Volume discounts start at 10 units, with wholesale options dropping to $0.29 per piece for 100+ orders.
Retailer pricing varies substantially, so compare suppliers before purchasing. Consider discount eligibility for sewing machine accessories when stocking up on these essential sewing machine tools for thick fabrics.
You may also find substantial savings by exploring the best sewing machine deals online for related items, which can lead to substantial savings.
Using Velcro to Attach Hump Jumper to Sewing Machine
You can attach Velcro to your sewing machine to keep your hump jumper within easy reach during projects.
This simple trick saves you from constantly searching for the tool when you need it most, and it is a simple trick that can greatly improve your workflow.
Sandra’s Tip: Using Velcro for Convenience
Sandra’s brilliant solution transforms your hump jumper into an always-ready tool.
Simply attach Velcro to both your hump jumper and sewing machine for instant accessibility benefits.
This storage solution provides quick access during thick fabric projects, eliminating the frustration of searching for your tool mid-seam.
You can even find hump jumper velcro for this purpose online.
The Velcro attachment creates unmatched sewing convenience, keeping your essential bulky seam assistant within arm’s reach, providing quick access.
Ensuring The Hump Jumper is Always Handy
By keeping your hump jumper attached to your sewing machine, you’ll never waste time searching through storage solutions when tackling bulky seams.
Smart Velcro placement means this sewing tool stays within arm’s reach during sewing projects.
Unlike DIY alternatives that get misplaced, proper accessibility tips guarantee machine compatibility while maintaining your workflow’s momentum.
For heavier fabrics, consider iron-on Velcro for a stronger hold to ensure your sewing projects are done efficiently with the right sewing tool.
Benefits of Using Velcro Attachment
Velcro attachment transforms your hump jumper into a permanently accessible sewing tool.
This accessibility boost means you won’t waste time searching through drawers when thick seams appear.
The secure storage system prevents misplacement while providing quick access during projects.
Your sewing efficiency improves dramatically when this essential tool stays within arm’s reach on your sewing machine, ready for bulky seams, and provides an accessibility boost.
Frequently Asked Questions (FAQs)
How do you sew a hump jumper on a sewing machine?
You don’t sew a hump jumper—you use it as a tool.
Position it behind your presser foot before thick seams, letting it level the foot for smooth stitching over bulky areas.
How do you use a hump jumper?
Stop struggling with thick seams—there’s a simple solution.
Place your hump jumper behind the presser foot before approaching bulky areas.
It’ll level your foot, preventing skipped stitches and broken needles while you sew smoothly over thick spots, ensuring a process that is free from struggles with thick seams.
How does a hump jumper work?
A hump jumper levels your presser foot when sewing over thick seams. It slides under the foot’s back, preventing tilting that causes skipped stitches and broken needles.
Can you use a hump jumper when sewing?
Yes, you can definitely use a hump jumper when sewing thick fabrics or bulky seams.
It levels your presser foot, preventing skipped stitches and broken needles while maintaining smooth, even stitching across challenging areas, which is crucial for achieving professional-looking results with bulky seams.
Why does my hump jumper fall off my sewing machine?
Your hump jumper falls off because it’s designed to.
When you’re sewing over thick seams, the tool gets pushed out naturally as your presser foot moves forward, allowing you to continue stitching smoothly without interruption.
How do you Hem jeans without a hump jumper?
Fold cardboard into a wedge shape and slide it under your presser foot’s back to level it when crossing thick seams, preventing skipped stitches and needle breaks.
What Types of Fabrics and Projects Are Hump Jumpers Most Useful For?
You’ll find hump jumpers most helpful when sewing denim, canvas, upholstery, and heavy quilts.
They’re essential for thick seams, pocket corners, strap attachments, and layered fabric intersections in bags and garments.
What Size Hump Jumper Should I Purchase?
Most sewists wonder if size matters when choosing their first hump jumper.
You’ll want different thicknesses for various projects – most tools feature two ends with thin and thick options to handle everything from lightweight seams to heavy denim intersections perfectly.
Can I Sew Without a Hump Jumper if I Don’t Have One?
You can definitely sew thick fabrics without a hump jumper by using alternatives like folded cardboard or fabric scraps to level your presser foot over bulky seams.
Are There Any Safety Concerns When Using a Hump Jumper?
Safety’s practically a non-issue with hump jumpers since they’re simple tools.
Keep your fingers away from the needle, sew slowly over thick seams, and make certain the tool’s positioned correctly before stitching.
Conclusion
Mastering how to use a hump jumper in sewing transforms your thick fabric projects from frustrating to flawless.
You’ll conquer heavyweight denim, navigate bulky seams, and achieve professional results every time.
This simple tool prevents skipped stitches, protects your needle, and maintains consistent stitch quality.
With proper timing and positioning, you’ll breeze through challenging areas that once caused headaches.
Keep your hump jumper handy using the Velcro attachment method, and you’ll wonder how you ever sewed without this game-changing accessory.
- https://countrycowdesigns.com/blog/hump-jumper/
- https://youmakeitsimple.com/tag/hump-jumper/
- https://madamsew.com/blogs/sewing-blog/manage-your-bulky-seams-with-this-magic-tool
- https://missmaudesewing.co.nz/blogs/miss-maude-musings-1/how-to-sew-thicker-seams
- https://www.reddit.com/r/sewing/comments/wr95hl/can_anyone_tell_me_what_this_is_and_recommend_a/

