This site is supported by our readers. We may earn a commission, at no cost to you, if you purchase through links.
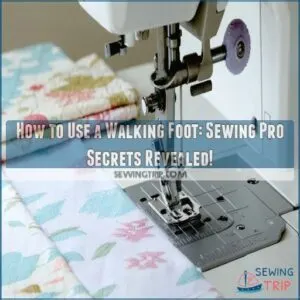
First, check your machine’s manual and verify compatibility. Remove your standard presser foot and carefully attach the walking foot, ensuring its claw aligns perfectly with the needle bar.
Sew slowly at first—the walking foot’s magic is its even fabric feeding, preventing those dreaded bunching and puckering nightmares.
It’s a game-changer for quilting, working with knits, silks, and multi-layered projects.
Pro tip: Start on scrap fabric to get the feel.
Remember, this foot’s all about smooth, professional-looking stitches that’ll make your sewing projects look like they’ve been crafted by a seasoned pro.
Table Of Contents
Key Takeaways
- You’ll need to consult your machine’s manual first to ensure compatibility and proper installation of the walking foot, matching your specific machine’s shank type.
- When sewing, you’ll want to slow down and use pins or clips to stabilize your fabric, as the walking foot works best with precise, controlled movements and even fabric feeding.
- You’ll find the walking foot is a game-changer for challenging projects like quilting, sewing multiple layers, and working with stretchy or slippery fabrics that tend to shift during stitching.
- You’ll want to practice on scrap fabric first to get a feel for how the walking foot handles different materials, testing stitch length and tension to achieve smooth, professional-looking results.
Benefits of a Walking Foot
If you’re tired of uneven stitches and fabric bunching up while sewing, a walking foot might just be your new best friend.
This handy sewing machine attachment will help you tackle tricky fabrics and multiple layers with ease.
ensuring smooth, professional-looking results every time.
Even Stitches on Various Fabrics
With the precision of a master craftsman, your walking foot transforms challenging fabrics into perfectly stitched masterpieces. This sewing superhero tackles uneven surfaces like a pro, ensuring every stitch lands exactly where you want it.
- Feel the confidence of perfectly aligned fabric layers
- Conquer tricky materials with unmatched control
- Experience the joy of professional-looking results
Whether you’re wrestling with stretchy knits, slippery silks, or stubborn leather, the walking foot becomes your secret weapon. Its specialized feed dogs grip and guide fabric with incredible consistency, preventing bunching, puckering, and those frustrating stitch irregularities that can turn your sewing project into a nightmare. Your machine’s stitch quality just leveled up.
Essential for Quilting and Topstitching
Ever nailed a perfect quilt that looks like a pro made it? Your secret weapon might just be the walking foot – a sewing machine accessory that transforms quilting and topstitching from frustrating to phenomenal. Most sewists hit roadblocks when working with multiple fabric layers, but this little marvel changes the game completely.
You can find walking foot sewing machines online at sewing machine stores, which is helpful when searching for a specific model. Quilting enthusiasts know the walking foot isn’t just another presser foot – it’s a precision tool that keeps your stitches straight and true. Topstitching becomes a breeze when you’ve got this buddy attached to your machine. Picture yourself creating crisp, clean lines that make your projects look professionally finished, the usual fabric wrestling match.
Your walking foot shines brightest during straight-line quilting, where precision is king. It moves fabric layers in perfect harmony, ensuring each stitch sits exactly where you want it.
While it won’t handle fancy decorative stitches, it’s unbeatable for standard quilting and topstitching techniques.
Brands like Janome and Singer offer compatible walking foot, so check your machine’s specifications. Start slow, practice on scrap fabrics, and watch your sewing skills level up. Remember, mastering your walking foot means mastering your craft – one perfectly aligned stitch at a time.
Prevents Fabric Shifting and Puckering
Quilting demands precision, and your walking foot is the ultimate fabric whisperer.
It tackles tricky layers like a pro, keeping your quilt sandwich perfectly aligned without a single pucker.
By gripping both fabric layers simultaneously, this sewing superhero prevents shifting and bunching, ensuring your stitches glide smoothly across different textures.
Say goodbye to fabric frustrations and hello to professional-looking projects that’ll make other sewists green with envy.
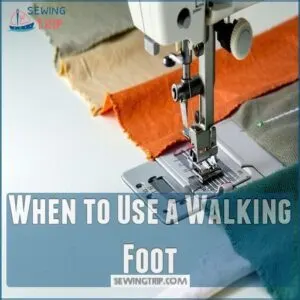
When to Use a Walking Foot
If you’re sewing tricky fabrics like stretchy knits, bulky quilts, or slippery vinyl, a walking foot is your secret weapon for smooth, professional results.
You’ll want to reach for this handy tool whenever you need precise fabric feeding and perfect stitches.
across multiple layers or challenging materials.
Handling Bulky, Stretchy, and Slippery Fabrics
Wrestle those fabric rebels into submission with your walking foot – the unsung hero of tricky textile challenges! When bulky, stretchy, or slippery fabrics threaten to derail your sewing project, this miraculous attachment becomes your ultimate ally.
Your walking foot tackles fabric challenges like a pro, ensuring smooth, even stitches
- Knits and stretchy fabrics demand gentle handling – your walking foot prevents unwanted stretching and distortion
- Slippery satins and silks will glide under control, eliminating frustrating shifting and misalignment
- Bulky materials like canvas or thick denim become manageable, with each layer moving in perfect sync
Needle types too. Choose sharp, fine needles for delicate fabrics, and stronger needles for materials. Adjust your stitch tension carefully, watching how different fabrics respond. A test run on scrap fabric isn’t just recommended – it’s your roadmap to sewing success.
Troubleshooting tip: If you experience fabric resistance, slow down your machine’s speed. Patience transforms challenging fabrics from nightmares to dream projects, one perfectly placed stitch at a time. Your walking foot isn’t just a tool – it’s your sewing superpower.
Sewing Multiple Layers Like Quilt Sandwiches
Shifting gears from handling tricky fabrics, let’s explore how your walking foot becomes a game-changer when sewing multiple layers like a quilt sandwich. It’s your precision tool for conquering fabric layers that would make ordinary presser feet break a sweat.
For smooth and even stitching, setting your stitch length to 3.0, as recommended in Straight Line Quilting Tips, can make a big difference.
| Layer Type | Challenge | Walking Foot Solution |
|---|---|---|
| Cotton | Shifting | Prevents fabric drift |
| Batting | Thickness | Even feed control |
| Backing | Slipperiness | Synchronized movement |
Your walking foot works like a tag-team partner, synchronizing with machine feed dogs to grip both top and bottom layers. This means your quilt sandwich moves smoothly, eliminating annoying puckers and misalignments that can ruin hours of careful work. Think of it as cruise control for your sewing machine.
When you’re wrestling with a bulky quilt sandwich, the walking foot’s extra set of feed dogs becomes your secret weapon. It pulls fabric layers through evenly, ensuring your stitches look professional from edge to edge. Brands like Janome and Brother offer specialized walking feet designed to handle everything from delicate cotton to thick batting.
Pro: Always test your setup on scrap fabric first. A little practice goes a long way in mastering those perfect, smooth multi-layer projects.
Setting Up a Walking Foot
Ready to upgrade your sewing game with a walking foot?
Before you start, you’ll want to carefully check your machine’s manual.
Gather the right tools to facilitate a smooth installation.
That’ll have you stitching like a pro in no time.
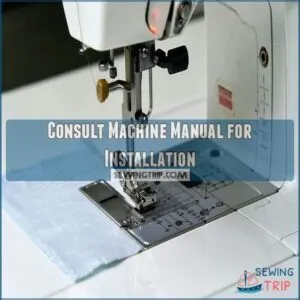
Consult Machine Manual for Installation
Your walking foot is like a trusted co-pilot for traversing tricky fabric terrains. Before launching into installation, grab your machine’s manual – it’s your roadmap to success. Each sewing machine has its quirks, so manual specifics are your first defense against potential mishaps. Remember that using a walking foot on a machine with a different shank type compatibility can lead to damage or poor performance.
Here’s your walking foot installation checklist:
- Verify your machine’s exact shank type
- Check brand compatibility carefully
- Gather necessary tools (typically a screwdriver)
- Clear your workspace of unnecessary clutter
- Have your manual within reach
Universal walking feet might seem tempting, but they’re not always a perfect match. Some require special connections that aren’t one-size-fits-all. You’ll want to remove your current presser foot with precision, treating the process like a delicate surgical procedure. Troubleshooting guide tip: if something feels off, double-check your manual’s walking foot sewing machine installation instructions.
Remember, patience transforms tricky installations into smooth sewing victories. Your careful approach makes it possible to master walking foot attachment without breaking a sweat.
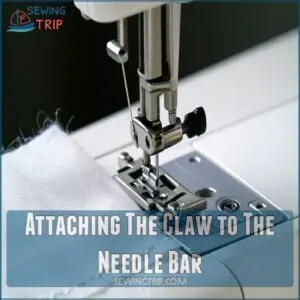
Attaching The Claw to The Needle Bar
Right in the midst of your sewing machine’s inner workings, the walking foot’s claw mechanism becomes your precision partner for fabric control.
Different claw types demand careful alignment with the needle bar’s unique landscape.
For the best results, always consider purchasing a sewing machine claw that matches your machine’s specifications.
| Claw Type | Shank Fitting | Lever Action |
|---|---|---|
| Universal | High Shank | Smooth Glide |
| Specific | Low Shank | Precise Grip |
| Adaptive | Mid Shank | Firm Engage |
Matching the claw’s lever perfectly guarantees fabric feeding magic.
Securing The Foot With Screws
Because precision matters in walking foot installation, you’ll want to carefully tighten the set screw without overdoing it.
Use a small screwdriver to secure the foot’s mounting screw, ensuring it’s snug but not forced.
Check that the foot doesn’t wobble – a stable attachment is key to smooth sewing and preventing potential fabric mishaps during your project.
Before starting, make sure to remove the presser foot adaptor using a screwdriver to access the area for the walking foot.
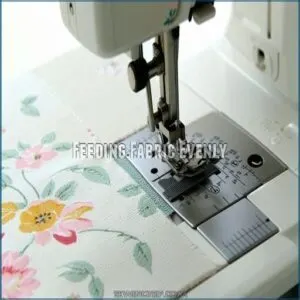
Feeding Fabric Evenly
When you’re working with tricky fabrics that tend to misbehave, a walking foot becomes your secret weapon for smooth, even stitching.
By gripping both the top and bottom layers simultaneously, you’ll prevent shifting, puckering, and those frustrating uneven seams.
These uneven seams can make your sewing project look amateurish.
Stitch Slowly for Smooth Feeding
Mastering the walking foot requires a gentle touch and strategic approach. Sewing at a slower pace transforms your fabric handling, giving you unprecedented control over tricky materials.
When handling challenging fabrics, consider these slow-speed sewing benefits:
- Feel the fabric’s unique rhythm and movement
- Prevent unexpected fabric slippage and misalignment
- Maintain perfect stitch tension with minimal effort
- Reduce the risk of needle breakage and fabric damage
- Create professional-grade, even stitches every single time
Imagine your sewing machine as a precision instrument. Each stitch becomes a deliberate dance between needle and fabric, where speed takes a backseat to accuracy. The walking foot thrives on methodical movements, gripping layers with mechanical precision. Slow sewing isn’t about limitation—it’s about releasing your true sewing potential. By embracing a measured pace, you’ll transform potentially frustrating projects into smooth, controlled experiences that showcase your craftsmanship. Your needle will glide, your fabric will behave, and your confidence will soar with every carefully executed stitch.
Use Pins or Clips for Fabric Stability
Slowing down taught you control, now it’s time to lock your fabric in place.
Grab those pins or best sewing clips and become a fabric wrangler.
Different projects demand different pinning techniques: quilting might need more pins, while sleek knits prefer gentle clips.
Keep your fabric layers tight and aligned, preventing any sneaky shifting.
Experiment with pin placement—closer together for tricky fabrics, more spread out for stable materials.
Your walking foot will thank you for the extra stability.
Practice on Similar Scrap Fabric
Want to guarantee your walking foot works like a charm? Test-driving on scrap fabric is your secret weapon before diving into the main event. To guarantee smooth fabric flow and prevent bunching, consider guiding fabric with both hands, keeping in mind Maintaining Fabric Tension.
- Select scrap fabric that mirrors your project’s material
- Mimic actual project conditions for realistic practice
- Treat this as a dress rehearsal for your sewing performance
Grab fabric scraps that match your intended project—whether it’s a quilt, denim jacket, or silk blouse. Pin or clip your layers with precision, creating a stable foundation that’ll prevent fabric from doing unexpected somersaults. Start stitching at a tortoise-like pace, letting your walking foot find its rhythm. This isn’t about speed; it’s about control.
Experiment with stitch length, adjusting between 2.5-3.0 mm to find your sweet spot. Watch how different fabrics respond, noting any tension changes or unexpected fabric behavior. Your scrap fabric test run isn’t just practice—it’s your roadmap to sewing success.
Limitations of a Walking Foot
While a walking foot is a powerful tool for even fabric feeding, it’s not a one-size-fits-all solution for every sewing project.
You’ll want to be aware of its limitations, like slower sewing speeds and the inability to create wide decorative stitches or backstitch easily.
Not Suitable for Wide Decorative Stitches
Dancing through your sewing project, you’ll quickly discover that walking feet have strict stitch limitations. These specialized feet aren’t designed for wide decorative stitches or intricate patterns.
Your walking foot excels at straight-line quilting but falls short when you want to get creative with your needle work.
Decorative stitch alternatives like open-toe or zigzag feet are your best bet for adding flair to fabrics. The foot’s narrow design prevents wide stitch width variations, pretty much putting a governor on your sewing machine’s creative potential.
When you’re itching to break free from linear stitching, swap out that walking foot and explore the possibilities of more flexible presser feet.
For perfect topstitched edge, consider using a Quilt Binding Foot.
Slower Sewing Speed and Straight Lines Preferred
Your walking foot isn’t built for speed – it’s the tortoise in your sewing toolkit. Think precision over pace.
Here’s why slow stitching matters:
- Fabric control trumps rapid-fire sewing
- Even feeding prevents layer shifting
- Straight line projects demand measured movements
When working with multiple fabric layers or tricky materials, your sewing machine’s walking foot performs best at a gentle pace, ideal for straight line quilting. You’re not racing against the clock; you’re crafting something spectacular.
Picture yourself as a fabric whisperer, coaxing each layer into perfect alignment with methodical, intentional stitches. By keeping your speed in check, you’ll avoid puckering, maintain stitch quality, and create professional-looking projects that showcase your sewing prowess. Slow and steady? More like slow and extraordinary.
Reverse Stitching Not Recommended
Though walking feet excel at forward motion, reversing can turn your sewing project into a fabric fiasco.
Your machine’s walking foot isn’t designed for moonwalking backward, which risks:
- Fabric distortion that’ll make your seams cry
- Uneven stitching threatening your project’s professional finish
- Potential machine damage lurking with every backstitch attempt
Stick to straight-line sewing and explore alternative finishing techniques to secure those seams without risking your walking foot’s delicate dance.
Obtaining a Walking Foot
When you’re ready to upgrade your sewing game, finding the perfect walking foot starts with checking your machine’s shank type—high or low.
You’ll want to explore both built-in and universal options that match your specific sewing machine model.
Ensuring a seamless fit for smooth, professional stitching.
Check Compatibility With Machine Shank Type
Compatibility‘s the secret sauce when matching a walking foot to your sewing machine.
Shank types are like machine DNA – they determine which walking foot will work seamlessly. Low shank machines are the chameleons of the sewing world, fitting most universal walking feet. High shank models demand specialized attachments, so check your machine’s specs carefully.
Some sewing machines like the Consew 100 may have high shank foot compatibility issues.
Want to know your machine’s shank type? Measure from the needle plate to the presser foot attachment point or peek into your machine’s manual.
Pro tip: Bring your machine’s model number to a sewing shop for a quick compatibility check. Don’t guess – verify first!
Options for Built-in or Universal Walking Feet
Sizing up your sewing machine’s walking foot situation comes down to two paths: built-in brilliance or universal upgrades.
If your machine arrived with a built-in walking foot, you’ve hit the jackpot. These integrated systems are like having a fabric-handling ninja right inside your machine, ensuring thick materials like leather and canvas glide smoothly without throwing a stitch tantrum. Investing in a compound feed machine for heavy-duty upholstery work can also markedly improve sewing results.
But what if your machine didn’t come equipped? No sweat. The universal walking foot market is your new best friend. These aftermarket heroes are designed to turn your standard machine into a precision stitching powerhouse. When shopping, you’ll want to pay close attention to shank types – low-shank or high-shank compatibility can make or break your foot attachment. Cost comparison is your secret weapon. Brands like Singer, Brother, and Janome offer various walking foot options, with prices ranging from budget-friendly to professional-grade. Attachment methods vary, so carefully check your machine’s specific requirements. Some feet click right in, while others need a bit more finesse.
Pro tip: Always measure twice and buy once. Check your machine’s manual, measure your shank type, and look for walking foot features that match your sewing needs. The right walking foot can turn fabric challenges into smooth sailing.
Quilting With a Walking Foot
If you’ve ever struggled with keeping your quilt layers perfectly aligned while sewing, a walking foot is about to become your new best friend.
With its unique mechanism that grips both fabric layers evenly, you’ll achieve professional-looking quilts.
You’ll achieve professional-looking quilts that lay flat and stitch smoothly, even through multiple fabric thicknesses.
Keeps Quilt Layers Aligned
With your walking foot freshly installed, you’re now equipped to conquer quilt layer alignment like a pro.
This precision tool acts as your fabric’s guardian, preventing those pesky layer shifts that can turn your quilting project into a bumpy nightmare.
The walking foot’s unique design grips both top and bottom layers, ensuring they glide together without bunching or puckering. Imagine each layer of your quilt moving in perfect sync, just like a well-choreographed dance – that’s the magic of an even feed foot.
When you’re working on intricate quilting projects, this tool becomes your best friend, keeping fabric layers as smooth as butter on a hot skillet.
No more wrestling with stubborn materials or fighting uneven stitches. Your walking foot transforms complex quilting challenges into a breeze, giving you the confidence to create stunning, professional-looking quilts that’ll make other sewists green with envy.
Ideal for Straight and Wavy Line Quilting
Ready to transform your quilting game? Your walking foot is about to become your new best friend. This magical sewing attachment keeps your fabric layers dancing together in perfect harmony, preventing those dreaded puckers and shifts that can turn a beautiful quilt into a bumpy mess.
- Quilt Pattern Power: Whether you’re dreaming of laser-straight lines or gentle, flowing waves, your walking foot guarantees each stitch lands exactly where you want it.
- Layer Love: Handling multiple fabric layers becomes a breeze, letting you focus on creativity instead of fighting fabric movement, and for more quilting techniques and tips, check out quilting video tutorials.
- Precision Quilting: Think of your walking foot as a fabric conductor, orchestrating smooth, even stitches across your entire project.
Straight line quilting? Wavy line magic? Your walking foot has got you covered. Start slow, practice on scrap fabric, and watch your quilting confidence soar. Remember, every pro was once a beginner – and your walking foot is the secret weapon that’ll help you land those perfect quilting designs.
Frequently Asked Questions (FAQs)
Can a walking foot be used in reverse sewing?
Like a stubborn mule refusing to back up, your walking foot won’t reverse.
It’s designed for forward motion only, so when you need to backstitch, you’ll have to switch to a standard presser foot.
Can you use a walking foot on a sewing machine?
Yes, you can use a walking foot on most sewing machines!
It’s perfect for quilting, multiple fabric layers, and tricky materials like vinyl.
Just check your machine’s compatibility and follow the manual’s attachment instructions carefully.
How do you use a walking foot sewing machine?
Perfectly position your walking foot by first checking machine compatibility.
Securely attach it to the needle clamp, align the lever correctly, and start sewing slowly.
Test on scrap fabric to verify smooth, even fabric feeding.
Can you sew using a walking presser foot?
You can sew using a walking foot, which helps feed multiple fabric layers evenly.
It’s perfect for quilting, thick materials, and preventing fabric shifting.
but works best with straight stitches at a slower pace.
How do I set up a walking foot for machine quilting?
Check your machine’s manual for compatibility.
Attach the walking foot securely to the needle clamp.
Select a 5-0 mm stitch length. Start slowly, test on scrap fabric.
Use the guide bar for precise quilting lines.
What is a walking foot attachment on a sewing machine?
A walking foot is a special sewing machine attachment.
It helps feed fabric evenly.
Preventing layers from shifting while quilting or sewing multiple fabric types together.
Ensuring smoother, more consistent stitching.
When should you use a walking foot on a sewing machine?
Like a trusty sidekick for tricky fabrics, you’ll want a walking foot when sewing multiple layers.
quilting.
matching plaids, or working with stretchy, slippery materials.
that tend to shift during stitching.
Do you drop the feed dogs when using a walking foot?
Typically, you’ll lower the feed dogs when using a walking foot.
Most machines have a lever or button to disengage them, allowing the walking foot to grip and move fabric evenly.
This prevents interference from the machine’s built-in feed mechanism.
How to attach a walking foot to a sewing machine?
Measure twice, cut once—your sewing mantra applies to attaching a walking foot.
Unplug the current presser foot.
Align the walking foot’s lever with the needle clamp, and tighten securely for smooth, even fabric feeding.
What stitch do you use with a walking foot?
You’ll want to use straight stitches between 5-5 mm long when using a walking foot.
Stick to simple, even stitching.
to keep your fabric layers moving smoothly and prevent shifting during quilting or sewing multiple fabric layers.
Conclusion
Perfecting Precise Performance: Your walking foot journey transforms ordinary sewing into extraordinary craftsmanship.
Master how to use a walking foot on a sewing machine by practicing patience, understanding your machine’s unique needs, and embracing this versatile tool.
With careful technique and consistent practice, you’ll achieve professional-grade stitches that elevate your projects from amateur to artisan.
Remember, every stitch tells a story—make yours smooth, even, and impeccably crafted.


