This site is supported by our readers. We may earn a commission, at no cost to you, if you purchase through links.
I bought my first embroidery machine with visions of customized gifts and custom apparel dancing in my head. Then I opened the manual—48 pages of threading diagrams, stabilizer charts, and tension adjustments that made my eyes glaze over.
Here’s what I wish someone had told me on day one: using an embroidery machine isn’t nearly as complicated as manufacturers make it sound, but it does require understanding a handful of essential steps in the right order. Once you master the basics of setup, stabilization, and thread management, you’ll wonder why you waited so long to start stitching.
Table Of Contents
- Key Takeaways
- Choosing The Right Embroidery Machine
- Essential Supplies for Machine Embroidery
- Preparing Fabric and Stabilizer
- Threading and Setting Up The Machine
- Loading and Aligning Embroidery Designs
- Choosing and Using Embroidery Stabilizers
- Selecting and Managing Embroidery Threads
- Basic Embroidery Techniques for Beginners
- Troubleshooting Common Embroidery Issues
- Top 5 Essential Embroidery Products
- Frequently Asked Questions (FAQs)
- Conclusion
Key Takeaways
- Mastering embroidery machines requires understanding stabilizer selection, thread management, and proper fabric preparation before focusing on machine features or design complexity.
- Budget $300-$800 for entry-level machines with 5×7 inch embroidery fields, then invest in cut-away stabilizers for knits, tear-away for wovens, and 40-weight polyester thread for durability.
- Most beginner mistakes stem from skipping fabric marking, improper hooping tension, or incorrect thread tension settings rather than machine limitations or design file issues.
- Essential tools include water-soluble marking pens for placement accuracy, sharp embroidery scissors for clean finishes, and software like Embrilliance for design customization without learning full digitizing programs.
Choosing The Right Embroidery Machine
You’re standing at the crossroads of a big decision, and choosing the right embroidery machine will shape every project you create.
Before you commit, check out these top-rated embroidery machines and what makes them worth the investment to see how they perform in real-world conditions.
Your budget, the type of work you’ll tackle, and the features you actually need all play a role in finding your perfect match.
For adults refining their skills or starting out, choosing the right sewing kit can make all the difference in staying motivated and prepared.
Let’s walk through the key factors that’ll guide you to a machine you won’t outgrow in six months.
These include stitch quality, throat space, speed control, and build durability—features that deserve a closer look before you commit.
Evaluating Budget and Project Needs
Start your embroidery journey with smart budget planning—entry-level machines run $300 to $800, while mid-range options hit $800 to $1,500.
For reliable performance and features that grow with your skills, check out Bernina sewing machines as a quality mid-range choice.
Before choosing the right embroidery machine, think about project sizing: small custom gifts need less firepower than bulk apparel orders.
Factor in expense tracking for supplies and annual maintenance costs of $60 to $120, ensuring your financial options match your embroidery for beginners goals.
Researching Brands and Models
Once you’ve set your budget, dig into brand comparison through model reviews and online forums—Brother consistently ranks high for reliability and beginner-friendly interfaces.
Check feature sets against price analysis to spot market trends like built-in WiFi or LCD touchscreens.
I learned the hard way that skipping this research step cost me six months of frustration with a machine that didn’t match my actual embroidery needs.
Comparing Features and Specifications
Now that you’ve narrowed your machine comparison, focus on spec analysis to separate game-changers from gimmicks. Look for automatic thread tension systems, built-in embroidery software compatibility, and real-time stitch monitoring through tech reviews.
I compare how many built-in designs versus USB connectivity each model offers during model research.
Machine embroidery maintenance features like self-cleaning modes drastically cut your downtime between choosing the right embroidery machine and actually creating.
Considering Embroidery Field Size
Field size limits what you can stitch in one pass, so your hoop selection determines whether you’ll complete full-chest logos or need multiple alignments. I check machines offering at least 5×7 inches for flexible fabric coverage. Design scaling shrinks intricate embroidery designs, affecting stitch density—smaller hoops mean tighter detail work. Your embroidery machine’s field guides which stabilizer dimensions and embroidery software features you’ll actually use.
- Home machines typically offer 4×4 to 6×10 inch fields
- Larger fields reduce repositioning for back designs
- Small fields suit caps, sleeves, and name tags
- Design bounding boxes must fit within field dimensions
- Hoop compatibility ensures accurate placement every time
Essential Supplies for Machine Embroidery
You’ve picked your embroidery machine, and now it’s time to stock up on the supplies that’ll turn those digital designs into real, stitched masterpieces. Getting the right materials from the start saves you frustration, wasted fabric, and those “why won’t this work?” moments I’ve definitely had.
Let’s break down the essential supplies you’ll need to set yourself up for embroidery success.
Selecting Stabilizers for Your Project
Think of stabilizer types as the secret backbone of your embroidery—skip it, and your design risks puckering or sinking. For sturdy fabric support, match your stabilizer to fabric and thread compatibility.
If you run into issues like thread breakage or fabric distortion, check out this guide on troubleshooting common advanced sewing problems for quick fixes.
Tearaway stabilizer works for quick removal, but dense embroidery needs cut-away.
Hoop selection matters too; the right hoop keeps stabilizer and fabric steady for crisp results.
Choosing Embroidery Threads and Needles
Thread materials set the stage for your embroidery success, with polyester thread offering machine wash durability and rayon bringing high sheen. For needle selection, match size to fabric weight—75/11 to 90/14 covers most projects.
Here’s what matters most:
- Choose fiber content based on finish: polyester for longevity, rayon for shine
- Use 40-weight embroidery thread as your standard
- Balance thread colors with tension control for crisp stitches
Must-Have Tools and Accessories
Beyond needles and thread, your embroidery machine needs a tight support crew. Sharp embroidery scissors trim jump stitches cleanly, while fabric markers guide placement. Hoop adapters expand your creative reach, and stabilizer mats protect surfaces during hooping.
| Tool Category | Essential Items | Primary Function |
|---|---|---|
| Cutting | Embroidery scissors, thread cutters | Trim threads and clean designs |
| Marking | Fabric markers, chalk wheels | Guide accurate placement |
| Hooping | Hoop adapters, stabilizer mats | Secure fabric and protect surfaces |
Preparing Fabric and Stabilizer
Getting your fabric and stabilizer ready is where most embroidery mistakes happen, but it doesn’t have to be complicated. The secret is taking a few extra minutes to mark, hoop, and secure everything before you start stitching.
Let’s walk through the three essential steps that’ll set you up for clean, professional results every time.
Marking Embroidery Placement
Accurate stitch placement starts before you even touch the hoop—you need to mark your fabric with precision. Use a water-soluble pen or tailor’s chalk to draw a 1-inch crosshair exactly where your design center will land.
I always verify these placement guides with a ruler, measuring equal distances from seams or edges. This simple fabric marking step prevents costly misalignment and ensures your embroidery designs sit exactly where you want them.
Understanding the basics of proper embroidery placement can further improve your results by ensuring designs complement your garment’s shape and style.
Hooping Techniques for Beginners
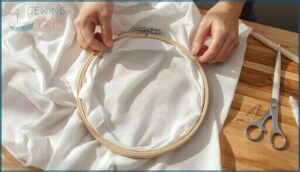
Proper hooping feels like a balancing act at first, but you’ll master it quickly. I tighten hoop screws just enough to keep fabric flat without distortion—too loose causes shifting, too tight warps the material. Choose hoop sizes that match your design width, layer your stabilizer underneath the fabric, and always align grain lines with hoop guides.
- Select the right hoop: Match hoop selection to your design area for better embroidery alignment
- Layer stabilizer first: Place embroidery stabilizers under fabric before tightening the hoop
- Check fabric tension: Adjust screws until material lies smooth with no slack or gathered edges
- Maintain your hoops: Clean clasp surfaces regularly as part of hoop maintenance to prevent fabric pulling
Floating Fabric When Hooping Isn’t Possible
Some fabrics fight back when you try to squeeze them into a hoop—bulky fleece, delicate silk, or stretchy knits just won’t cooperate. That’s when floating fabric saves the day.
You’ll secure your stabilizer in the embroidery machine hoop, then attach your fabric on top using spray adhesive or tape. This hoop alternative keeps your embroidery alignment precise without crushing delicate materials during embroidery hooping.
For a deeper understanding of proper hooping techniques and stabilizer, explore resources that detail how stabilization impacts embroidery quality.
Threading and Setting Up The Machine
Getting your embroidery machine ready to stitch is where everything you’ve prepped comes together. You’ll need to thread your machine correctly, install the right needle for your project, and attach the presser foot before you can start.
Let’s walk through each of these setup steps so you’re ready to run your first design.
Threading The Embroidery Machine
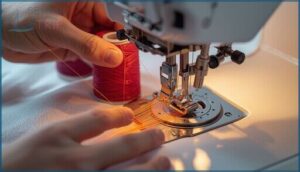
Start by guiding your embroidery thread from the spool pin through each thread guide—this Thread Path Optimization ensures smooth feeding. Next, seat the thread firmly between the tension discs for proper Tension Disc Calibration.
Continue threading down to the take-up lever, then through the final guides before Needle Thread Management: pass the thread through your embroidery needles’ eye, front to back, completing the upper thread adjustment.
Installing The Correct Needle
Once you’ve threaded your embroidery machine, needle selection becomes your next focus for getting started with machine embroidery. Insert your embroidery needles fully until you hear a gentle click, ensuring thread compatibility with fabric tension.
I recommend size 75/11 for most woven fabrics—it’s my go-to for basic embroidery techniques. Replace needles every 8-12 hours of stitching for ideal stitch quality and needle maintenance.
Attaching The Presser Foot
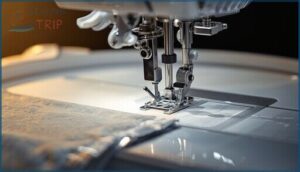
After installing your embroidery needles, raise the presser foot lever to its highest position. Snap your embroidery machine’s presser foot into place under the presser bar—you’ll hear a satisfying click when it’s secure.
Lower the needle to check needle clearance; it should pass through without touching the foot. This presser foot alignment directly impacts stitch quality and prevents thread jams during hoop movement on your sewing machine.
Loading and Aligning Embroidery Designs
Once your machine is threaded and ready, the next step is getting your design loaded and positioned correctly. This process varies slightly depending on whether you’re using a built-in design or importing your own file, but the basic principles stay the same.
Let’s walk through how to get your design from storage into the machine, then aligned perfectly on your fabric.
Importing Designs to Your Machine
Your embroidery machine won’t automatically recognize every design file format, so let’s talk compatibility. Most machines accept PES, DST, EXP, VIP, VP3, or CSD files depending on the brand.
You can transfer designs using a USB drive—the most universal method—or try wireless transfer via Wi-Fi if your model allows it.
Always convert designs using embroidery software before importing to avoid stitch density issues or frustrating errors.
Selecting Built-in or Custom Designs
Your design library holds hundreds of embroidery patterns ranging from florals to geometric shapes, organized by category for quick browsing. Custom imports give you unlimited creative freedom—you’ll use embroidery software for digitizing and color optimization before transferring files.
When choosing designs, consider these factors:
- Check stitch count and thread mapping compatibility
- Preview design editing options like resize or rotate
- Verify hoop size matches your embroidery design creation
- Review color stops for efficient stitching
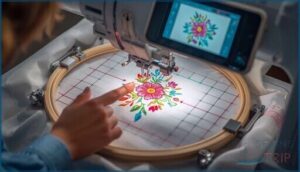
Centering and Aligning Designs on Fabric
Before you start stitching, fabric alignment determines whether your embroidery lands exactly where you want it. Centering marks on your hoop and fabric help you match the design center with your garment’s center—improving stitch accuracy by up to 1.5 centimeters.
Properly hooped fabric stays taut, preventing shifting during long runs and keeping your embroidery designs perfectly aligned.
| Centering Method | Best For |
|---|---|
| On-screen crosshair | Digital design centering with live preview |
| Grid ruler overlay | Manual fabric alignment on visible weaves |
| Hoop center mark | Quick needle placement checks |
| Stabilizer guidelines | Maintaining hoop tension on stretchy knits |
Choosing and Using Embroidery Stabilizers
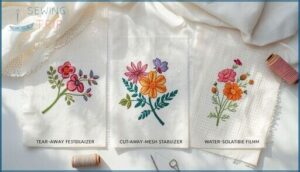
Stabilizers are the unsung heroes of machine embroidery—they keep your fabric from puckering, shifting, or distorting while the machine stitches your design. Choosing the right type depends on your fabric, project, and how you want the finished piece to look and feel.
Here’s what you need to know about the three main stabilizer types and when to use each one.
Cut-Away Stabilizer Uses
When you need permanent fabric support that won’t vanish after the first wash, cut-away stabilizer becomes your go-to embroidery backing. I reach for this stabilizer selection on knits, polo shirts, and dense logo designs where the embroidery materials need ongoing strength.
Unlike tearaway stabilizer options, cut-away tips include choosing stabilizer weights from ultra-light to heavy based on your fabric’s thickness and the embroidery thread density you’re working with.
Tear-Away Stabilizer Applications
Your best tearaway stabilizer choice comes down to fabric preparation and stitch density. I use light tearaway stabilizer on fine cotton with simple lettering, medium weight for shirts and moderate designs, and heavy options for canvas or dense fill-stitch patterns.
After your embroidery machine finishes, gently tear away excess from the back—proper hoop management and thread tension prevent puckering during removal.
Wash-Away and Sticky-Back Stabilizers
Wash-away stabilizers dissolve completely in water after stitching—perfect for delicate fabrics like chiffon where you don’t want bulk showing through. Sticky-back versions grip fabric with temporary adhesive backing, eliminating pins when you can’t hoop items easily.
I combine both for floating lace projects in the hoop, then rinse away all traces for clean, professional embroidery support on sheer materials.
Selecting and Managing Embroidery Threads
Thread selection can make or break your embroidery project, and I’ve learned this the hard way through countless trial-and-error sessions. The right thread type, weight, and color management system will save you time, prevent frustration, and deliver professional-looking results every single time.
Let’s walk through the essential thread considerations you need to master before your next project.
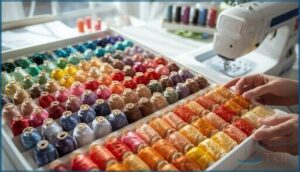
Best Thread Types for Embroidery Machines
Walking into a thread aisle feels like choosing paint for a masterpiece—you want the right fiber for the job. Polyester embroidery thread delivers excellent colorfastness testing results and manages frequent washing beautifully, while rayon thread offers stunning sheen for decorative work. Cotton thread provides a classic matte finish on natural fabrics.
For specialty thread effects, metallic thread uses require careful bobbin thread management and tension adjustments to prevent breaks.
Understanding Thread Weights and Colors
Thread weight numbers work backwards—40 weight creates fine detail, while 30 weight produces bolder designs on woven fabrics. Cotton thread offers matte finishes, while gradient embroidery techniques layer multiple thread colors for smooth transitions.
Your color theory choices matter just as much: light embroidery thread pops on dark fabric, dark rayon thread recedes on light backgrounds. Color management starts before you load that first spool.
Managing Thread Changes During Embroidery
When your embroidery machine beeps for a color change, pause and secure the needle first—spool organization prevents tangles before they start. I always recheck tension control after swapping thread colors, then test on scrap fabric.
Keep your most-used thread management colors front and center. One quick stitch optimization trick: trim those tails short to avoid loops messing up your design.
Basic Embroidery Techniques for Beginners
Once you’ve got your machine threaded and your design loaded, it’s time to actually run your first project. The key to success isn’t just pushing the start button—it’s knowing how to monitor the process, when to intervene, and what mistakes you can avoid from the get-go.
Let me walk you through the essentials that’ll help you stitch confidently without the frustration most beginners face.
Starting and Stopping The Machine
Your embroidery machine gives you full control over the start sequence and auto stop features, letting you stitch with confidence. Press the start button, and within 1-2 seconds, the needle drops—it’s that quick. Here’s what you need to know:
- Manual mode lets you position the needle exactly where you want before starting
- Safety features automatically raise the needle when you hit stop, protecting both you and your fabric
- Thread trimming happens at the end of each color change, keeping your work clean
- Low bobbin alerts trigger an auto stop, so you won’t run out mid-design
- Emergency stop buttons halt everything instantly if something goes wrong
Master these controls and you’ll breeze through machine embroidery projects without hesitation.
Monitoring The Embroidery Process
Once you hit start, real-time monitoring becomes your best friend. Watch the embroidery machine’s display for thread tension alerts and stitch quality warnings—most units pause automatically if something’s off.
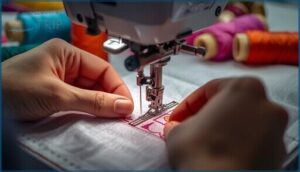
I keep my eyes on the fabric during the first 50 stitches, checking alignment and coverage.
Error recovery features save your progress, so if a thread breaks, you’ll resume exactly where you left off.
Avoiding Common Beginner Mistakes
Most beginners skip machine calibration before their first stitch—don’t make that mistake. Error prevention starts with fabric preparation: remove wrinkles, check hoop alignment twice, and test thread management on scrap material.
When choosing the right embroidery supplies, match stabilizer weight to your project. These machine embroidery tips and tricks prevent the frustrating troubleshooting embroidery issues that derail new users mid-project.
Troubleshooting Common Embroidery Issues
Even with careful setup, you’ll run into frustrating problems like loose stitches, broken needles, or designs that refuse to line up properly. These issues aren’t a sign you’re doing something wrong—they’re just part of learning how your machine behaves under different conditions.
Let’s walk through the most common problems and exactly how to fix them so you can get back to stitching with confidence.
Thread Tension Problems
When your stitches look wonky or your fabric puckers, tension issues are probably the culprit. Here’s how I troubleshoot tension adjustment problems to restore stitch quality:
- Check for loops underneath – tighten your top thread tension in small increments to prevent thread breakage
- Spot bobbin issues on top – loosen bobbin tension gradually using the tension screw
- Test on scrap fabric – verify adjustments before returning to your project
- Rethread completely – sometimes the simplest fix solves embroidery machine mysteries
- Match thread weight to fabric – heavier materials need adjusted settings to avoid fabric distortion
These machine embroidery tips and tricks will help you master troubleshooting embroidery issues and achieve perfect embroidery stitches every time.
Needle Breakage and Skipped Stitches
Frustration sets in fast when your needle snaps mid-design or your embroidery stitches skip randomly. Wrong needle type for your fabric selection, excessive thread tension, or poor stabilizer choice usually cause breakage prevention issues.
I’ve learned that bent embroidery needles, improper needle maintenance, and skipping regular cleaning create chaos.
Match your thread weight to fabric, use fresh embroidery needles, and these machine embroidery tips will save your sanity.
Design Misalignment Solutions
Watching your embroidery design shift off-center halfway through ruins the whole project. Design alignment starts before you hoop—mark your fabric precisely, secure your embroidery stabilizers flat, and confirm your hoop locks tight.
- Center designs using your embroidery software’s grid view before transferring
- Test alignment on scrap fabric first
- Check hoop tension—loose hoops cause drift
- Verify your embroidery machine’s calibration settings
- Use basting stitches as placement guides
Proper stakeholder management means your fabric, hoop, and embroidery designs work together.
Top 5 Essential Embroidery Products
You’ve learned the techniques, but the right products make everything smoother. I’ve tested dozens of embroidery accessories over the years, and these five have earned a permanent spot in my workspace.
Let’s look at the tools that’ll save you time and frustration as you build your embroidery toolkit.
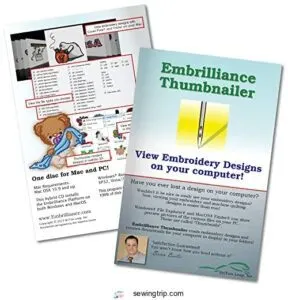
1. Embrilliance Embroidery Software Thumbnailer
Imagine scrolling through hundreds of embroidery designs, opening each file one by one just to see what’s inside. That’s where Embrilliance Thumbnailer changes everything.
This embroidery software adds realistic 3D thumbnail views directly in your computer’s file explorer, so you can see what each design actually looks like without opening any programs. It works with both Windows and Mac, integrating seamlessly with Explorer or Finder.
For design management and embroidery organization, it’s a breakthrough—you’ll spot the perfect motif in seconds instead of wasting time clicking through digital libraries.
| Best For | Machine embroidery enthusiasts who manage large design libraries and want to quickly browse and organize their files without opening each one individually. |
|---|---|
| Brand | Embrilliance |
| Primary Use | Design viewing |
| Compatibility | Windows and MacOS |
| Skill Level | All levels |
| Price Range | Mid-range |
| Product Type | Software |
| Additional Features |
|
- Saves serious time by showing realistic 3D previews right in your file browser—no need to launch embroidery software just to see what a design looks like.
- Works with tons of embroidery file formats including.svg and vinyl cutting files, making it versatile for different project types.
- Simple installation with no CD drive needed, and it runs on both Windows and Mac systems.
- .EXP files won’t show thumbnails on MacOS Big Sur and Monterey due to Apple’s operating system limitations.
- Some users report compatibility hiccups with certain Windows versions like Windows 11, plus occasional installation or registration issues.
- Thumbnail previews can lack detail and colors might look off on some computers, so you’re not always getting a perfect representation.
2. Embrilliance Embroidery Software
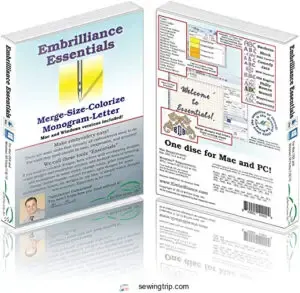
Once you’re ready to customize embroidery designs instead of just stitching what came with your machine, Embrilliance Essentials is the gateway software. At $139, it manages design editing, resizing with automatic stitch recalculation, and thread management across brands.
You’ll merge designs, add lettering in multi-line or monogram modes using 21 included fonts, and run embroidery simulation to preview stitches before you waste thread.
It doesn’t manage embroidery digitizing from scratch—that requires StitchArtist—but for modifying existing designs, it’s user-friendly enough for beginners following software tutorials on Embrilliance Basics.
| Best For | Beginners and hobbyists who want to customize, resize, and personalize existing embroidery designs without learning complex digitizing software. |
|---|---|
| Brand | Embrilliance |
| Primary Use | Design editing |
| Compatibility | Windows and MacOS |
| Skill Level | Beginners to hobbyists |
| Price Range | $139.00 |
| Product Type | Software |
| Additional Features |
|
- Automatically recalculates stitches when resizing designs, so you don’t have to worry about distortion or stitch density issues
- Includes 21 fonts with multi-line, monogram, and circle lettering modes for adding custom text to any design
- User-friendly interface that’s easy to learn, even if you’re new to embroidery software
- Can’t create embroidery designs from scratch or convert images to stitches—you’ll need separate digitizing software for that
- Some users find the $139 price tag steep for what’s essentially editing software rather than full design creation
- Technical issues during installation or setup may require reaching out to customer support
3. Water Soluble Marking Pen
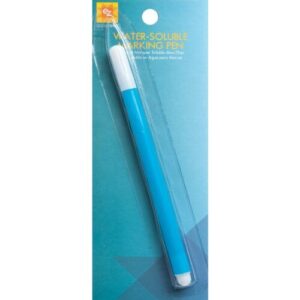
After you’ve mastered embroidery software for design edits, you need accurate placement marks on fabric before hooping. EZ Quilting’s water-soluble marking pen ($0.48 ounces, blue ink composition) draws grids and alignment guides for embroidery designs that rinse completely with water—no ironing over marks first or they’ll set.
Test fabric markers on scrap cotton before marking towels or shirts, since some synthetic blends resist complete removal. These pen tips work best on tightly woven fabrics, giving you confidence that your embroidery machine will stitch exactly where you planned using proper embroidery techniques.
| Best For | Quilters, sewers, and embroiderers who need temporary fabric markings that disappear completely with water. |
|---|---|
| Brand | EZ Quilting |
| Primary Use | Fabric marking |
| Compatibility | Various fabrics |
| Skill Level | All levels |
| Price Range | Budget-friendly |
| Product Type | Marking tool |
| Additional Features |
|
- Marks rinse away cleanly with just water or a damp cloth, leaving no residue or stains
- Works great for creating grids, patterns, and precise alignment guides on most fabrics
- Lightweight and easy to use for detailed quilting, embroidery, and cross-stitch projects
- Marks become permanent if you iron over them or wash the fabric before removing them with water
- Not suitable for dry-clean-only fabrics or certain materials like some hand towels
- Pen tip can dry out if not stored upright properly
4. Dritz Chalk Wheel Marker Kit
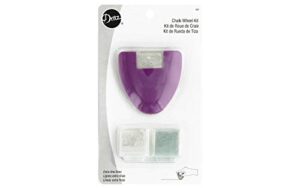
Water-soluble pens vanish with moisture, but chalk wheel markers leave temporary lines you control. The Dritz Chalk Wheel Marker Kit ($14.51, 3-piece set) includes one metal roller plus white and blue chalk refills for marking hems and design placement on embroidery blanks.
The wheel draws ultra-fine lines, perfect for centering embroidery designs in your hoop before loading fabric into the embroidery machine. Just wipe marks away with a damp cloth after stitching.
These marking tools work faster than fabric markers when you’re batch-processing shirts or towels.
| Best For | Sewers, quilters, and embroidery enthusiasts who need precise, temporary marking lines for hems, alterations, and design placement on fabric. |
|---|---|
| Brand | 3-piece set |
| Primary Use | Fabric marking |
| Compatibility | Various fabrics |
| Skill Level | All levels |
| Price Range | $14.51 |
| Product Type | Marking tool |
| Additional Features |
|
- Ultra-fine lines make it easy to center embroidery designs and mark accurate seam lines
- Marks wipe away cleanly with a damp cloth when you’re done stitching
- Comes with white and blue chalk refills so you can mark on different fabric colors
- Chalk lines can be faint and hard to see, especially in low light
- The tiny wheel may need gentle tapping to get chalk flowing smoothly
- Not ideal for delicate fabrics since the metal roller can be rough and cause snags or damage
5. Sulky Tender Touch Iron On Backing
Once chalk marks guide your placement, protecting skin from scratchy embroidery stitches becomes the next consideration. Sulky Tender Touch Iron On Backing ($12-15, 8″ × 9 yd roll) creates a soft barrier between finished embroidery and sensitive skin—perfect for baby clothes and athletic wear.
This permanent stabilizer selection offers fabric protection that stretches with knits without adding bulk. Cut the backing slightly larger than your hoop area, iron the adhesive side over completed stitches, then trim excess. The lightweight mesh moves with your garment through countless washes.
| Best For | Parents making baby clothes, anyone working with sports apparel or lingerie, and embroiderers who want to protect sensitive skin from scratchy stitches. |
|---|---|
| Brand | Sulky |
| Primary Use | Embroidery backing |
| Compatibility | Cotton garments |
| Skill Level | All levels |
| Price Range | Budget-friendly |
| Product Type | Stabilizer |
| Additional Features |
|
- Stretches with knit fabrics and stays soft through machine washing
- Lightweight mesh adds comfort without bulk or stiffness
- Creates a permanent barrier between embroidery and skin at an affordable price
- Requires careful attention to identify which side has the adhesive before ironing
- Can lift or peel if corners aren’t rounded properly when cutting
- Limited color options (only available in June Berry)
Frequently Asked Questions (FAQs)
How to use an embroidery machine for beginners step by step?
Like learning to ride a bike, using an embroidery machine becomes second nature once you master the basics: thread your needle correctly, hoop stabilized fabric taut, load your design, and press start.
What is needed to use an embroidery machine?
You’ll need an embroidery machine, embroidery needles sized 75/11 to 90/14, stabilizer types like tear-away or cut-away, thread, a hoop, embroidery blanks, and fabric preparation supplies including marking tools.
Do you need a computer for an embroidery machine?
Most modern embroidery machines operate independently using built-in controls and USB drives—no computer required. However, computerized embroidery software becomes essential when you’re ready to digitize custom designs or edit existing patterns before digital stitching.
Is it easy to use an embroidery machine?
Yes, embroidery machines are beginner-friendly. Modern user interfaces with color LCD screens guide you through setup, while automatic thread management and built-in troubleshooting checklists simplify machine embroidery for newcomers.
What are the steps of machine embroidery?
Wondering where to start? Machine embroidery follows these essential steps: fabric preparation, hooping with embroidery stabilizers, machine setup, design loading, thread management, stitch optimization, and monitoring your embroidery machine throughout the process.
What do I need for machine embroidery?
You’ll need an embroidery machine, stabilizer matched to your fabric, embroidery thread in rayon or polyester, the right hoop size for your design, sharp needles (75/11 or 80/12), and scissors for clean finishes.
Is embroidery easy for beginners?
Machine embroidery becomes manageable once you’ve mastered the basics—stabilizer selection, thread management, and proper fabric preparation.
Most beginners handle simple projects within a few practice runs, though dense designs demand patience and attention to detail.
How to clean and maintain an embroidery machine?
Clean your embroidery machine’s bobbin area after each project, oil guided points every 40-50 hours, and wipe thread paths regularly.
Schedule professional servicing annually to keep your machine running smoothly and prevent costly repairs.
Can I embroider on pre-made garments?
You can absolutely embroider pre-made garments like shirts, towels, and caps.
Choose stable fabrics like cotton or denim, use proper stabilizers, and verify correct embroidery placement for professional-looking garment decoration on your embroidery blanks.
What causes thread breakage during embroidery?
You’ll notice thread snapping for a few key reasons: tension set too tight or too loose, a dull needle creating friction, poor bobbin winding, overly dense embroidery stitches, or fabric shifting in the hoop.
Conclusion
Remember that manual I mentioned—the one that nearly scared me off embroidery forever? I haven’t opened it in months. Once you learn how to use an embroidery machine through hands-on practice, those intimidating diagrams become background noise.
You’ll develop your own shortcuts, favorite stabilizer combinations, and go-to techniques that no manual can teach. Start with one simple project today. Your first finished design will prove you’re already more capable than you think.

