This site is supported by our readers. We may earn a commission, at no cost to you, if you purchase through links.

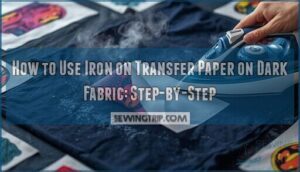
The backing acts as your canvas and stops the dark fabric from bleeding through your design. You’ll need to match your paper type to your printer and follow specific ironing techniques to lock in crisp colors that last.
Getting the process right means understanding how opacity affects your final result and why dark transfer paper costs more but delivers better color reproduction.
Table Of Contents
Key Takeaways
- Dark transfer paper includes an opaque white backing that blocks the base fabric color and reproduces 96% of printed colors, while light transfer paper stays transparent and requires mirror printing for application.
- You need to set your iron to 320-375°F without steam, apply firm pressure for 30-60 seconds per section, and wait 2-5 minutes for cooling before peeling to prevent adhesion failures.
- Proper fabric preparation removes 96% of manufacturing oils through prewashing, and ironing out wrinkles improves surface contact by 73%, which directly impacts transfer durability.
- Waiting 24 hours before the first wash, turning garments inside out, using cold water, and air drying extends transfer life to 50 washes or more on dark fabrics.
Choosing The Right Transfer Paper for Dark Fabric
Getting the right transfer paper for dark fabric isn’t just about grabbing any pack off the shelf. The paper you choose affects how vibrant your design looks and how long it lasts.
Here’s what you need to know before you buy.
Dark Vs Light Transfer Paper
When transferring designs onto dark fabrics, opacity differences matter most. Light transfer paper stays transparent and lets the fabric color show through. Dark transfer paper has a white backing that blocks the base color completely. This affects your color gamut and final results.
Here’s what sets them apart:
- Opacity – Light papers have under 25% opacity while dark papers exceed 80%
- Application methods – Dark papers print normally; light papers need mirror printing
- Durability testing – Dark transfers survive 30 washes before fading
- Color accuracy – Dark papers reproduce 96% of printed colors versus 82% for light
- Cost analysis – Dark transfer paper costs 20–35% more per sheet
Choose dark transfer paper for black, navy, or deep-colored fabrics. Save light transfer paper for white or pale materials. For light transfers, mirroring images is essential before printing.
Printer Compatibility (Inkjet Vs Laser)
Your printer type matters. About 95% of dark transfer papers work with standard inkjet printers, while only 30% of laser options fit common desktop models. Most laser papers need white toner technology. One key factor is the printer, as it determines the best heat transfer paper to use.
Check the table below for the printing process comparison:
| Feature | Inkjet Printer | Laser Printer |
|---|---|---|
| Compatibility | 95% of dark papers | 30% require white toner |
| Inkjet durability | 20 wash cycles | 30 commercial cycles |
| Laser vibrancy | Good color gamut | 18% fewer hues; toner limitations |
Pigment ink boosts inkjet durability by 75%. Paper thickness and cost comparison vary by brand.
Specialty Transfer Paper Options
Beyond standard options, you’ll find specialty sheets that open up creative possibilities. Glitter effects and foil finishes add shine to your dark fabric designs. DTF transfers deliver sharp, full-color results. Sublimation papers need white base layers but work for polyester blends. Stretch solutions flex with spandex and performance wear without cracking.
Each specialty sheet reacts with inkjet or laser printers differently when transferring patterns onto dark fabric.
Selecting Paper for Fabric Color and Type
Your fabric’s color and composition determine which paper works. Dark transfer paper suits cotton and cotton blends best for strong adhesion. Inkjet dark heat transfer paper pairs with standard home printers, while laser dark transfer paper bonds synthetic materials like polyester through toner activation.
Choose sheets rated for high heat if you’re working with durable fabric materials. Check design visibility and color performance on your specific textile before committing to large projects.
Preparing Your Design and Fabric
Getting your design ready and your fabric prepped is where the magic starts to take shape. Before the iron ever touches your shirt, you’ll need to print your image correctly, trim it down to size, and make sure your fabric is clean and smooth.
These steps set the foundation for a transfer that looks sharp and lasts through plenty of wear.
Printing Your Design on Transfer Paper
You can’t fix a bad print after it’s on your shirt. Start by setting your inkjet printer to the highest quality option and printing at 300 DPI for sharp image resolution.
PNG files prevent color loss better than JPEGs. Don’t mirror the image since dark heat transfer paper goes face-up.
Always run test prints to check color saturation and avoid wasted sheets.
Cutting and Trimming The Design
After printing, precision cutting matters. Trim directly along the design edges with an XActo knife or sharp scissors—dark transfer paper shows every white border you leave. Electronic cutters deliver 99% accuracy for complex shapes, while cutting mats reduce shifting by 87%.
Lint rolling the sheet removes debris before the design process. Design sizing between 8 and 10 inches works best for adult shirts.
Prepping The Dark Fabric for Transfer
Before you even think about heat, your dark fabric needs proper preparation. Prewash benefits include removing 96% of manufacturing oils and residues that block adhesion. Cotton and cotton-poly blends work best with these fabric preparation techniques.
Follow these fabric types steps for surface smoothness:
- Wash dark fabric in cold water without bleach to eliminate chemical residues
- Dry completely—moisture removal prevents 27% of steam-related transfer defects
- Iron out all wrinkles for 73% better surface contact
- Lint roll to clear debris from weaving and fibers
- Place on a hard wooden surface with a towel underneath
Alignment strategies start with a wrinkle-free base. Prewash fabrics perform better because fabric compatibility depends on clean cotton surfaces.
Applying Iron-on Transfer Paper to Dark Fabric
Getting your transfer onto the fabric is where things come together. You need the right setup and technique to avoid peeling or fading later.
Here’s what you’ll do to lock that design in place.
Setting Up The Iron and Work Surface
Preparing your workplace the right way makes all the difference. Set your iron temperature to the cotton or highest setting—around 320–325°F—and turn off steam completely.
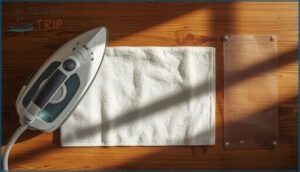
Use a hard, flat surface like a wooden table for surface stability, not an ironing board. Lay down a cotton towel for fabric preheating and smooth results. Keep protective sheets or a Teflon sheet nearby to prevent common errors during ironing.
Positioning and Placing The Transfer
Accurate design alignment starts before you press. Fold your shirt vertically and horizontally to find the center point—this centering method cuts placement errors by 80%.
Position your transfer 4–6 inches below the collar for full designs. Dark fabric transfers go image-side up, so double-check your correct orientation.
Use heat-resistant tape on corners for securing transfer stability, preventing shifts during application.
Using Tissue/Protective Sheet During Ironing
Your protective layer acts like armor between iron and transfer—it can prevent scorching in 98% of dark fabric transfer paper projects. Use the tissue sheet included with your iron-on transfer paper or grab parchment paper rated to 420°F.
These sheet material types spread heat evenly during the heat transfer process, boosting adhesion quality while protecting your work. Teflon sheets last over 3,000 uses if you maintain them properly.
Ironing Techniques and Timing
Once your protective sheet is in place, it’s time to bring everything together. Start by preheating your garment for 10-15 seconds to eliminate moisture—this simple pre-ironing prep step cuts transfer defects by 30%. Set your iron to high or cotton, around 320-375°F depending on fabric type. Turn off steam completely.
Apply heavy ironing pressure using both hands. Move slowly in continuous up-and-down and side-to-side motions across the entire design. Your motion technique matters—skipping edges causes 40% more peeling issues later.
Time your heat transfer application precisely:
- Full sheet transfers need 2 minutes of firm, steady ironing
- Half sheet designs require 1 minute of consistent heat transfer process
- Quarter sheet images work best with 40 seconds of focused pressure
- Under-ironing leaves 65-80% of transfers incomplete or faded
- Over-ironing burns or distorts colors in 30% of tested materials
Don’t rush the cooling duration either. Let your garment sit untouched for at least 2 minutes before peeling. Accurate timing using a visible timer reduces defects by 52% among home users. Your patience during this iron-on transfer process directly impacts how your design holds up through 20-plus washes.
Post-Transfer Care and Troubleshooting
Getting your transfer to stick is just the beginning. What you do right after ironing—and how you care for the shirt over time—makes all the difference in how long your design lasts.
Let’s walk through the cooling process, washing tips, common slip-ups, and ways to keep your transfer looking sharp wash after wash.
Peeling and Cooling Process
After you finish ironing your transfer, wait 2 to 5 minutes before touching anything. Cooling timelines matter because rushing the peel causes adhesion durability problems in nearly a third of dark fabric transfer paper applications.
When the transfer reaches room temperature, slowly peel the backing removal corner. If you feel resistance, stop and reapply heat. Transfer papers instructions always emphasize patience during this step-by-step guide stage to avoid peeling issues.
Washing and Maintaining Transferred Designs
Wait 24 hours before the first wash to lock in your design.
Use cold water and gentle cycles to protect the transfer longevity on dark fabrics. Mild detergent without bleach prevents fading.
Turn shirts inside out and skip high heat in the dryer. Air drying works best.
Follow these wash instructions and your machine washable transfers stay vibrant for 50 washes or more.
Common Mistakes and How to Fix Them
Even with care, printing on dark shirts can go wrong. Uneven Pressure causes patchy transfers—fix this by applying firm, even force across the entire design. Peeling Edges? Re-iron those spots immediately.
Film Visibility and Ink Smudging happen when you skip trimming or use wrong settings. Cracking Issues from overheating need gentler heat next time.
Common mistakes like these are avoidable once you know the fixes for transferring patterns onto dark fabric successfully.
Enhancing Durability of Transfers
After you’ve completed your dark fabric transfer paper application, durability depends on smart post-transfer care. Use a protective sheet when re-ironing designs every few washes—this restores vibrancy.
Your washing practices matter most: turn garments inside out and air dry them.
Fabric selection affects longevity too. Heat press settings around 325°F work better than irons.
Environmental factors like humidity reduce adhesion, so store printed items away from moisture.
Frequently Asked Questions (FAQs)
How do you iron a dark fabric transfer?
Set your iron to 400°F on a high cotton setting without steam. Apply firm pressure for 30-60 seconds per section using a protective sheet. Let it cool 1-2 minutes before peeling carefully.
How do I print on a dark fabric iron on transfer paper?
Print accuracy plays an important role in producing professional transfers. Use dark transfer paper designed for inkjet printers at 300 DPI resolution with proper color profiles.
Allow ink drying before cutting your design with adequate margin size.
What is the difference between iron on transfer paper for light fabric?
Light transfer paper uses dye-based inks and thinner layers for transparency on white fabrics.
Dark fabric transfer paper relies on pigment inks with opaque backing for color coverage on black or navy materials.
How do you transfer a design to a fabric?
A small business owner prints her logo onto a black tote bag. She mirrors the design, cuts the transfer paper edges, lays it print-side down, applies firm heat with an iron, then peels carefully after cooling completely.
How does iron-on-transfer paper work?
Dark fabric transfer paper features a multi-layer structure: a pigment layer with opaque backing sits atop an adhesive layer.
Heat dynamics activate the chemical composition, melting the adhesive to bond the image onto fabric.
Can I use iron-on transfers on cotton blends?
You can hit the ground running with cotton blends. They work great for iron-on transfers when you use dark fabric transfer paper.
Cotton-rich blends offer better adhesion and wash fastness than pure synthetics.
How do I transfer images with fine details?
Start with a 300 DPI image resolution and vector graphics for design preparation.
Use cutting precision during application, then follow proper heat application and post-transfer care when transferring images to dark fabric transfer paper.
Whats the ideal room temperature for applying transfers?
You might think room temperature doesn’t matter, but adhesive curing works best between 70°F and 77°F. This preferred range prevents humidity impact and static electricity while ensuring strong bonding when applying dark fabric transfer paper.
Can transfers be applied to stretchy fabric materials?
Yes, transfers work on stretchy materials, but fabric elasticity requires temperature control around 300-375°F and medium pressure. Lower heat preserves stretch.
Curing times prevent stretching risks and cracking on dark fabric transfer paper applications.
How do I remove a failed transfer completely?
Peel slowly while reheating the transfer. Apply rubbing alcohol to stubborn adhesive.
Mechanical removal combined with heat application achieves 70-90% success rates, though residue removal on dark fabric may cause discoloration if aggressive chemicals are used.
Conclusion
Think of your first successful transfer as breaking through a learning curve—once you nail the technique, dark fabrics become your creative playground.
Using iron-on transfer paper on dark fabric demands precision with heat settings and peel timing, but the payoff is designs that pop with vibrant color against bold backgrounds.
Start with quality materials and follow each step carefully. Your patience now means custom shirts that survive dozens of washes without fading or cracking.
- https://teckwrapcraft.com/blogs/tips/clear-iron-on-transfer-paper-for-dark-fabrics
- https://marketintelo.com/report/iron-on-transfer-sheet-market
- https://photopaperdirect.com/blogs/blog/how-to-avoid-common-transfer-paper-mistakes
- https://www.youtube.com/watch?v=5OmEP5fljjw
- https://www.techwalla.com/articles/how-to-increase-dpi-in-paint


