This site is supported by our readers. We may earn a commission, at no cost to you, if you purchase through links.
Whether you’re a seasoned stitcher or a novice eager to dive into the world of threads and needles, mastering the art of using tracing paper on fabric can elevate your embroidery game.
This guide, Tracing Paper on Fabric: Master Embroidery Design Transfer in 6 Steps, is your ticket to flawless design transfers. From selecting the right materials to the final stitch, we’ll walk you through each step, ensuring your embroidery stands out with precision and beauty.
Let’s unravel the secrets to turning your fabric into a canvas for creativity.
Yes, you can use tracing paper on fabric to transfer embroidery designs in a few steps. Place the tracing paper between your design and the fabric, then trace firmly without damaging the materials.
Table Of Contents
Key Takeaways
- Trace the pattern onto tracing paper with accuracy, ensuring a generous border around the design for future embellishments.
- Transfer the design to fabric by basting the pattern with large, removable stitches, starting from the center and working outwards to secure the design for precise embroidery.
- Embroider through the tracing paper using consistent stitches such as backstitch, stem stitch, or running stitch, then carefully remove the basting and paper to reveal the transferred pattern.
- Finalize the embroidery by keeping stitches close for design integrity and aesthetics, adjusting thread tension to avoid puckering, and gently removing any remaining tracing paper and transfer marks.
Choosing Materials and Tools
When you’re ready to transfer your embroidery design onto fabric, the right materials and tools are crucial for a successful outcome.
You’ll want to select crayons and freezer paper that work well together, ensuring your marks are visible and washable.
A tracing wheel can also be a game-changer, providing precision and ease when transferring patterns.
Opt for tracing paper in colors that contrast with your fabric, so every line is clear and ready for stitching.
Selecting Crayons and Freezer Paper
When embarking on your embroidery journey, selecting the right materials is crucial for ensuring both the quality and durability of your work.
For tracing your designs onto fabric, consider pairing Crayola Washable Large Crayons with Reynolds Freezer Paper. This combination not only promises transfer accuracy but also offers the convenience of freezer paper storage, ensuring your patterns are preserved until you’re ready to bring them to life.
The crayons, known for their vibrant colors and ease of use, serve as an excellent crayon alternative to traditional fabric markers, allowing for clear and washable marks on your fabric. Meanwhile, the durability factors of freezer paper make it an ideal backing for your designs, providing a sturdy yet easily removable layer that complements the tracing paper quality.
This method not only enhances the precision of your pattern transfer but also supports the longevity of your embroidery, ensuring your creations remain as timeless as the art form itself.
Opting for a Tracing Wheel
When you’re diving into the world of fabric design, choosing the right tools can make all the difference.
A tracing wheel, for instance, is a game-changer for transferring patterns accurately onto fabric. Its design, marrying durability with precision, ensures that your stitches align perfectly with your vision.
Whether you’re working with delicate silks or robust denims, the versatility of a tracing wheel caters to all fabric types. Opt for a model that feels right in your hand; ergonomics matter as much as materials.
With a tracing wheel in your toolkit, you’re not just stitching; you’re crafting a masterpiece, stitch by stitch. Remember, the right wheel can remove the guesswork, making your basting and design transfer a breeze.
Choosing Tracing Paper Colors
When choosing tracing paper colors for your embroidery project, consider the fabric texture and the complexity of your design. Color matching is crucial; select a tracing paper color that contrasts well with your fabric to ensure visibility.
Personal preference plays a role, but also consider color fastness—opt for tracing paper that won’t leave permanent marks or bleed color onto your fabric. Different colors like white, yellow, red, blue, or black are available and can be matched according to the color of the fabric you’re working with.
Preparing the Design
When preparing your embroidery design, start by tracing the pattern onto tracing paper with precision and care.
Ensure you leave a generous border around the traced design—about an inch should suffice.
This method sets the stage for a successful transfer to your fabric, allowing you to stitch your design with confidence and accuracy.
Tracing Design Onto Paper
After selecting your materials, you’re ready to bring your embroidery design to life on fabric.
- Place your design beneath the tracing paper, securing it if necessary to prevent movement.
- Using a pencil or fine-tipped pen, carefully trace the outline and details of your design, ensuring transfer accuracy.
- Consider the complexity of your design; intricate patterns may require more attention to detail.
- Think about future embellishment options as you trace, leaving room for creativity in your stitching.
This step sets the foundation for your embroidery project, so take your time to ensure precision and clarity in your tracing methods. Proper paper preparation now will make the subsequent transfer to fabric smoother and more accurate.
Cutting Design With Border
Once you’ve traced your design onto the tracing paper, it’s time to prepare it for transfer. Cutting precision is key here; you’ll want to cut around the traced design, leaving a 1-inch border. This border is crucial for design placement and ensures you have enough space to secure the paper to the fabric.
The paper thickness should be considered to avoid tearing during the stitching process.
| Step | Importance |
|---|---|
| Trace Design | Ensures tracing accuracy |
| Cut with Border | Facilitates design placement |
| 1-inch Border | Allows for secure basting |
| Cutting Precision | Prevents misalignment |
| Consider Paper Thickness | Avoids tears during stitching |
Transferring the Design
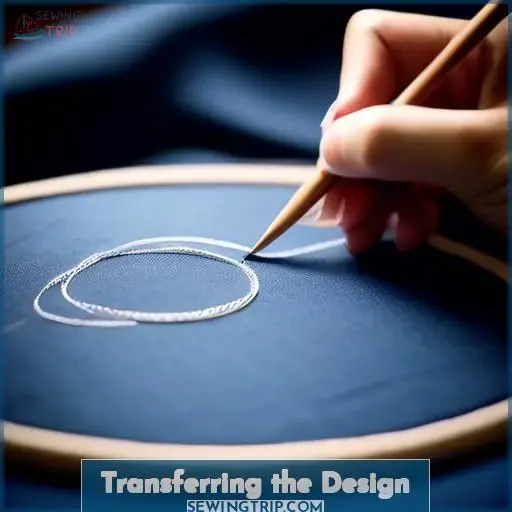
When it comes to transferring your embroidery design onto fabric, the process can be both exciting and meticulous. You’ll start by basting the pattern directly onto your chosen fabric, ensuring it’s securely in place for the detailed work ahead.
As you embroider through the tracing paper, you’ll select stitches like the backstitch, stem stitch, or running stitch, keeping them tight and close to capture the essence of your design.
Finally, removing the basting and paper reveals your craftsmanship, a moment of unveiling that’s both satisfying and a testament to your skill.
Basting Pattern to Fabric
After tracing your design onto paper and cutting it out with a border, it’s time to transfer this design to your fabric, a crucial step that bridges your preparation with the actual embroidery.
- Cut your basting thread to a manageable length. Avoid lengths that are too long as they can tangle easily.
- Thread your needle with the basting thread. Choose a needle that’s easy to handle and appropriate for the fabric and thread thickness.
- Baste the design onto the fabric using large, easily removable stitches. Start from the center of the design, working your way outwards to ensure the design stays aligned and doesn’t shift.
This method secures your design in place, allowing for precise embroidery. Basting isn’t just a preliminary step; it’s a bridge that ensures your creative vision is accurately transferred onto the fabric, ready for the embroidery to bring it to life.
Embroidering Through Paper
Embroidering through paper is a clever twist in the art of embroidery, allowing for precise pattern transfer and stitch consistency.
As you embark on this phase, you’ll thread your needle with your chosen embroidery floss, ready to bring your design to life. The key here is to maintain stitch consistency, ensuring each stitch is placed with care and attention to detail.
Whether you’re employing backstitch, stem stitch, or running stitch, keep your stitches close together to capture the essence of your design accurately. This method not only aids in material selection by allowing you to work on a variety of fabrics but also simplifies paper removal.
Once your embroidery is complete, the tracing paper you’ve stitched through becomes a guide you can tear away, revealing a beautifully transferred pattern beneath. This innovative approach marries creativity with technical proficiency, offering a satisfying journey from pattern transfer to the final embroidered masterpiece.
Finalizing the Embroidery
When finalizing your embroidery, mastering a few key stitching techniques can elevate your project.
You’ll want to familiarize yourself with the backstitch, stem stitch, and running stitch, ensuring your stitches are kept close together for a polished look.
This approach not only enhances the durability of your work but also its aesthetic appeal, making your embroidered design stand out with precision and clarity.
Stitching Techniques: Backstitch, Stem Stitch, Running Stitch
When stitching your design, you’ll employ a variety of techniques to ensure a beautiful finish.
- Backstitch: This sturdy line stitch is perfect for outlines. Keep your stitches even and fabric tension consistent for a smooth appearance.
- Running stitch: A basic but versatile stitch. Aim for uniform stitch lengths and intervals to maintain a neat look.
- Stem stitch: Ideal for curves, this stitch creates a ropelike effect. Ensure thread weight is suitable for your fabric to prevent puckering.
- Fabric tension: Keep it even to avoid distorting your design. Adjust as needed for different stitch types.
- Thread weight: Choose the right weight for your fabric and stitch choice to enhance the embroidery’s quality and durability.
Keeping Stitches Close
When finalizing your embroidery, it’s crucial to keep your stitches close to ensure the design’s integrity and aesthetic appeal.
Needle selection is key; choose one that glides through your fabric texture without distorting it.
Adjust thread tension to avoid puckering, especially with complex designs.
Consider stitch length in relation to design complexity—shorter for intricate areas, longer for straight paths.
Close stitches prevent gaps and create a smooth, professional finish.
Removing the Paper
Once you’ve finished your embroidery, it’s time to remove the tracing paper.
Gently tear away the paper from the edges, being careful not to disturb your stitches.
If any stubborn bits remain, use your tweezers to meticulously pick them out, ensuring a clean finish to showcase your design.
Tearing Away Tracing Paper
When it comes to removing tracing paper after embroidering your design, it’s a delicate process that requires patience and a gentle touch.
- Start at the Edges: Begin by carefully tearing away the tracing paper from the edges of your embroidery. This initial step helps in minimizing the risk of disturbing your stitches.
- Work in Sections: Remove the paper in small sections rather than attempting to pull it off in one go. This method gives you more control and reduces the chance of damaging your work.
- Use Tweezers for Precision: For those stubborn bits of paper that cling to your stitches, tweezers become an invaluable tool. They allow you to grasp and remove tiny pieces without pulling on the embroidery thread.
- Keep Stitches Intact: As you remove the paper, place your other hand on the fabric to support your stitches. This prevents them from being stretched or pulled out of shape.
- Troubleshooting Tips: If you encounter resistance, don’t force the paper out. Instead, gently tease it away from the stitches, and consider using a damp cloth to soften any particularly stubborn areas.
This process, while meticulous, ensures that your embroidery remains pristine and undamaged, revealing the full beauty of your work without any remnants of the tracing paper.
Removing Stubborn Paper Bits With Tweezers
After you’ve torn away the tracing paper from your embroidery, you might find some stubborn bits clinging to your stitches.
With patience and precision work, use them to gently pluck out these pesky remnants.
Your dedication here ensures that your embroidery emerges pristine, showcasing your skill and attention to detail.
Cleaning Up
When it comes to cleaning up after transferring your embroidery design onto fabric, it’s important to handle the process with care to ensure the durability of your embroidery.
After you’ve completed your stitching, you’ll want to remove any remaining marks from the tracing paper or other transfer methods. Washing out these marks can be done by gently dabbing with a wet cloth or sponge, or for more stubborn marks, using specific removal techniques such as a putty eraser for carbon paper or a mixture of white vinegar and water for chalk marks.
It’s crucial to choose the right method based on the type of marking tool you’ve used, as some, like heat transfer pens, create permanent marks that can’t be removed. Remember, the goal is to maintain the integrity of your embroidery while ensuring a clean finish.
Washing Out Marks
After you’ve meticulously embroidered your design, ensuring every stitch is in place, the next step is to remove any remaining marks from the transfer process.
- Check the fabric type: Different fabrics react differently to water and soap. Delicate fabrics may require a gentler approach, while sturdier materials can withstand more vigorous washing.
- Adjust water temperature: Use lukewarm water for most fabrics, but always refer to the fabric’s care instructions. Some materials may shrink or fade in hot water.
- Mind the soap residue: Ensure all soap is thoroughly rinsed out to avoid leaving any residue that could attract dirt or become visible after drying.
- Prevent fading: To keep colors vibrant, limit the time your fabric soaks and avoid harsh detergents. Adding a half cup of vinegar to the wash can help set the colors and act as a natural fabric softener.
By following these steps, you’ll ensure your embroidered piece remains as beautiful as the effort you put into it, with colors that stay true and a finish that’s clean and professional.
Ensuring Durability of Embroidery
After washing out the marks from your embroidery project, it’s crucial to ensure the durability of your work.
Selecting the right embroidery thread strength is essential; opt for threads that balance delicacy with durability. Needle size selection plays a pivotal role too; a needle too large can damage the fabric, while one too small may strain the thread.
Consider fabric reinforcement techniques, especially for delicate materials, to prevent puckering and maintain the integrity of your design. Stitching density can affect both the aesthetic and the longevity of your embroidery; too dense, and the fabric may become stiff, too sparse, and the design may not hold up over time.
Lastly, adopt material cleaning techniques that are gentle yet effective, ensuring your embroidered piece remains vibrant and intact through washes and wear.
By paying attention to these aspects, you’ll craft embroidery works that stand the test of time, embodying both beauty and resilience.
Frequently Asked Questions (FAQs)
Can tracing paper be reused multiple times for transferring designs onto fabric?
Yes, tracing paper can be reused multiple times for transferring designs onto fabric, especially if you handle it carefully and avoid tearing.
How do you prevent tracing paper from slipping while transferring a pattern onto stretchy or slippery fabrics?
Imagine your fabric as a slippery fish that you’re trying to hold onto without it wriggling away.
To prevent tracing paper from slipping on stretchy or slippery fabrics, use pattern weights or pins to secure the paper in place before tracing.
Is there a way to transfer patterns using tracing paper without leaving any residue or marks on delicate fabrics?
To transfer patterns onto delicate fabrics using tracing paper, opt for wax-free tracing paper.
Can tracing paper be used effectively on textured fabrics such as terrycloth or velvet, and if so, how?
You can use tracing paper on textured fabrics like terrycloth or velvet by thread-tracing long edges.
How do you correct mistakes made during the transfer process when using tracing paper on fabric?
To correct mistakes made during the transfer process with tracing paper on fabric, gently erase the marks if using pencil. For washable inks, lightly dab with a damp cloth. For stubborn errors, cover with a small piece of similar fabric or creatively incorporate into your design.
Conclusion
Imagine you’ve just completed a delicate floral pattern, your needle and thread weaving through the fabric like a painter’s brush on canvas.
This journey, from selecting vibrant crayons and tracing paper to the final, satisfying stitch, hasn’t only adorned your fabric with beauty but also enriched your skills in the art of embroidery.
Using tracing paper on fabric, you’ve transformed a simple piece of cloth into a masterpiece, a testament to your creativity and technical prowess.
As you move forward, let this project be a reminder of the endless possibilities that tracing paper on fabric holds, unlocking doors to new designs and stories waiting to be told on the canvas of your choice.


