This site is supported by our readers. We may earn a commission, at no cost to you, if you purchase through links.
 Cutting a buttonhole can seem daunting, but with the right technique, it’s a breeze. Imagine you’re about to add the final touch to your handmade garment—the buttonhole.
It’s not just a slit in the fabric; it’s the gateway for your button, the detail that can elevate your piece from homemade to professionally crafted. You’ve sewn them with precision, and now it’s time to slice through the fabric with confidence.
Whether you’re using a chisel-like buttonhole cutter for a clean cut or a seam ripper for a quick snip, mastering this skill will make your sewing projects look and function beautifully. Let’s dive into the steps to ensure your buttonholes are as perfect as the rest of your creation.
Yes, to cut a buttonhole, use a buttonhole cutter or a seam ripper, placing pins at the ends as a barrier to prevent overcutting.
Table Of Contents
Key Takeaways
- Use a buttonhole cutter for precise and clean cuts, ensuring not to cut through the stitching of the buttonhole.
- Place sewing pins at the ends of the buttonhole to act as barriers, preventing accidental cuts through the stitching when using a seam ripper or scissors.
- Optimize your workspace with proper lighting, a cutting mat, and sharpened tools to facilitate accurate and safe cutting.
- After cutting, protect the integrity of the buttonhole by applying fray check to prevent fraying and ensure a neat finish.
Preparing Your Workspace
To prepare your workspace for cutting a buttonhole, start by gathering all the necessary tools and materials.
Lay out your cutting mat and position your fabric on it, ensuring it’s smooth and flat. This setup is crucial for achieving clean cuts and avoiding damage to your fabric or work surface.
Gather Necessary Tools and Materials
To prepare your workspace for cutting a buttonhole, start by selecting the right tools and materials. This includes a sharp buttonhole cutter, a durable cutting mat, a reliable seam ripper, sewing pins for precision, and scissors for any additional trimming.
Prioritize fabric selection and preparation to ensure a smooth cutting process. Sharpen your tools beforehand to guarantee clean cuts and take necessary safety precautions to avoid accidents.
Properly setting up your fabric on the cutting mat, with no underlying layers, is crucial for accurate work. This preparation phase is essential for creating precise holes in your fabric, leading to professional-looking buttonholes in your sewing projects.
Set Up Cutting Mat and Fabric
Once you’ve gathered your tools, it’s time to set up your workspace for cutting buttonholes.
- Align your fabric on the cutting mat, ensuring it’s smooth and flat to avoid any unwanted creases.
- Check your posture; you should be comfortable and able to apply even cutting pressure without straining.
- Optimize lighting conditions to clearly see your work and avoid mistakes.
- Secure the fabric with pins if necessary to maintain tension and prevent shifting during cutting.
Cutting Techniques
When it comes to cutting buttonholes, precision and care are key to achieving a clean finish.
You’ll want to use a buttonhole cutter or a seam ripper, depending on what you have on hand and the fabric you’re working with. Both tools can effectively open buttonholes, but a buttonhole cutter provides a very clean cut without the risk of cutting through the stitching.
A seam ripper is a more common tool that requires a bit more caution to avoid damaging the buttonhole.
Using a Buttonhole Cutter
Once your workspace is prepped with the necessary tools and materials, it’s time to focus on the buttonhole cutter—a precise tool for cutting holes in buttonholes.
With blade sharpness tailored for different buttonhole sizes, it ensures clean cuts without damaging the stitching. Always observe safety precautions, like using a cutting mat to protect your surface and keeping fingers clear of the blade.
This tool is especially useful for thicker fabrics where precision is key. Machine compatibility isn’t an issue; whether you have a buttonhole foot or not, the cutter can create perfect buttonholes, enhancing your garment’s finish.
Using a Seam Ripper
When using a seam ripper to open buttonholes, it’s essential to approach the task with precision and care. Start by positioning glass head pins at each end of the buttonhole. These pins serve as markers and protect the fabric’s integrity during the cutting process.
With the seam ripper in hand, gently insert its pointed end into the fabric at one end of the buttonhole. Carefully push the seam ripper through the fabric, moving towards the center of the buttonhole.
This method ensures that you’re only cutting the necessary stitches without damaging the surrounding fabric.
Once you reach the midpoint, repeat the process from the other end, ensuring the buttonhole is cleanly opened without fraying or uneven edges. This technique, utilizing a seam ripper, contrasts with using a buttonhole cutter, which is designed for more precise cuts but requires a cutting mat to protect surfaces.
The choice between a seam ripper and a buttonhole cutter often depends on the tools available and the specific needs of the project, such as the fabric type and the buttonhole’s size.
Buttonhole Placement and Spacing
When it comes to cutting buttonholes, precision is key. You’ll want to start by placing the first buttonhole at the largest circumference of the garment, which is typically around the bust area.
From there, work your way up and down, spacing the subsequent buttonholes at regular intervals. It’s important to adjust the placket to match any adjustments made to the shirt front and to add or subtract length to the placket pieces as necessary.
For those with a full bust, smaller buttons or covered snaps can be considered to prevent gaping. Use a tape measure or ruler to mark the locations of the buttonholes accurately, and consider using a button spacer for precise spacing.
Before sewing the buttonholes onto the garment, it’s a good practice to test the spacing on a scrap of fabric.
Determining First Buttonhole Placement
To determine the first buttonhole placement, start at the largest circumference of your body, typically the bust, to prevent gaping.
Place buttons at regular intervals from this point, ensuring buttonhole uniformity.
For those with a full bust, consider smaller buttons or covered snaps for a secure fit.
Use a buttonhole foot on your machine for precise sewing of buttonholes and placing buttons.
Marking Buttonhole Locations
Once you’ve determined the first buttonhole placement, it’s time to mark the rest.
For buttonhole spacing, use a tape measure or ruler to ensure even intervals between each. Remember, buttonhole size and shape should complement the button style you’ve chosen.
Whether you’re working with standard eyelets or keyhole buttonholes, precision is key. Consider using a buttonhole chisel or an eyelet tool for clean cuts. Sewing notions like these aid in achieving professional results.
Regular testing on scrap fabric can help refine your technique, ensuring each buttonhole is perfectly placed and spaced for your garment.
Adjusting for Different Sizes
When adjusting for different sizes in buttonhole placement and spacing, it’s crucial to consider the unique characteristics of your project.
- Account for different fabrics, as they may affect the size and placement of buttonholes.
- Adapt to various shapes and sizes of buttons; each may require a unique approach.
- Learn how to cut a buttonhole that complements the garment’s design and function.
Sewing Buttonholes
Before you start sewing buttonholes, it’s essential to practice on scrap fabric to get a feel for the process and ensure precision.
Stabilizing the fabric with interfacing is a crucial step that prevents puckering and helps maintain the shape of the buttonhole.
Once you’ve sewn the buttonholes, reinforcing them by sewing around the edges twice can increase their durability and give a professional finish.
Practice on Scrap Fabric
Before attempting to sew buttonholes on your final garment, it’s crucial to practice on scrap fabric.
It gives you the opportunity to test the stitch durability and fray prevention methods. By practicing, you can also refine your technique for fabric stabilization and perfect your pin placement.
This preparatory step is essential for achieving professional-looking buttonholes and avoiding mistakes on your actual project.
Stabilizing Fabric With Interfacing
When it comes to sewing buttonholes, stabilizing the fabric with interfacing is a crucial step that can’t be overlooked.
Interfacing selection and placement are key to ensuring the durability and neat appearance of your buttonholes. There are various interfacing types available, each suited to different fabric weights and types.
For instance, lightweight fusible interfacing is ideal for woven fabrics, while knit interfacing should be used with knit fabrics to maintain the fabric’s stretch. Proper interfacing not only prevents the buttonhole from stretching out but also supports the fabric during stitching, making the process smoother and the results more professional.
Sewing and Reinforcing Buttonholes
When sewing and reinforcing buttonholes, consider the following factors:
- Adjust the buttonhole size to accommodate the button’s thickness, ensuring a snug fit without strain.
- Choose fabric wisely; heavier fabrics may require keyhole buttonholes for durability, while lighter fabrics work well with standard or no bartack styles.
- Prevent fraying by applying fray check before cutting the buttonhole open.
- Adjust thread tension to achieve a balanced stitch without visible bobbin thread, enhancing the buttonhole’s appearance and strength.
- Practice on scrap fabric to refine your technique, ensuring each buttonhole is consistent and durable.
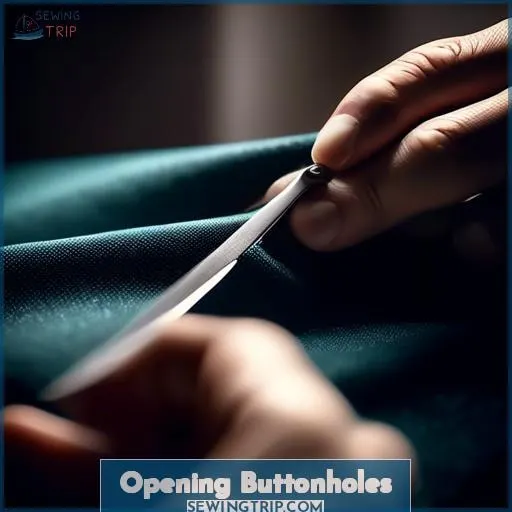
Opening Buttonholes
Once you’ve sewn your buttonholes, it’s time to open them up.
You’ll want to protect the stitching by placing pins at each end, ensuring you don’t cut through the threads.
With precision tools like a seam ripper or a buttonhole cutter, you can make clean cuts.
Finish by trimming any loose threads for a neat result.
Protecting Stitching With Pins
When cutting open a buttonhole, it’s crucial to protect the stitching to maintain the integrity of the buttonhole’s structure. To do this, you’ll want to use glass head pins, which are recommended due to their heat resistance and ease of handling.
Insert the pins at each end of the buttonhole, within the tack area, to act as a barrier against cutting too far and damaging the stitching.
Choose pins that are the appropriate size for the task—neither too large to obstruct your cutting path nor too small to handle easily. The color of the pins can be helpful for visibility against your fabric, ensuring you don’t lose them in the material or accidentally leave them in the garment.
After cutting the buttonhole, safely dispose of any pins that become bent or dull to avoid future accidents. Store your pins properly in a pin cushion, magnetic holder, or any other storage method that keeps them organized and easily accessible for your next project.
Using a buttonhole cutter can eliminate the need for trimming after cutting, as it can create clean cuts without fraying the fabric edges. However, if you’re using a seam ripper or scissors, the pin placement technique is a safeguard against cutting through the stitching.
Remember to test your cutting tools on a scrap of fabric before proceeding to your garment to ensure a clean cut and to familiarize yourself with the tool’s handling. Whether you’re using a seam ripper, fabric knife, or a specialized buttonhole cutter, the goal is to achieve a neatly opened buttonhole that complements the finished garment.
Cutting With Precision Tools
After protecting your buttonhole stitching with pins, it’s time to focus on cutting with precision tools.
Whether you’re working with delicate silks or sturdy denim, choosing the right tool is crucial. A sharp blade ensures clean cuts without fraying, while safety considerations like using a non-slip handle and keeping blades covered when not in use protect you and your fabric.
Regular tool maintenance, like keeping blades sharp, extends their life and improves performance. For those who prefer hand sewing techniques, precision tools offer an alternative to achieve professional-looking buttonholes on various fabric types.
Finishing Touches
After you’ve used your buttonhole cutter or seam ripper to open the buttonhole, it’s time for the finishing touches.
If the buttonhole placement or spacing isn’t perfect, you may need to make slight adjustments. When sewing on buttons, ensure they align with the buttonholes for a professional finish.
Sewing on Buttons
When it comes to sewing on buttons, the process might seem daunting at first, but it’s actually quite straightforward once you get the hang of it.
You’ll want to start by measuring the distance between the holes on your button; this measurement will determine the stitch width on your sewing machine. It’s crucial to test these settings on a scrap piece of fabric first to ensure accuracy and prevent any mishaps.
Additionally, applying a dab of washable glue or a piece of transparent tape can help keep the button in place while you sew, making the process smoother and more efficient.
Machine Sewing for Strength
After sewing your buttonholes, it’s time to ensure they’re strong enough to withstand use.
- Use interfacing behind the buttonhole for added reinforcement.
- Select the appropriate buttonhole thread for strength and durability.
- Adjust the buttonhole size to match the button, ensuring a snug fit.
- Double-stitch buttonholes for extra durability, if your machine allows.
These steps will help maintain the integrity of your buttonholes, preventing fraying and ensuring they hold up to the stress of buttoning and unbuttoning.
Measuring and Setting Stitch Width
When sewing on buttons, especially with a sewing machine, it’s crucial to measure and set the stitch width accurately to ensure the stitches align perfectly with the buttonholes.
This process involves considering the button size, which directly influences the required stitch length. For instance, larger buttons may necessitate a wider stitch width to accommodate their size.
Additionally, selecting the appropriate needle and adjusting the thread tension are essential steps to prevent fabric puckering and ensure the durability of the sewn button. The fabric type also plays a significant role; heavier fabrics might require a stronger needle and higher thread tension.
By carefully adjusting these settings, you can achieve a secure and aesthetically pleasing button attachment.
Testing on Handwheel
Before you dive into sewing on buttons, it’s crucial to test your machine’s settings.
- Turn the handwheel slowly to check the needle’s position.
- Observe the hand movements; they should be smooth and precise.
- Acknowledge the practice importance; it prevents mishaps.
- Adjust the stitch width if necessary for the button size.
- Confirm machine functionality to avoid any surprises during the actual sewing.
Frequently Asked Questions (FAQs)
How do I prevent my fabric from puckering around the buttonhole when cutting it?
To prevent fabric puckering around buttonholes, ensure you’re using interfacing to stabilize the area before sewing.
Also, consider using a buttonhole punch or carefully placing pins at each end of the buttonhole to avoid cutting through the stitching, which can lead to puckering.
What is the best way to ensure my buttonholes are evenly spaced without a button spacer?
To ensure evenly spaced buttonholes without a spacer:
Measure the distance between the top and bottom buttonholes.
Divide this distance by the number of gaps.
Mark each interval with a ruler or tape measure.
Can I create custom-sized buttonholes if my sewing machine’s buttonhole foot doesn’t match my button size?
Yes, you can create custom-sized buttonholes even if your sewing machine’s buttonhole foot doesn’t match your button size.
To sew buttonholes without an automatic function, you can use only the zigzag stitch on your sewing machine. This method is useful if your sewing machine lacks a buttonhole function or if the automatic function cannot handle certain threads or fabrics.
It’s important to practice on scrap fabric and to tweak the settings on your machine until you achieve the desired result. You should also place a pin at the end of the buttonhole opening to prevent cutting too far when opening the buttonhole.
When using a regular zigzag foot and the zigzag setting on your machine, set the stitch length almost to zero so that it barely moves forward as you stitch. Start on one end of the marked buttonhole with a wide zigzag, then switch to a smaller zigzag to sew a straight line to the other end.
After sewing the end bartack with a full zigzag width, set the zigzag back to the smaller setting and sew in reverse to create a parallel line to the first one.
If you don’t have a buttonhole foot, you can still make buttonholes by measuring your button to determine the size of the buttonhole. After drawing the buttonhole outline on your fabric, use a zigzag stitch with adjusted settings to sew the buttonhole.
Experiment with the stitch length and width to find the best settings for your fabric and button size. Once you’ve sewn the buttonhole, cut it open carefully without cutting any stitches.
In summary, custom-sized buttonholes can be created by manually adjusting the zigzag stitch settings on your sewing machine and carefully marking and sewing the buttonhole area, even if you don’t have a buttonhole foot or automatic buttonhole function.
How do I repair a buttonhole if I accidentally cut the stitches or it begins to fray?
To mend a frayed buttonhole, apply fray check to reinforce the area.
Then hand-stitch around the buttonhole using a buttonhole stitch for a durable fix.
If you’ve cut the stitches, re-sew the buttonhole or apply small patches of fabric beneath and sew over the area for reinforcement.
Is there a difference in cutting techniques for different types of fabric, such as knit versus woven?
Different fabrics do require different cutting techniques; knit fabrics need reinforcement to prevent stretching.
Woven fabrics may need less stabilization but precise cutting to avoid fraying.
Conclusion
Nearly 60% of sewers agree that mastering buttonholes is a crucial skill for elevating their projects from homemade to professional.
Now that you’ve navigated through the steps of creating and cutting buttonholes, you’re well on your way to adding those polished, functional details to your garments.
Whether you’re using a buttonhole cutter for a clean finish or a seam ripper for a quick fix, each buttonhole you cut brings you closer to perfection. Keep experimenting with placement, spacing, and sewing techniques to find what works best for you.
Your dedication to mastering how to cut a buttonhole will surely pay off, making your handmade garments look and function beautifully.

