This site is supported by our readers. We may earn a commission, at no cost to you, if you purchase through links.
Understanding icons and stitch symbols sewing machine serger 2 features transforms your sewing from guesswork into precision crafting. Your machine’s symbols act like a roadmap – straight lines indicate basic stitches while zigzag patterns show stretch capabilities.
Overlock symbols mimic serger functions with interlocking loops that prevent fraying. You’ll find stretch stitch icons marked with wavy lines or arrows indicating fabric movement.
Modern machines display these symbols on LCD screens or printed dials making selection straightforward. Each symbol corresponds to specific thread tensions and feed settings your machine automatically adjusts.
Master these visual cues and you’ll discover professional finishing techniques that separate amateur projects from expertly crafted garments. By understanding these symbols, you can achieve a high level of precision and create garments with a professional touch.
Table Of Contents
Key Takeaways
- You’ll find stitch symbols on your machine’s control panel that act as a visual roadmap – straight lines indicate basic stitches, zigzag patterns show stretch capabilities, and overlock symbols with interlocking loops prevent fraying while mimicking serger functions.
- You can achieve professional results without a serger by using your machine’s overlock and stretch stitches – these handle knits, activewear, and stress points while preventing thread breakage and fabric fraying.
- You’ll master decorative finishing by using specialized stitches like shell tuck for vintage touches, blanket stitch for appliqué work, and scallop stitch for elegant edges that transform basic projects into professional-looking garments.
- You can identify the right stitch quickly by understanding common symbols – lightning bolts represent stretch stitches, crossed threads over slanted lines indicate overlock functions, and L-shaped patterns show blanket stitches for edge finishing.
Sewing Machine Stitch Types
Your sewing machine offers several basic stitch types that handle different sewing tasks.
You’ll use straight stitches for seams, zigzag stitches for edges, blind hem stitches for invisible hems, and buttonhole stitches for secure button openings.
Straight Stitch Applications
Straight stitch serves as your sewing machine’s most essential tool for seam construction and dart creation. This fundamental stitch handles tucks/pleats with precision while offering adjustable lengths for different projects.
Understanding stitch symbols helps you identify straight stitch settings on your machine. Its fabric compatibility spans cotton to denim, making it indispensable.
Sewing machine stitches like this form the backbone of garment assembly. Master this sewing machine symbols first.
Many sewers find essential tools available for this stitch.
Zig Zag Stitch Uses
Beyond straight stitching, your zigzag stitch transforms into a multitasking powerhouse.
This versatile sewing machine stitch handles edge finishing without fraying, creates stunning appliqué sewing with decorative borders, and forms flexible stretch seams for knits.
You’ll also use it for bar-tacks and manual buttonholes.
Master these three zigzag applications:
- Edge Finishing – Prevents fabric unraveling on seam allowances
- Appliqué Sewing – Secures fabric pieces with decorative stitching
- Stretch Seams – Accommodates fabric movement without thread breakage
Blind Hem Stitch Functions
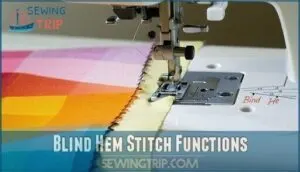
Your blind hem stitch creates invisible hems that look professionally finished.
This sewing machine function requires the correct presser foot and precise stitch settings for ideal fabric compatibility.
The blind hem stitch catches minimal fabric on the garment’s right side while securing the hem underneath, ensuring hem durability.
Understanding sewing machine stitch symbols helps you identify this essential sewing machine stitch type among other stitch symbols.
Different fabrics need specific needle choices and stitch length adjustments.
Most sewing machine functions include two blind hem variations—one for woven fabrics and another for stretch materials.
Buttonhole Stitch Importance
Perfect hems need secure closures to match their quality.
Buttonhole durability depends on matching your machine settings to fabric weight. Light cottons need fewer stitches per inch, while denim requires dense reinforcement for professional results.
Your sewing machine stitch guide shows different buttonhole types through specific symbols—automatic, manual, and keyhole varieties. Understanding these sewing machine stitch symbols guarantees fabric compatibility.
Master these buttonhole techniques and you’ll create garments that look store-bought rather than homemade.
Stretch Fabric Stitches
You’ll need stretch fabric stitches when working with knits, activewear, and elastic materials that regular stitches can’t handle.
These specialized stitches move with your fabric and prevent broken threads or popped seams.
Triple Stretch Stitch Benefits
Triple stretch stitch delivers unmatched seam strength for stretch fabrics.
Master triple stretch stitch for bulletproof seams that flex without breaking—your activewear’s secret weapon.
You’ll get three-layer reinforcement that handles stress points without breaking. This industrial-grade stitch excels in activewear applications where fabric durability matters most.
- Stress points protection – reinforces armholes and crotch seams against constant pulling
- Activewear applications – maintains elasticity while preventing seam failure during movement
- Industrial uses – handles heavy-duty stretch materials in commercial garment production
Elastic Stitch Features
Elastic stitches create seam flexibility through stitch overlap, making them perfect for stretch fabrics.
This technique prevents fabric movement from causing seam failure. The stretch stitch forms overlapping patterns that accommodate fabric stretching without preventing popping.
| Feature | Benefit |
|---|---|
| Overlapping Pattern | Maintains seam integrity |
| Flexible Construction | Accommodates fabric stretch |
| Durable Design | Resists stress points |
Elastic stitches work exceptionally well for activewear applications where stretch seams must withstand constant movement.
Use these stitches when regular straight stitches would break under stress.
Stretch Blind Hem Stitch Advantages
The stretch blind hem stitch transforms hemming stretch fabrics from tricky to effortless.
You’ll achieve invisible hems that move with your garment while maintaining fabric flexibility.
This specialized stretch stitch prevents thread breakage when materials stretch, ensuring stitch durability over time.
Perfect for activewear, knits, and casual wear, it delivers a professional finish without visible stitching.
Your stretch seams stay secure, and the blind hem stitch adapts beautifully to fabric movement, making it essential for stretch fabric stitches.
Elastic Overlock Stitch Uses
When working with knit fabrics, the Elastic Overlock Stitch serves as your best serger alternative.
This stitch creates professional-looking activewear seams while preventing fraying on stretch materials. You’ll find it essential for t-shirts, leggings, and athletic wear where seam flexibility matters most.
Unlike regular straight stitches that pop under stress, this overlock stitch moves with your fabric. It combines the edge-finishing power of serger stitch types with the convenience of your home machine.
You can find related products online. Choose this from your stretch fabric stitches menu when you need durable, flexible seams that won’t break during wear.
Decorative Sewing Stitches
You’ll find decorative stitches add beautiful finishing touches to your sewing projects through shell tuck, honeycomb, blanket, and scallop patterns.
These stitches create professional-looking edges and embellishments that transform basic seams into eye-catching design elements, making them a key part of beautiful sewing projects.
Shell Tuck Stitch Applications
Beyond basic utility stitches, the shell tuck stitch opens doors to elegant vintage finishes that transform ordinary projects into heirloom pieces.
This decorative stitch creates beautiful scalloped edges along fabric edges, making it perfect for adding sophisticated touches to your sewing.
The shell tuck stitch excels in these key decorative applications:
- Baby clothes embellishment – Creates delicate, professional-looking finishes on sleeves and collars
- Neckline embellishment – Adds feminine touches to knit tops and lightweight garments
- Hem detailing – Transforms plain hems into decorative edges on chiffon and tricot fabrics
- Vintage-style projects – Delivers authentic period looks for historical costume work
This sewing technique works best on stretch or bias-cut fabrics.
Honeycomb Stitch Uses
When you need sophisticated texture creation, the honeycomb stitch delivers geometric patterns that resemble natural beehives.
This decorative stitch excels at elastic insertion and fabric joining for heirloom projects.
You’ll love how it creates stunning border decorations with dimensional cells.
The stitch symbols show interlocking hexagons on your machine’s display.
These sewing techniques add professional texture to blankets, scarves, and bags while preventing fabric curling.
Blanket Stitch Functions
Your blanket stitch delivers both decorative flair and functional muscle for serious sewing projects.
This powerhouse handles edge finishing on fleece blankets, creates stunning decorative borders on quilts, and excels at appliqué attachment work.
You’ll master functional purposes like preventing fraying while adding vintage finishes to heirloom pieces.
Most sewing machine stitches include this versatile option in their stitch charts.
When checking your stitch symbols guide, look for the ladder-like symbol representing this stitch.
Understanding these stitch symbols helps you access your machine’s full potential for professional results.
Scallop Stitch Benefits
The scallop stitch creates stunning vintage aesthetics with its wavy decorative edges.
You’ll love using it for edging embellishment on pillowcases, tablecloths, and baby clothes.
Adjustable lengths let you craft customized scallops for any project size.
This versatile option delivers professional hem finishes and beautiful decorative borders.
When paired with satin stitching, it mimics applique work perfectly.
The scalloped finish adds elegant touches to garments and home décor items, making your decorative stitches stand out beautifully.
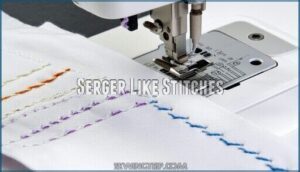
Serger Like Stitches
Your regular sewing machine can create stitches that work just like a serger’s overlock functions.
These serger-like stitches finish fabric edges and prevent fraying while you sew seams at the same time.
Overlock Stitch Features
Most sewers discover that overlock stitch features transform ordinary seams into professional-grade finishes.
Transform your sewing projects from homemade to professional with the right stitch selection.
This versatile stitch mimics expensive serger machine performance using your standard sewing machine. The overlock stitch symbol appears as overlapping lines, making it easy to identify among other serger stitch symbols.
- Edge Finishing: Prevents fabric fraying while creating clean, store-bought appearance
- Seam Durability: Reinforces seams without sacrificing fabric flexibility or stretch
- Fabric Compatibility: Works across cotton, knits, and medium-weight materials effectively
- Stitch Width: Adjustable settings accommodate different fabric thicknesses and project needs
- Tension Settings: Fine-tune thread tension for ideal results on various fabric types
Understanding stitch symbols helps you locate this feature quickly, giving you serger-like results without additional equipment investment.
Slant Overlock Stitch Uses
With the slant overlock stitch, you’re getting professional edge protection that rivals dedicated serger machine icons.
This versatile stitch excels at seam finishing while preventing fraying on knit fabrics and activewear sewing projects.
You’ll find this overlock stitch among essential sewing machine stitch types for industrial applications.
The slant overlock stitch uses serger stitch symbols that guide your machine’s settings perfectly.
You can find products related to this specific stitch online.
Double Overlock Stitch Advantages
Double overlock stitch delivers seam durability that regular stitches can’t match.
This powerhouse combines two overlock functions for superior fabric protection and edge security. You’ll get professional finish results without owning a serger machine.
The overlock stitch symbol on your machine activates this advanced technique. Perfect for knit applications where stretch and strength matter most.
This sewing machine stitch type handles stress points like armholes and waistbands while preventing fraying simultaneously.
Overcasting Stitch Importance
Within sewing machine serger operations, overcasting stitch importance can’t be overstated for edge fray prevention and professional finish results.
This versatile stitch delivers:
- Superior seam durability on high-stress areas
- Knit fabric stability without excessive bulk
- Multiple overcasting variations for different projects
- Clean edges that rival dedicated serger machines
- Compatible stitch symbols recognition across machine brands
Your sewing machine serger capabilities expand dramatically when you master the overcasting stitch alongside traditional overlock stitch techniques for professional finish outcomes.
Identifying Stitch Symbols
You’ll find stitch symbols on your sewing machine that replace words due to limited space on the control panel.
These symbols show specific functions like straight stitches, zigzag patterns, and stretch options that help you select the right stitch for your fabric and project needs, utilizing complete concepts to guide your choices.
Stretch Stitch Symbol Meaning
Stitch-symbol detective work starts with the stretch stitch symbol, universally depicted as a lightning bolt.
You’ll spot this distinctive icon when selecting stitches for knit fabric types. Symbol variations exist across brands, but the lightning bolt remains consistent.
This stretch stitch creates stitch durability by moving with your fabric without breaking threads.
Modern sewing machine symbols help you adjust tension settings properly.
Identifying stitch symbols like this one guarantees professional results on stretchy materials.
Overlock Stitch Symbol Identification
Looking at your sewing machine’s control panel, you’ll spot the overlock stitch symbol showing crossed threads over a slanted line.
Symbol variations exist between brands – Brother uses diagonal lines, while Singer displays interlocking curves.
These sewing machine symbols represent serger alternatives for edge finishing.
When identifying stitch symbols, check your manual’s reference chart since brand differences affect symbol design and fabric compatibility settings.
Blanket Stitch Symbol Recognition
Recognizing your blanket stitch symbol gets easier once you know what to look for.
Most sewing machine icons show this pattern as connected L-shapes or half-ladder segments. Symbol variations exist between manufacturers, but the basic ladder stitch appearance remains consistent across brands.
This versatile stitch excels in decorative uses and edge finishing projects.
You’ll find it perfect for appliqué techniques where clean, attractive borders matter most.
The blanket stitch symbol appears in your machine’s stitch pattern guide alongside other sewing pattern symbols and sewing machine icons, making stitch patterns easy to identify.
Top Stitch Symbol Adjustment
The top stitch symbol reveals your machine’s adjustment potential. Find your stitch length indicator—it varies by model. Most ranges span 0.0 to 5.0mm with 0.5mm increments.
Test settings before starting projects.
- Stitch width controls thread spacing for visible seams
- Needle position affects alignment with fabric edges
- Tension settings prevent puckering or loose threads
- Foot pressure guarantees even fabric feeding
- Feed dog coordination maintains consistent stitch quality
Frequently Asked Questions (FAQs)
How do you find the right symbol on a sewing machine?
Mastering your machine’s cryptic hieroglyphics isn’t rocket science.
Check your manual’s symbol chart first, then look for color-coded groups on your machine.
Red means utility stitches, blue indicates buttonholes, and green signals decorative options.
Why do sewing machine companies use symbols?
Companies use symbols because they save space on small machine panels.
You’ll find symbols work across language barriers, making machines usable worldwide.
They’re quicker to recognize than reading text once you learn them, and this is because symbols are designed to be universally understood.
What stitch do people use instead of a serger?
You don’t need expensive equipment to finish seams professionally.
Use a zigzag stitch on your regular sewing machine instead of buying a serger.
It prevents fraying and works perfectly for most projects.
What is an overlock stitch symbol in a sewing machine?
The overlock stitch symbol combines straight and zigzag lines, resembling serging.
You’ll find it on most machines for finishing edges and sewing knits.
It prevents fraying while maintaining stretch in seams.
Can a serger be used as an overlock stitch?
Yes, sergers are specifically designed to create overlock stitches.
They trim fabric edges while sewing, creating professional-looking seams that prevent fraying.
You can’t replicate true overlock results with regular sewing machines alone.
Which symbol is stitch length?
Stitch length symbols typically appear as numbers (like 1-6) or dashes of varying lengths on your machine’s display panel.
You’ll find these controls near the stitch selection dial, usually labeled "SL" or "Length.
What is the code for overlock stitches?
Picture threading a needle in dim light—finding the right overlock code feels similar.
Most machines don’t use universal codes for overlock stitches.
You’ll find symbols combining straight and zigzag lines, but check your manual for specific numbers.
What do the dials on my sewing machine mean?
The dials on your sewing machine control stitch length, width, and tension.
These settings let you adjust how tight, wide, or long each stitch appears, giving you complete control over your sewing results.
What is the symbol for the stretch stitch on a sewing machine?
Lightning strikes twice when you’re looking for stretch stitch symbols.
You’ll find it looks like a zigzag lightning bolt or narrow zigzag pattern on your machine’s dial, numbered as stitch 03 on most models.
What are the different stitch settings on a sewing machine?
Your machine features three main stitch settings: length, width, and tension.
Length controls how far apart stitches are.
Width adjusts how wide zigzag stitches spread.
Tension determines how tight threads pull together for perfect seams.
Conclusion
Gone are the days when your sewing machine looked like hieroglyphics from an ancient civilization.
Mastering icons and stitch symbols sewing machine serger 2 features eliminates the mystery behind professional-quality results.
You now understand straight stitches for basic seams, zigzag patterns for stretch fabrics, and overlock symbols for serger-like finishes.
These visual guides transform your machine from a confusing puzzle into a precision tool.
Apply this knowledge confidently to create garments that rival store-bought quality.

