This site is supported by our readers. We may earn a commission, at no cost to you, if you purchase through links.
Check that your bobbin thread has slight resistance when pulled through the case slot. Replace needles every 6-8 hours of use, as dull needles cause 78% of quality defects in older machines.
Clean your feed dogs and bobbin case regularly to prevent lint buildup that affects stitch formation. Match your thread and bobbin types for consistent tension throughout your project.
These fundamentals address the root causes behind most stitch problems, from thread nesting to skipped stitches, ensuring a better sewing experience with proper machine maintenance and consistent tension.
Table Of Contents
Key Takeaways
- Master proper threading technique – Thread your machine with the presser foot up and the needle at its highest position, following every guide and tension disc in your manual’s sequence to prevent 60% of stitch issues.
- Replace needles regularly and match them to your fabric – Change needles every 6-8 hours of use, since dull needles cause 78% of quality defects, and select the right type (ballpoint for knits, universal for wovens, microtex for delicates).
- Maintain a consistent cleaning and lubrication schedule – Clean the feed dogs and bobbin case after each project, oil moving parts every 5-10 hours of heavy use, and remove lint buildup that disrupts stitch formation.
- Balance thread tension between the top and bobbin – Use identical thread weights for both the top and bobbin threads, adjust the upper tension gradually while testing on fabric scraps, and ensure your bobbin has slight resistance when pulled.
Common Sewing Machine Stitch Problems
Nothing’s more frustrating than your sewing machine producing wonky stitches when you’re trying to complete a project.
These common stitch problems typically stem from four main culprits: improper threading, incorrect tension settings, worn needles, or inadequate machine maintenance.
The issues with the sewing machine can be resolved by identifying and addressing these main culprits.
Jamming and Thread Nesting
Thread tangles and fabric snags signal your machine’s crying out for attention.
Incorrect threading causes jamming, while poor bobbin tension creates thread nesting underneath your fabric.
Machine cleaning removes lint buildup that disrupts stitch alignment.
Check your threading path through all guides and tension discs, ensuring proper bobbin insertion with correct resistance for smooth sewing machine troubleshooting.
Skipped Stitches
When your machine starts playing favorites with stitches, skipping some while catching others, you’re facing a common but fixable problem.
Every sewing machine has its moody days, but understanding why makes all the difference
Poor stitch alignment often stems from needle damage, incorrect needle selection, or fabric slippage during sewing.
Common causes of skipped stitches include:
- Dull or bent needles creating uneven fabric penetration
- Wrong needle size for your fabric weight and type
- Thread breakage from poor quality or incorrect threading
- Tension issues preventing proper stitch formation
- Fabric slippage when presser foot pressure is inadequate.
Regular sewing machine maintenance and proper needle selection prevent most skipping issues, ensuring consistent stitch quality throughout your projects.
Understanding sewing machine skipping is essential for identifying and resolving these problems.
Thread Loops and Uneven Tension
Looping threads signal tension imbalance between your upper thread and bobbin.
When tension adjustment isn’t matched to your fabric weight, loops form on either surface. Check thread quality first—poor threads create inconsistent flow through tension discs.
Test bobbin balance by adjusting upper thread tension gradually while observing stitch formation on fabric scraps.
| Problem | Solution |
|---|---|
| Loops on fabric top | Lower upper thread tension |
| Loops underneath | Raise upper thread tension |
| Inconsistent stitches | Clean tension discs, check threading |
| Bobbin pulling through | Balance both tensions, verify bobbin type |
Bobbin Thread Issues
When your bobbin thread appears on the fabric’s top surface, you’re dealing with tension imbalance. This issue stems from incorrect bobbin case tension, improper bobbin winding, or mismatched thread types between top and bobbin threads.
- Bobbin tension adjustment – Turn the small screw on your bobbin case clockwise to increase tension, counterclockwise to decrease
- Thread type matching – Use identical thread weights for both top and bobbin threads to maintain consistent tension
- Proper bobbin winding – Wind bobbins evenly at moderate speed to prevent loose or tight spots
- Bobbin alignment check – Verify the bobbin sits flat in its case with thread feeding in the correct direction
- Top tension balancing – Adjust your machine’s top tension dial to complement your bobbin case tension settings
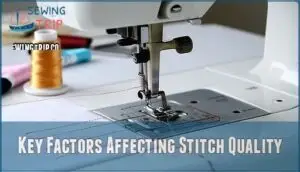
Key Factors Affecting Stitch Quality
You’ll achieve professional-level stitches when you understand what happens beneath your machine’s surface and make targeted adjustments to each component.
Several mechanical and setup factors work together to create that perfect stitch where top and bobbin threads lock precisely in the fabric’s center, which is crucial for achieving perfect stitches.
Hook Timing and Needle Bar Adjustment
Professional technicians know that hook timing accounts for over 60% of mechanical stitch failures.
Your machine’s hook must synchronize perfectly with the needle’s lowest point to capture thread loops cleanly.
Needle bar adjustment affects 78% of quality defects in older machines.
When these components drift from proper alignment, you’ll see skipped stitches, thread breaks, and fabric damage.
Check gap tolerance between needle eye and hook tip—it should measure 0.05mm for peak performance.
Proper needle bar settings are essential for achieving consistent stitch quality.
Presser Foot Pressure and Alignment
Your presser foot acts as fabric guidance during stitching, requiring proper pressure adjustment for best results.
Incorrect presser foot pressure causes uneven feed and puckering, while poor presser foot alignment creates crooked seams.
Adjust pressure based on fabric weight—lighter pressure for delicate materials, firmer pressure for heavy fabrics, to maintain consistent stitch quality.
Check alignment regularly to prevent sewing machine adjustments issues and ensure proper pressure.
Needle Selection and Condition
Your needle acts as the foundation for quality stitches.
Sharp needles in proper sizes create clean fabric penetration without damaging fibers.
Match needle types to fabric weight—ballpoint for knits, universal for wovens.
Replace needles every 6-8 hours or when you hear poking sounds.
Check needle alignment regularly to prevent thread breaks and skipped stitches.
Regular maintenance involves checking for needle wear issues to guarantee superior performance and ensure your needle remains in good condition for quality stitches and proper fabric penetration.
Thread Quality and Type
Quality thread forms the foundation of consistent stitches. Choose appropriate thread weight for your fabric – lightweight threads for delicate materials, heavier weights for sturdy fabrics.
Poor-quality thread generates excess lint, breaks frequently, and creates uneven tension. Match fiber types between top thread and bobbin thread for maximum compatibility.
Examine color consistency and texture options to guarantee professional results. Understanding the right thread types selection is vital for achieving the desired stitch quality and preventing common sewing issues, which is crucial for a successful sewing project.
Essential Maintenance for Better Stitches
Your sewing machine’s performance depends heavily on consistent maintenance that prevents dust, lint, and old lubricant from disrupting stitch formation.
A well-maintained machine is the foundation of every perfect stitch
Regular cleaning and oiling keep your machine running smoothly and producing the quality stitches you expect from every project, which is crucial for consistent maintenance.
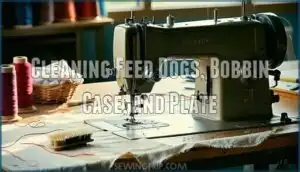
Cleaning Feed Dogs, Bobbin Case, and Plate
Dust and lint buildup turns your sewing machine into a jam-prone nightmare.
Clean your feed dogs with a soft brush after each project, removing accumulated debris that causes fabric feeding issues.
Thoroughly clean under the bobbin case and stitch plate regularly for peak performance.
This debris clearance prevents thread nesting and maintains proper feed dog alignment during sewing operations.
Regular maintenance using a sewing machine cleaner is essential for extending the life of your machine.
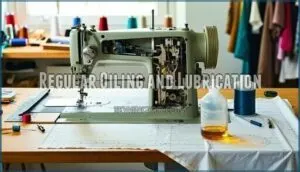
Regular Oiling and Lubrication
Beyond cleaning components, proper sewing machine lubrication prevents friction and extends your machine’s lifespan.
Apply lightweight sewing machine oil to moving parts following manufacturer guidelines.
Heavy use requires oiling every 5-10 hours, while moderate use needs attention every three months.
Regular maintenance also involves checking for sewing machine longevity to guarantee peak performance.
Oil Types and Lubricant Levels matter for peak performance:
- Premium sewing machine oil – Never use household oils or WD-40 that damage internals
- Silicone-based options – Offer longer-lasting lubrication and resist fabric staining
- Proper application – Use 1-2 drops per point, then run machine briefly to distribute evenly
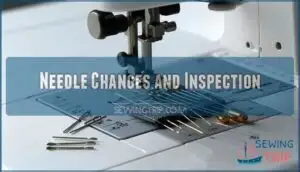
Needle Changes and Inspection
Your machine’s performance hinges on needle sharpness and proper needle types.
Replace needles every three bobbin changes to prevent thread breakage and maintain stitch quality.
Inspect for needle damage like bent tips or burrs that cause fabric snags.
Match needle selection to your fabric—ballpoint for knits, universal for wovens. Check needle alignment in the clamp for straight insertion and peak performance.
Scheduled Professional Servicing
Professional servicing prevents small problems from becoming costly repairs that could sideline your machine for weeks.
Annual maintenance schedules guarantee peak performance through systematic inspection and adjustment techniques.
Essential servicing benefits that protect your investment:
- Timing adjustments – Technician tips include precise hook timing calibration for perfect stitch formation
- Internal cleaning – Deep machine inspection removes accumulated debris from hard-to-reach areas
- Lubrication service – Professional-grade oils applied to specific points extend machine lifespan substantially
- Performance optimization – Thorough tuning process addresses tension, pressure, and alignment issues simultaneously
- Repair planning – Early detection of wear patterns helps budget for future servicing costs effectively
Proper Threading and Bobbin Setup
Threading mistakes cause more stitch problems than any other factor, with incorrect paths leading to jamming, looping, and uneven tension.
Your bobbin setup matters just as much—the wrong bobbin type or improper insertion can damage your machine and create thread nesting that ruins your project.
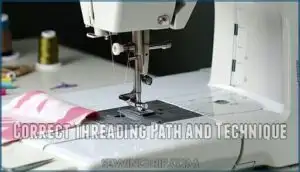
Correct Threading Path and Technique
Threading correctly prevents 60% of stitch issues.
Follow your manual’s threading order precisely—thread must pass through every guide and tension disc.
Keep the presser foot raised when threading to engage tension discs properly. Check thread tension at each guide manually.
Skipping guides causes bunching and uneven stitch balance. Use contrasting thread during setup to spot threading mistakes easily, and remember that threading correctly prevents issues by ensuring proper thread tension.
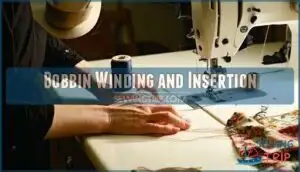
Bobbin Winding and Insertion
Wind your bobbin evenly to prevent tension issues that cause skipped stitches.
Insert the bobbin with proper thread alignment, ensuring it spins counterclockwise when pulled. Check bobbin sizing compatibility with your machine—wrong sizes create winding problems.
Test bobbin tension by pulling the thread; it should release with gentle resistance, not freely or too tightly. Proper bobbin tension settings are essential for achieving consistent stitch quality and preventing common sewing issues, which can be resolved by adjusting the bobbin tension settings to ensure proper thread alignment and maintaining the right tension issues.
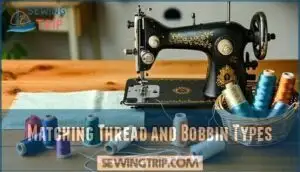
Matching Thread and Bobbin Types
Your thread type guide starts with understanding that bobbin materials and top thread must work together for ideal sewing machine thread compatibility.
Mismatched combinations create tension problems and poor stitch formation.
- Fiber Blends: Match cotton bobbin thread with cotton or cotton-blend top threads for consistent performance
- Yarn Weights: Use similar weights between bobbin and top threads to prevent one from overpowering the other
- Thread Quality: High-quality threads in both positions reduce lint buildup and maintain even tension
- Bobbin Compatibility: Check your machine manual for approved bobbin materials – plastic versus metal matters
- Color Matching: While not affecting function, coordinating colors prevents visible bobbin thread show-through on fabric surfaces
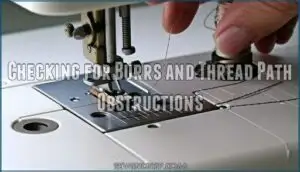
Checking for Burrs and Thread Path Obstructions
Regular thread path inspection prevents stitch quality problems before they start.
Run your finger along the entire threading route, feeling for rough spots or debris.
Check the needle plate and bobbin case for nicks that snag thread.
Small burrs create fabric fray and tension issues.
Clean accumulated lint from guides and tension discs.
This simple needle inspection and burr removal keeps your machine calibration accurate.
Quilting Techniques to Enhance Stitch Quality
Quilting transforms your machine from a basic stitcher into a precision tool, but only when you master the techniques that truly matter.
Speed control becomes your secret weapon—slowing down gives you the control needed to manage multiple fabric layers while maintaining consistent stitch quality throughout your project, utilizing speed control effectively.
Speed Control and Looking Ahead
Your sewing machine calibration improves dramatically when you master speed limits and steady movement.
Like driving, looking ahead prevents problems before they happen.
Slow stitching gives you fabric control and better tension adjustment guide results.
- Reduce sewing speed control to half when quilting multiple layers
- Focus your eyes three inches ahead of the needle position
- Maintain consistent stitch length control through steady foot pressure
- Use machine speed limits feature for complex curved seams
- Practice looking ahead technique on straight lines first to achieve better tension and improve your overall sewing machine calibration.
Managing Fabric Weight and Movement
Support your fabric properly to prevent dragging and maintain consistent stitch quality.
Rest heavy quilts on your lap rather than letting them hang, which creates tension that pulls stitches unevenly.
Bundle excess fabric instead of rolling it to reduce weight and improve control.
Gently smooth fabric ahead of your needle without stretching, allowing natural movement while preventing puckers and maintaining proper tension adjustment throughout your quilting process.
Using The Right Needles for Specialty Fabrics
Needle selection transforms your sewing machine’s performance on specialty fabrics.
Microtex needles pierce delicate silks without snags, while ballpoint needles slip between knit fibers to prevent runs.
Leather needles cut clean holes through tough materials, ensuring proper stitch formation and thread alignment.
The choice of needle type, including those for Microtex needles, is vital for achieving superior results.
- Microtex needles slice through silk and microfiber with surgical precision
- Ballpoint needles protect stretchy knits from damage and skipped stitches
- Leather needles punch through vinyl and thick materials without thread breaks
- Universal needles work for basic cotton but limit specialty fabric potential
- Regular needle replacement after 8 hours maintains high-quality stitch quality
Leveraging High-Quality Threads for Impact
Quality thread forms the backbone of exceptional stitches.
Choose Thread Weight carefully—12wt creates bold quilting lines, while 50wt suits delicate work.
Consider Fiber Types: cotton provides durability, rayon adds sheen, and Thread Blends offer versatility.
Yarn Texture affects how thread moves through your machine, while Color Consistency guarantees professional results.
Poor sewing thread quality creates lint buildup and breaks, disrupting thread tension and compromising stitch quality tips you’ve mastered.
Understanding thread weight basics is vital for achieving the desired stitch quality and overall quilt appearance.
Mindset Tips for Consistent Results
Your mindset shapes everything when pursuing stitch perfection guide results.
Adopt a Patient Approach rather than rushing through projects, as hasty sewing creates tension issues.
Focus Techniques on one section at a time instead of worrying about the entire quilt.
Remember that your Learning Curve includes mistakes—they’re part of mastering improve sewing stitches skills.
Embrace Creative Freedom by viewing imperfections as character, not failures.
This Practice Mindset transforms frustrating sessions into productive learning experiences.
Frequently Asked Questions (FAQs)
Can I use WD-40 to lubricate my sewing machine?
No, don’t use WD-40 on your sewing machine.
It’s too heavy and attracts dust, which creates more problems.
Use proper sewing machine oil instead—it’s lighter and designed for precision mechanisms.
Why is my sewing machine stitching weird?
Threading troubles, tension tangles, and timing troubles create weird stitches. Check your threading path, replace that dull needle, clean lint buildup, and test tension settings on fabric scraps first.
How do I adjust my sewing machines stitch length settings?
Locate your stitch length dial or setting on your machine’s control panel. Turn it clockwise for shorter stitches or counterclockwise for longer ones, testing on fabric scraps first.
What causes fabric puckering during machine sewing?
Fabric puckering occurs when tension’s too tight, needle’s wrong for your fabric weight, or you’re pulling the material while sewing. Check your thread tension first.
When should I replace my sewing machine belt?
Your belt’s practically screaming for mercy if it’s cracked, frayed, or slipping during heavy sewing.
Replace it when you notice reduced power transfer, squealing sounds, or visible wear after extended use.
How do I calibrate my machines buttonhole function?
Check your manual for buttonhole calibration steps.
Test on fabric scraps first, adjusting stitch density and width until stitches lock properly.
Most machines require specific button measurements and tension adjustments for desirable results.
Whats the difference between computerized and mechanical tension systems?
Like night and day, computerized systems automatically adjust tension through sensors and motors.
While mechanical systems require manual dial adjustments. You’ll find computerized versions offer consistent results.
But cost more than reliable mechanical alternatives.
Conclusion
Ironically, while many sewers invest thousands in advanced machines, they overlook basic maintenance that dramatically impacts stitch quality.
Your machine’s performance depends on consistent threading, proper needle selection, and regular cleaning—not expensive upgrades.
When you implement these maintenance practices systematically, you’ll improve sewing machine stitch quality more effectively than any new feature.
Remember, precision comes from understanding your machine’s fundamentals, not from complex technology.
- https://projectorsewing.com/trouble-shooting-common-sewing-machine-problems/
- https://pubs.nmsu.edu/_c/C202/index.html
- https://www.reddit.com/r/sewhelp/comments/13lciup/what_are_factors_that_affect_stitch_quality/
- https://www.threadsmagazine.com/2008/11/02/understanding-thread-tension
- https://lindehobby.com/how-to-easily-adjust-sewing-machine-tension-for-perfect-stitches-1698/

