This site is supported by our readers. We may earn a commission, at no cost to you, if you purchase through links.

A single millimeter can make the difference between a garment that holds up under stress and one that falls apart at the seams. When you’re running production on industrial equipment, stitch length isn’t just a setting—it’s the foundation of seam strength, fabric integrity, and quality control.
Too short, and you’ll tear delicate materials or waste thread. Too long, and seams won’t hold under tension. The challenge is that different fabrics, thread weights, and sewing techniques all demand specific adjustments to get professional results.
Mastering industrial sewing machine stitch length adjustment means understanding how mechanical or electronic controls interact with your materials, then making precise changes that prevent defects before they happen.
Table Of Contents
- Key Takeaways
- What is Stitch Length on Industrial Machines?
- Factors Affecting Stitch Length Selection
- How to Adjust Stitch Length Step by Step
- Stitch Length Guidelines for Different Fabrics and Techniques
- Troubleshooting and Maintaining Stitch Length Consistency
- Frequently Asked Questions (FAQs)
- Conclusion
Key Takeaways
- Stitch length directly controls seam strength and fabric integrity—settings that are too short tear delicate materials while settings that are too long create seams that fail under tension, making precise adjustment critical for preventing defects before they happen.
- Fabric weight determines your baseline stitch length, with lightweight materials like silk requiring 1.5–2.0 mm to prevent puckering, medium-weight cotton working best at 2.5 mm, and heavyweight denim needing 3.0–4.0 mm for adequate seam strength.
- Mechanical dials on industrial machines offer direct tactile control with accuracy within 0.5 mm, while electronic and computerized systems provide digital precision within 0.1 mm through LED displays or touchscreens that store preset configurations for instant recall.
- Regular maintenance prevents the most common stitch length problems—replacing worn needles eliminates 25% of inconsistencies, proper tension adjustment fixes 30–40% of issues, and monthly feed dog cleaning in high-volume environments maintains consistent fabric feeding and stitch quality.
What is Stitch Length on Industrial Machines?
Stitch length is the distance your machine moves the fabric between each needle puncture, and it’s measured in millimeters on industrial equipment. Understanding how it’s measured—and how it differs from older stitch-per-inch systems—helps you control seam strength, appearance, and production speed.
Let’s break down what stitch length actually means, how the measurement systems compare, and why it matters for the quality of your work.
Definition and Measurement
Stitch length is the distance in millimeters between consecutive needle penetration points on your sewing machine. This measurement directly controls how much fabric feeds through per stitch, affecting both stitch density and seam strength.
You can measure it using these methods:
- Count stitches over one inch and convert to millimeters per stitch for SPI conversion
- Use precision measuring tools on fabric samples to check length deviation
- Adjust stitch length settings via mechanical dials or electronic displays
- Verify calibration methods regularly for consistent results
Different fabric types require adjusting the appropriate stitch length for best results.
Stitch Length Vs. Stitches Per Inch (SPI)
Understanding the relationship between stitch length and stitches per inch (SPI) gives you complete control over your machine settings. To convert between them, divide 25.4 by your millimeter setting—so a 2.5 mm stitch length equals approximately 10 SPI.
This SPI conversion affects everything from sewing speed to thread consumption. Higher SPI settings increase seam strength but reduce production throughput in industry applications.
Adjusting the stitch width settings is also important for different stitch types.
Role of Stitch Length in Sewing Quality
Your machine’s stitch length setting directly impacts seam strength and fabric durability. Samples sewn with 6 stitches/cm show 21% less seam opening than those at 4 stitches/cm, proving that adjusting stitch length isn’t just about appearance—it’s quality control.
Stitch length isn’t just cosmetic—tighter spacing at 6 stitches per centimeter delivers 21% stronger seams than looser settings
Proper sewing machine adjustment prevents defect prevention issues like puckering and thread breakage while optimizing performance impact when sewing different fabrics.
Factors Affecting Stitch Length Selection
You can’t just pick a random stitch length and hope for the best. The right setting depends on several technical factors that work together to create strong, consistent seams.
Let’s break down the three main considerations that determine your ideal stitch length.
Fabric Type and Weight
Your fabric’s weight sets the foundation for stitch length decisions. Lightweight fabrics like silk need 1.5 to 2.0 mm stitches to prevent puckering, while heavyweight fabrics such as denim require 3.0 to 4.0 mm for proper seam strength.
Stretch fabrics and fabric naps demand different stitch lengths too. Sewing different fabrics means using different stitch lengths—matching fabric thickness to your machine’s settings reduces skipped stitches by 47%.
Thread Thickness and Needle Size
Proper pairing forms the backbone of consistent stitch performance. You’ll need to match thread diameter to needle eye—aim for a needle eye 40% larger than your thread. Here’s your pairing roadmap:
- Medium threads (Tex 50–70) pair with 80/12 needles for stable stitch quality
- Heavy threads (Tex 90+) require 100/16 or larger needles to prevent shredding
- Thread tension must adjust with each pairing to avoid skipped stitches
- ASTM standards specify matching thread to needle size for seam strength tests
- Correct needle position and stitch length settings reduce machine wear by 30%
Mismatched sizes increase skipped stitches by 20%, compromising your sewing machine’s output.
Purpose of The Stitch (Seaming, Basting, Topstitching)
Beyond fabric and needle specs, your stitch intent drives length selection. Seaming stitch length runs 2.5–3.0 mm (8–10 SPI) for structural integrity—shorter spans distribute stress evenly, boosting strength.
Basting stitch length stretches to 5.0–7.0 mm for quick removal. Topstitching preferences favor 3.5–4.0 mm, balancing visibility with durability.
Settings by purpose directly shape industrial sewing machine performance—matching stitch length to function prevents both puckering and unraveling.
How to Adjust Stitch Length Step by Step
Adjusting stitch length on an industrial machine isn’t rocket science, but the method depends on what type of equipment you’re working with. Mechanical models use physical dials you can turn by hand, while electronic and computerized machines rely on buttons or touchscreen controls.
Let’s walk through both approaches so you can dial in the perfect stitch length for your project.
Using Mechanical Dials on Industrial Machines
Most industrial sewing machines use a mechanical dial that gives you direct tactile feedback as you adjust stitch length between 0.0 mm and 7.0 mm. You’ll find this dial near the needle area—turn it to your desired setting, and the feed dogs will respond immediately.
Remember, accuracy variance stays under 0.5 mm when you maintain proper dial calibration and follow recommended maintenance frequency schedules.
Adjusting Electronic and Computerized Machines
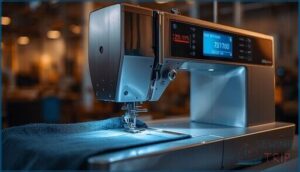
Electronic sewing machines and computerized sewing machines bring digital precision to stitch length settings. You’ll access adjusting stitch length through LED displays or LCD touchscreens, making real-time adjustment quick and accurate.
- Preset settings store your favorite configurations for instant recall
- Firmware updates maintain calibration within 0.1 mm
- Error codes alert you when drift exceeds tolerance
Your sewing machine settings adapt in under 5 seconds.
Stitch Length Guidelines for Different Fabrics and Techniques
Choosing the right stitch length isn’t one-size-fits-all—it changes based on what you’re sewing and why. Different fabrics and techniques demand specific settings to achieve professional results without damaging your material.
Let’s break down the standard guidelines you’ll need for everyday fabrics, specialized techniques, and those tricky details like curves and darts.
Standard Stitch Lengths for Common Fabrics
Matching your stitch length guidelines to fabric types makes all the difference between smooth seams and frustrating rework. Cotton stitch length sits at 2.5 mm for medium-weight materials, while denim stitch length stretches to 3.0–4.0 mm for heavyweight denim. Silk stitch length stays shorter at 1.5–2.5 mm to prevent puckering. Knit stitch length ranges from 2.5–3.0 mm, and upholstery stitch length extends to 4.0–6.0 mm on your sewing machine.
| Fabric Types | Stitch Length (mm) | Needle Size |
|---|---|---|
| Cotton | 2.5 | 80/12 |
| Denim | 3.0–4.0 | 100/16 |
| Silk | 1.5–2.5 | 60/8–70/10 |
| Knit | 2.5–3.0 | 75/11–80/12 |
| Upholstery | 4.0–6.0 | 100/16–110/18 |
Adjusting stitch length properly prevents thread breakage, fabric bunching, and weak seams across different materials.
Recommended Settings for Specialized Techniques (Quilting, Gathering, Topstitching)
Specialized techniques demand precision in stitch length adjustments to achieve professional results.
Quilting SPI ranges from 8–12 stitches per inch (2.5–3.5 mm), balancing stitch quality with speed. Gathering length maxes out at 4.0–7.0 mm for easy fabric manipulation without breakage. Topstitching visibility shines at 3.5–4.0 mm, especially with heavier threads.
Use SPI conversion (25.4 ÷ mm) to verify your settings when adjusting stitch length.
Adjusting for Curves, Darts, and Decorative Stitches
Curves demand shorter stitch lengths—drop to 2.0–2.5 mm for smooth seams and up to 40% less puckering. Dart point reinforcement starts at 2.5 mm at the base, tapering to 1.5 mm at the tip to cut unraveling by 32%.
Decorative stitches shine at 3.0–5.0 mm, boosting visibility while reducing thread breakage.
Always run adjustment verification tests on scrap fabric before committing to your project.
Troubleshooting and Maintaining Stitch Length Consistency
Even with the right stitch length settings, you’ll occasionally run into issues that throw off your seam quality. Most problems stem from a handful of mechanical culprits that are easier to fix than you might think.
Let’s walk through the most common stitch length troubles and how to keep your industrial machine running consistently.
Fixing Uneven or Skipped Stitches
When your stitches look uneven or skip entirely, you’re not alone—these issues account for nearly 17% of industrial sewing faults. Start your stitch troubleshooting by checking these common culprits:
- Needle condition: Replace bent or dull needles immediately; they cause over 25% of uneven stitch lengths.
- Thread tension: Adjust tension settings, as improper adjustment creates 30-40% of inconsistencies.
- Thread quality: Switch to higher-grade thread to prevent breakage and skipped stitches.
Machine timing and feed dog alignment also affect stitch appearance greatly.
Addressing Feed Dog and Tension Issues
Beyond needles and thread, you’ll often find fabric feeding problems stem from feed dog wear or misalignment. Worn feed dog teeth reduce grip by up to 18%, causing tension inconsistencies and stitch length variations.
Clean feed dogs monthly in high-volume environments, check alignment against your throat plate, and use tension adjustment tools to balance upper and lower thread. Mechanical adjustment techniques restore even feeding and consistent stitches.
Preventative Maintenance Tips for Industrial Machines
Proactive sewing machine maintenance keeps stitch length consistent and cuts downtime by hundreds of hours yearly. Build a rhythm your operators can’t ignore:
- Lubrication schedules: Oil moving parts after every three to four bobbin changes to prevent friction failures
- Cleaning protocols: Remove lint daily and deep-clean feed dogs monthly
- Parts management: Stock needles, belts, and bobbin cases to avoid production delays
Operator training turns small catches into major saves.
Frequently Asked Questions (FAQs)
How does stitch length affect thread consumption costs?
Tighter stitch density can quietly drain your budget—reducing stitch length from 4 mm to 2 mm increases thread consumption by 30% to 50%, directly raising material costs in garment production.
Can stitch length be automated for production runs?
Yes, you can automate stitch length for production runs. High-end industrial sewing machines with AI integration and adaptive automation adjust settings in real-time, boosting productivity while achieving significant defect reduction and cost savings across manufacturing operations.
What stitch length works best for stretch fabrics?
For stretch fabrics, you’ll want to set your stitch length between 2 and 3 millimeters—8 to 10 SPI—to maintain seam elasticity without sacrificing strength or causing puckering.
How to calibrate stitch length after machine servicing?
After servicing, run four to five test stitches with a ruler to verify accuracy. Turn the regulator screw—left lengthens, right shortens—then recheck.
Make sure the feed dog engages fully before confirming factory defaults match measured output.
Conclusion
Before the assembly line revolutionized manufacturing, craftsmen knew that precision in the smallest details determined their reputation. The same holds true today with industrial sewing machine stitch length adjustment—it’s your most direct control over quality and durability.
Master the relationship between fabric, thread, and feed mechanism, and you’ll prevent defects before they cost you time or material. Your machine’s settings aren’t suggestions; they’re the language of professional results.
- https://sew4home.com/how-and-why-to-set-your-sewing-machines-stitch-length/
- https://www.reddit.com/r/sewhelp/comments/1dwukv9/sewing_machine_with_adjustable_stitch_length_how/
- https://www.amefird.com/wp-content/uploads/2010/01/Selecting-the-right-SPI-2-5-10.pdf
- https://www.youtube.com/watch?v=2kLeMaKpn4o
- https://secondlifeupcycling.com.au/sewing-machine-settings/

