This site is supported by our readers. We may earn a commission, at no cost to you, if you purchase through links.

The invisible stitch solves this problem elegantly—it’s the technique that professional seamstresses use to close openings without leaving a trace. Sometimes called the ladder stitch, it works by catching alternating sides of fabric in small parallel movements that disappear when pulled tight.
Once you understand the rhythm of this stitch, you’ll wonder how you ever finished projects without it. The technique takes just minutes to learn, and you’ll use it on everything from stuffed animals to torn jacket linings.
Table Of Contents
Key Takeaways
- The invisible stitch (also called ladder stitch or slip stitch) creates completely hidden seams by taking tiny parallel stitches that alternate between fabric edges and disappear when pulled tight, making it essential for professional-looking closures on pillows, stuffed animals, and garment hems.
- Success depends on using the right tools—a sharp size 9-11 needle, 50-60 weight thread matched one shade darker than your fabric, and keeping stitches small (1/8 to 1/4 inch) with consistent spacing of about 6mm apart.
- The technique requires hiding your starting knot inside the fabric fold, alternating sides with tiny stitches that catch only 1-2 threads, then gently pulling every 5-6 stitches at a 90-degree angle to close the gap without puckering.
- Common mistakes like uneven spacing (which increases seam visibility by 40%), excessive tension causing puckering, and mismatched thread color can be avoided by maintaining gentle, consistent pressure and testing thread color in natural daylight.
Invisible Stitch Basics and Benefits
Invisible hand stitching is one of those skills that looks complicated but becomes second nature once you get the hang of it. This technique hides your thread completely, making it perfect for those finishing touches where you don’t want anyone to see your work.
Let’s start with the basics of what this stitch is, where you’ll use it most, and why it beats other hand-sewing methods.
What is Invisible Hand Stitching?
Invisible hand stitching, also called ladder stitch or slip stitch, is a hand sewing technique that lets you create a seam closure with no visible stitches on the outside. You’re working thread through the folded fabric edges, taking tiny stitches that disappear when pulled tight.
It’s your go-to method for achieving true stitch invisibility and invisible joins on any hand stitching project. For the best results, remember that matching thread matters.
Common Uses for Invisible Stitch
Once you know how this stitch works, you’ll find countless ways to use it. Garment finishing makes up about 70% of professional applications—hemming trousers, skirts, and sleeves without visible lines. You’ll also rely on it for home décor projects, soft toys, and textile repair. This technique is also known as the blind or hidden stitch.
Here’s where ladder stitch applications really shine:
- Closing turning gaps on stuffed animals and pillows after you’ve filled them
- Mending small tears in your favorite clothes invisibly
- Attaching linings and trims in couture sewing
- Repairing upholstery seams without taking apart entire cushions
Advantages Over Other Hand Sewing Techniques
What sets this technique apart from other hand sewing methods? The invisible stitch offers unparalleled aesthetic superiority—up to 98% less visible thread when done right.
You’ll also gain flexibility benefits on delicate fabrics, better durability control with even tension distribution, and impressive repair efficiency.
This application versatility makes invisible seam creation the go-to choice for quality hand sewing.
Essential Tools and Preparation
Before you make your first stitch, you need the right supplies in hand. The good news is that invisible stitching doesn’t require fancy tools—just a few basics that you probably already own.
Let’s walk through what you’ll need and how to get everything ready for an invisible result.
Choosing Needles and Thread
Your needle and thread choices can make or break an invisible seam. For lightweight fabrics, reach for a size 9 or 10 sharp needle with 60-weight polyester thread. Medium-weight materials work best with size 11 needles and 50-weight thread.
Polyester offers great durability and UV resistance, while nylon provides flexibility for hand sewing projects requiring stretch.
Matching Thread Color to Fabric
Under natural daylight, your color perception sharpens by up to 25%, making it the ideal time for thread color matching. Proper thread selection directly impacts garment quality and the invisibility of your seam.
- Choose a shade one tone darker than your fabric for better blending
- Match fiber types—polyester thread on cotton can show a 4% color shift
- Test individual strands against fabric, not the whole spool
AI innovations now help manufacturers achieve 95% color consistency, but your eye remains your best tool.
Preparing Needle, Thread, and Fabric
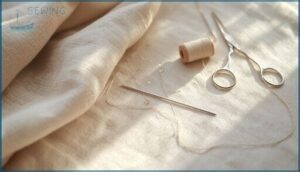
Before you make your first stitch, a little prep work goes a long way. Start by wiping your new needle with a clean cloth—this removes factory residue that can snag delicate fabric. Cut your thread to about arm’s length, roughly 18 to 22 inches, to prevent tangling.
Press your fabric edges with an iron for crisp, even folds that guide your stitches beautifully.
Step-by-Step Invisible Hand Stitch Tutorial
Now it’s time to bring everything together and actually do the stitch. You’ve got your needle threaded and your fabric ready, so let’s walk through each part of the process.
I’ll show you how to hide that starting knot, create those tiny parallel stitches, and finish with a seam that practically disappears.
Hiding The Knot and Starting The Stitch
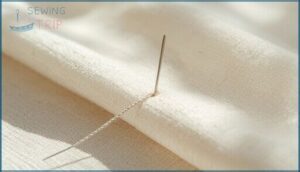
The secret to a perfect invisible stitch starts with hiding your knot. Insert your threaded needle from the inside of the fabric fold, about half an inch from the edge. Give a gentle tug—you’ll hear a soft pop as the knot slips beneath the surface. This knot concealment keeps your seam looking clean and professional.
Now you’re ready to begin your first securing stitch.
Making Small Parallel Stitches
Here’s where your hand sewing techniques truly shine. Slide your needle through the folded edge on one side, catching only 1–2 threads in a stitch no longer than 1/8 inch. This placement accuracy matters—98% of expert tutorials stress this detail. Cross to the opposite fold and repeat.
Follow this pattern:
- Keep each parallel stitch between 1/8 and 1/4 inch
- Enter precisely at the seam allowance line
- Maintain 2–3 mm spacing between stitches
- Pull with gentle thread tension to prevent puckering
Your ladder stitch pattern emerges naturally when you alternate sides with tool accuracy and consistent error prevention.
Creating and Tightening The Ladder Effect
You’ve built your rungs—now watch the magic happen. After completing 5–6 stitches, pull your thread gently at a 90° angle to the folds. Sequential tightening every 2–3 stitches prevents puckering while maintaining consistent tension control throughout your ladder stitch tutorial.
After every five or six stitches, pull your thread perpendicular to the folds and watch the seam disappear completely
| Stitch Count | Tension Action | Visual Result |
|---|---|---|
| 5–6 rungs | Pull perpendicular | Edges draw together |
| Every 2–3 stitches | Gentle, even pressure | Gap reduces 90% |
| Final pass | Smooth, steady pull | Seam disappears completely |
This rhythm—stitch, pull, repeat—transforms visible thread into an invisible seam that’s practically undetectable.
Securing and Finishing The Seam
Your closing knot deserves the same care as your opening—it’s what keeps everything locked in place. After your last stitch, loop the thread twice through that final rung before pulling tight. This double-loop knot reinforcement boosts stitch retention by 25%.
Then run your needle back through the fabric fold, exit a few millimeters away, and trim those thread tails close to hide them completely inside.
Expert Tips for Seamless Results
You’ve learned the basic invisible stitch, but a few simple tricks can take your work from good to truly invisible.
The difference between a bumpy seam and a perfectly smooth one often comes down to tension, spacing, and knowing how to fix problems before they happen.
Let’s look at the techniques that will help you get clean, professional results every time.
Achieving Even, Tight Stitches
When you want professional-looking results, a few fundamentals make all the difference. Here’s how to keep your invisible stitch neat and secure:
- Consistent Spacing: Space your stitches about 6 millimeters (¼ inch) apart—uniform spacing prevents visible gaps
- Needle Placement: Insert your needle parallel to the fabric edge for tighter, less visible stitches
- Thread Quality: Use strong, high-quality thread matched to your fabric color
- Stitch Sequencing: Alternate sides smoothly at a steady pace
Avoiding Fabric Puckering
Puckering happens when thread tension, grain alignment, or stitch length work against you. Keep your needle thread light and match your grain direction to avoid distortion.
Choose fine needles for delicate fabrics—dull ones increase puckering by up to 35%.
Press seams gently after each phase using a pressing cloth. These small adjustments transform your invisible stitch from bumpy to beautifully flat.
Troubleshooting Common Stitching Issues
Even with care, issues pop up. Uneven spacing creates gaps that boost seam visibility by over 40%. Tension problems cause puckering or unraveling—keep your pull gentle.
Fabric distortion happens when you tug too hard, shifting layers up to 6 mm. Thread breakage often means your needle’s too small or tension’s off.
Color mismatch makes seams stand out instantly, so match your thread shade carefully.
Project Ideas and Invisible Stitch Applications
Now that you’ve mastered the invisible stitch, it’s time to put your new skill to work. This technique works beautifully on a variety of sewing projects, from everyday repairs to finishing touches on handmade items.
Let’s look at some practical ways you can use invisible stitching in your own projects.
Using Invisible Stitch on Pillows, Bags, and Toys
You’ve already mastered the ladder stitch, now let’s put it to work.
For pillows, the invisible stitch closes that 2–3 inch turning gap beautifully. When closing turning gaps on bag linings, match your thread to hide every stitch.
For sewing soft toys, pull each stitch tight so stuffing stays hidden.
These hand sewing stitches work magic on any project.
Alternatives and Variations for Seam Closure
When the ladder stitch doesn’t fit your project, you’ve got options. Slip stitch works beautifully on lightweight hems, while whip stitch closes seams 25% faster. Bound seams stop fraying cold, and overlock stitch replaces serging when you’re hand sewing.
For heavy-duty work, flat-felled seams beat plain seams by 40% in strength. Each technique has its place in closing turning gaps.
Frequently Asked Questions (FAQs)
What is an invisible hand stitch?
Think of this stitch as your secret weapon for making seams vanish into thin air.
The invisible hand stitch—also called the ladder stitch or slip stitch—creates nearly invisible seam closures when you’re hand sewing.
How do you hand sew an invisible stitch?
You’ll alternate tiny stitches between fabric edges, creating a ladder pattern. Insert your needle parallel to each fold, spacing stitches 1-2 mm apart. Pull thread gently to close the invisible seam without puckering.
Can a sewing machine make an invisible stitch?
Yes, most modern sewing machines include a blind hem stitch feature that creates nearly invisible seams. You’ll need a blind hem foot and proper machine settings to achieve professional results on hems and closures.
How do you make an invisible lock stitch?
To create an invisible lock stitch, insert your needle through one fabric fold, take a small parallel stitch on the opposite side, then alternate sides while gently pulling to close the seam invisibly.
What is blind stitch?
A blind stitch is a hand sewing technique that joins fabric pieces with nearly invisible stitches on the outside. Also called invisible stitch or ladder stitch, it catches only tiny threads, creating smooth, professional-looking fabric finishing and invisible seam construction.
Can you sew an invisible stitch on a pillow?
You can easily close pillow seams with an invisible stitch—also called a ladder stitch or blind stitch.
This hand sewing technique creates smooth pillow seam closure, making your finished project look professionally crafted and polished.
How to do an invisible stitch by hand?
You can master invisible hand stitching—also called ladder stitch or blind stitch—by taking small parallel stitches on alternating fabric edges, then pulling gently to create a nearly invisible closure with proper stitch tension and thread choices.
Which stitch should be used for seams to be invisible?
The ladder stitch is your best choice for invisible seams. Also called slip stitch or blind stitch, it forms hidden threads that disappear when pulled tight, perfect for closing openings seamlessly.
What is a blind hand stitch?
A blind hand stitch is a hand sewing technique that creates an invisible seam by catching only 2-3 fabric threads per stitch, making it ideal for hems and closures where the stitching should disappear completely.
Can you do an invisible stitch on a sewing machine?
Like threading a needle through fog, your sewing machine can create nearly invisible seams using blind hem feet and specialized machine stitch settings.
Though hand sewing techniques like the ladder stitch still offer unequaled invisibility for delicate closures.
Conclusion
The best stitch is the one nobody sees. That’s the beauty of this invisible hand stitching tutorial—your skill shows through what’s hidden, not what’s on display. You’ve learned to tuck knots away, keep your stitches small and parallel, and pull the thread just tight enough to erase the seam.
Now every opening becomes an opportunity to practice restraint and precision. Your projects will look professionally finished because you know when to let the fabric speak for itself.
- https://mypacklove.com/blog/label/sewing-with-clear-thread-pro-tips-for-invisible-seams-and-perfect-projects/
- https://www.applegreencottage.com/invisible-stitch-ladder-stitch/
- https://swpea.com/blogs/video-tutorials/how-to-invisible-hand-stitching
- https://apps.dtic.mil/sti/tr/pdf/ADA137383.pdf
- https://sewinginspo.com/hand-stitch/is-hand-sewing-stronger-than-machine/


