This site is supported by our readers. We may earn a commission, at no cost to you, if you purchase through links.
If your machine won’t turn on, check connections and power cords. Feed dog height affects fabric movement, so adjust it properly.
Regular maintenance prevents most headaches – oil moving parts monthly and remove lint weekly. Professional help’s needed for timing issues or electrical problems, but these simple fixes solve most common troubles.
Table Of Contents
Key Takeaways
- Check your threading first – Improper threading causes 80% of sewing problems like bunching and skipped stitches, so rethread completely when issues arise.
- Replace needles regularly – You’ll prevent breakage and uneven stitches by using the right needle size for your fabric and replacing bent or dull needles immediately.
- Clean and maintain monthly – You’ll avoid most headaches by removing lint weekly, oiling moving parts monthly, and cleaning your bobbin case regularly.
- Adjust tension and feed dogs properly – You’ll get consistent stitches by matching thread tension to your fabric type and setting feed dog height correctly for smooth fabric movement.
Common Juki Sewing Machine Problems
When your Juki sewing machine starts acting up, you’ll likely encounter a handful of common issues that can turn your creative project into a frustrating puzzle.
Thread bunching, needle breakage, skipped stitches, uneven tension, and fabric feeding problems are the usual suspects that’ll have you scratching your head.
Thread Bunching and Bird’s Nesting
When thread bunching and bird’s nesting plague your Juki machine, improper threading is usually the culprit. Check your thread tension settings first, then rethread completely.
Bobbin issues like incorrect insertion or poor thread quality often create these tangles. Verify your bobbin thread winds smoothly and your threading follows the proper path through all guides.
Needle Breakage
Nothing kills your sewing momentum quite like a needle that keeps snapping. If your Juki machine is giving you needle trouble, here’s what usually goes wrong:
- Wrong needle size – Match needle thickness to fabric weight
- Bent needles – Replace immediately to prevent timing issues
- Needle alignment – Confirm correct placement into needle plate
Swapping out the needle solves most breakage headaches in seconds.
Skipped Stitches
When your Juki sewing machine starts skipping stitches, you’re dealing with timing issues. Check needle timing first – it must sync perfectly with the hook mechanism. Adjust hook timing if needed.
Feed dog height affects stitch formation too. Increase presser foot pressure for thicker fabrics. Use fabric stabilizers on stretchy materials to prevent skipped stitches.
Uneven Stitching or Tension Issues
When your Juki sewing machine creates uneven stitches, check thread tension first. Incorrect tension adjustment causes loops or puckering. Verify thread quality matches your fabric compatibility.
Clean feed dogs if stitches appear irregular. Make certain of proper needle positioning for consistent stitch quality.
Test tension settings on scrap fabric before continuing your project.
Fabric Not Feeding Properly
Why isn’t your fabric feeding through? The culprit might be simpler than you think. Check your settings and adjust the stitch length if it’s set too low, or troubleshoot these common fabric feeding issues:
- Feed Dog Height: If feed dogs are too low to grab the fabric, adjust feed dog height
- Presser Foot Pressure: Too much pressure prevents smooth fabric movement
- Feed Dog Cleaning: Lint and fabric fibers can accumulate around the feed dogs, potentially causing them to stick
Troubleshooting Power and Functionality Issues
When your Juki machine won’t turn on or the foot pedal stops responding, you’re dealing with power and functionality problems that can halt your sewing projects completely.
Most electrical problems actually have straightforward solutions. The trick is working through the troubleshooting steps methodically – checking your connections first, then the power source, and finally the control mechanisms.
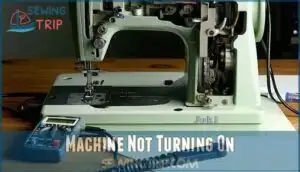
Machine Not Turning On
When your Juki sewing machine won’t start, the power cord is your first stop. Check for loose connections or any visible damage. Then take a quick look at your home’s fuse box – sometimes a tripped breaker is the culprit.
Motor burnout or control panel failure will also prevent startup. Internal wiring issues need a professional’s touch. Power surges and heavy use often cause these electrical headaches.
Before you pick up the phone to call for help, try these basic checks first – they’ll catch most electrical gremlins.
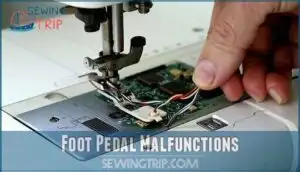
Foot Pedal Malfunctions
Most foot pedal malfunctions stem from connection or calibration issues. Check your pedal’s responsiveness first—loose wiring often causes motor synchronization problems. A common cause is worn or damaged wires in the pedal itself.
- Inspect pedal wiring for burns, frays, or loose connections
- Test with alternative foot pedal to isolate electrical issues
- Recalibrate speed control through machine settings menu
- Verify proper pedal connection to machine’s electrical system
- Consider pedal replacement if motor problems persist after troubleshooting
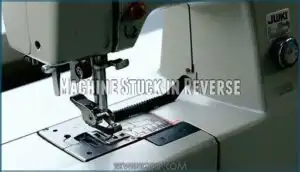
Machine Stuck in Reverse
Sometimes your Juki sewing machine gets stuck going backwards, leaving you scratching your head. Check the reverse lever first – it might be jammed or damaged.
Electronic control problems can cause solenoid malfunction, making the machine think it’s always in reverse mode. Try resetting the reverse function by cycling the power off and on.
If mechanical linkage failure occurs, you’ll need professional machine repair to fix this tricky sewing machine problem.
Fixing Needle, Thread, and Bobbin Issues
When your Juki machine acts up, needle, thread, and bobbin problems are often the culprits behind frustrating sewing sessions.
Start with these three fundamentals – they work together, so fixing one often clears up the rest.
Choosing The Right Needle and Thread
Getting your needle and thread pairing right saves you countless headaches down the road. Wrong combinations cause thread breakage, poor stitch quality, and fabric damage. Here’s what you need to know:
- Match needle size to fabric thickness – Heavy denim needs size 16-18 needles, while delicate silk works best with size 9-11
- Choose compatible thread type – Polyester thread works with universal needles, but metallic threads require special needle eyes
- Check thread tension settings – Thicker threads need looser tension to prevent needle and thread issues
Remember: needle-thread compatibility directly affects your machine’s performance and your project’s success.
Rethreading and Correct Needle Insertion
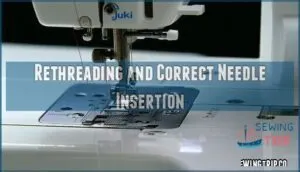
Rethreading your machine correctly prevents most needle and thread issues. Start by raising the needle to its highest position. Follow your threading guide carefully, ensuring proper thread path through each tension disc.
Check needle size matches your fabric type. Insert the needle with the flat side facing back, pushing it up completely.
Test thread tension on scrap fabric before starting your project.
Bobbin Winding and Insertion Problems
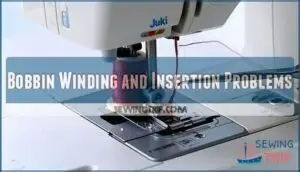
When bobbin issues plague your machine, start with the basics. Poor winding consistency creates uneven tension that’ll mess up your stitches. Here’s your bobbin troubleshooting checklist:
- Clean the bobbin case thoroughly – lint buildup causes thread snags
- Check thread type impact – heavy threads need looser bobbin tension
- Confirm correct insertion with proper thread direction
- Wind bobbins smoothly at consistent speed for even tension
Essential Maintenance Tips for Juki Machines
You can prevent most Juki sewing machine problems by following a simple maintenance routine that keeps your machine running smoothly.
Regular cleaning, proper lubrication, and checking worn parts will save you hours of frustration and costly repairs down the road.
Cleaning and Lubrication Schedule
Your Juki sewing machine maintenance schedule depends on usage frequency. Oil moving parts monthly with approved lubricant types for home sewers. Professional quilters need bi-weekly oiling frequency.
Weekly lint removal using cleaning tools keeps mechanisms smooth. Daily lint cleaning is essential for professional quilters. Schedule adherence prevents costly repairs.
Clean feed dogs, bobbin area, and tension discs regularly. Proper Juki sewing machine maintenance extends your machine’s lifespan a lot.
Checking and Replacing Worn Parts
Beyond keeping your Juki sewing machine clean, you need to check worn parts regularly. Inspect needles every eight hours of use—replace them if they’re bent or dull. Check feed dogs and presser feet for smoothing or missing "teeth" every year. Look for nicks on the rotary hook that cause thread jams. Replace tension disks when cleaning won’t restore proper thread control.
Using genuine Juki spare parts ensures component replacement maintains your machine’s performance and prevents costly internal damage. Jacksew is a prime distributor for Juki industrial machines.
Preventing Dust and Lint Buildup
Like a magnet attracts metal shavings, your Juki sewing machine pulls in dust and lint with every stitch. Lint buildup effects include jamming and poor stitch quality. Regular cleaning tools and a cleaning frequency guide help maintain peak performance. Preventive measures protect your investment.
- Use a machine cover when not sewing to block dust and debris
- Clean the bobbin area weekly with compressed air or small brush
- Establish regular maintenance schedules based on your sewing frequency
When to Seek Professional Repair Help
Basic troubleshooting hits a wall when you’re dealing with fried electrical components or busted mechanical parts that require actual expertise.
Don’t risk making things worse or voiding your warranty when professional repair becomes your smartest move.
Complex Mechanical or Electronic Problems
Your Juki hits a wall when it comes to five big problems: motor replacement, circuit board failures, sensor malfunctions, internal timing issues, and gear alignment troubles. These aren’t DIY fixes.
Electronic and electrical problems need someone who knows what they’re doing and has the right tools.
| Problem Type | Professional Required |
|---|---|
| Motor problems | Yes – High voltage risk |
| Circuit board failure | Yes – Technical expertise needed |
| Internal timing issues | Yes – Precision adjustment required |
Warranty and Safety Concerns
Don’t mess around with electrical repairs on your Juki sewing machine. Your warranty protects you from costly mistakes, and electrical safety isn’t worth the risk. Professional technicians know how to handle electrical repairs safely.
Before you start troubleshooting any sewing machine problems, check your user manual for warranty details. Smart usage means recognizing when it’s time to stop the DIY approach and bring in experts for part replacements.
Finding Manuals and Spare Parts
Getting the right repair manuals and spare parts for your Juki sewing machine doesn’t have to feel like hunting for treasure. Start with your Model Number Lookup to access Online Parts Catalogs and connect with the Juki Dealer Network.
- Check Juki’s official website for sewing machine manuals and guides using your model number
- Browse Online Parts Catalogs for genuine spare parts before considering Aftermarket Parts
- Contact your local Juki Dealer Network for discontinued models assistance
- Keep your manual handy—it’s your best friend for parts identification
Frequently Asked Questions (FAQs)
Why is my Juki sewing machine not working?
Imagine your Juki as a stubborn old friend who’s decided to take an unscheduled nap.
Check if it’s properly threaded, clean the bobbin area, make sure the needle isn’t bent or dull, and verify you’re using the correct needle for your fabric.
Do Juki sewing machines have thread problems?
Yes, Juki machines can experience thread issues. You’ll see problems like bunching, breaking, or uneven stitches from incorrect threading, wrong tension settings, or using poor-quality thread that doesn’t match your needle size.
What should I do if my Juki sewing machine is bad?
First, identify specific problems like thread jamming, broken needles, or skipped stitches. Check your threading, clean the machine thoroughly, and replace the needle. If issues persist, consult a professional technician.
Why is my Juki sewing machine clumping?
Your Juki’s clumping because the thread tension’s off or you’ve got lint buildup in the bobbin area. Check your threading, clean out debris, and adjust tension settings.
What should I do if my Juki sewing machine jams?
When your machine hits a snag, don’t panic. Turn off power, remove fabric gently, and check for tangled thread in the bobbin area. Clean out lint buildup and rethread completely.
Why is my Juki sewing machine making a loud noise?
Loud noises usually mean you’re running low on oil or haven’t threaded correctly. Check your lubrication first, then rethread completely. Loose screws can also cause rattling.
Why is my Juki sewing machine not sewing straight?
Check your needle position and presser foot pressure first. Bent needles, incorrect threading, or uneven feed dogs can throw off your straight-line sewing game completely.
Why is my Juki sewing machine skipping stitches?
Like a needle missing its dance partner, skipped stitches happen when your needle’s dull, bent, or wrong for your fabric. You’ll also see this when threading’s incorrect or tension’s off.
Why is my Juki sewing machine jamming?
You’re dealing with tangled thread in the bobbin area or lint buildup. Remove the bobbin case and clean out any debris thoroughly. Then rethread both the upper and lower threading systems properly.
Why is my Juki sewing machine not bobbin winding?
A stitch in time saves nine, but your bobbin winding won’t start without proper setup.
Check if you’ve engaged the bobbin winding mechanism and verify the bobbin’s seated correctly on its spindle.
Conclusion
Sarah’s vintage Juki suddenly started making awful grinding noises during her daughter’s wedding dress project. Don’t let this happen to you. These Juki sewing machine problems troubleshooting tips you need to know will save your projects and sanity.
Don’t let grinding noises during your daughter’s wedding dress project become your sewing nightmare
Regular cleaning, proper threading, and correct needle selection prevent most issues. When problems arise, check threading first, then tension settings. Remember to oil moving parts monthly and replace needles frequently.
With consistent maintenance and quick fixes, you’ll keep your Juki running smoothly for years.
- https://mysewingmall.com/blogs/juki/troubleshooting-common-problems-with-a-juki-sewing-machine-a-practical-guide
- https://www.goldstartool.com/blog/tips-to-maintain-and-repair-your-juki-sewing-machine.htm
- https://www.sewingtime.co.nz/blogs/news/maintaining-your-machine-how-often
- https://juki.com/blog/post/basic-sewing-machine-knowledge-technical-seminar/
- https://www.reddit.com/r/sewing/comments/1ba6pn6/juki_machine_not_working/




liz
September 24, 2025 at 09:02 PM
I have a brand new machine. I cannot get it to sew. everything you mentioned does not apply. bobbin is in correctly,, machine is threaded correctly , i use expensive coats thread , when i start to sew, the bobbin clangs and the thread comes un done from needle