This site is supported by our readers. We may earn a commission, at no cost to you, if you purchase through links.

Wear the T-shirt and have a friend wrap you in duct tape—like a fashionable mummy—making sure it fits snugly without cutting off circulation.
Once fully taped, carefully cut it off along the back, seal the edges, and stuff it with fabric scraps or foam for structure.
Mount it on a stand for stability, and voilà—your custom-fit dress form is ready.
It’s budget-friendly, personalized, and perfect for nailing those tricky garment adjustments.
Stick around for tips to refine your form for professional-level results.
Table Of Contents
- Key Takeaways
- Benefits of a DIY Dress Form
- Choosing The Right Dress Form Pattern
- Materials and Accessories for DIY Dress Forms
- Creating a Duct Tape Dress Form
- Making a Plaster Bandage Dress Form
- Tips for a Realistic Dress Form
- Using Your DIY Dress Form
- Common Challenges and Solutions
- Advanced Techniques for DIY Dress Forms
- Displaying and Showcasing Your DIY Dress Form
- Frequently Asked Questions (FAQs)
- Conclusion
Key Takeaways
- Wrap yourself with materials like duct tape or plaster over a fitted shirt to create the basic shape, ensuring it matches your body’s exact measurements.
- Cut carefully, reseal, and stuff the form with fiberfill or foam for stability and structure, then mount it on a sturdy stand.
- Customize your form with padding, fabric covers, or modular adjustments to mimic your unique curves and proportions perfectly.
- Use your personalized dress form to pin, drape, and adjust garments with precision, making fitting sessions easier and more accurate.
Benefits of a DIY Dress Form
You’ll save hundreds of dollars on a professional dress form while creating an exact replica of your unique body shape for perfect-fitting garments every time.
Your custom form will capture all your asymmetries and proportions that ready-made forms simply can’t match, providing a perfect-fitting solution.
Affordable Custom Fit
Anyone can create a custom dress form without breaking the bank.
By using household materials like duct tape or plaster, you’ll save hundreds compared to store-bought alternatives.
Your DIY dress form will capture your exact body measurements and unique contours that standard forms miss.
A DIY dress form mirrors your unique shape, empowering you to craft clothes that truly fit and flatter.
This affordable option guarantees perfect-fitting garments every time while embracing your custom shape.
It’s a practical sewing tip that pays for itself with each well-fitted garment you create.
Perfect Fit for Every Body
The true magic of a DIY dress form lies in its ability to mirror your exact body shape.
- Capture every unique curve and contour that standard sizing ignores
- Address specific fit issues before they become sewing frustrations
- Visualize how garments will drape on your actual silhouette
- Make precise adjustments for asymmetrical features most patterns don’t account for
- Test garment modifications without endless fitting sessions
Your custom dress form becomes a silent tailoring partner, helping you craft clothes that respect your body’s natural architecture. No more compromising on fit or wrestling with standard measurements that never quite work for your frame, allowing you to achieve a perfect fit and work with your body’s natural architecture in a more precise manner.
Convenient and Accessible
Building on the perfect fit concept, a DIY dress form brings unmatched convenience right to your sewing table.
You’ll create your custom dress form using simple materials found at local craft stores—no special tools required.
"I finished my duct tape form in just one afternoon," reports home seamstress Lisa.
Now it’s always ready when inspiration strikes, and this affordable option saves both money and travel time to fitting appointments.
With your dress form standing by, quick fitting checks become part of your natural sewing workflow, making the process more efficient and streamlined with a custom dress form.
Variety of Styles and Sizes
After seeing how accessible DIY dress forms can be, you’ll appreciate their incredible variety in styles and sizes too.
Your unique body shape deserves a custom dress form that matches perfectly. Whether you’re sewing for:
- Hourglass figures needing defined waist shaping
- Plus-size bodies that commercial forms rarely accommodate
- Petite frames requiring scaled proportions
- Athletic builds with broader shoulders or muscular thighs
No more squeezing into standard sizes! With DIY methods, you can capture every curve, angle, and proportion that makes your body uniquely yours. A custom dress form becomes your personal fitting companion, ensuring clothes hang beautifully on your actual shape—not some idealized mannequin.
Step-by-Step Instructions
Creating a DIY dress form doesn’t have to be complicated with our straightforward instructions.
Our dress form tutorial guides you through both duct tape and plaster methods with precise measurement tips to guarantee accuracy.
You’ll learn essential taping techniques for capturing your unique curves, proper form filling to maintain shape, and professional finishing touches that make your dress form last.
Whether you’re a beginner or experienced sewist, you’ll make your own perfect sewing companion in no time.
Choosing The Right Dress Form Pattern
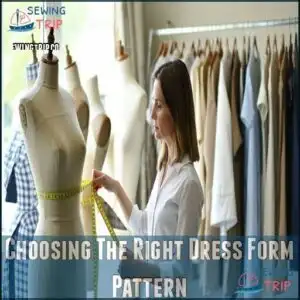
You’ll need a dress form pattern that matches your unique body shape for those tricky fitting sessions where your cat just won’t stand still while you pin fabric.
Select from custom-fit female forms, missy fit options, plus-size models, pant forms, or standard sizes based on your specific sewing projects and measurements.
Custom-Fit Female Full Body Dress Form
Now that you know the benefits, let’s explore the Custom-Fit Female Full Body Dress Form—your perfect sewing companion.
A custom-fit dress form captures your exact body measurements and female silhouette for truly personalized sewing projects. With precise measurements and simple materials, you’ll create your identical twin in mannequin form!
Your custom dress form advantages:
- Creates an exact replica of your unique curves and proportions
- Allows for perfect-fitting garments every time
- Eliminates the need for multiple fittings on yourself
This DIY approach delivers professional results without the boutique price tag.
Missy Fit DIY Stuffed Dress Form
While custom forms capture every body detail, the Missy Fit DIY stuffed dress form offers simplicity without sacrificing functionality. This pattern adapts beautifully to standard sizing with room for easy adjustments.
Your fabric selection makes all the difference in this project. Choose medium-weight cotton or canvas for durability while remaining pin-friendly.
Four reasons sewists love the Missy Fit pattern:
- Streamlined Construction – Complete in a weekend with basic sewing skills
- Budget-Friendly Materials – Uses stuffing techniques that won’t empty your wallet
- Versatile Adjustability – Accommodates seasonal weight fluctuations with removable padding
- Professional-Looking Results – Finishing touches rival store-bought mannequins.
The stand construction couldn’t be simpler—a wooden base with adjustable height keeps your sewing projects at eye level. To achieve a custom fit, understanding dress form basics is essential for any sewing project.
Curvy, Plus Size DIY Stuffed Dress Form
Your plus size DIY dress form should embrace every beautiful curve with precision and care. By taking accurate body measurements, you’ll create a personalized sewing companion that honors your unique silhouette.
| Feature | Customization Tips | Materials Needed |
|---|---|---|
| Bust | Add shaped padding | Flexible foam |
| Waist | Layer for curves | Plaster strips |
| Hips | Build progressive sections | Strong fabric |
| Shoulders | Adjustable width | Support wire |
| Torso | Modular construction | Sturdy base |
This approach lets you tailor fabric choices specifically for curvy fits, ensuring your DIY stuffed dress form captures every contour—making pattern adjustments infinitely easier and more accurate.
DIY Pant Form Mannequin/Dummy
For anyone struggling with ill-fitting trousers, a DIY pant form mannequin is your secret weapon.
Begin with accurate measurements for your custom pattern, then wrap a slim base with layers of duct tape.
Shape your form with polyester filling that mirrors your unique curves.
Mount it on a sturdy stand, and you’ll finally achieve those perfect-fitting pants you’ve been dreaming about.
DIY Stuffed Dress Form in Standard Sizes
While custom pant forms target specific areas, standard-sized DIY dress forms offer an excellent budget-friendly option.
Available in sizes 2-14 or 16-28, these form-fitting projects come with detailed PDF patterns and sewing instructions.
Simply match your measurements, select a sturdy fabric choice, and stuff with 5-10 pounds of polyester fiberfill.
You’ll create a professional dress form at a fraction of retail cost—perfect for sewists seeking accuracy without custom prices.
Materials and Accessories for DIY Dress Forms
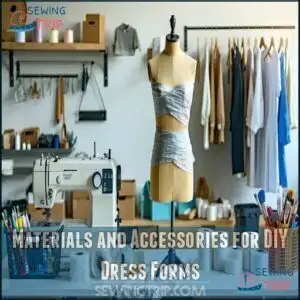
You’ll need the right materials on hand before starting your DIY dress form project, from duct tape and plaster bandages to fabric covers and sturdy stands.
Your choice of materials directly impacts the durability and accuracy of your custom dress form, so select quality supplies that match your skill level and budget.
Duct Tape and Cardboard Materials
Gathering quality materials for your DIY dress form guarantees a sturdy foundation for all your sewing projects.
Start with these duct tape and cardboard essentials:
- 2-3 rolls of heavy-duty silver duct tape (avoid the cheap stuff—it’ll peel later)
- Sturdy cardboard pieces for neck, armholes, and base support
- An old, fitted t-shirt as your base layer
- Sharp scissors for precise tape application and form shaping
For cardboard cutting success, use a craft knife on thicker pieces and reinforce stress points with double layers. When applying tape, work in cross-hatched patterns—horizontal strips first, then vertical—creating a sturdy shell that won’t collapse during form shaping.
Using the right duct tape products is vital for a professional finish. "I’ve made six dress forms," says veteran seamstress Marta, "and nothing beats the satisfaction of pinning fabric to your exact body double!
Plaster Bandage Tape and Expanding Foam
For creating professional DIY dress forms, two essential materials stand out: plaster bandage tape and expanding foam.
Begin with medical-grade plaster of Paris strips, applying three layers for a sturdy mold. This tape application technique guarantees your casting holds its shape perfectly.
Once your plaster mold is completely dry, carefully add expandable foam in thin layers, allowing room for expansion. Remember to wear a face mask during this process—foam casting releases fumes you don’t want to inhale.
Papier mache can be added later for reinforcement, creating a dress form that captures every curve with remarkable precision.
Fabric Options for Dress Form Covers
Moving from plaster work to fabric selection, your dress form cover material makes all the difference in usability.
Knit fabrics hug your custom dress form’s curves perfectly, while woven options provide stability. Cotton fabrics offer breathability and easy pinning, making them ideal for most DIY dress forms.
Polyester delivers durability at a lower cost. For luxury touches, consider silk options, velvet choices, or lace covers that add visual interest.
Muslin textures create a professional finish and traditional look. Remember, your fabric should be sturdy enough for repeated pinning but smooth enough to accurately represent how garments will drape on your body.
When choosing a fabric, consider the benefits of a cotton fabric for your dress form cover, which provides a smooth surface for draping.
DIY Dress Form Accessories
With your fabric cover complete, your DIY dress form needs practical accessories to transform it into a sewing powerhouse.
The right tools will take your DIY mannequin from basic to professional-grade in no time.
Here are 5 must-have accessories for your dress form:
- Adjustable dress form stands with heavy bases for stability during fittings
- Color-coded measuring tapes attached at strategic points for quick reference
- Pin cushion wristbands that slide onto your dress form for easy access
- Magnetic sewing tool holders that attach to your dress form stand
- LED dress form lights that clip onto the neck for shadow-free workspaces
These practical additions won’t just make your DIY dress form project look polished—they’ll actually make your sewing life easier and your garments fit better.
When choosing a stand, consider the importance of Dress Form Stands for overall stability and durability.
Discount Cards and Gift Options
Craft store savings cards can slash your DIY dress form budget substantially.
Most retailers offer special discount codes that stack with seasonal sales for maximum value.
| Store Type | Discount Options | Best For |
|---|---|---|
| Fabric Chains | 40-60% coupons weekly | Base materials |
| Craft Superstores | Rewards cards, 20% total purchase | Tools, accessories |
| Online Retailers | Flash sales, free shipping codes | Specialty items |
| Local Shops | Loyalty programs, clearance bins | Last-minute needs |
Consider gifting a custom dress form tutorial package to your sewing friends, which can be a thoughtful way to share DIY skills and promote creativity.
Creating a Duct Tape Dress Form
You’ll create an accurate torso replica by wrapping your body in crisscross layers of duct tape over a t-shirt.
This economical dress form method requires minimal materials while providing a custom fit that perfectly mirrors your unique measurements and contours.
Taping The Structure
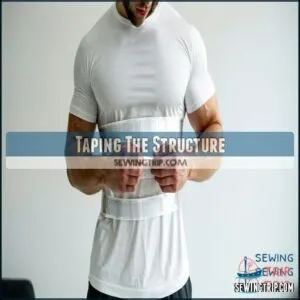
Your body’s contours deserve careful mapping when taping the structure of your DIY dress form.
Begin with a well-fitted t-shirt as your base layer.
- Apply duct tape strips horizontally around your torso, ensuring smooth application
- Reinforce critical areas like bust, waist, and hips with extra tape
- Build up 3-5 layers for stability without restricting breathing
Work methodically for professional-quality form shaping results.
Covering and Supporting The Form
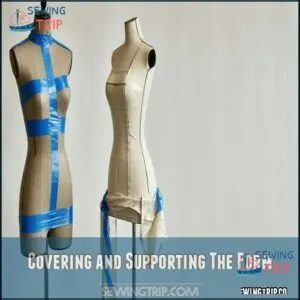
With your duct tape shell now complete, it’s time to transform it into a functional dress form.
First, seal the back cut line with additional tape. For form filling, use polyester fiberfill, foam scraps, or old clothing to stuff your form firmly.
Secure a PVC pipe through the center for stability, then mount it on a sturdy base.
Cover with stretch fabric for a smooth, pinnable surface.
To achieve a professional finish, consider using dress form techniques for superior results.
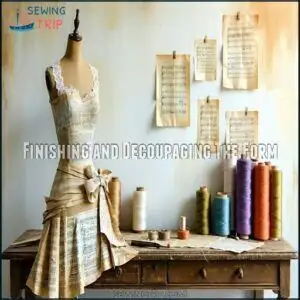
Finishing and Decoupaging The Form
Now that your duct tape form has structure, it’s time for the fun part—making it beautiful and professional.
Transforming your dress form with decorative elements both enhances its appearance and strengthens its surface.
- Apply vintage papers (book pages or music sheets) for an elegant, timeless look
- Use wallpaper paste to secure decorative tissue papers in overlapping layers
- Seal the entire surface with multiple coats of decoupage medium for durability
- Add a final layer of knit fabric for pinning capabilities during future fittings
These finishing touches will turn your DIY project into a professional-looking dress form you’ll be proud to display in your sewing space.
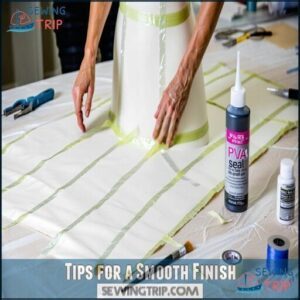
Tips for a Smooth Finish
Now that your form has taken shape, let’s perfect that surface. After taping, you’ll notice small creases and wrinkles that need attention.
Smooth these imperfections using additional strips of tape, pressing firmly to eliminate air pockets.
For professional-grade finishing techniques, apply a thin layer of PVA sealant to create a stable surface preparation base.
When decoupaging, think of it as smoothing icing on a cake—work from the center outward using edge finishing methods that prevent bubbling.
Proper texture control now prevents headaches later when fitting garments. Your DIY dress form should feel as smooth as your confidence will be when using it!
Making a Plaster Bandage Dress Form
You’ll create a precise body double using plaster bandage strips that capture every curve and contour of your figure.
Once dried and filled with stuffing, this custom dress form becomes your personal fitting assistant for achieving professional-quality garment alterations at home.
Preparing Your Body
Moving from duct tape to plaster creates a more durable dress form.
Before diving into the messy fun of plaster bandages, you’ll need to prep your body properly. Proper preparation guarantees your DIY body double captures accurate measurements.
- Layer up protection: Apply a generous coat of petroleum jelly to exposed skin areas to prevent plaster from sticking directly to your skin.
- Dress strategically: Wear a thin, tight-fitting t-shirt or tank top you don’t mind sacrificing to the crafting gods.
- Shield sensitive areas: Wrap plastic around your neck and hairline for easy removal later.
- Strike the pose: Stand in a natural, slightly relaxed posture you can maintain for 30-45 minutes.
Remember, your model readiness directly affects how well your custom dress form will mirror your unique shape.
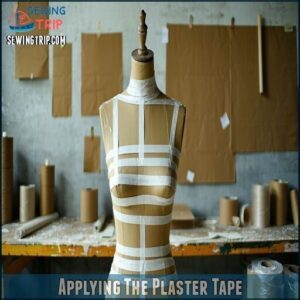
Applying The Plaster Tape
Now that you’re prepped, let’s tackle the plaster tape application—the heart of form creation.
Cut your plaster bandages into manageable 4-6 inch strips. Dip each piece in warm water until completely soaked, then apply from neck downward, overlapping strips by 50% for strength.
Build multiple layers until you achieve desired thickness. The papier mache technique requires patience—smooth each section carefully to avoid bubbles that could compromise your dress form’s accuracy.
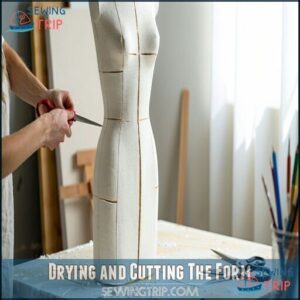
Drying and Cutting The Form
After applying your last plaster bandage, proper drying is critical before moving forward. Your form needs 24-48 hours to completely harden in a well-ventilated area. Rushing this step leads to a weak structure that won’t hold its shape.
Once dry, carefully cut along the back using sharp scissors:
- Make a straight vertical cut from neck to bottom
- Support the form with one hand while cutting with the other
- Use short, controlled cuts to prevent tearing the plaster
Understanding dress form basics is essential for creating an accurate and functional form. Patience during form drying guarantees cutting success!
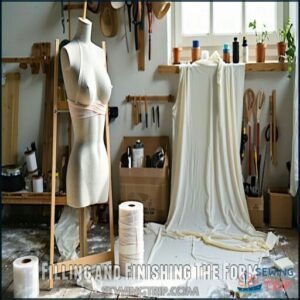
Filling and Finishing The Form
With your plaster bandage form completely dry, it’s time to bring it to life through proper filling and finishing.
Begin stuffing the form with polyester fiberfill or expanding foam, ensuring even distribution to maintain your body’s exact proportions.
For realistic curves, add strategic dress form padding at the bust, hips, and buttocks using a padded bra or shaped fabric packets.
After sealing the form halves with sturdy tape along the cutting line, sand any rough edges for a smooth surface.
Mount the form onto a stable stand—a repurposed lamp base works perfectly.
overfilling!
firmly.
wonders!
Finish by covering the form with stretch fabric for a professional appearance and easier pinning.
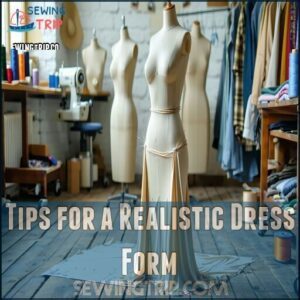
Tips for a Realistic Dress Form
You’ll transform your DIY dress form from a basic shape into a true body double by adding strategic padding and accurate contours.
Your finished form will capture not just measurements but also posture quirks and body asymmetries, making it an invaluable fitting tool for all your sewing projects.
Capturing Your Measurements
The foundation of any realistic dress form lies in precise body measurements. Your measuring tape is the gateway to custom-fit perfection.
For accurate body proportions:
- Position the tape parallel to the floor when measuring circumferences
- Breathe normally during chest and waist measurements
- Use consistent tension—snug but not tight
Record measurements in both inches and centimeters for pattern making flexibility. Remember, your measuring technique directly impacts your dress form’s accuracy—and ultimately, how well your finished garments fit.
Creating a Realistic Bust and Hip Shape
Creating lifelike bust-to-hip proportions transforms a basic dress form into your body double—the foundation of perfectly fitted garments.
Your dress form should mirror your unique silhouette with precision.
Follow these steps for realistic curves:
- Shape your bust contours by wearing a well-fitted bra during form creation, then enhance with strategic padding using fiberfill, cotton batting, or even rice-filled pouches for natural weight distribution.
- Craft authentic hip curves by layering foam pieces in strategic locations, smoothing passages between waist and fullest hip point for form-fitting accuracy.
- Fine-tune body proportions by comparing your measurements to the form, adjusting until the silhouette matches your natural stance in both front and profile views.
Don’t rush this process—your patience will pay off with garments that drape beautifully on your actual body.
Adding Details and Texture
Now that you’ve created the basic shape, it’s time to add character to your dress form.
Select textured fabrics or try decoupage with patterned papers for visual interest.
Consider embellishing with embroidery or fabric paint for a personalized touch.
Papier mâché layers create dimension, while duct tape patterns add structure, and even simple paper tape designs can transform your plain dress form into a functional fashion piece that inspires your sewing projects.
Customizing Your Dress Form
Your dress form becomes a true reflection of your body with thoughtful customization.
Transform it into a perfect sewing companion with these essential modifications:
- Apply padding adjustments at bust, waist, and hips for accurate fitting
- Enhance functionality through adding arms and proper neck construction
- Personalize with fabric covers in patterns that inspire your designs
- Complete with stand customization and surface finishing for a professional look
Using Your DIY Dress Form
Your custom dress form will transform your sewing space into a professional fitting studio where you’ll pin, drape, and alter garments with newfound precision.
You’ll find that once you’ve mastered working with your dress double, fitting challenges that once left you frustrated will become satisfying puzzles you can solve without contorting yourself in front of the mirror, and this will lead to a more efficient and enjoyable sewing experience with your custom dress form.
Fitting and Altering Garments
Now that your custom form is ready, it’s time to perfect those garments! Your DIY dress form transforms fitting sessions from frustrating guesswork to precise adjustments.
| Fitting Task | With Regular Mirror | With Dress Form |
|---|---|---|
| Hem length | Awkward twisting | Pin at exact height |
| Shoulder fit | Can’t see back | 360° visibility |
| Waistline | Hard to measure | Mark and adjust easily |
| Bust darts | Difficult to pin | Perfect placement |
| Sleeve fit | Limited mobility | Test without movement |
Pin, adjust, and perfect—your sewing mannequin reveals exactly where alterations are needed.
Draping and Designing Fabric
Now that you’ve got your garment fitting dialed in, your DIY dress form becomes an invaluable fashion design tool.
It’s the perfect canvas for fabric draping experiments!
With your personal mannequin, you can visualize how textiles behave before cutting a single piece.
Try these pattern making techniques:
- Pin draping: Secure uncut fabric directly to explore natural folds and movement
- Dart manipulation: Shift fullness to create different silhouettes
- Bias exploration: Place fabric at 45° angles for elegant drape
- Volume play: Create structured shapes with pleating and gathering
Don’t just follow patterns—design them!
Your dress form turns textile design ideas into wearable garment construction reality.
Displaying and Storing Your Dress Form
Now that you’ve mastered draping on your dress form, let’s talk shop about displaying and storing your new fitting companion.
Your handcrafted dress form deserves a proper home in your sewing space! A sturdy stand transforms it from a simple tool into a statement piece.
Don’t just tuck it away—showcase your craftsmanship with these display and storage options:
| Display Options | Storage Solutions |
|---|---|
| Wooden lamp base stand | Breathable cotton cover |
| DIY PVC pipe structure | Dedicated corner space |
| Repurposed mic stand | Collapsible form design |
| Decorative dress form skirt | Dust protection bag |
| Rolling wheel base | Height-adjustable stand |
When not in use, protect your form from dust, pets, and humidity with a lightweight cover.
Remember: never store your dress form in cramped spaces or damp basements—it’ll warp faster than a wool sweater in hot water!
Caring for Your Dress Form
Your DIY dress form masterpiece deserves the same care as your favorite custom-made garments.
With proper maintenance, your custom fitting companion will remain reliable for years of garment creation.
- Dust weekly with a microfiber cloth to prevent fabric particles from accumulating
- Apply a breathable cover when not in use to protect from UV damage and dust
- Check stuffing density every few months—reshaping as needed to maintain accurate measurements
- Repair minor damages immediately with matching materials (tape for duct tape forms, fabric for sewn ones)
These simple dress form maintenance tips guarantee your creation stays in perfect shape!
Common Challenges and Solutions
You’ll encounter a few bumps along your dress form journey, from pesky air bubbles to the dreaded collapsed form syndrome.
Don’t worry—we’ve got practical fixes for every DIY disaster, ensuring your handmade mannequin stands tall and smooth for perfect-fitting garments.
Ensuring a Smooth Finish
Your new dress form now needs a smooth finish to enhance both function and appearance.
After the fitting process, focus on surface preparation to transform your creation into a professional tool.
| Surface Issue | Finishing Technique | Required Tools |
|---|---|---|
| Rough seams | Gentle sanding | Fine-grit sandpaper |
| Visible joints | Paper mache smoothing | Wallpaper paste, tissue |
| Indentations | Fill and level | Wood filler, spackling |
| Texture inconsistency | Decoupage layering | Mod Podge, thin paper |
When applying paper layers for texture control, work in small sections and allow each to dry completely.
You’ll want to smooth edges with careful attention – every seamstress knows a smooth dress form makes pinning and fitting infinitely easier!
Dealing With Air Pockets and Bubbles
Air pockets and bubbles can sabotage your DIY dress form’s professional appearance.
Troubleshooting these common issues requires patience and the right techniques for a flawless finish.
- Gentle Pressure Method: Press expanding foam evenly while it sets to eliminate hidden air pockets
- Water-Dipped Fingers: Smooth papier mache with dampened fingertips for a bubble-free surface
- Pin-Prick Technique: Puncture visible bubbles with a needle, then press flat with a damp sponge
- Slow Application Strategy: Apply duct tape or paper tape in small, overlapping sections to prevent trapping air
For stubborn bubbles in foam forms, try tapping the exterior gently while the material is still partially set.
Fixing a Collapsed or Distorted Form
Many dress forms eventually collapse or become distorted with use.
When your DIY dress form loses its shape, first examine the internal support structure. For collapse prevention, reinforce the dress form stand with PVC pipe or add weights to the base.
Address distortion correction by removing and redistributing stuffing evenly throughout the form. Apply strong fabric reinforcement at stress points, and seal any tears with duct tape before they worsen.
For severe damage, consider a papier mache layer over trouble spots for added stability. Remember, shape restoration is easier when caught early—regular maintenance of your custom dress form prevents major structural issues down the road, ensuring a longer lifespan with proper care and maintenance.
Troubleshooting Common Issues
While fixing collapsed forms takes patience, troubleshooting other issues is equally important for dress form success.
- Eliminate air bubbles by piercing with a pin and pressing flat
- Correct warping by reinforcing with additional support materials
- Fix collapsing sections by adding internal structure or more stuffing
- Smooth uneven surfaces with sandpaper or an additional cover layer
- Adjust inaccurate shapes by strategic padding in specific areas
When problems arise with your DIY dress form, try these quick solutions. Remember, perfection comes through practice—each fix makes you better at dress form creation.
Advanced Techniques for DIY Dress Forms
You’ll take your dress form to the next level with these advanced techniques that include adding functional arms, customizable features, and specialized textures for precision fitting.
Once you’ve mastered these professional-grade modifications, your homemade dress form will rival commercial models at a fraction of the cost.
Adding Arms and a Neck Support
Having conquered common dress form issues, let’s elevate your DIY mannequin with realistic appendages!
For arm construction, pool noodles provide the perfect structure while maintaining flexibility at attachment points. Secure them to armhole shaping with Velcro strips for adjustable positioning that accommodates your shoulder slope.
For neck support options, cylindrical cardboard or foam creates a natural silhouette. Cover everything with matching fabric for a seamless custom dress form that’s ready for any sewing challenge.
Creating a Customizable Dress Form
Now that you’ve crafted your perfect body double, let’s transform it into a truly adaptable sewing companion. With some clever Pattern Customization, your DIY dress form becomes a chameleon that changes with your needs!
- Create zippered sections – Installing zippers in strategic areas allows you to add or remove Padding Adjustments as your measurements change.
- Incorporate modular pieces – Design detachable bust cups of varying sizes that attach with heavy-duty snaps or hook-and-loop fasteners.
- Build adjustable waist channels – Thread drawstrings through fabric channels at the waist for quick size modifications.
- Add a layering system – Sew fitted covers in different thicknesses that can be layered for subtle shape changes.
Your custom dress form should work as hard as you do! With these Assembly Techniques, you’ll have a fitting partner that adapts perfectly to seasonal fluctuations or style experiments.
Using Different Materials and Textures
Now that you’ve mastered creating a customizable form, let’s explore material options.
Duct tape provides durability while cardboard offers affordable structure. For something lighter, try expanding foam.
Cover your form with cotton, muslin, or jersey depending on your pinning needs.
Paper mache creates smooth textures, while plaster casting delivers precise body contours.
Mix materials like fabric draping with tape wrapping for unique effects that make your dress form both functional and visually striking.
Experimenting With New Designs
Elevating your DIY dress form opens doors to design innovation beyond basic functionality.
Try incorporating current design trends with unconventional fabric choices like textured upholstery or sustainable materials. Transform your dressmaking aid with pattern making techniques that add removable extensions for different garment styles.
Consider adding magnetic attachments for style inspiration or experimenting with convertible features. Your custom dress form becomes not just a fitting tool but a reflection of your sewing tips and creative vision.
Mastering advanced techniques, such as dress form preparation, can substantially enhance your sewing skills and garment quality, leading to garment quality and improved sewing skills.
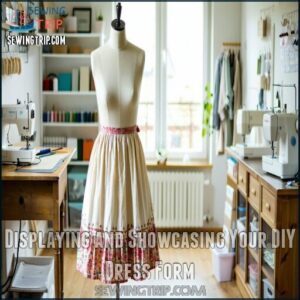
Displaying and Showcasing Your DIY Dress Form
You’ll transform your DIY dress form from a fitting tool into a statement piece with the right display techniques.
Your custom mannequin deserves a proper showcase in your sewing space, whether mounted on a decorative stand or dressed with a coordinating fabric skirt to create a custom look.
Creating a Display Stand or Base
You’ll need to set up your dress form stand to make certain it stands tall without wobbling. Make certain your mannequin stays securely in place during fittings.
Choose base materials like lamp stands, microphone stands, or wooden tripods for durability. Create stability through proper weight distribution—a heavy wood base works perfectly.
For mounting options, attach a threaded rod or wooden cloth hanger at the top. DIY alternatives include repurposing camera tripods or constructing a simple PVC pipe stand.
Adding a Decorative Cover or Skirt
Once your display stand is complete, occasionally you’ll want to elevate your DIY dress form with a decorative cover or skirt that reflects your personal style.
This finishing touch transforms your practical tool into an attractive studio centerpiece.
Consider these fabric choices for your dress form decoration:
- Classic Fitted Skirt – Use medium-weight cotton with a zipper closure for a clean, professional finish that complements any sewing space
- Vintage-Inspired Cover – Incorporate lace overlays and pearl embellishments for a touch of nostalgia
- Modern Color Block Design – Combine contrasting fabrics with precise topstitching for contemporary appeal
- Seasonal Slip Cover – Create interchangeable covers using seasonal prints that you can swap throughout the year
The skirt construction process is straightforward—measure the circumference of your custom dress form base, add seam allowances, and select finishing techniques that showcase your sewing skills.
Simple hook-and-loop closures make your cover design easily removable for cleaning.
Showcasing Your Dress Form in a Sewing Space
Your handcrafted dress form deserves to be the centerpiece of your sewing space.
Position it strategically near natural light to create an inspiring Dress Form Display that’s both functional and aesthetically pleasing. Mount it on a sturdy dress form stand that complements your décor—whether industrial, vintage, or modern.
Transform your DIY dress form into a storage solution by hanging frequently used notions on it or arranging pattern weights nearby. For creative form decoration, try draping a beautiful fabric swatch or pinning your current project inspiration.
Many sewists find their custom dress form becomes a conversation starter when positioned prominently in their sewing station. It’s not just a tool—it’s a reflection of your craftsmanship and the perfect-fitting garments yet to come.
Sharing Your DIY Dress Form With Others
Your crafted dress form deserves its moment in the spotlight.
Share photos on Social Media or connect with DIY Communities in Online Forums where fellow creators appreciate custom work.
Join Craft Blogs to exchange Sharing Tips or host a small workshop for friends.
Your DIY dress form tutorial might inspire others just starting their sewing journey, and remember—every shared project builds stronger connections within the maker community.
Frequently Asked Questions (FAQs)
Is it worth buying a dressmakers dummy?
Buying a dressmaker’s dummy is like hiring a silent assistant—it’s a game-changer for precision tailoring.
If you’re crafting garments regularly, it saves time, guarantees accurate fitting, and offers an unmatched professional touch to your work, making it a crucial tool for precision tailoring.
Can I make a dress without a dress form?
Absolutely, you can.
While a dress form helps with fit and design, you can use your measurements, mirror checks, and adjustments during fittings.
It’s more effort, but creativity and persistence go a long way!
What are dress forms filled with?
Did you know custom dress forms can mimic your exact shape?
They’re typically stuffed with fiberfill or batting for softness, rice for weight, or expandable foam for precision—your choice depends on your needs and budget!
How to make a DIY dress form?
Start by wrapping your body with duct tape or paper tape over a fitted shirt.
Cut it off carefully, then reseal, stuff with filler, and mount on a sturdy stand.
Customize it for accuracy!
Can You Make your own dress form?
Where there’s a will, there’s a way—you can absolutely make your own dress form!
Wrap materials like duct tape or paper mache around your torso.
Layer for strength and stuff for shaping perfection.
How do I make a custom dress form?
To make a custom dress form, wrap yourself in duct tape or paper tape layers over a t-shirt.
Mark key points, cut the shell, reseal, stuff it, and mount on a sturdy stand.
Can you make a dress form from a real body?
Creating a dress form from a real body is like sculpting a masterpiece—you’ll wrap yourself in duct tape, plaster, or brown paper tape, layer by layer, ensuring precision while shaping it to match your exact measurements.
This process allows for a customized fit, as the dress form is molded to your unique body shape, enabling accurate garment construction and alterations.
Why should you make your own dress form?
You should create your own dress form to guarantee a perfect fit made to your exact measurements.
It’s cost-effective, customizable, and offers full control over design, making sewing projects more precise and satisfying.
How do you fill a dress form?
Don’t worry about perfection—fill your dress form with fiberfill, batting, or even old clothes.
Start gradually, focusing on even density.
Adjust for curves with extra stuffing, ensuring a firm yet flexible shape for pinning and shaping.
Is it worth buying a Dressmakers dummy?
Buying a dressmaker’s dummy is worth it if you frequently sew, alter, or design clothing.
It saves time, guarantees precise fitting, and provides a dependable mannequin.
DIY options can offer similar benefits at lower costs.
Conclusion
Crafting a perfect garment starts with the right tools, and what’s more personal than making your own dress form?
It’s practical yet creative—combining precision with a touch of DIY spirit.
Whether you’re using duct tape or plaster, a custom dress form guarantees every stitch fits perfectly to your shape.
Say goodbye to generic sizes and hello to custom tailoring.
With a little effort and simple materials, you’ll have a personal sewing companion that’s unique to you!


