This site is supported by our readers. We may earn a commission, at no cost to you, if you purchase through links.
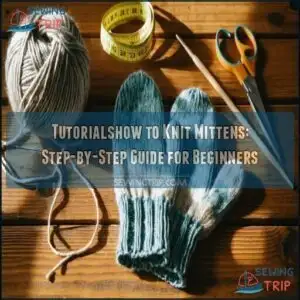 Knitting mittens is simpler than it looks. Start with worsted weight yarn—wool’s cozy, but acrylic works too.
Grab double-pointed needles (DPNs) or circular needles, depending on your preference. Begin with a long-tail cast-on, then knit the cuff in ribbing for stretch.
For the mitten body, increase stitches gradually for the hand, then decrease at the top to shape it. Set aside stitches for the thumb gusset while working the mitten.
Later, pick those up, shaping and closing off the thumb. Weave in your ends, and voilà—mittens! Choose colors you love, and maybe try a pattern with stripes or simple designs.
Table Of Contents
- Key Takeaways
- Choosing The Right Yarn
- Essential Knitting Tools
- Casting on and Starting The Cuff
- Shaping The Mitten Body
- Creating The Thumb Gusset
- Working The Thumb
- Finishing The Mitten
- Adding a Monogram or Embellishments
- Troubleshooting Common Issues
- Tips for Customizing Your Mittens
- Frequently Asked Questions (FAQs)
- Conclusion
Key Takeaways
- Pick worsted weight yarn and choose between wool or acrylic for warmth and durability based on your needs.
- Master key techniques like casting on, ribbing, shaping the thumb gusset, and knitting in the round for a polished mitten.
- Use double-pointed needles (DPNs) or the magic loop method with circular needles for seamless knitting.
- Customize your mittens with contrasting colors, monograms, or embellishments for a personal touch.
Choosing The Right Yarn
Choosing the right yarn is the first step to making mittens that are warm, durable, and comfortable.
The perfect yarn sets the stage for mittens that keep hands cozy, stylish, and ready for winter adventures.
Stick with worsted weight yarn for its versatility, and think about fiber types like wool or acrylic based on your needs.
Worsted Weight Yarn Options
Worsted weight yarn is your mitten-making best friend, offering the perfect mix of thickness and durability.
For exceptional results, consider these trusted choices:
- Patons Classic Wool: A natural option with excellent warmth and stitch definition.
- Lion Brand Wool-Ease: A durable blend combining acrylic’s longevity with wool’s cozy feel.
- Cascade 220: A classic choice with vibrant colors and professional-quality finish.
Consider yarn product options for your project.
These options balance structure, softness, and style for winter projects!
Yarn Fiber Choices (Wool, Acrylic, Blends)
Choosing the right yarn fiber can make or break your mitten experience.
Here’s what to keep in mind:
- Wool Warmth – Natural and breathable, wool (like Patons Classic Wool) keeps hands cozy.
- Acrylic Durability – Budget-friendly and machine-washable, acrylic yarn withstands wear and tear.
- Blend Benefits – Wool-acrylic blends combine softness with easy care, perfect for long-lasting mittens.
- Eco-Friendly Yarns – Organic wool, bamboo, and alpaca offer sustainable choices, blending comfort and longevity.
Choose fibers that fit your lifestyle and knitting goals!
Considering the project, remember that fabric weight matters for the final product.
Color Selection and Contrast
Color choices can elevate your mittens from basic to brilliant. Use color theory to guide your pairing, like warm seasonal palettes or vivid contrasts.
For dimension, try contrasting yarn or blends. Here’s a quick guide:
| Technique | Examples |
|---|---|
| Seasonal Palettes | Winter blues, autumn reds |
| Contrast Techniques | Bright with neutral tones |
| Pattern Design | Stripes, two-tone cuffs |
Stick with two colors at first—simple yet striking. Explore textured looks with different yarn weights. Think of your mittens as art—you’re the designer crafting something unique.
Essential Knitting Tools
Before you start knitting mittens, make sure you have the right tools to keep things smooth and simple.
From double-pointed needles to a trusty tapestry needle, each piece plays a key role in creating a flawless finish.
Double-Pointed Needles (DPNs) Vs. Circular Needles
You’ve got your yarn, now let’s pick knitting needles! For mitten knitting, both double-pointed needles (DPNs) and circular needles work wonders in the round.
DPNs win for needle maneuverability and tackling tight spots like thumb gussets. Circular needles, using the magic loop method, keep stitch security high and reduce gaps.
Many knitters find it useful to shop for DPNs for specialized projects.
- DPNs: Ideal for small tubes like mitten thumbs.
- Circular needles: Better for seamless knitting.
- Stitch security: Consistent tension matters.
- Project suitability: Try both; comfort wins!
Experiment to see what fits your knitting style.
Needle Sizes and Materials (Wood, Metal, Plastic)
How do knitting needles affect your project? The right tool makes all the difference.
For mittens, US sizes 6-8 (4-5mm) pair well with worsted yarn. Choose materials wisely:
- Wood needles: Warm to the touch, offer grip, and prevent sliding. Perfect for beginners.
- Metal tips: Durable and smooth for faster knitting, but slippier for new knitters.
- Plastic handles: Lightweight and affordable, with moderate grip. Gentle on hands but less sturdy.
Your knitting materials should suit your comfort and style for the best results! Many knitters also find that bamboo needles are comfortable to use.
Scissors, Tapestry Needles, and Other Accessories
If you’ve settled on your needles, let’s talk accessories to make mitten-making easier and more organized.
These handy tools are your backstage crew, ensuring a smooth knitting experience:
- Scissors Types: Sharp yarn clippers for clean, fray-free cuts.
- Stitch Markers: Perfect for tracking thumb placement or pattern changes.
- Tapestry Needles: Key for weaving in ends and closing gaps.
- Cable Needles: Help hold stitches during thumb gusset work.
- Knitting Bags: Keep yarn, row counters, and pom-pom makers tidy.
Sharp blades are essential, so consider investing in specialized cutting tools.
Equip yourself with these, and you’re ready!
Casting on and Starting The Cuff
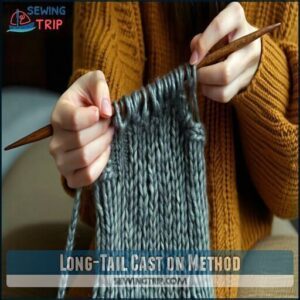
To start your mittens, use the long-tail cast-on method to create a strong, stretchy edge for the cuff.
Join your stitches in the round carefully, making sure they’re not twisted, and you’re ready to knit the cuff rows.
Long-Tail Cast on Method
The longtail caston method is great for knitting mittens.
It gives you a sturdy, flexible edge and prevents beginner mistakes.
Start by measuring a long tail about three times your mitten’s width.
Make a slip knot, hold the yarn in a “slingshot” with your thumb and finger, then pull the yarn through the loops to form stitches.
Keep even yarn tension for an even stitch count.
This beginner knitting technique is fast, reliable, and perfect for any mitten pattern.
Joining Stitches in The Round
You’ve cast on your stitches—now it’s time to connect them for circular knitting. Joining stitches in the round is where your mitten pattern begins to take shape.
First, arrange your stitches evenly without twisting them. It’s like aligning puzzle pieces—everything has to fit neatly. Place a stitch marker at the starting point, so you always know where your round begins.
When connecting, tighten the first couple of stitches to avoid gaps—that’s key for seamless joins and invisible seams. Here’s what to keep in mind:
- Double-check stitches aren’t twisted.
- Use a marker to track rounds.
- Work with steady tension control.
- Practice patience for smooth circular knitting.
Knitting The Initial Cuff Rows
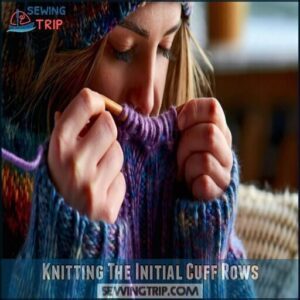
Now that your stitches are joined, it’s time to focus on knitting the initial cuff rows.
Start with a stretchy cuff stitch pattern, like 1×1 or 2×2 ribbing, which gives a snug, comfortable fit. Keep your ribbing tension control steady for a polished, seamless cuff join.
Decide on your cuff length—short for a sleek look or longer for extra warmth. Pay attention to edge stitch options to create a neat foundation.
This cylindrical cuff sets the tone for your mitten’s fit and feel, so take your time to get it just right.
Shaping The Mitten Body
Now it’s time to shape the mitten’s body, giving it structure and a snug fit.
You’ll add stitches for the hand, knit even rows, and carefully decrease at the top to create the rounded finish.
Increasing Stitches for The Hand
To shape the mitten comfortably, increase stitches using M1L (Make 1 Left) and M1R (Make 1 Right). These smooth techniques prevent gaps and guarantee proper mitten expansion for finger width.
Place increases evenly to avoid lumps and holes. Use stitch markers, focus on maintaining tension, and align the rate of increases with your pattern for the best fit.
- Track progress with stitch markers.
- Space increases consistently.
- Choose M1L vs M1R for symmetry.
- Keep tension even.
Working Even Rows
Once you’ve shaped the increases, it’s time to focus on working even rows. Keep your stitches steady and pay close attention to consistent tension for a fabric smoothness that shines.
Use row markers—they’re lifesavers for tracking progress and ensuring your row gauge stays on point. Check your stitch count often to avoid gaps that disrupt the mitten’s flow.
Think of each row as building blocks—they stack neatly when done with care. Working rows evenly adds stitch definition and keeps your work tidy. Enjoy the process; every stitch brings your mittens closer to completion!
| Tip | Action Needed | Benefit |
|---|---|---|
| Row Tension | Stay consistent | Smooth fabric texture |
| Stitch Count | Check frequently | Avoid shape issues |
| Row Markers | Place strategically | Clear progress tracking |
| Stay Steady | Knit with patience | Fewer errors |
| Take Breaks | Avoid knitting fatigue | Seamless focus |
Decreasing Stitches for The Top
When decreasing stitches for the top, focus on smooth crown shaping to complete your mitten.
Use k2tog (knit two together) and ssk for tidy decreases. Keep an accurate stitch count and consistent tension to avoid holes.
- Alternate decrease techniques like k2tog and ssk every round.
- Reduce evenly for clean shaping.
- Take it slow—your tension matters.
- Finish by weaving ends tightly. Perfect closure!
Creating The Thumb Gusset
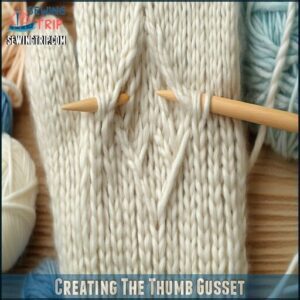
Adding a thumb gusset might sound tricky, but it’s all about increasing stitches in the right spots.
You’ll create a neat triangle of fabric that gives your thumb the perfect room to move.
Placing Thumb Stitches on Hold
When placing thumb stitches on hold, you’ll need some waste yarn or a reliable stitch holder.
Just slide your gusset stitches onto the holder or yarn—it’s like saving them for later.
This keeps your mitten neat and ready for shaping the thumb later.
To prevent gaps (or "ladders"), secure stitches snugly.
| Tools Needed | Purpose | Examples | Pros | Cons |
|---|---|---|---|---|
| Waste Yarn | Holds stitches | Scrap yarn | Simple, cost-effective | Might loosen over time |
| Stitch Holders | Secures stitches | Plastic holders | Sturdy, reusable | Bulkier than yarn |
| Tapestry Needle | Thread waste yarn | Blunt needles | Precise stitch placement | Extra tool needed |
| Circular Needle | Alternative holder | Size 7–8 needles | Convenient for knitters | May feel clunky |
| Safety Pins | Improvised holder | Metal pins | Easy to find, inexpensive | May snag delicate yarns |
Working The Thumb Gusset Increases
Building the thumb gusset is where your mitten truly starts to fit like a glove.
Use markers to define the gusset area, and work symmetrical increases to expand it evenly.
Follow these steps:
- Knit to the first marker, then make a Make 1 Left (M1L) increase for a neat edge.
- Knit across the center gusset stitches.
- Finish with a Make 1 Right (M1R) increase after the second marker.
Repeat every three rounds.
Proper tension is important, but for sewing projects, consider how beeswax can smooth threads.
Keep your tension steady, and this avoids holes while ensuring a smooth thumb gusset.
Shaping The Thumb
Shaping the thumb is like adding the finishing touch to a puzzle—it guarantees your mitten fits snugly and comfortably.
Start by working the thumb gusset increases evenly on both sides, use stitch markers to track progress and keep everything symmetrical.
Once the gusset’s triangle is complete, place these thumb gusset stitches on hold, next, pick up thumb stitches around the gusset, making sure to close any gaps.
Decrease stitches for the thumb gradually, shaping the thumb tip for a smooth, rounded finish, don’t rush—precision here means a polished mitten, and it’s crucial for a comfortable fit, ensuring the mitten is snugly and well-made.
Working The Thumb
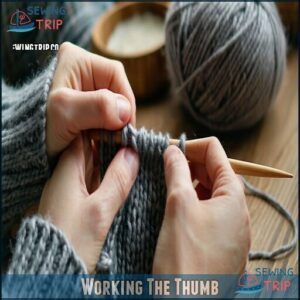
Now it’s time to complete the thumb, giving your mitten its final touch. You’ll pick up stitches, shape the thumb, and finish with a snug, tidy tip.
Picking Up Thumb Stitches
It’s time to pick up those thumb stitches.
Use your needle to retrieve the held stitches, keeping an even Edge Stitch Count for a smooth thumb base.
Be mindful of Yarn Tail Management to avoid tangles.
To prevent gusset holes, keep a firm, even tension.
This guarantees a snug Thumb Circumference Fit and invisible join seam when finishing the thumb.
Decreasing Stitches for The Thumb
After picking up thumb stitches, focus on decreasing stitches for the thumb to shape it snugly.
Use the K2tog method for neat reductions, keeping an even stitch count. Work steadily with double-pointed needles, ensuring the fabric stays smooth.
Pay attention to tension to avoid gaps. Thumb shaping might feel tricky at first, but with practice, it’ll become a satisfying part of making mittens.
Shaping The Thumb Tip
You’re almost there! To finish the thumb, focus on decreasing methods like k2tog. Work evenly, keeping tension smooth.
Finish strong—decrease evenly with k2tog, smooth your tension, and create a snug, polished thumb tip for ultimate comfort.
As the thumb length narrows, aim for a snug, seamless finish. For a flawless tip, thread your yarn through the last stitches, pull tightly, and knot securely. This closure guarantees no cold air sneaks in.
- Use gusset integration stitches to avoid gaps.
- Prevent points by evenly spacing decreases.
- Double-check fit to keep your knit mittens cozy.
Enjoy your perfectly shaped mitten thumb!
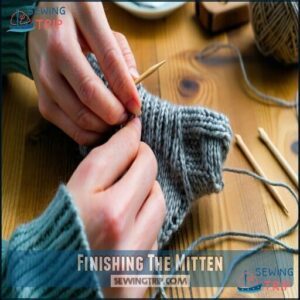
Finishing The Mitten
You’re almost finished! Now, bind off the stitches, weave in any loose ends, and block the mitten for a polished, professional look.
Binding Off Stitches
To finish your mittens and secure the stitches, you’ll use a bind-off method. The stretchy bind-off is perfect for maintaining edge elasticity.
Here’s how: knit two stitches, pass the first stitch over the second, and repeat until you reach the end. Keep an eye on tension control—too tight, and the edge might pucker; too loose, and it won’t hold.
Here’s a quick breakdown:
| Step | Action |
|---|---|
| 1. Knit | Two stitches |
| 2. Pass Over | First stitch |
| 3. Continue | Across the row |
| 4. Secure Tail | Snip and weave |
| 5. Check Edge | Verify flexibility |
This knitting technique locks every stitch while keeping your edge smooth and stretchy!
Weaving in Ends
Weaving in ends is essential for neatly finishing your mitten project.
It’s the final touch that secures everything in place.
Follow these steps:
- Secure ends by threading yarn tails through nearby stitches, mimicking the knit pattern.
- Avoid bulkiness with invisible weaving techniques that blend seamlessly.
- Trim carefully, keeping ends snug and hidden.
This simple yet vital step completes your mittens like a pro.
Blocking The Finished Mitten
After weaving in ends, blocking the finished mitten makes everything look polished.
Wet blocking is simple—soak your mittens, gently squeeze out water (no wringing), and lay flat to dry.
If you’re short on time, go for steam blocking or spray blocking with Blocking Tools like mats or pins.
Blocking evens out stitches, smooths edges, and gives your mittens a professional touch. It’s the secret to turning good knitting into great knitting!
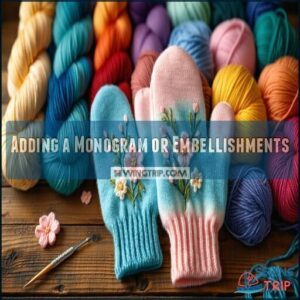
Adding a Monogram or Embellishments
Add a personal touch to your mittens by stitching on a monogram or fun embellishments.
Just grab some contrasting yarn, a tapestry needle, and your creativity to make them uniquely yours.
Choosing Contrasting Yarn
Choosing the right contrasting yarn can breathe new life into your mittens. Use color theory to find shades that either softly blend or boldly stand out against your main color.
The secret to a polished look lies in matching fiber types and weights—you don’t want uneven wear ruining the cozy vibe. Take contrasts further by exploring yarn textures. Pair shiny yarn with matte or fuzzy textures for a touch of flair.
Test small swatches to verify your choices align with the pattern design and don’t overpower. Remember, small details create big visual impact, making your project feel like a personal masterpiece.
- Complement or contrast: Harmonize colors or create bold pops.
- Match fiber types: Guarantee durability.
- Experiment with textures: Try shiny, matte, or fuzzy contrasts.
- Test combinations: Swatch first for perfect personalization.
Simple Embroidery Techniques
Personalizing your handmade mittens is fun with simple embroidery techniques like a backstitch or satin stitch.
Opt for bold color palettes to make designs pop against your yarn choice.
Sketch designs with fabric markers for neat mitten placement.
Use quality embroidery needles for smooth stitches.
For adding elegance, consider using French knot embellishments for textured dots.
Here’s a quick guide:
| Stitch Type | Difficulty | Best For | Look | Example Ideas |
|---|---|---|---|---|
| Backstitch | Easy | Outlines | Neat, defined | Monogram initials |
| Running Stitch | Easy | Dashed effects | Simple, textured | Borders |
| Satin Stitch | Medium | Filling shapes | Smooth, solid | Heart motifs |
| Straight Stitch | Easy | Adding texture | Random, playful | Abstract details |
| Stem Stitch | Medium | Curved lines | Clean, flowing | Flower stems |
Let your diy mittens stand out with just a few thoughtful touches!
Adding a Monogram or Logo
Give your mittens a personalized touch with a monogram or logo.
First, sketch guidelines on the cuff or back with a water-soluble pen. Use simple embroidery techniques like backstitch for outlines or chain stitch for dynamic details.
For bold designs, try charted designs or duplicate stitch with embroidery floss. If you’re feeling adventurous, intarsia knitting works too!
Choose contrasting colors that pop, and enjoy turning your personalized mittens into wearable art!
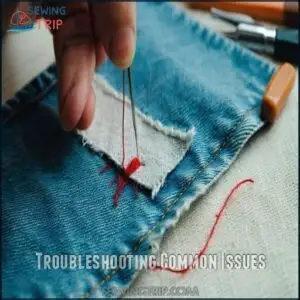
Troubleshooting Common Issues
When knitting mittens, it’s normal to run into a few hiccups like dropped stitches or uneven tension.
Don’t worry—these simple fixes will keep your project on track and looking great.
Fixing Dropped Stitches
Dropped stitches might seem like knitting nightmares, but they’re easy to fix! Spot the slip by identifying drops early to prevent unraveling chaos.
Here’s how to tackle it:
- Use a crochet hook to secure loops; laddering up each “rung” one at a time.
- Maintain steady tension while pulling rungs through securely.
- Slip repaired stitches back onto your needle with care.
With practice, this knitting mittens tutorial makes fixing dropped stitches a breeze—your secret skill against tension issues!
Dealing With Uneven Tension
Uneven tension can sabotage your knitting, leaving your mittens looking less polished.
Stitches that vary in size often stem from inconsistent grip, tight rows, or uneven technique.
Here’s how to fix it:
| Tension Issue | Cause | Solution |
|---|---|---|
| Loose stitches | Yarn too loose | Hold the yarn snugly |
| Tight rows | Over-pulling yarn | Relax your hands |
| Uneven patterns | Poor technique | Practice swatches regularly |
To improve stitch tension, make small practice swatches with scrap yarn. Focus on developing a consistent gauge.
Blocking techniques can smooth minor imperfections, while adjusting needle size helps match your preferred style.
Remember, steady practice is key to improving your knitting skills, and it is essential for achieving polished results.
Resolving Yarn or Needle Issues
Struggling with snagging or slipping while knitting your yarn mittens? Needle and yarn mismatches are often to blame.
Problems like yarn splitting, uneven tension, or needle slippage can make any knitting tutorial feel frustrating.
- Switch needle types: Use metal for slippery yarns or wood for grippier control.
- Choose plied yarns: Single-ply yarns split more often than multi-ply options.
- Match needle size to yarn weight: Too small? Expect tension problems.
- Inspect your needles: Bent tips or dull points affect your stitches.
Knitting isn’t perfect, and that’s okay. If your yarn still misbehaves, experiment with a different yarn weight for smoother progress.
Tips for Customizing Your Mittens
You can make your mittens truly unique by trying different yarn weights, colors, or adding fun embellishments like cuffs or patterns.
Adjusting the size or design guarantees a perfect fit and lets you create mittens that match your style perfectly.
Changing Yarn Weights or Colors
Ready to spice things up? Changing yarn weights or colors can refresh your mittens instantly.
Swapping yarn weights? It’s all about gauge adjustments! Grab a yarn collection and test a small swatch to measure your gauge. Pair bulkier yarn with larger needles for cozy mittens or finer yarn with smaller needles for intricate designs. Use yarn weight conversion charts to guarantee the perfect fit.
For colors, try colorwork techniques like stripes, gradient effects, or patterns like intarsia knitting. Scrap yarn projects can add something unique. Mixing bold contrasts or subtle shades? Both work wonders.
Here are some ideas:
- Knitting colorful stripes with leftover yarn
- Blending ombre yarn for gradient effects
- Adding pops of color with scrap yarn
- Testing unique colorwork techniques
- Experimenting bold or soft tones in knitting patterns
Modifying The Pattern for Different Sizes
When modifying the pattern for different sizes, start with hand measurements and gauge swatching to adjust for children or adult mittens.
Use stitch multiples to resize the hand circumference while keeping an ease allowance for comfort.
Pattern grading helps fine-tune thumb gusset placement to fit naturally.
For children, reduce stitches by 20%; for larger adults, increase by 15% to ensure a proper fit with ease allowance.
Regularly check your gauge so your sizing stays accurate and consistent.
Adding Cuffs or Other Embellishments
Give your mittens a personality boost by sprucing them up with fun finishes.
Try these ideas to customize while keeping them cozy:
- Experiment with cuff variations, like folded edges or colorwork designs. Extra warmth, anyone?
- Add flair with bead embellishments or pom-pom attachments. A little sparkle never hurts!
- Play with fringe details or textured stitches, like cables, for standout borders.
- Finish smart by incorporating a neat cuff design before binding off stitches—a pro look made simple.
These tweaks turn knitting patterns into stylish, beginner-friendly masterpieces!
Frequently Asked Questions (FAQs)
How do I Knit a mitten?
Start by casting on stitches for the cuff, then knit in ribbing.
Shape the mitten and thumb gusset with increases, knit the hand section, decrease for the top.
Finish the thumb, and weave ends, which includes weave ends.
Are mittens a good knitting project?
Mittens are a great knitting project, especially for beginners.
They’re small, practical, and teach key skills like shaping and working in the round.
Plus, who doesn’t love creating something cozy and functional?
What is simple mittens knitting pattern?
Don’t sweat it—knitting mittens is a breeze!
Cast on stitches for the cuff, knit in ribbing, create a thumb gusset.
Then shape the hand and thumb.
Finish by weaving ends and blocking the mittens.
Can You Make your own mittens?
Absolutely, you can knit your own mittens.
All you need is yarn, needles, and some patience.
Start with a simple pattern, like a cuff-to-top design, and enjoy creating something warm and personal.
How do you make a symmetrical Mitten?
Think of knitting a mitten like shaping two peas in a pod.
Use techniques like Make 1 Left and Right for even thumb gussets, maintain tension, and decrease symmetrically for a polished, balanced look.
What should I know before knitting mittens?
Before knitting mittens, pick the right yarn and needles.
Learn basic techniques like casting on, ribbing, and shaping. Understand sizing and a thumb gusset.
Practice patience—mistakes happen! A snug cuff guarantees a great fit.
Can a beginner knit mittens?
Yes, you can!
Start with simple patterns and worsted-weight yarn.
Focus on techniques like ribbing, knitting in the round, and shaping.
Be patient, practice often, and embrace mistakes—they’re part of the process!
Can you knit mittens on straight needles?
Picture cozy mittens warming your hands—believe it or not, you can knit them on straight needles.
You’ll knit flat, seam the edges, and shape carefully.
Patience and practice help you create snug, charming mittens.
What needles are best for knitting mittens?
Double-pointed needles (DPNs) are your best bet for knitting mittens, especially when tackling small details.
Circular needles with the magic loop technique work too, offering convenience.
Choose wood or metal based on your knitting style!
How do I choose a mitten pattern?
Choosing a mitten pattern is like picking the perfect recipe—match it to your skill level, yarn type, and style.
Look for clear instructions, adaptable sizing, and inspiring designs that excite you to start knitting.
Conclusion
Master mitten-making with this step-by-step guide, and you’ll see it’s simpler than it seems.
Practice patience, pick your perfect yarn, and enjoy working through this "tutorial show to knit mittens."
From cuffs to the thumb, each step builds your skills. Don’t stress mistakes—those are part of the process.
Customize your mittens with colors, patterns, or monograms. Before you know it, you’ll create cozy, handmade mittens that are practical and fun.
Start knitting your masterpiece today!


