This site is supported by our readers. We may earn a commission, at no cost to you, if you purchase through links.
Start with accurate measurements – they’re your best friend in getting that perfect fit.
Think of fabric selection like matchmaking: the right weight and drape make all the difference.
You’ll need to master dart manipulation to enhance curves naturally, and grading between sizes guarantees your creation fits like a glove.
Combine hand and machine stitching for professional results, whether you’re working with delicate laces or sturdy materials.
Soon you’ll transform basic patterns into stunning custom designs that’ll make everyone ask, "Where did you get that dress?
Table Of Contents
- Key Takeaways
- Dress Pattern Basics
- Advanced Pattern Making
- Sewing Machine Mastery
- Fabric Selection Guide
- Cutting Techniques Essentials
- Sewing Techniques Fundamentals
- Fitting Techniques Mastery
- Troubleshooting Common Issues
- Customization Options Guide
- Project Completion Tips
- Frequently Asked Questions (FAQs)
- Conclusion
Key Takeaways
- You’ll need precise body measurements and pattern adjustments to achieve a perfect fit – start by mastering dart manipulation, grading between sizes, and making systematic fitting adjustments throughout the construction process.
- Your fabric choice determines your dress’s success – select materials with appropriate weight, fiber content, and stretch properties that match your pattern’s requirements for proper drape and structure.
- You’ll create professional results by combining hand and machine techniques – master straight seams, curved edges, and proper thread tension while using the right tools for cutting and construction.
- You can transform basic patterns into custom designs through smart modifications – experiment with design variations, add strategic embellishments, and use appropriate closure methods to create unique, polished garments.
Dress Pattern Basics
Understanding dress pattern basics is like cracking a secret code for sewing success—you’ve got to start with the right fabric and make adjustments to achieve a great fit.
Don’t worry, with a little patience and some careful measuring, you’ll be stitching up stylish masterpieces in no time!
Fabric Choice Importance
Selecting the right fabric is like finding the perfect dance partner—it sets the tone!
Consider fabric weight for structure, analyze the fiber content for care, and prioritize texture selection for comfort.
Check color matching under different lighting, and choose a drape that flatters your pattern.
A smart fabric choice transforms an idea into a runway-ready masterpiece!
Pattern Adjustments Techniques
Before diving into your dress project, mastering pattern adjustments can make the difference between a so-so fit and a perfectly crafted masterpiece. You’ll need to embrace fit modifications that transform basic patterns into custom creations that flatter your unique shape.
- Measure twice, mark once – accurate measurements are your best friend
- Master dart manipulation to enhance curves naturally
- Learn to grade between sizes for a perfect fit
- Adjust shoulder and bust lines for proper drape
- Fine-tune waist and hip measurements for comfort
The key to precision pattern adjustments lies in understanding how small changes create big impacts on your final garment. Think of it like tailoring a suit – each tweak brings you closer to that perfect, made-for-you fit.
The process of making these adjustments requires patience and attention to detail, as small changes can have a significant effect on the overall outcome.
Sewing Techniques Variations
Now that you’ve adjusted your pattern perfectly, let’s explore the exciting world of sewing techniques.
You’ll find that complex sewing transforms a simple dress into a masterpiece through clever fabric manipulation.
Mix hand stitching with machine work for professional results – think French seams for delicate fabrics and flat-felled seams for sturdy ones.
Add garment embellishments like pintucks or decorative textile finishing to make your creation truly unique.
Advanced Pattern Making
You’ll find that advanced pattern making is like solving a fun puzzle, where each piece of your dress design comes together through precise measurements and creative adjustments.
When you’re ready to tackle those intricate lace overlays, flowing wedding gowns, or sophisticated evening wear patterns, you’ll discover that your basic pattern-making skills will transform into something truly spectacular.
You’ll be working with precise measurements and creative adjustments to bring your design to life.
Lace Dress Patterns
Now that you’ve mastered basic patterns, let’s tackle the enchanting world of lace dress patterns. Working with lace fabric requires precision and patience – think of it as crafting a delicate spider’s web.
Consider exploring advanced sewing pattern making to further refine your skills. You’ll need to carefully align floral motifs, handle beaded details with care, and master specialized cutting techniques.
Pattern drafting for lace dresses involves strategic placement of seams to showcase the fabric’s beauty, especially around necklines and hems. This requires a deep understanding of how to work with lace, including precision and patience, to create a truly stunning garment.
Wedding Dress Patterns
Moving from delicate lace to bridal elegance, wedding dress patterns open up a world of creative possibilities. A wedding dress fabric guide can help you choose the perfect material.
You’ll find joy in crafting your dream gown with these key steps:
- Start with databases like The Fold Line for authentic wedding dress patterns
- Choose luxurious fabrics like silk satin or Mikado
- Customize necklines and bodice details
- Add beaded lace embellishments
- Perfect your bridal corsets and dress train
Remember, wedding dresses bloom from careful pattern making, just like love itself grows from attention to detail. This process involves transforming your ideas into a beautiful, luxurious gown, making your wedding day even more special.
Evening Dress Patterns
The art of creating evening dress patterns demands precision in silhouette design and fabric draping.
You’ll need to master neckline options that flatter while ensuring proper support, especially for strapless styles.
When working with sequins or beading techniques, opt for designs with fewer seams, and consider using materials like nylon mesh or chiffon for body-hugging effects.
Learn more about evening gown construction, and remember that advanced sewing skills shine in details like invisible zippers and narrow rolled hems.
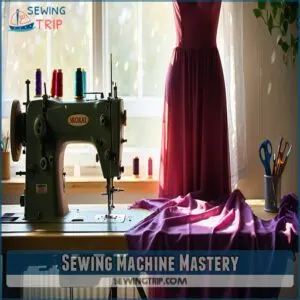
Sewing Machine Mastery
You’ll need to become best friends with your sewing machine before tackling complex dress patterns, just like you’d learn to drive before entering a race.
Your success with intricate designs starts with mastering the basics: understanding your machine’s parts, adjusting thread tension like a pro, and practicing those straight stitches until they’re as smooth as butter.
This approach ensures that you develop a strong foundation, allowing you to tackle more complex projects with confidence.
Machine Parts Functions
Understanding your sewing machine’s parts is like getting to know a new friend – it takes time but pays off in perfect stitches.
For seamless pattern execution, familiarize yourself with these core components:
- Bobbin Management system controls the lower thread supply
- Presser feet attachments guide fabric through different stitch patterns
- Needle Alignment mechanism guarantees precise stitch placement
The essential thread management system includes the spool holder, thread guide, and tension regulator.
Mastering these fundamentals transforms complex dress patterns into manageable projects, and includes understanding the essential thread management system.
Thread Tension Adjustment
Now that you’re familiar with your machine’s parts, let’s tackle thread tension – the secret sauce of perfect stitches.
Think of tension like a dance between your top and bottom threads.
Too tight? Your fabric puckers like a disappointed face.
Too loose? You’ll get loopy stitches that look like a toddler’s art project.
Adjust your tension dial in small increments until both threads meet perfectly in the middle, achieving a balance that is the key to perfect stitches with the right tension dial adjustments.
Straight Stitch Practice
Now that you’ve got your thread tension just right, let’s perfect that straight stitch – it’s like learning to walk before you run in the sewing world.
Start with a scrap fabric, set your stitch length to 2.5mm, and maintain steady sewing speed. Remember, practice makes permanent.
- Keep your eyes focused about 1/2 inch ahead of the needle, not directly on it
- Use the machine’s guide lines on the needle plate for accuracy
- Practice at different speeds to find your comfort zone
- Try sewing curved lines after mastering straight ones
- Experiment with various stitch lengths to see how they affect your seam’s appearance
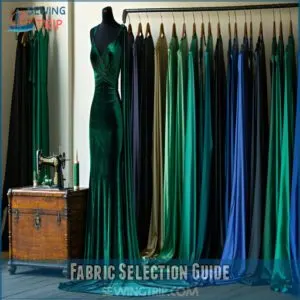
Fabric Selection Guide
You’ll need more than just a pretty pattern to create your dream dress, as choosing the right fabric is like finding the perfect dance partner for your design.
Just as you wouldn’t wear flip-flops to a ballroom competition, you’ll want to match your fabric’s weight, stretch, and fiber content to your pattern’s specific requirements for the best results.
Fabric Weight Considerations
You’ll dive deeper into success with dress patterns when you grasp fabric weight’s key role.
Your fabric’s density impacts how it hangs, moves, and behaves during construction.
Choosing the correct dress pattern fabric weight is essential for the final look.
Here’s a quick guide to common weight classes and their ideal uses:
| Weight Class | Fabric Examples | Best Uses |
|---|---|---|
| Lightweight | Chiffon, Silk | Flowing dresses |
| Medium | Cotton, Linen | Everyday wear |
| Medium-Heavy | Denim, Twill | Structured pieces |
| Heavy | Wool, Velvet | Winter garments |
Remember, matching fabric weight to your pattern’s requirements guarantees proper drape effects and texture impact.
Fiber Content Analysis
Your dress’s success starts with analyzing fiber content, just like checking ingredients before baking.
Examine the fabric label for natural fibers like cotton and silk, or synthetics like polyester.
Consider how fiber types affect drape, care, and durability.
Understanding dress fabric fiber types is essential for informed choices.
A high thread count with dense weave typically indicates quality, while textile science shows that fiber analysis helps predict fabric behavior during construction and wear.
Fabric Stretch Matching
Now that you’ve analyzed your fiber content, matching the right stretch factor to your pattern is like finding the perfect dance partner.
Your fabric’s elasticity should complement your design’s needs. Consider various stretch fabric dress options available online.
When working with knit selections and stretch fabrics, test the recovery by pulling gently – if it bounces back quickly, you’re golden.
For stable seams, reinforce stretchy areas with stay tape or stabilizer.
Cutting Techniques Essentials
You’ll need to master cutting techniques like a skilled chef preparing ingredients, as your pattern pieces will only fit together perfectly when you’ve cut them with precision and followed the grainline markings.
Just like measuring twice and cutting once saves you from cooking disasters, taking your time with careful cutting will save you from the dreaded "why won’t these pieces match up" headache later.
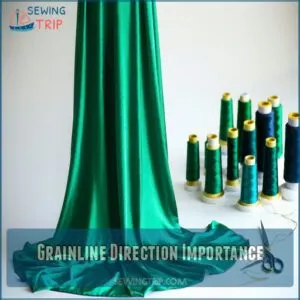
Grainline Direction Importance
Now that you’ve selected your fabric, let’s talk about a game-changing detail that’ll make or break your dress: the grainline. Think of it as your fabric’s compass – it determines how your garment will hang and fit.
- Wrong grainline = twisted seams that look like a pretzel
- Pattern arrows must align with fabric grain
- Check grainline before every cut
- Stretch fabric has special grainline rules
- Double-check pattern placement for matching prints
Remember, proper grainline alignment means your dress will drape beautifully and maintain seam integrity. It’s like following a map – when you stay on course, you’ll reach your destination looking fabulous!
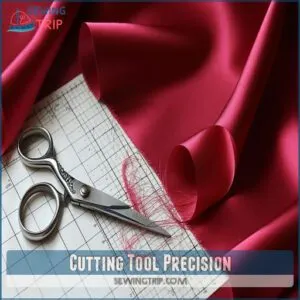
Cutting Tool Precision
Before diving into your next dress project, master your cutting tool precision for flawless results.
Your fabric shears should glide through material like butter – keep them sharp and dedicated only to fabric.
For intricate pattern pieces, try rotary cutting tools with a fresh blade.
Remember, clean cuts now mean smoother seams later, so take your time and let your tools do the work.
Beveling Edges Methods
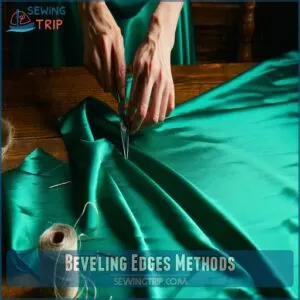
Now that you’ve got your cutting tools ready, let’s make those edges smooth as butter! Beveling edges in garment construction isn’t just about precision – it’s your secret weapon for professional-looking seam finishes.
Your bevel tools will help you achieve:
- Clean, angled cuts that reduce bulk in corners
- Perfectly trimmed seam allowances that lay flat
- Smooth curves that flow like silk
- Notched edges that prevent puckering
- Balanced fabric stability along complex shapes
The magic happens when you angle your scissors at 45 degrees, treating each edge like you’re sculpting a masterpiece. Remember, smooth edges mean smoother sewing!
Sewing Techniques Fundamentals
You’ll find mastering the basics of sewing techniques is like learning to ride a bike – wobbly at first, but soon you’ll be zooming through straight seams, curved edges, and facing attachments with confidence.
Whether you’re working with cotton or silk, these fundamental skills will help you tackle even the most complex dress patterns, turning your fabric dreams into wearable masterpieces, utilizing your understanding of sewing techniques.
Straight Seams Sewing
Now that you’ve mastered precise cutting, let’s tackle straight seams – the building blocks of garment construction.
You’ll find that straight stitch mastery opens up a world of possibilities in your sewing journey.
Remember: smooth, even stitches are like train tracks – they should run parallel and stay consistent throughout your seam.
| Technique | Common Mistake | Quick Fix |
|---|---|---|
| Seam Alignment | Wavy edges | Use pins every 2-3 inches |
| Edge Finishing | Fraying | Apply zigzag stitch |
| Stitch Control | Uneven spacing | Draw guide lines |
| Fabric Tension | Puckering | Adjust presser foot pressure |
Curved Seams Sewing
Curved seams are like graceful dance moves in your sewing journey – they require finesse and practice to perfect.
When you’re sewing complex garments, mastering seam navigation around curves is essential for professional results. You’ll need patience and the right technique to achieve smooth, rounded edges.
To achieve these results, follow these key steps:
- Pin fabric pieces together at key points, easing fullness between pins
- Use shorter stitch lengths (1.5-2mm) for tighter curves
- Clip into seam allowances every 1/2 inch for inner curves
- Press seams over a tailor’s ham to maintain shape
- Test your curve stitching technique on scrap fabric first to ensure smooth and rounded edges.
Attaching Facings Techniques
The art of attaching facings transforms your dress from homemade to haute couture.
You’ll need to master these essential facing methods for a polished finish that’ll make your friends ask "Where’d you buy that?"
| Facing Type | Best Uses | Pro Tips |
|---|---|---|
| Neck Facing | V-necks, scoop necks | Understitch to prevent rolling |
| Armhole Facing | Sleeveless designs | Grade seams for smooth curves |
| Combined Facing | Bodice edges | Interface for stability |
Remember, proper interfacing tips and edge beveling make all the difference in garment construction.
Your folded hems should lie flat, and seam finishing will give your dress that professional touch, ensuring a polished finish.
Fitting Techniques Mastery
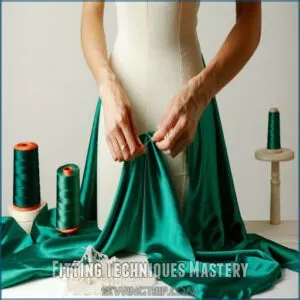
You’ll discover the secret to perfect-fitting dresses by mastering essential measurement techniques, just like a skilled detective solving the mystery of your unique body shape.
With your measuring tape as your trusty sidekick, you’ll learn to capture every curve and contour accurately, transforming those puzzling pattern pieces into your dream dress that fits like it was made for you.
Because it will be, you can trust that the outcome of mastering these techniques will lead to a dress that not only fits like it was made for you, but also makes you feel confident and beautiful.
Body Measurements Accuracy
Standing confidently in front of your mirror, accurate body measurements become your secret weapon for achieving that perfect dress fit.
You’ll need reliable measurement tools and a systematic approach to capture your unique body proportions. These measurements form the foundation of your fitting techniques, ensuring every seam sits just right.
- Your measuring tape should hug your curves like a gentle embrace, not too tight or loose
- Record measurements while wearing the undergarments you’ll use with the dress
- Take measurements at the same time of day for consistency, since body proportions naturally fluctuate
Pattern Grading Importance
Why does pattern grading make such a huge difference in your sewing success? When you’re mastering sewing patterns, proper grading guarantees your dress fits perfectly across sizes. It’s like having a secret recipe for sizing – you’ll need to understand how bodies grow differently in various areas.
| Grading Element | Basic Method | Advanced Technique |
|---|---|---|
| Size Accuracy | Measure twice | Digital precision |
| Fit Models | Standard form | Custom mannequin |
| Grading Rules | Manual calc | Software assisted |
| Standards | Basic sizing | Industry specs |
| Sizing Charts | Paper based | Digital tracking |
Bodice Block Creation
When creating your first bodice block, you’ll need to draft the essential lines that form the foundation of dress patterns.
Start with your center back and move forward, mapping out the bust line, waistline, and center front.
Add shaping through strategic darts, ensuring a snug fit, and think of it as creating a personalized blueprint – your very own dress-fitting roadmap!
Troubleshooting Common Issues
You’ll find that even the most complex dress patterns can throw you curveballs, just like that time your sewing machine decided to eat your favorite fabric.
When you’re stuck with wonky darts or mysterious fit issues, don’t worry – we’ll walk through the most common pattern problems and their fixes, turning those head-scratching moments into "aha!" victories.
Fabric Choice Problems
Now that you’ve nailed those measurements, let’s tackle the trickiest fabric headaches that can derail your dress dreams.
You’ll want to watch out for these common fabric choice pitfalls:
- Selecting lightweight chiffon for structured designs (it’s like trying to build a castle with clouds!)
- Picking heavy fabrics for flowing styles, making your dress move like a cardboard box
- Mismatching stretch content with fitted patterns, leading to puckered seams and wonky fits
Remember, your fabric’s weight and drape should always match your pattern’s personality, to avoid common issues like puckered seams and ensure a good fit.
Dart Manipulation Techniques
Now that you’ve tackled fabric selection, let’s master dart manipulation – your secret weapon for perfect pattern fitting.
Think of darts as your garment’s magic wands, shaping flat fabric into beautiful 3D curves.
By rotating, combining, or splitting darts, you’ll transform basic dress patterns into custom-fitted masterpieces.
Remember, precise dart placement makes the difference between "meh" and "magnificent" in your garment silhouette.
Seam Allowances Adjustment
Every successful dress pattern hinges on precise seam allowances that can make or break your final fit.
You’ll need to adjust your seam margins based on fabric type and edge finishing techniques. Incorrect thread tension can cause puckering and uneven stitches, so it’s important to troubleshoot sewing errors.
Here’s how to nail perfect seam tolerance:
- Measure twice before adjusting stitch length
- Account for fabric shrink in washable materials
- Add extra allowance for curved seams
- Double-check pattern adjustments against garment construction needs
- Test seam allowances on scrap fabric first
Remember, proper seam allowances make sure your dress fits like a dream, so take your time with these adjustments to achieve a final fit that is comfortable and flattering, with even stitches.
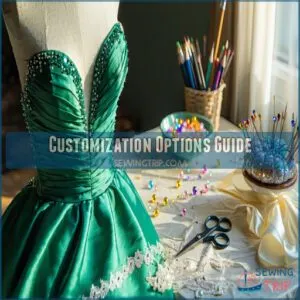
Customization Options Guide
You’ll love how you can transform any dress pattern into your personal masterpiece with clever design tweaks, eye-catching embellishments, and customized closures that fit your style.
Just like adding your favorite toppings to make the perfect pizza, you’ll learn to mix and match customization options that’ll make your dress uniquely yours, from elegant beading to creative sleeve variations that showcase your personal taste, allowing you to express yourself through clever design tweaks.
Design Variations Techniques
Now that you’ve mastered troubleshooting, let’s transform basic dress patterns into stunning originals.
Mix fabrics like a pro by combining silk with cotton, or play with asymmetrical designs to create eye-catching looks.
Try color blocking to add visual interest – think navy with coral, or black with white.
Pattern drafting becomes your creative playground when you experiment with different textures and unique design elements, allowing you to mix fabrics like a pro and create stunning originals with visual interest.
Embellishments Addition
Adding embellishments transforms a simple dress into a showstopping masterpiece.
To create stunning effects, consider these essential techniques:
- Layer delicate lace appliques over smooth fabric for romantic texture
- Apply beading in geometric patterns using matching thread colors
- Create dimension with ribbon embroidery along seam lines
- Paint fabric designs that complement your dress’s drape
- Add sequin work gradually, testing placement before permanent attachment
Consider adding hand sewn fabric flower embellishments for a unique touch.
Your creativity’s the limit – just remember to balance embellishments for an elegant finish.
Closure Attachment Methods
Now that you’ve mastered embellishments, let’s secure your creation with style.
While zippers might seem tricky at first, they’re your best friend for a polished look. Start with invisible zippers for side seams, or try snap fasteners for a casual vibe.
Button holes and hook eyes work beautifully for formal wear, while lace ties add romantic flair.
Remember, seam reinforcement prevents embarrassing zipper mishaps, and using the right fasteners, like invisible zippers, can make all the difference.
Project Completion Tips
You’re just steps away from turning your dress from a work-in-progress into a polished masterpiece that’ll make you feel like you’ve graduated from the school of sewing with flying colors.
Whether you’re wrestling with those tricky seam finishes or searching for the perfect hem technique, these completion tips will help you add those professional finishing touches.
That’ll make your handmade dress look like it came straight from a boutique.
Finishing Seams Techniques
Several professional seam finishing techniques can transform your dress from homemade to haute couture.
Your choice of finish impacts both durability and appearance, so let’s explore the options.
- French seams create an elegant encased edge perfect for sheer fabrics
- Flat-felled seams offer sturdy reinforcement for medium-weight materials
- Hong Kong binding adds a luxurious touch with contrasting bias tape
- Serged edges provide quick, clean finishes for knits
- Pinked edges work well for fabrics that don’t fray easily
Hemming Methods Variations
With dresses, your hemming choice can make or break the final look.
For delicate fabrics, try a rolled hem that creates an elegant, barely-there finish.
A blind hem works wonders on formal wear, while stretch hems keep knit dresses flowing naturally.
Baby hems add a professional touch to lightweight materials, and traditional hand hemming gives you perfect control for those tricky curved edges.
Final Fitting Adjustments
Now that you’ve perfected those hems, let’s make sure your dress fits like a dream. When making final fitting adjustments, think of your dress as a canvas that needs those last artistic touches.
Here’s your game plan for a flawless fit:
- Check garment balance by having someone take photos from all angles
- Refine the silhouette by pinning excess fabric while wearing the dress
- Evaluate fit across shoulders, bust, waist, and hips using measurement tips
- Adjust seam allowances for comfort in problem areas
- Mark pattern adjustments clearly for future reference
Your final fitting can transform a good dress into a showstopper that fits perfectly.
Frequently Asked Questions (FAQs)
How to modify patterns for unique sleeve designs?
You’re in the driver’s seat when you modify basic sleeves.
Simply trace your pattern, split it at key points, add width or length, then pivot and slide pieces to create dramatic styles you’ll love.
Can historical dress patterns work with modern fabrics?
You can adapt historical patterns for modern fabrics by adjusting seam allowances and considering fabric weight.
Today’s stretch materials work well with Victorian designs, while synthetic silks beautifully complement 1920s patterns, making Victorian designs easily adaptable.
What causes pattern pieces to not align properly?
You’ll find pieces misaligned when your grainline isn’t straight, cutting accuracy wavers, or seam allowances vary. Watch for incorrect pattern markings and fabric stretching during pinning. Double-check notches before sewing.
Which interfacing works best for structured dress bodices?
For structured dress bodices, you’ll want medium to heavyweight fusible woven interfacing.
It’ll give you crisp support without being too stiff.
Cotton or silk-blend interfacing works great, especially in areas needing extra stability.
How to properly scale patterns between different sizes?
Picture grading patterns like zooming a photo – expand or shrink proportionally.
You’ll measure between sizes at key points (bust, waist, hips), then smoothly connect the dots using a curved ruler for professional results.
Conclusion
You’ll feel like a sewing superhero once you’ve conquered mastering complex sewing patterns for dresses.
With these techniques in your toolkit, you’re ready to tackle any design challenge.
Remember, perfect measurements, thoughtful fabric selection, and patient practice are your secret weapons.
Whether you’re creating a wedding gown or a cocktail dress, you’ll confidently transform flat patterns into stunning three-dimensional masterpieces.
Trust your skills, embrace the learning process, and watch your creations come to life beautifully.
- https://www.moodfabrics.com/blog/category/free-sewing-patterns/dress-patterns/
- https://www.reddit.com/r/sewing/comments/13i53xn/simple_dress_patterns_for_beginners_free/
- https://threadsmonthly.com/easy-dress-patterns/
- https://www.wikihow.com/Make-Your-Own-Sewing-Patterns
- https://camimade.com/how-to-use-a-sewing-pattern-5-basic-things-to-know-about-sewing-patterns/

