This site is supported by our readers. We may earn a commission, at no cost to you, if you purchase through links.
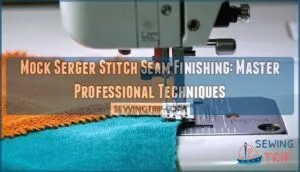
This technique combines zigzag stitching with careful edge trimming to prevent fraying and achieve that coveted commercial appearance.
Start by adjusting your machine’s stitch width to 3-4mm and length to 2-3mm, then use an overcast or overedge foot for best results.
Test on fabric scraps first, as different materials require slight tension adjustments.
The zigzag catches raw edges while trimming excess fabric simultaneously, and it works beautifully on knits and wovens alike, giving you serger-quality results without the expense.
Master a few key adjustments and you’ll discover techniques that transform amateur seams into professional masterpieces.
Table Of Contents
Key Takeaways
- Transform your regular sewing machine into a professional finishing tool by using zigzag stitches with 3-4mm width and 2-3mm length, plus an overcast foot to create serger-quality results without expensive equipment.
- Match your technique to your fabric type – lighter fabrics need gentler tension and shorter stitch lengths for dense coverage, while heavier materials require longer settings and stronger thread counts for durability.
- Test your settings on fabric scraps first to perfect tension adjustments, stitch density, and thread selection before working on your actual project, preventing costly mistakes and ensuring professional results.
- Master the four-step process – test your stitch, baste the seam, serge with steady guidance, and properly finish chain tails to achieve store-quality seam finishes that prevent fraying and add strength.
Choosing Serger Stitches
You’ll need to match your serger stitch choice to your specific fabric and project requirements for professional results.
The right combination of thread count, stitch length, and tension settings can make the difference between a store-bought finish and an amateur attempt.
Thread Count Options
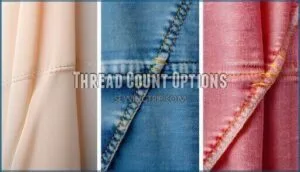
When selecting thread count for mock serger stitch seam finishing, you’ll choose between 2-thread, 3-thread, or 4-thread options based on your fabric weight and project needs.
Two-Thread Benefits include minimal bulk for delicate materials, while Three-Thread Density offers balanced coverage for most knit fabrics.
Thread count matters – choose wisely for professional seam finishing that won’t disappoint.
Four-Thread Durability provides maximum strength for woven fabrics and heavy materials, making thread selection vital for professional seam finishing results.
Some sewers prefer using a dedicated 2-thread serger for lighter fabrics.
Fabric Type Considerations
Your fabric choice dictates everything about serger success.
Knit fabrics need stretchy overlock stitches that won’t snap during wear, while woven fabrics require secure finishing to prevent fraying.
Delicate fabrics like silk demand lighter thread counts and gentle tension, but heavy fabrics like denim need robust four-thread overlock for durability.
Match your stitch to fabric weight for professional results.
Stitch Length Adjustments
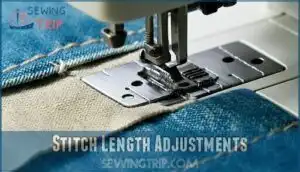
Controlling stitch length transforms your mock serger stitch from basic to brilliant.
Shorter lengths (2-3mm) create dense coverage for decorative effects and maximum seam strength on delicate fabrics.
Longer settings (3-4mm) reduce bulk while maintaining durability on heavier materials.
Your zigzag stitch responds to fabric type—experiment with density control to achieve professional results.
Tension Settings
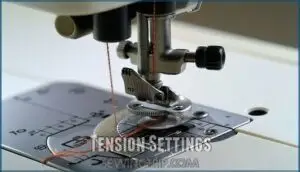
Proper tension settings make or break your faux serger finish.
Balanced stitch quality depends on matching thread tension to fabric weight and thread type. Heavy fabrics need looser settings, while lightweight materials require tighter needle tension.
Adjust looper tension first, then fine-tune needle tension. Uneven tension creates puckering or visible loops.
Understanding serger tension basics guarantees threads are evenly distributed, creating a stable stitch.
Test sewing machine tension on scraps before starting your project.
Serger Stitch Applications
You’ll discover four essential serger stitch applications that transform your sewing projects from homemade to professional quality.
These versatile techniques handle everything from delicate silk scarves to heavy denim seams with precision.
Overlock Stitches
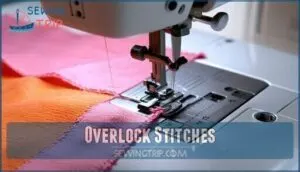
Overlock stitches work like a seamstress’s safety net, joining fabric pieces while preventing fraying in one swift motion.
This serger alternative creates professional seam durability that rivals store-bought garments, especially vital for knit fabrics that stretch and move.
- Tension control determines stitch quality – loose threads create gaps, tight threads pucker fabric
- Stitch density affects coverage – shorter lengths provide tighter edge finishing for delicate materials
- Thread count impacts strength – 4-thread overlock offers maximum durability for heavy fabrics
- Stretch accommodation makes this sewing technique perfect for activewear and stretchy materials
- Faux serger finish achieves professional results without expensive equipment using standard machines
Rolled Hem Method
You’ll love the rolled hem method for creating elegant edges on delicate fabrics like silk and chiffon.
This sewing technique transforms raw edges into beautifully finished borders that resist fraying. Fabric selection matters – lightweight materials work best.
Adjust tension control and thread choice for superior results. Practice foot pressure settings on scraps first.
Curve mastery comes with experience, making this serger alternative perfect for scarves and formal wear finishing. Using a serger can also help with adjusting differential feed to prevent puckering, which is a key aspect of achieving a professional finish with delicate fabrics and requires understanding of differential feed.
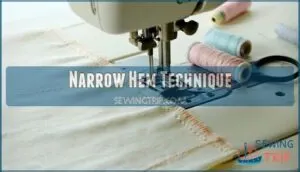
Narrow Hem Technique
Narrow hem creates sleeker finishes than rolled hem, perfect for structured edges and tight spaces.
This sewing tutorial works best on lightweight fabrics like napkins and scarves. Your fabric choice affects thread tension settings—delicate materials need gentler pressure.
The narrow hem technique features visible thread lines with gaps between stitches, offering less bulk. Foot compatibility guarantees smooth curved hems, though it’s less effective on fray-prone fabrics compared to rolled hem alternatives, which can provide a sleeker finish.
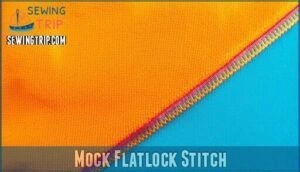
Mock Flatlock Stitch
Mock flatlock creates a faux serger stitch that mimics commercial sportswear seams. Your sewing machine can produce this decorative stitching technique, though it won’t match true industrial strength.
Your sewing machine can fake that professional sportswear look—just don’t expect industrial-strength durability.
This seam finishing option works brilliantly for fleece seams and activewear projects where you want that professional fabric edge appearance.
- Perfect for sportswear applications where chafing reduction matters most
- Creates decorative stitching effects that add visual interest to garments
- Ideal for fleece seams since it reduces bulk in thick layers
- Domestic limitations mean it’s more decorative than structural compared to commercial versions
- Achieves a distinctive seam appearance that mimics expensive activewear construction
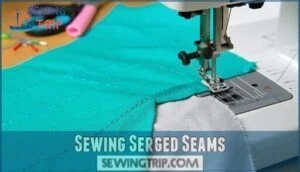
Sewing Serged Seams
You’ll master serged seams by following four essential steps that create professional-quality finishes.
These techniques work whether you’re using a dedicated serger or mimicking the stitch on a regular sewing machine.
Step 1 – Test Serger Stitch
Before diving into your sewing project, testing your serger stitch on scrap fabric guarantees perfect tension regulation and looper adjustments.
This essential step prevents costly mistakes on your actual fabric.
Experiment with needle selection and stitch settings to achieve superior stitch quality.
Even experienced sewers follow this beginner sewing rule – it’s one of the most valuable sewing tips for mastering seam finishing options through easy sewing practice.
Step 2 – Baste The Seam
Before serging, you’ll need to secure your seam temporarily.
Hand basting offers the most control for beginners, while machine basting provides speed for experienced sewers.
Both methods prevent fabric shifting during serging, and skip pins entirely—they’ll damage your serger’s blade.
This seam security step guarantees professional results and protects your equipment from costly repairs, ensuring a process that supports complete concepts.
Step 3 – Serging The Seam
Now you’ll guide your fabric through the overlock machine with steady hands. Keep the fabric aligned with the seam guide while maintaining consistent pressure. The blade safety mechanism will trim excess material as you work. Adjusting differential feed can prevent puckering on delicate fabrics.
- Fabric Feeding: Guide material smoothly without pulling or pushing – let the machine’s feed dogs do the work
- Foot Pressure: Maintain even pressure to guarantee consistent seam finishing options and prevent fabric bunching
- Chain Tail: Start with a 4-inch thread chain before placing fabric under the presser foot for clean entry
- Seam Consistency: Keep steady speed and alignment for professional serged seams that rival commercial quality
Step 4 – Finishing The Serged Seam
Proper chain-tail management separates amateur work from professional results.
Thread the chain tail back through your stitching using a tapestry needle, or apply fray check for quick securing.
You can also tie knotting ends discreetly behind the seam.
These seam finishing options give your project that coveted serger look without expensive equipment, making advanced sewing techniques accessible for beginners mastering sewing machine stitches.
Serger Alternatives Compared
You don’t need a serger to achieve professional-looking seams when you’ve got the right tools and techniques with your regular sewing machine.
Standard machines can create mock serger stitches using zigzag capabilities, specialized feet, and proper needle selection that’ll give you results that look surprisingly close to the real thing.
Zigzag Stitch Capability
Your sewing machine’s zigzag stitch creates a convincing serger look when you adjust stitch width to 4-5mm and reduce stitch length for density control.
This versatile technique prevents fraying while maintaining tension balance across various fabrics.
Decorative zigzag options expand your sewing machine capabilities, making professional seam finishing accessible for beginners without investing in specialized equipment.
Overedge Foot Guidance
Your overedge foot transforms standard sewing machine accessories into professional finishing tools.
This specialized presser foot channels threads precisely along fabric edges, preventing fabric curling while maintaining edge stability. The foot’s built-in guide creates consistent stitch placement for reliable tension control.
Many sewers find an overedge foot available for their machine.
Key benefits include:
- Enhanced foot alignment – guides fabric smoothly without shifting
- Reduced fabric curling – maintains flat edges during stitching
- Improved stitch consistency – creates uniform serger stitch appearance
Stretch Needle Options
Stretch needles feature rounded tips that push fabric fibers apart instead of piercing them, preventing snags on stretchy knits. These sewing machine needles reduce skipped stitches and thread breakage when creating serger-style finishes.
Sizes 75/11 and 90/14 work best for different fabric weights. Universal needle uses won’t achieve the same results on stretch fabrics.
Selecting the right needle prevents skipped stitches and broken threads, which is crucial for a smooth sewing experience with serger-style finishes.
Ballpoint Needle Uses
Ballpoint needles work like a gentle handshake with knit fabric, pushing fibers apart instead of piercing through them.
You’ll want sizes 70/10 to 80/12 for single knits and interlock materials.
These rounded-tip sewing machine needles prevent runs in stretchy knits while maintaining proper tension control across various stitch types, making them perfect for casual wear and loungewear projects.
Consider exploring different ballpoint needle options for specialized knit projects.
Advanced Serger Techniques
Once you’ve mastered basic serger techniques, you can tackle advanced methods that create professional-quality results. These techniques help you handle challenging fabrics and create durable seams that rival store-bought clothing.
Closed Seams Encasing
After exploring serger alternatives, let’s talk closed seams. You wrap raw edges inside the seam, giving your project Durability Enhancement and Professional Finishes. It’s like tucking in the sheets—neat and secure.
Here’s how you master seam concealment:
- Align fabric edges
- Sew with regular machine
- Serge edges together
- Press seams to one side
- Admire Fabric Longevity
Open Seams Flexibility
Unlike closed seams, open seams leave serging allowances visible, offering exceptional flexibility for lightweight fabrics.
This approach lets you finish raw edges first, then sew your seam with a regular machine and press open. You’ll gain better control over seam neatening while maintaining fabric compatibility across different weights and textures.
A serger, also known as an overlocker, can greatly improve seam finishing.
| Aspect | Open Seams | Closed Seams |
|---|---|---|
| Visibility | Allowances remain visible | Edges completely enclosed |
| Flexibility Benefits | Adapt to any fabric weight | Limited to compatible materials |
| Pressing Options | Press flat or open easily | Must press to one side |
| Fraying Prevention | Excellent edge protection | Maximum raw edge coverage |
| Sewing Process | Finish first, sew second | Sew and finish together |
Multiple Pass Reinforcement
When you need bullet-proof seams that won’t quit, multiple pass reinforcement transforms ordinary serger stitches into fortress-like barriers.
This technique builds layered seam strength by running fabric through your serger twice, creating decorative overlays while boosting fabric strength.
Here’s your reinforcement playbook:
- Stress Point Reinforcement – Target high-wear areas like armholes and crotch seams
- Seam Durability Enhancement – Layer contrasting threads for visual appeal and strength
- Fabric Stabilization – Secure stretchy knits with overlapping stitch lines
- Decorative Overlays – Add artistic flair while improving seam strength
Differential Feed Settings
You’ll find that differential feed adjusts how your serger handles different materials by controlling two sets of feed dogs at variable rates.
Set the feed ratio lower (0.7) for puckering prevention on lightweight fabrics, or higher (1.5-2.0) for stretching control on knit fabrics.
This serger setting guarantees proper fabric compatibility and professional seam finishes across varying fabric weights.
Frequently Asked Questions (FAQs)
How to finish seams if you don’t have a serger?
Use your sewing machine’s zigzag stitch along raw edges, or try an overedge foot for cleaner results.
You can also use pinking shears or hand-sew blanket stitches for basic fray prevention.
What is the best serger stitch for seams?
Four-thread overlock delivers the strongest, most durable seams for most fabrics. It’s your go-to choice for both knits and wovens, providing excellent stretch and fray prevention in one pass.
How does mock serger work without serger?
Home sewers create 70% of their garments without professional equipment, yet achieve store-quality results.
You’ll mimic serger functions using your regular sewing machine’s zigzag stitch and overedge foot, trimming fabric edges while stitching to prevent fraying and create professional-looking seams.
What threads work best for mock serger?
All-purpose polyester thread delivers excellent results for mock serger stitches.
It’s strong, stretchy, and available in countless colors.
You can also try serger thread for smoother feeding through your machine’s mechanisms.
Can mock serger replace professional serging entirely?
Despite seeming like a perfect workaround, mock serger stitches can’t fully replace professional serging. You’ll miss the strength, speed, and precise edge trimming that dedicated sergers provide for heavy-duty projects.
Which sewing machines handle mock serger best?
Most sewing machines with zigzag capability can handle mock serger stitches effectively.
You’ll get better results with models featuring adjustable stitch width, built-in overlock stitches, and an overlock foot for smooth fabric feeding.
Does mock serger work on curved seams?
Like threading a needle through a winding path, curved seams challenge your precision.
You can use mock serger stitches on curves, but you’ll need to ease the fabric carefully and adjust your stitch length for smooth results.
Conclusion
Like Midas turning everything to gold, you’ve transformed your regular sewing machine into a professional finishing powerhouse.
Mock serger stitch seam finishing doesn’t require expensive equipment—just practice and the right techniques.
You’ve learned to adjust tension settings, choose appropriate needles, and master various stitch applications.
These skills will elevate every project from basic to boutique quality.
Your seams now rival commercial garments, proving that dedication and technique matter more than costly machinery.
This achievement demonstrates the value of mastering the right skills to produce high-quality results.

