This site is supported by our readers. We may earn a commission, at no cost to you, if you purchase through links.
 Sewing a hem with a serger is like having a secret weapon for polished, professional finishes.
Start by threading your serger correctly—trust me, this step saves headaches later. Use a narrow hem for lightweight fabrics or a rolled hem for thicker ones; both create clean edges without bulk.
Adjust the differential feed to prevent puckering, especially with stretchy or delicate fabrics. Don’t forget to pre-wash and press your fabric for the best results—wrinkles are no one’s friend.
With practice, you’ll master this technique and wonder how you ever lived without it. Ready to level up? Specialized presser feet might be your next move, and having a serger can be a game-changer for achieving professional finishes.
Table Of Contents
Key Takeaways
- Pre-wash and press your fabric to prevent surprises like shrinkage and ensure a smooth, professional finish.
- Thread your serger correctly and test settings on scrap fabric to avoid stitching issues.
- Adjust the differential feed and tension to prevent puckering, especially with stretchy or delicate fabrics.
- Use the right hem technique—narrow for lightweight fabrics, rolled for heavier ones, and blind for discreet finishes.
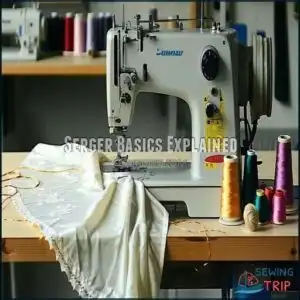
Serger Basics Explained
A serger is a sewing machine that trims, stitches, and finishes fabric edges all at once, giving your projects a polished look.
It’s a game-changer for hemming, especially if you’re tired of frayed edges or uneven seams, providing a professional finish.
What is a Serger Machine
A serger, also called an overlock machine, is your sewing sidekick for quick, polished edges.
An overlock machine transforms raw edges into polished seams, making every sewing project look effortlessly professional.
It trims, stitches, and finishes fabric all at once—like multitasking magic! With multiple threads and blades, it delivers professional results faster than traditional machines.
- Compatible with various fabrics, from knits to wovens.
- Speeds up sewing projects effortlessly.
- Essential for durable, fray-free seams.
Benefits of Using a Serger
With a serger, hemming feels like magic—stitch, trim, and finish all in one go.
It saves time while giving your projects a professional finish. Those sewing overlock stitches? They protect fabric edges from fraying, adding durability enhancement and seam strength.
Whether tackling serger sewing projects or quick hems, these serger sewing tips guarantee lasting, polished results. Understanding serger capabilities is essential for achieving perfect finishes with your serger, ensuring lasting quality.
Types of Serger Stitches
With a serger, you can explore Overlock Stitches for clean edges, Cover Stitches for hems, and Chain Stitches for flexibility.
Stretch Stitches handle knits beautifully, while Decorative Stitches add flair.
Adjusting serger stitch length guarantees precision, and using quality serger sewing threads improves durability.
For hemming with a serger, sewing overlock stitches offers a polished, professional finish every time.
Preparing Fabric Correctly
Getting your fabric ready is the first step to a flawless hem. From washing to cutting, a little prep work saves you headaches later.
Pre-Washing and Drying Fabric
Before diving into serger sewing, start with proper fabric preparation.
Pre-treatment like pre-washing and drying prevents surprises like fabric shrinking later. Think of it as "shrinkage control insurance"!
This step guarantees your sewing hem techniques stay flawless. Plus, clean fabric makes thread selection smoother and hems sturdier.
Using a pre wash detergent is essential for removing impurities. Skip this, and your perfect serger finish might unravel—literally, which is why it’s a crucial step for serger sewing and achieving a flawless hem.
Ironing and Pressing Fabric
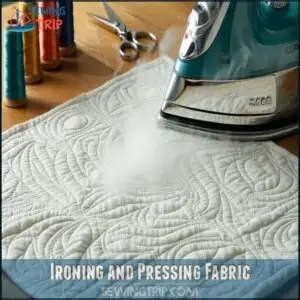
A wrinkle-free fabric makes hemming with a serger a breeze. Ironing tips to remember: use pressing tools for crisp edges and steaming techniques for stubborn creases.
Fabric smoothing guarantees professional results, so don’t skip this step. Using the right steam iron tools can make a significant difference in the quality of the finish.
- Use a steam iron for wrinkle removal.
- Press seams with a pressing cloth.
- Adjust heat for delicate fabrics.
- Iron in straight, consistent strokes.
Cutting and Marking Fabric
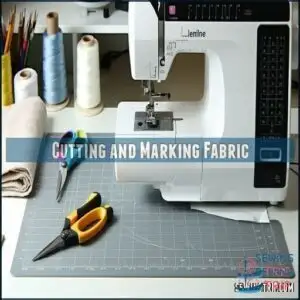
After pressing, grab sharp cutting tools to shape your fabric precisely.
Accurate fabric cutting guarantees a clean edge for hemming with a serger.
Use a ruler to mark the hemline and maintain a consistent seam allowance.
Edge marking helps guide your work, making hemming smoother.
Remember, careful fabric preparation means fewer hiccups and a polished finish every time.
Threading The Serger Machine
Threading your serger machine might feel like untangling holiday lights, but it’s simpler than it seems.
Threading a serger may seem tricky, but with practice, it transforms into a smooth and satisfying step in your sewing process.
Follow the thread guides carefully, matching the serger thread types to your project, and adjust tension control for smooth stitches.
Double-check needle selection for your fabric, and test your serger settings on scrap fabric—serger troubleshooting now saves headaches later.
Mastering this step guarantees flawless hems! Using a machine with self threading sergers can greatly simplify the threading process.
Serger Hemming Techniques
Hemming with a serger gives your projects a polished, professional touch while saving you time.
Whether you’re working with lightweight chiffon or heavy denim, mastering a few key techniques guarantees flawless results every time.
Narrow Hem for Lightweight Fabrics
Lightweight fabrics like chiffon demand precision when hemming with a serger.
Start by choosing the right serger thread types to match your fabric selection. Set a narrow hem width and adjust stitch tension for smooth edge finishing.
A narrow hem enhances seam security and adds a polished touch. Think of it as giving your fabric a custom handshake!
Rolled Hem for Heavier Fabrics
A rolled hem is your go-to for heavier fabrics, giving edges a clean, polished look.
Adjust your serger machine settings carefully for success:
- Trim the fabric edge to reduce bulk.
- Set thread tension for tight, secure stitches.
- Fold fabric evenly to maintain consistency.
- Adjust differential feed to prevent puckering.
- Test hem settings on scrap fabric first.
Understanding serger tension settings is essential for a professional finish.
Master this, and you’re golden!
Blind Hem for Discreet Finishing
For a polished hem finish, try the blind hem technique with your serger.
It’s perfect for creating discreet seams on heavier fabrics.
Fold your fabric edge to the desired sewing hem allowance, press it, and feed it into the blind hem foot.
Adjust serger settings for a precise blind stitch.
This method guarantees professional, nearly invisible results every time!
Adjusting Differential Feed
After mastering the blind hem, let’s talk about the differential feed.
This feature on your serger machine controls fabric stretch and gathers, ensuring smooth hems.
Adjust the feed control for tricky fabrics—like knits or silks—to prevent puckering or waves.
Proper stitch regulation paired with balanced tension settings transforms hemming with a serger into a seamless, professional process every time.
Troubleshooting Common Issues
When your serger isn’t cooperating, it’s easy to feel frustrated mid-project.
Don’t worry—most issues like uneven stitches or puckering have quick fixes that’ll get you back on track in no time.
Loose or Uneven Stitches
When hemming with a serger, loose or uneven stitches can feel like a snag in your plans.
Here’s how to troubleshoot:
- Check tension settings—balanced threads are key.
- Use the right needle size and fabric type combo; it’s a matchmaker’s dream.
- Slow down! Speeding through serger sewing can compromise stitch length and thread quality.
By following these steps, you can ensure that your serger sewing projects turn out with professional-looking results, and troubleshooting common issues like loose or uneven stitches becomes easier, allowing you to focus on creating high-quality garments with balanced threads.
Puckering or Gathering Fabric
Puckering fabric while hemming with a serger can feel like a stitch in the wrong direction.
Adjust the differential feed to balance fabric stretch and prevent gathers. Check fabric tension—too tight and you’re asking for trouble!
Test on scraps to dodge thread breakage. A smooth seam allowance guarantees your rolled hem stays crisp and professional every time.
Trimming Excess Fabric
When trimming excess fabric with a serger, precision is key. A clean cut guarantees smooth edge finishing and prevents fraying.
Use steady cutting techniques and align the seam allowance carefully. Whether you’re creating a rolled hem or a narrow hem, let the overlock sewing machine blades do the work.
Remember, neat fabric trimming sets the stage for professional-looking hems every time. To achieve superior results, understanding thread tension issues is vital for preventing common sewing problems.
Regular Maintenance Tips
Keeping your serger in top shape is like caring for a prized car—it’s all about regular maintenance.
Here are three essentials:
- Oil Changes: Lubricate moving parts to keep stitches smooth.
- Blade Replacement: Dull blades lead to messy trims—swap them regularly.
- Machine Cleaning: Dust buildup can jam your serger, so clean it often.
Happy sewing!
Advanced Serger Methods
You can take your hemming skills to the next level with advanced serger techniques that combine precision and creativity.
From wider hems to mastering the blind hem stitch, these methods guarantee your projects look polished and professional every time.
Serging for Wider Hems
When tackling wider hems, your serger shines. It trims and secures edges while maintaining fabric stretch, making it ideal for knits or denim.
Adjust the hem allowance for clean results and avoid puckering. Need quick tips? Check this table:
| Fabric Type | Hem Allowance | Recommended Stitch | Wider Hem Tips |
|---|---|---|---|
| Knits | 1 inch | Rolled Hem | Use differential feed |
| Denim | 1.5 inches | Narrow Hem | Test tension settings |
| Silk | 0.5 inch | Rolled Hem | Trim edges carefully |
| Linen | 1 inch | Blind Hem | Press before serging |
The table provides guidance on hem allowance, recommended stitch, and wider hem tips for different fabric types, including denim and silk.
Double Folded Hem Technique
When tackling wider hems, the double folded hem technique shines.
Start by folding the fabric twice at the hem allowance, pressing each fold for crisp edges.
Feed it into your serger, adjusting serger settings for a clean finish.
This method secures the hem and also adds durability to your garment. Perfect for sturdy, polished hem finishing!
Mastering Blind Hem Stitch
Blind hemming with a serger feels like magic once you nail it.
Start with proper fabric prep—press and fold the hem neatly. Use these hemming tricks: adjust serger settings for a blind hem and test on scraps for stitch control.
This technique hides stitches beautifully, making it perfect for pants or skirts. Think of it as sewing’s secret handshake!
Using Specialized Presser Feet
Mastering blind hem stitches is satisfying, but specialized presser feet make hemming with a serger even smoother.
Hem feet and edge guides keep your lines sharp, while stitch regulators guarantee precision.
Foot controls simplify tricky fabrics, and interfacing tips help with stability.
These serger machine uses expand your skills, especially for rolled hems, adding finesse to every project.
Understanding proper serger presser feet is vital for achieving professional results.
Frequently Asked Questions (FAQs)
Can you sew a hem with a serger?
Absolutely, you can hem with a serger!
It trims, stitches, and finishes edges all at once, giving your fabric a clean, professional look.
Just adjust the settings and practice on scraps first!
Can you use a serger for hemming?
Yes, you can hem with a serger!
It trims, stitches, and finishes edges all at once, giving your fabric a polished look.
Perfect for durable, professional hems on garments, especially lightweight or stretchy fabrics.
Can you do a blind hem with a serger machine?
You can absolutely create a blind hem with a serger.
Use a blind hem foot, adjust your settings carefully, and fold the fabric just right.
It’s quick, discreet, and perfect for stretchy or heavier fabrics.
How do I make a perfect hem on a serger?
Think of your serger as a multitasking wizard.
Pre-wash, press, and cut fabric accurately.
Thread properly, test on scraps, and adjust tension.
Fold, press, and feed edges smoothly for clean, professional hems every time.
How do you sew a hem on a sewing machine?
To sew a hem on a sewing machine, fold the fabric to your desired length, press it flat, and pin it.
Use a straight stitch or blind hem stitch, adjusting tension for a clean finish.
What is a rolled hem & a serger Hem?
Did you know sergers can stitch up to 1,500 stitches per minute?
A rolled hem creates a delicate, narrow edge, perfect for lightweight fabrics.
A serger hem trims, stitches, and finishes edges in one swift pass, which can be considered a complete concept in serger operations.
Can you use a serger like a sewing machine?
You can’t fully replace a sewing machine with a serger, but it’s a fantastic sidekick.
While a serger excels at finishing edges and creating strong seams, it doesn’t handle detailed stitching or buttonholes.
What is the best thread for a serger rolled hem?
Polyester or nylon threads work best for serger rolled hems.
They’re strong, smooth, and create a clean finish without breaking.
Choose lightweight threads for delicate fabrics, ensuring the hem looks polished and professional every time.
What is the difference between rolled hem and overlock?
Think of a rolled hem as delicate and decorative, perfect for lightweight fabrics.
While an overlock stitch is your sturdy multitasker, sealing raw edges to prevent fraying.
Both shine, but their purposes couldn’t be more distinct!
Can you sew seams with a serger?
Yes, you can sew seams with a serger!
It stitches, trims, and finishes edges all at once, creating strong, professional seams.
It’s perfect for stretchy fabrics or when you want durable, fray-free results.
Conclusion
Mastering sewing a hem with a serger might feel like discovering a superpower, but it’s easier than you think with practice.
From threading your machine to choosing the right hem style, every step brings you closer to professional-looking results.
Don’t skip prepping your fabric—it’s the foundation for success.
Experiment with techniques like rolled hems or blind stitches to expand your skills.
With patience and creativity, your serger will become your go-to tool for flawless finishes.

